
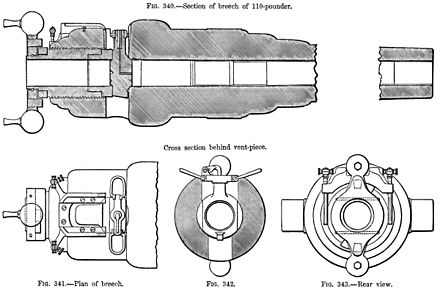
Armstrong RBL 110pr Model Breech Block Seat.
by John
If the screw which held the breech block in place was not tightened, when the gun was fired, explosive corrosive gases would escape backwards rather than propelling the projectile. An inefficient and destructive result.
If the screw was not not tightened at all, the breech block, which weighed 130lb, could be ejected with great force, and devastating, potentially fatal results to the gun crew.
So it was important that a gas tight seal was achieved when the block was inserted and tightened. That required a seat like a valve seat in an internal combustion engine, and a corresponding 45º angle on the breech block.
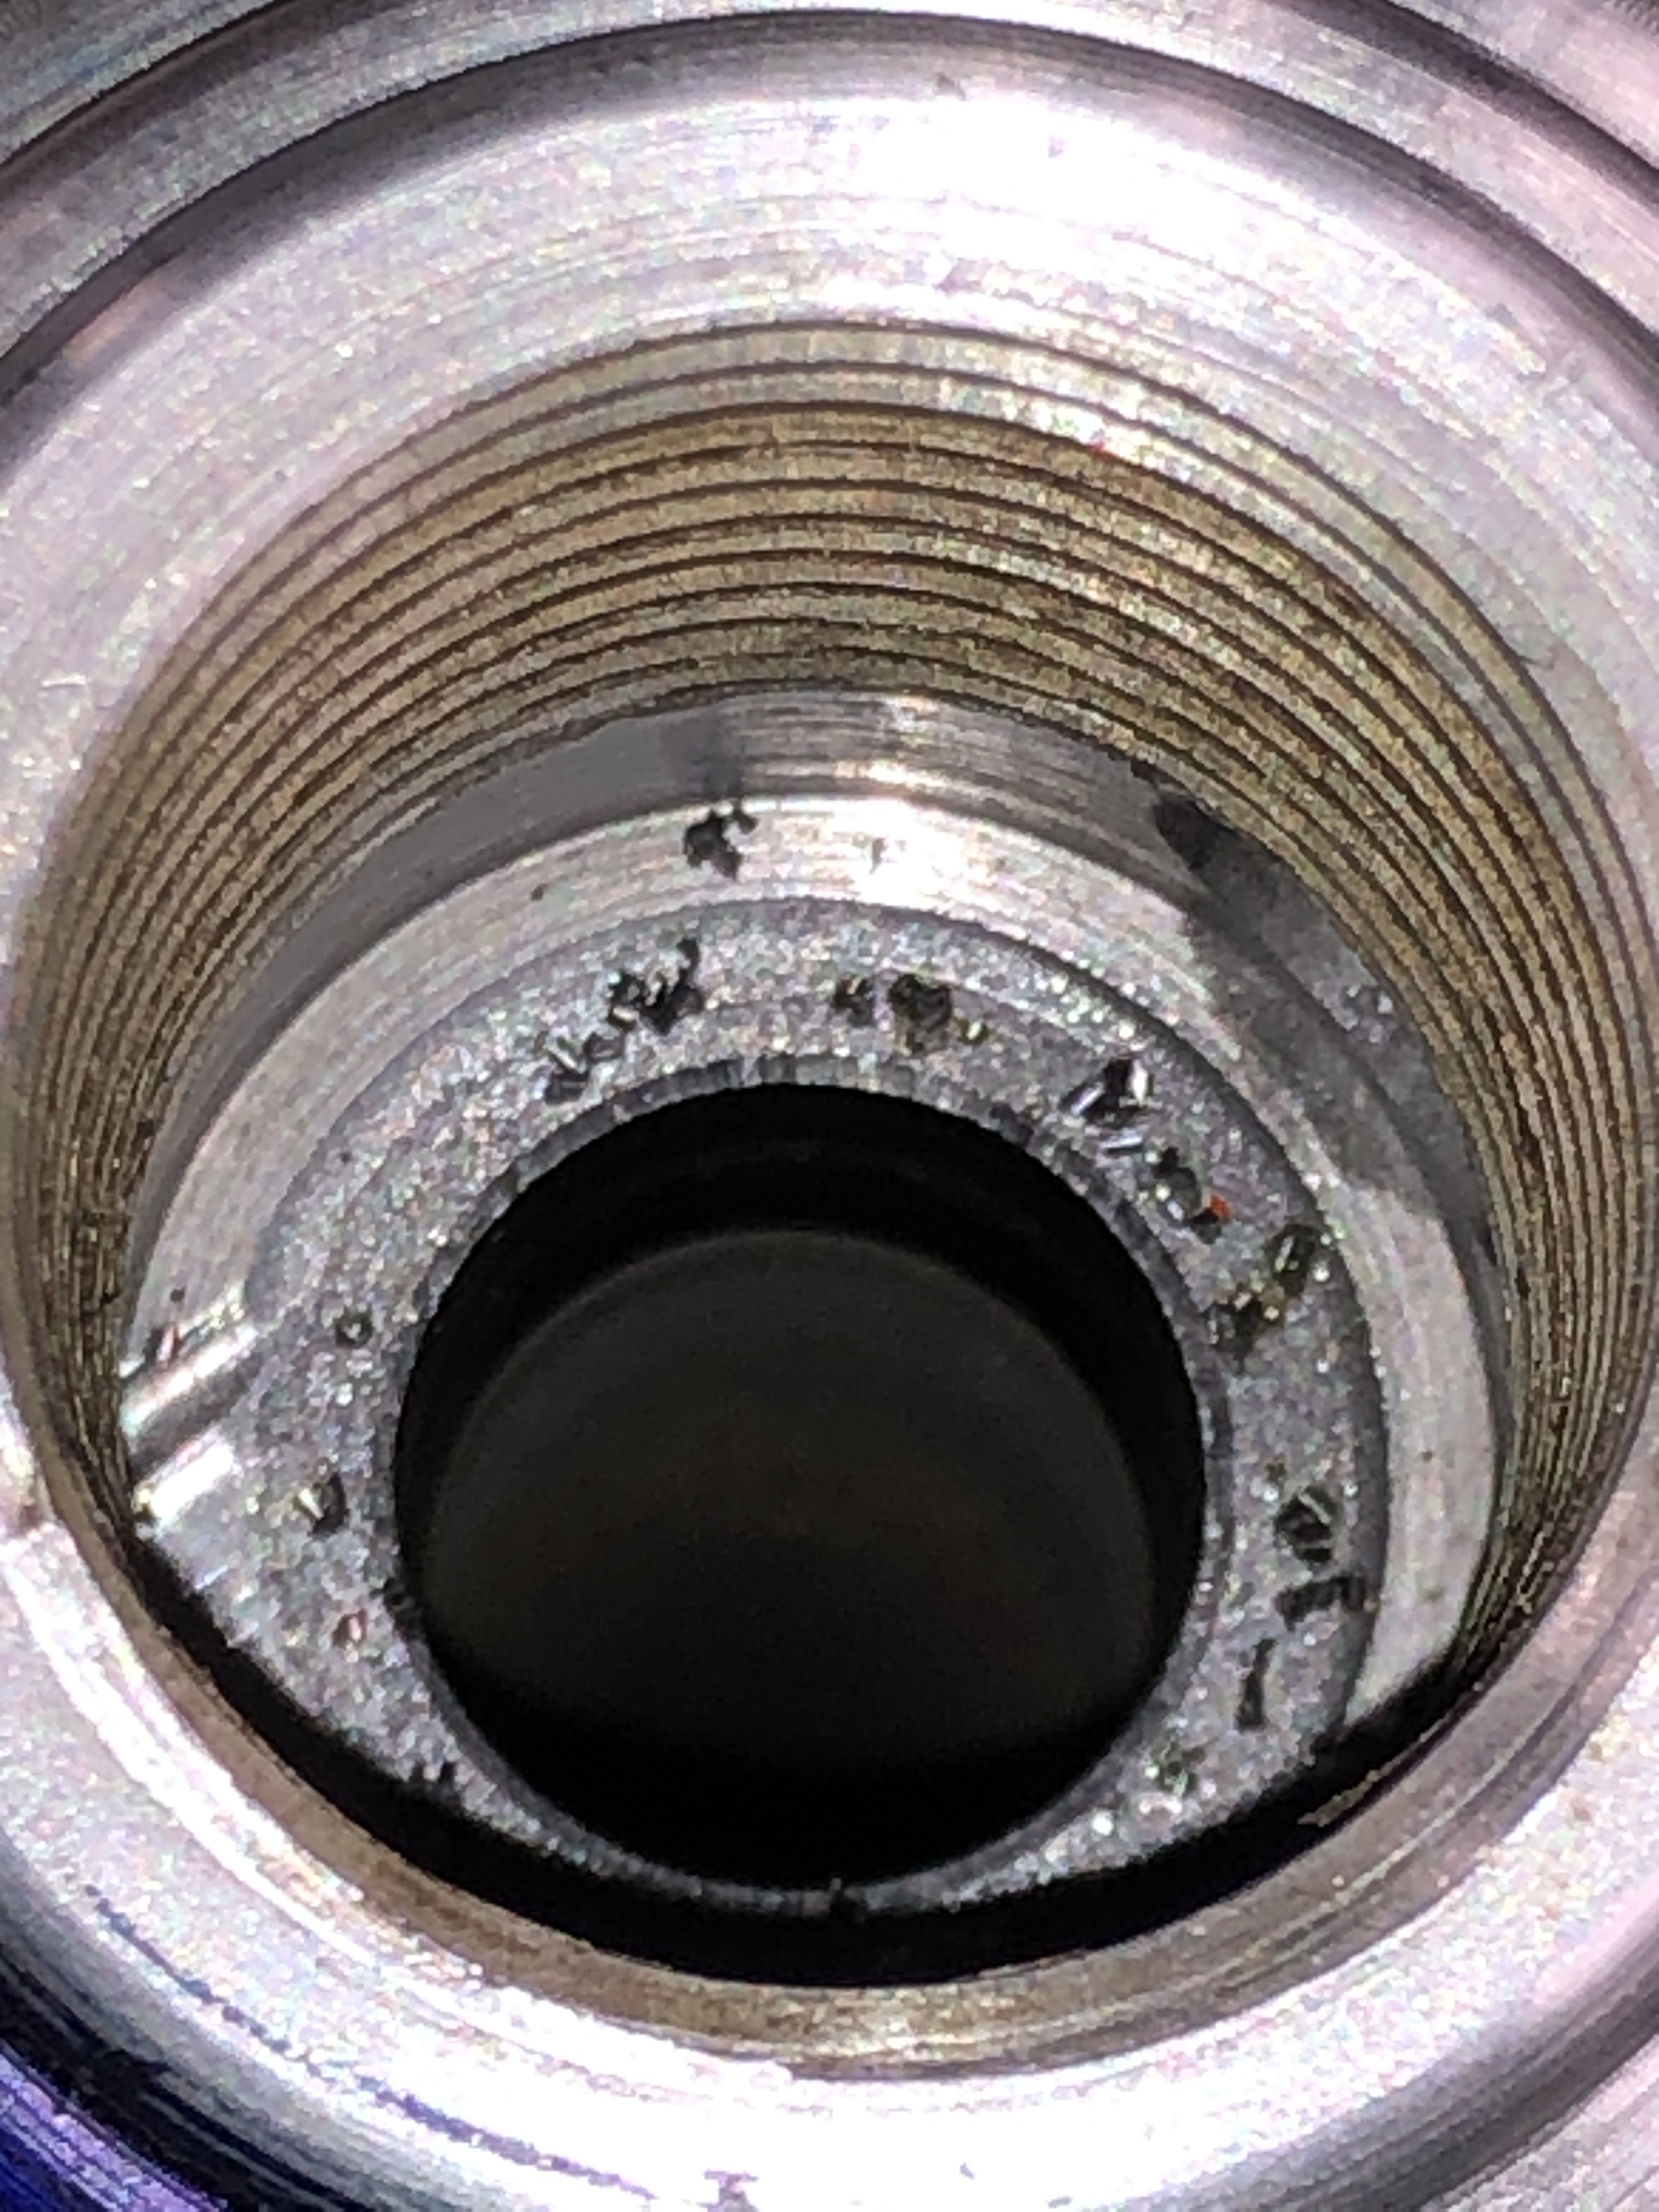
- First I made the breech block. The plug was turned from LG2 bronze. This will seat against the steel barrel bore. In the original the block was made of steel or iron, and it seated against a copper insert seat. I decided that it would be too fiddly and difficult to reproduce the original steel/copper system, so I substituted the bronze block which fitted against the steel end of bore in a 45º seat.

2. cnc turning the bronze breech plug. The cylindrical section fits into the 18mm bore. A similar cylindrical section on the other end fits into the breech screw. The 45º section is seen.

3. A further final contour, then parting the plug from the bronze bar. I finished the parting by using a hacksaw.

4. The plug is 31mm diameter, 16mm thick.
I used 2 tools to make the seat. A commercial carbide seat cutter, and a shaped stone to finish.

5. The brass shaft and pilot were each 18mm diameter, and fitted neatly in the bore and breech screw.

6. The stone was given a 45º bevel using a diamond. The ways were covered and thoroughly cleaned afterwards.
The seat was cut with the carbide cutter, by hand and using cutting fluid. When it was 1-2mm wide, some chatter marks were just visible, so they were polished out using the stone, also by hand.
7. The chatter is visible, along with the chips which were produced by the carbide cutter. I don’t have a good photo of the end result, but it looked much better than this.

8. The hole underneath was to drain water after swabbing/post firing. The breech block is just visible.
And today I picked up some laser cut parts from the cutter. (JR Laser, Geelong)

9. Minimal cleanup was required on the 6 and 8mm thick parts. Some extra machining is required. But the 25mm thick part has some problems. It is a little undersize. Apparently caused by heat expansion of the steel during cutting. I have not yet decided what to do about this problem. I might have to get it re-made 2-3% bigger. Or I might remake it myself on the CNC mill.
So, the model engineering of the Armstrong 110pr breech loading cannon continues….

Is your lathe a CNC or did you turn that manually? Nice work either way.
LikeLike
Hi John, the breech block was CNC turned. Sides milled of course. And thanks. John
LikeLiked by 1 person