
Shicheng Model Instructions
I have now assembled 3 of the 4 “small” boats (1:96) for my USS Constitution model(1:93).

This post is mostly about the instructions provided with the kits. Overall, I am fairly happy with the end results. They are not totally finished… one to go, and none yet painted/varnished, but 3 are glued up.
I write this assessment of the kits as a beginner ship modeler. My experience with wooden ship kits is one USS Constitution hull, and the three Shicheng Model small boats.
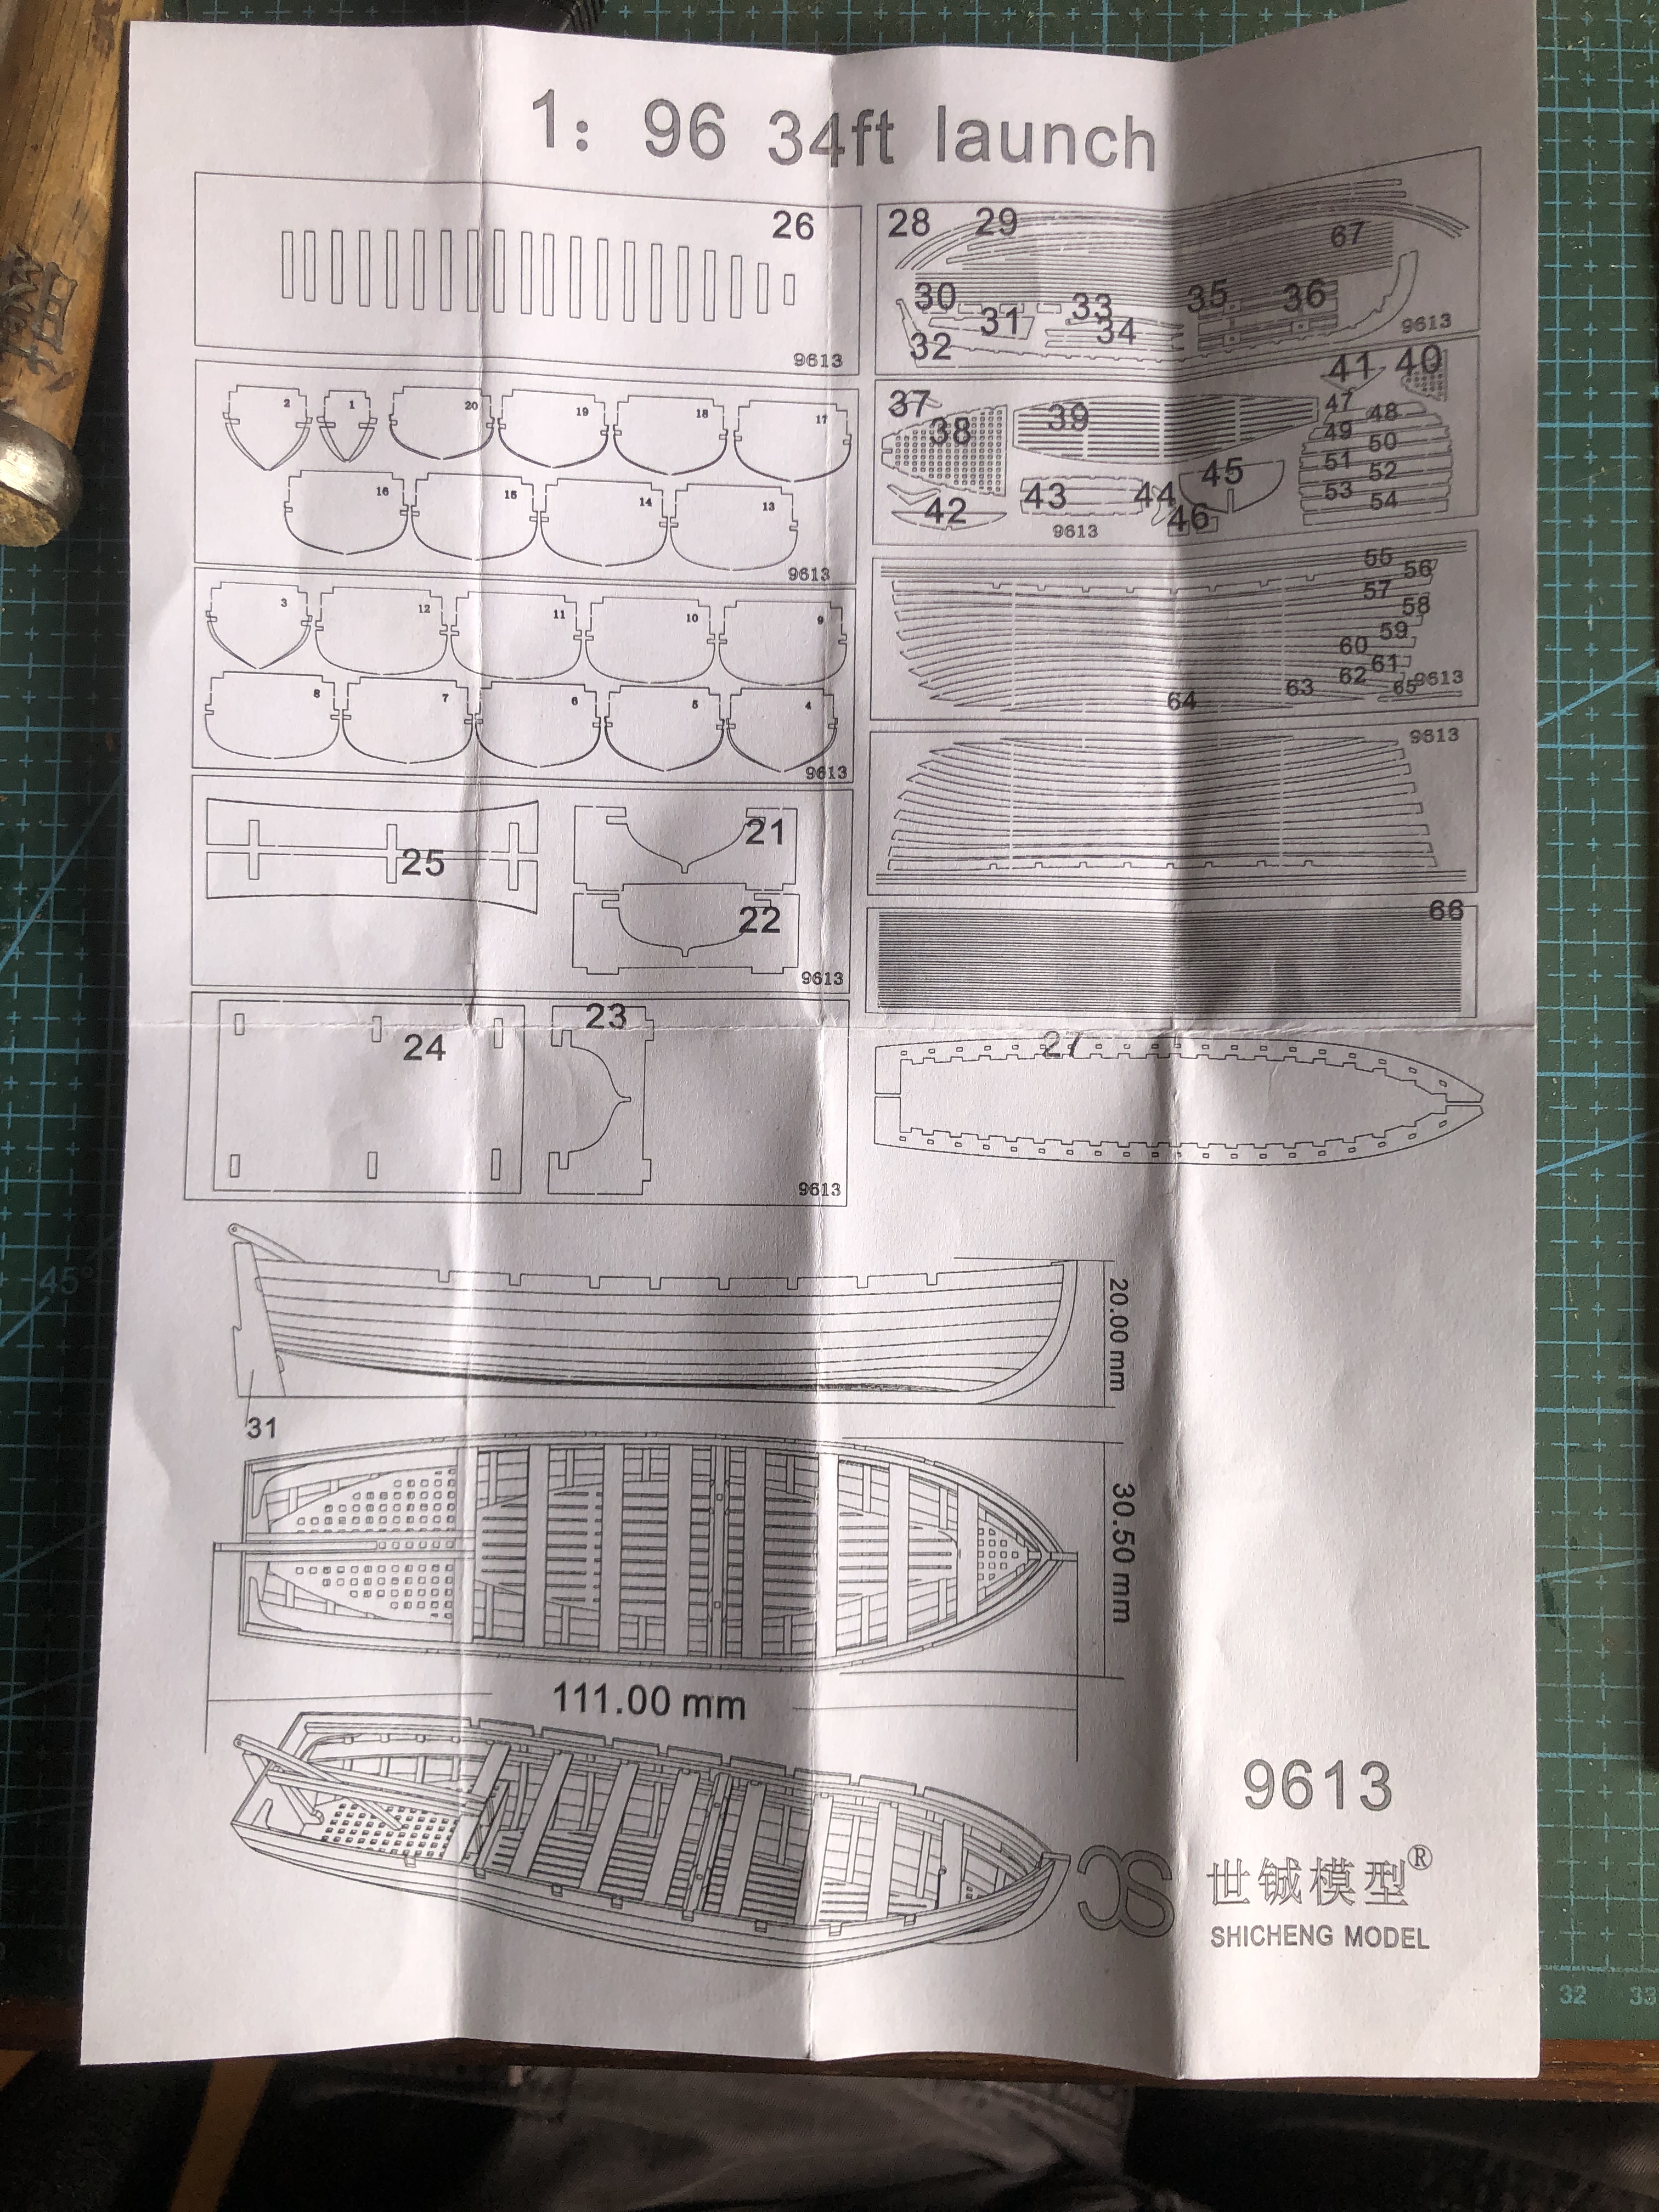
As noted in my previous post, these are the instructions which came with one of the boats…the 34 foot launch.

I made several mistakes with this model. Those mistakes probably would not have been made by a more experienced modeler, or by an inexperienced modeler with decent instructions. After I had finished the launch I discovered Google Translate, which worked simply and brilliantly, and would have saved me a lot of time and angst if I had known about it earlier. But even with the Google translation, the instructions are woefully inadequate.
I must add that the laser cut parts are very accurately made, and rarely required alteration. The wooden sheets were well packaged, and the tabs were easily cut with a razor blade. My only complaint is that the instructions need to be more detailed.
The first page, with the layout of the 9 laser cut sheets, and the 3 ship views is good and useful. My only criticism is that the font for numbering the components is too big on some pieces, and unclear which pieces the number is referring to. (referring to the 28 ft pinnace in particular).
The second page is more problematic, particularly for less experienced modelers.
It is in Chinese only. The diagrams are in sequence down the columns.
Suggested additional written instructions. These refer to the 34ft launch, but can be applied to all 4 kits.
Some numbering of the diagrams would help.
- The hull support cradle (parts 21-25) should be the first item assembled. The joins should be glued. Use CA or white glue. [Assemble first because it is useful for positioning the keel]
- The second item to assemble is gluing the rib forms to the base. These must be pushed firmly into the base, and be exactly perpendicular to the base. Rapid setting CA preferred. There are lines on one face of the forms which are used to assist chamfering. Face the 10 or so bow end forms to the bow, and the 10 or so stern end bulkheads to the stern. [yes, obviously, but it needs to be stated.]
- Pin or screw the base/forms assembly to a block of softwood, approximately 90x45x150mm. [it prevents the thin plywood base from distorting during the gluing up. Yes, that occurred before I used a softwood block, and improves visualisation and handling of the evolving assembly].
- The forms need to be chamfered by carving and/or sanding. Use the guidelines on the form face. Hopefully you have installed the forms with the guidelines facing appropriately as in 2 above.
- Apply a thin layer of car or furniture wax to the edges of the forms. [this step will prevent inadvertent gluing of the ribs to the forms].
- Glue the slotted side supports (27) to the forms after test fitting. Avoid glue entering the square holes in the supports. Avoid covering the square holes with the supports. The side supports need to be curved slightly to fit into the slots on the forms.
- Bending the ribs. Soak the rib strip in water for a few minutes prior to bending it over the form. [minimizes the risk of breakage]. Suggest starting with number 10 rib, and working towards the bow and stern. Cut 42 wedges plus some spares before starting. Make the wedges from rib material, about 10mm long. [** wrong!! Use the plywood specified in the Shicheng plans. It is slightly thicker than the rib material and less inclined to fall out.] Then insert a rib strip approx 5mm through the square hole. Bend the strip over the form, following the contour. Note that the rib is positioned near one edge of the form. Cut to length, allowing approx 5mm beyond the side strips. Using fine tweezers, bend and insert the other end into its square hole. It helps to hold the first end while inserting the second end. Massage the rib to shape against the form. Insert the wedges. Ensure that the rib lines up with the form. As the rib dries, it shrinks, and often wedges will fall out. So I, very carefully, apply a minute drop of CA with a needle point, to glue the outside of the wedge to the slotted strip. When dry, trim the wedges flush with the top of the slotted side strip. Do NOT cut the ribs while trimming the wedges.
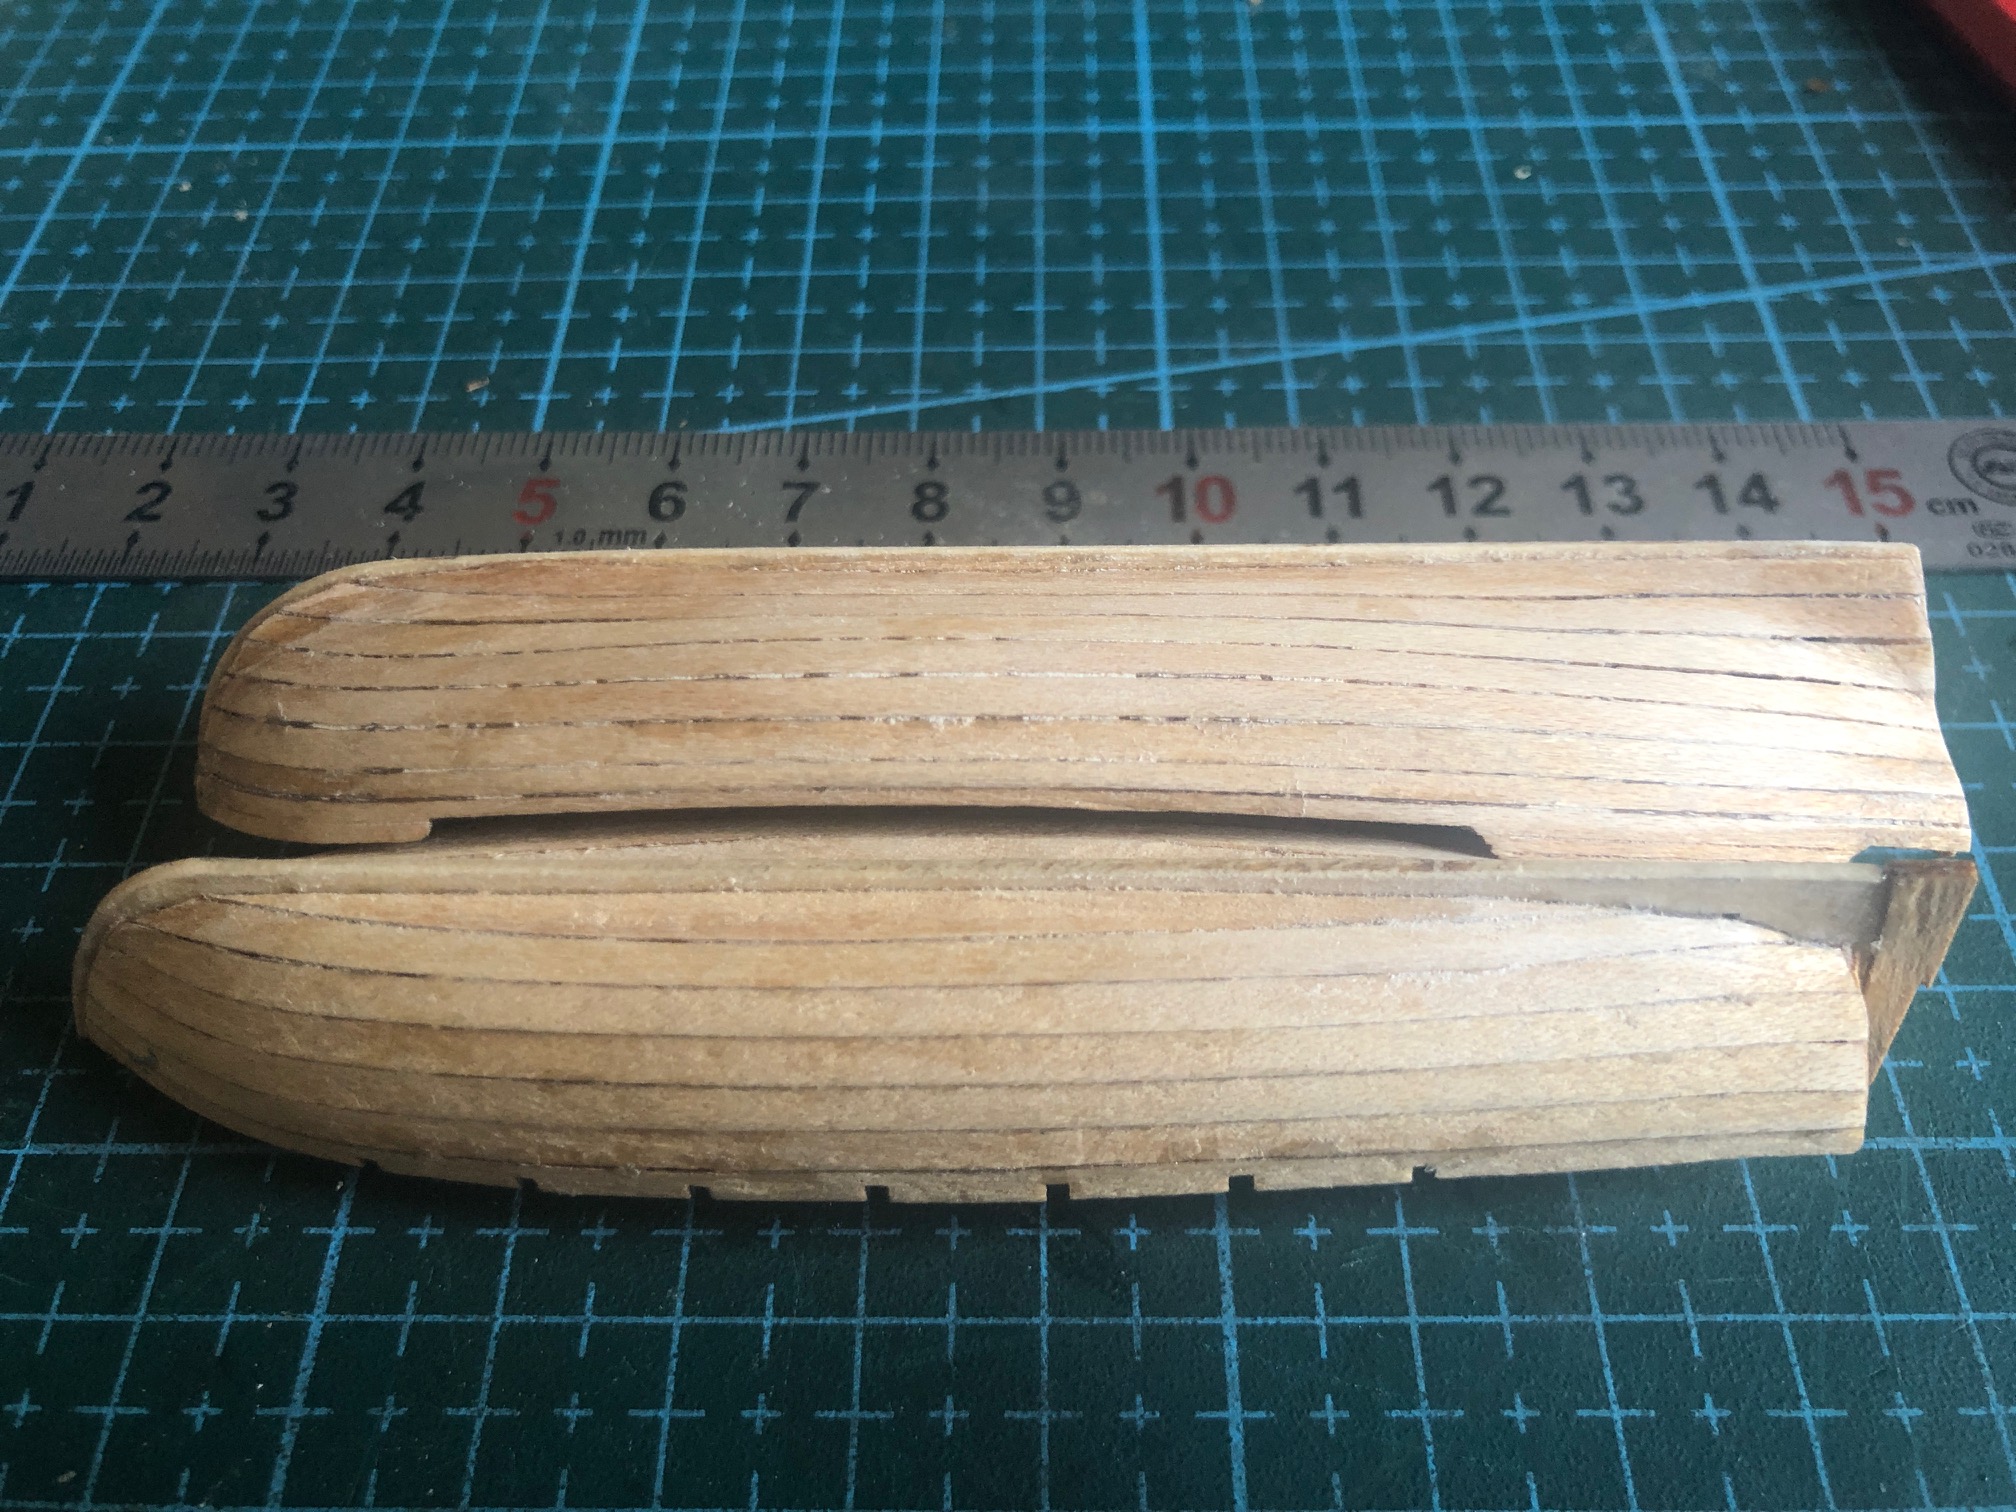
- Attach the keel. Glue the transom to the keel. Then position the keel then place the hull support cradle upside down, as in the photo below. Note or mark the position of the keel on the forms. Do not rely, as I did, on the marks left by the tabs, to be in the center. Many are not.

8. (cont). Use white glue for the keel joins. You might need to make adjustments. Try to avoid glue spreading from the ribs to the forms. The previously applied wax should help avoiding adhesion between the ribs and the forms. If you do get unwanted adhesion, use water to loosen white glue joins, heat from a soldering iron for CA.
9. Applying the planks. Soak the planks which adjoin the slotted slide strips (no 56 on the barge). Use your fingers to form the bow bends. Heat is not necessary. Use CA to glue the plank to the cutwater and the first rib. Then use white glue for the remaining ribs. But I suggest using CA to join the plank to the transom, and holding it until set. Similarly glue the plank on the other side.

The planks as supplied are remarkably accurately shaped, and if the rib forms and keel have been accurately assembled the planks can be glued on without any further shaping.
10. Separating the hull from the base and forms. This is an anxious process. Hopefully there will be no glue between the ribs and the forms, but this is when you find out. Start by using pliers to break the base from the forms, in small pieces. Some of the forms will come free, which is anxiolytic. Any forms which remain stuck in place can be twisted free, one at a time. If there are any unbreakable glue joins to the forms it will be time for the water or heat treatment to attempt to separate the offending parts. Good luck with that. Best to avoid the problem. Use wax as described in 5, above.

11. Finishing. The rest is comparatively straightforward. The gunwales, side strips, flooring, seats are glued in place, carefully keeping the central parts central, and the side components level with each other. Sanding the planking, then painting or varnishing, which I have yet to do. Rudders, oars, etc. were never left on the small boats when the ship was at sea to avoid loss in rough weather.
Now, just the 18ft dinghy to go. The first one of these kits took almost 3 days to assemble. The third took just one day. Not counting finishing of course.
