johnsmachines

machines which I have made, am making, or intend to make, and some other stuff. If you find this site interesting, please leave a comment. I read every comment and respond to most. n.b. There is a list of my first 800 posts in my post of 17 June 2021, titled "800 Posts"

Tag: Eye of Horus

Khufu Ship – The Eye of Horus

This project is finished.

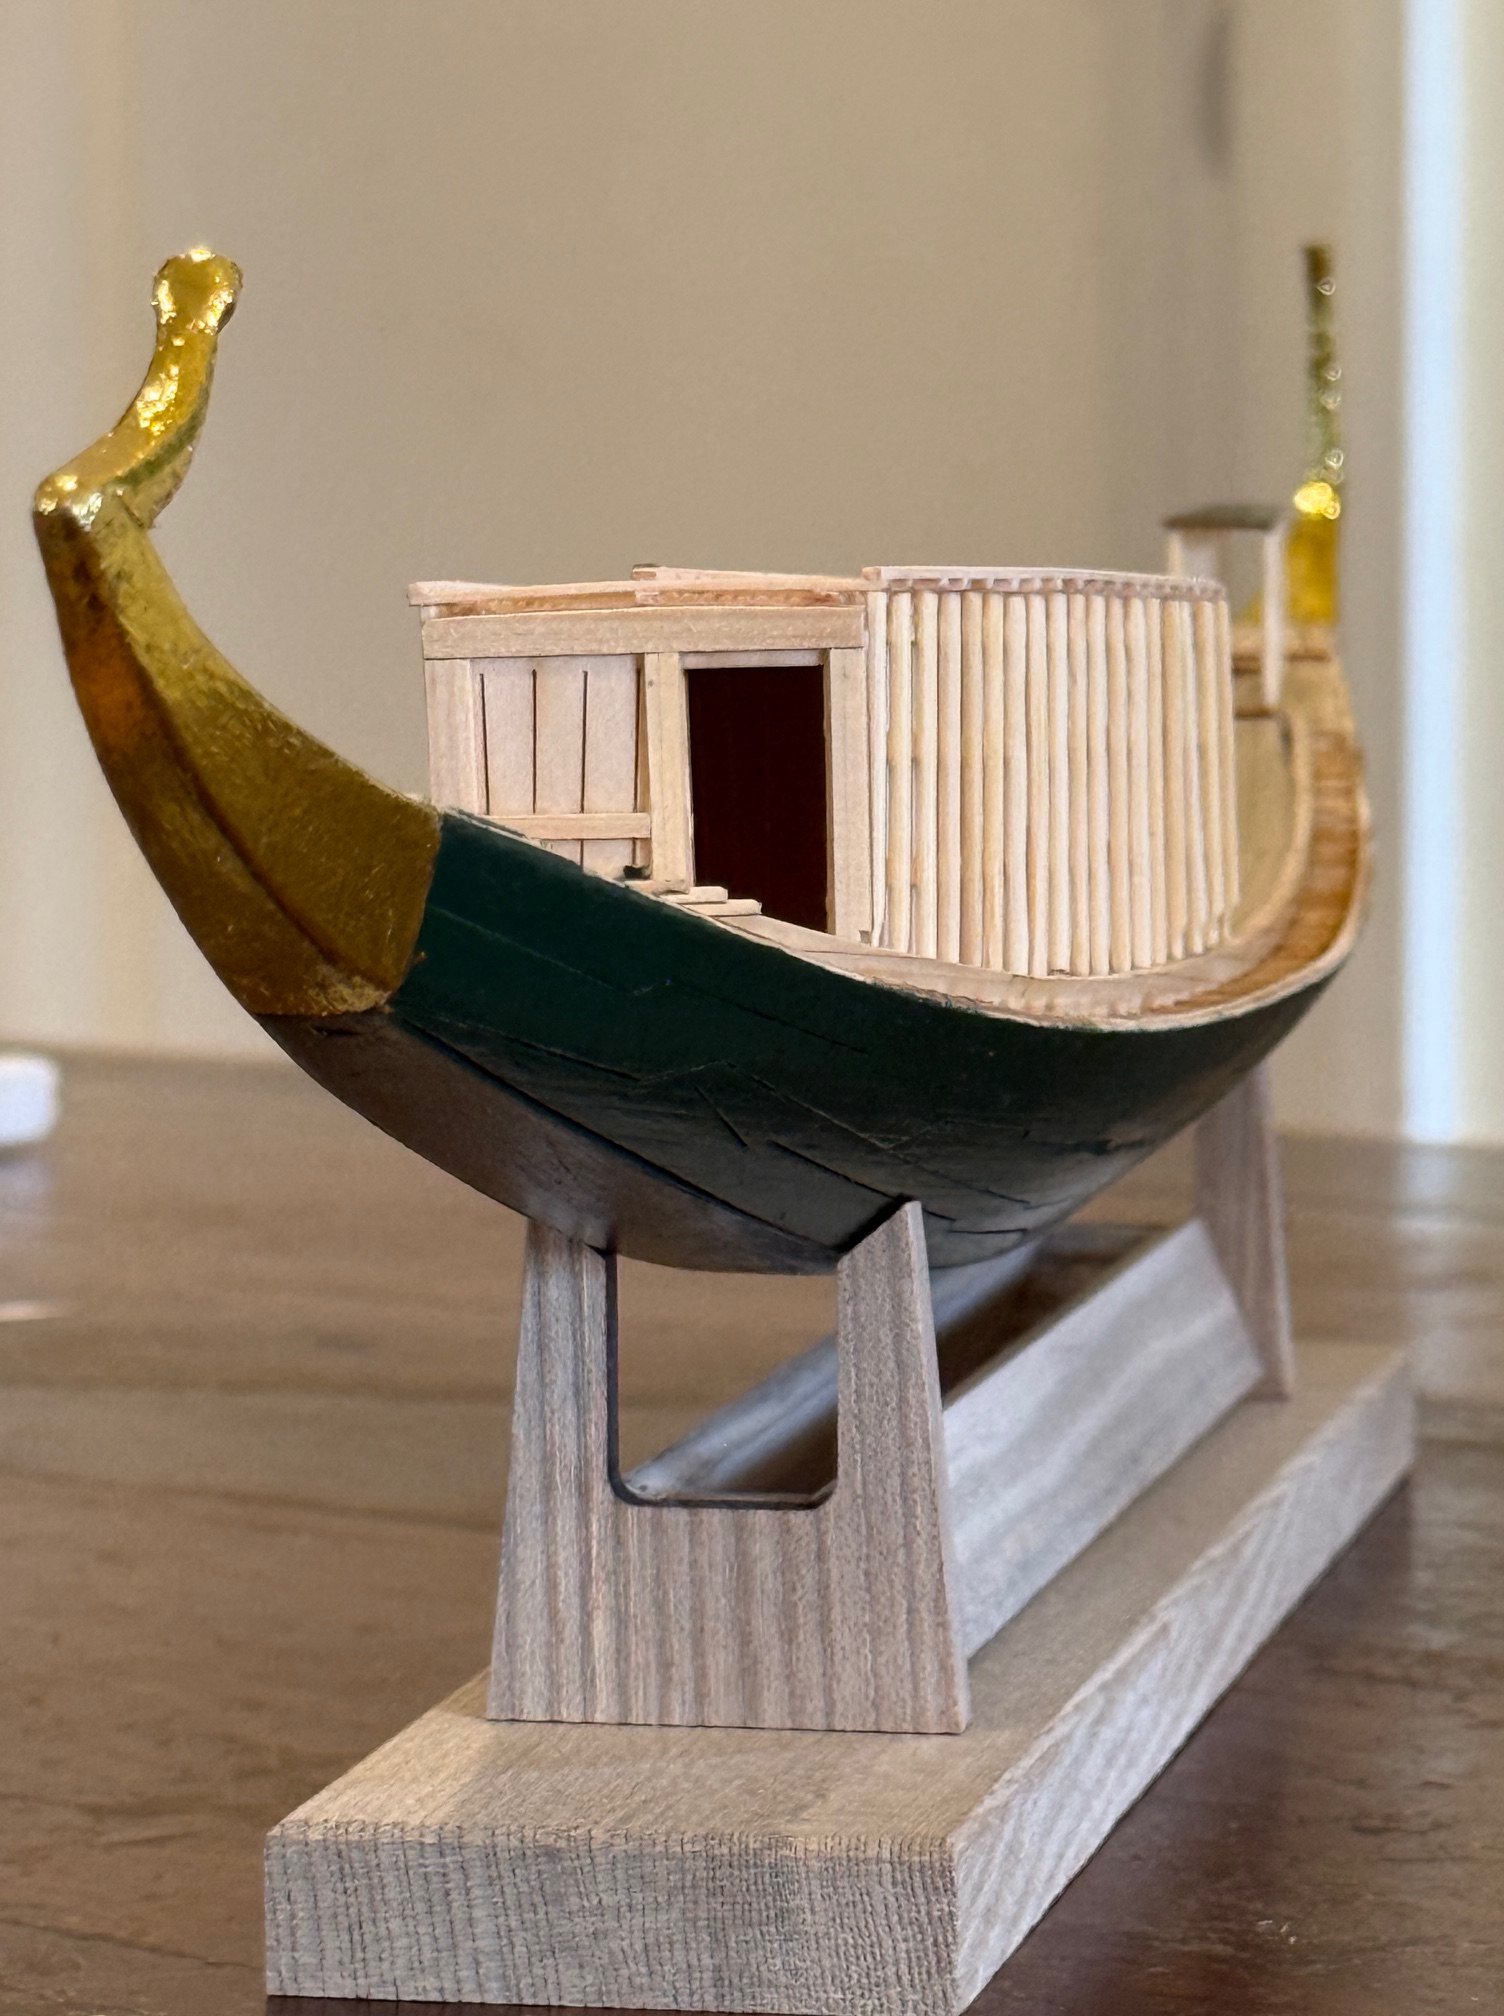
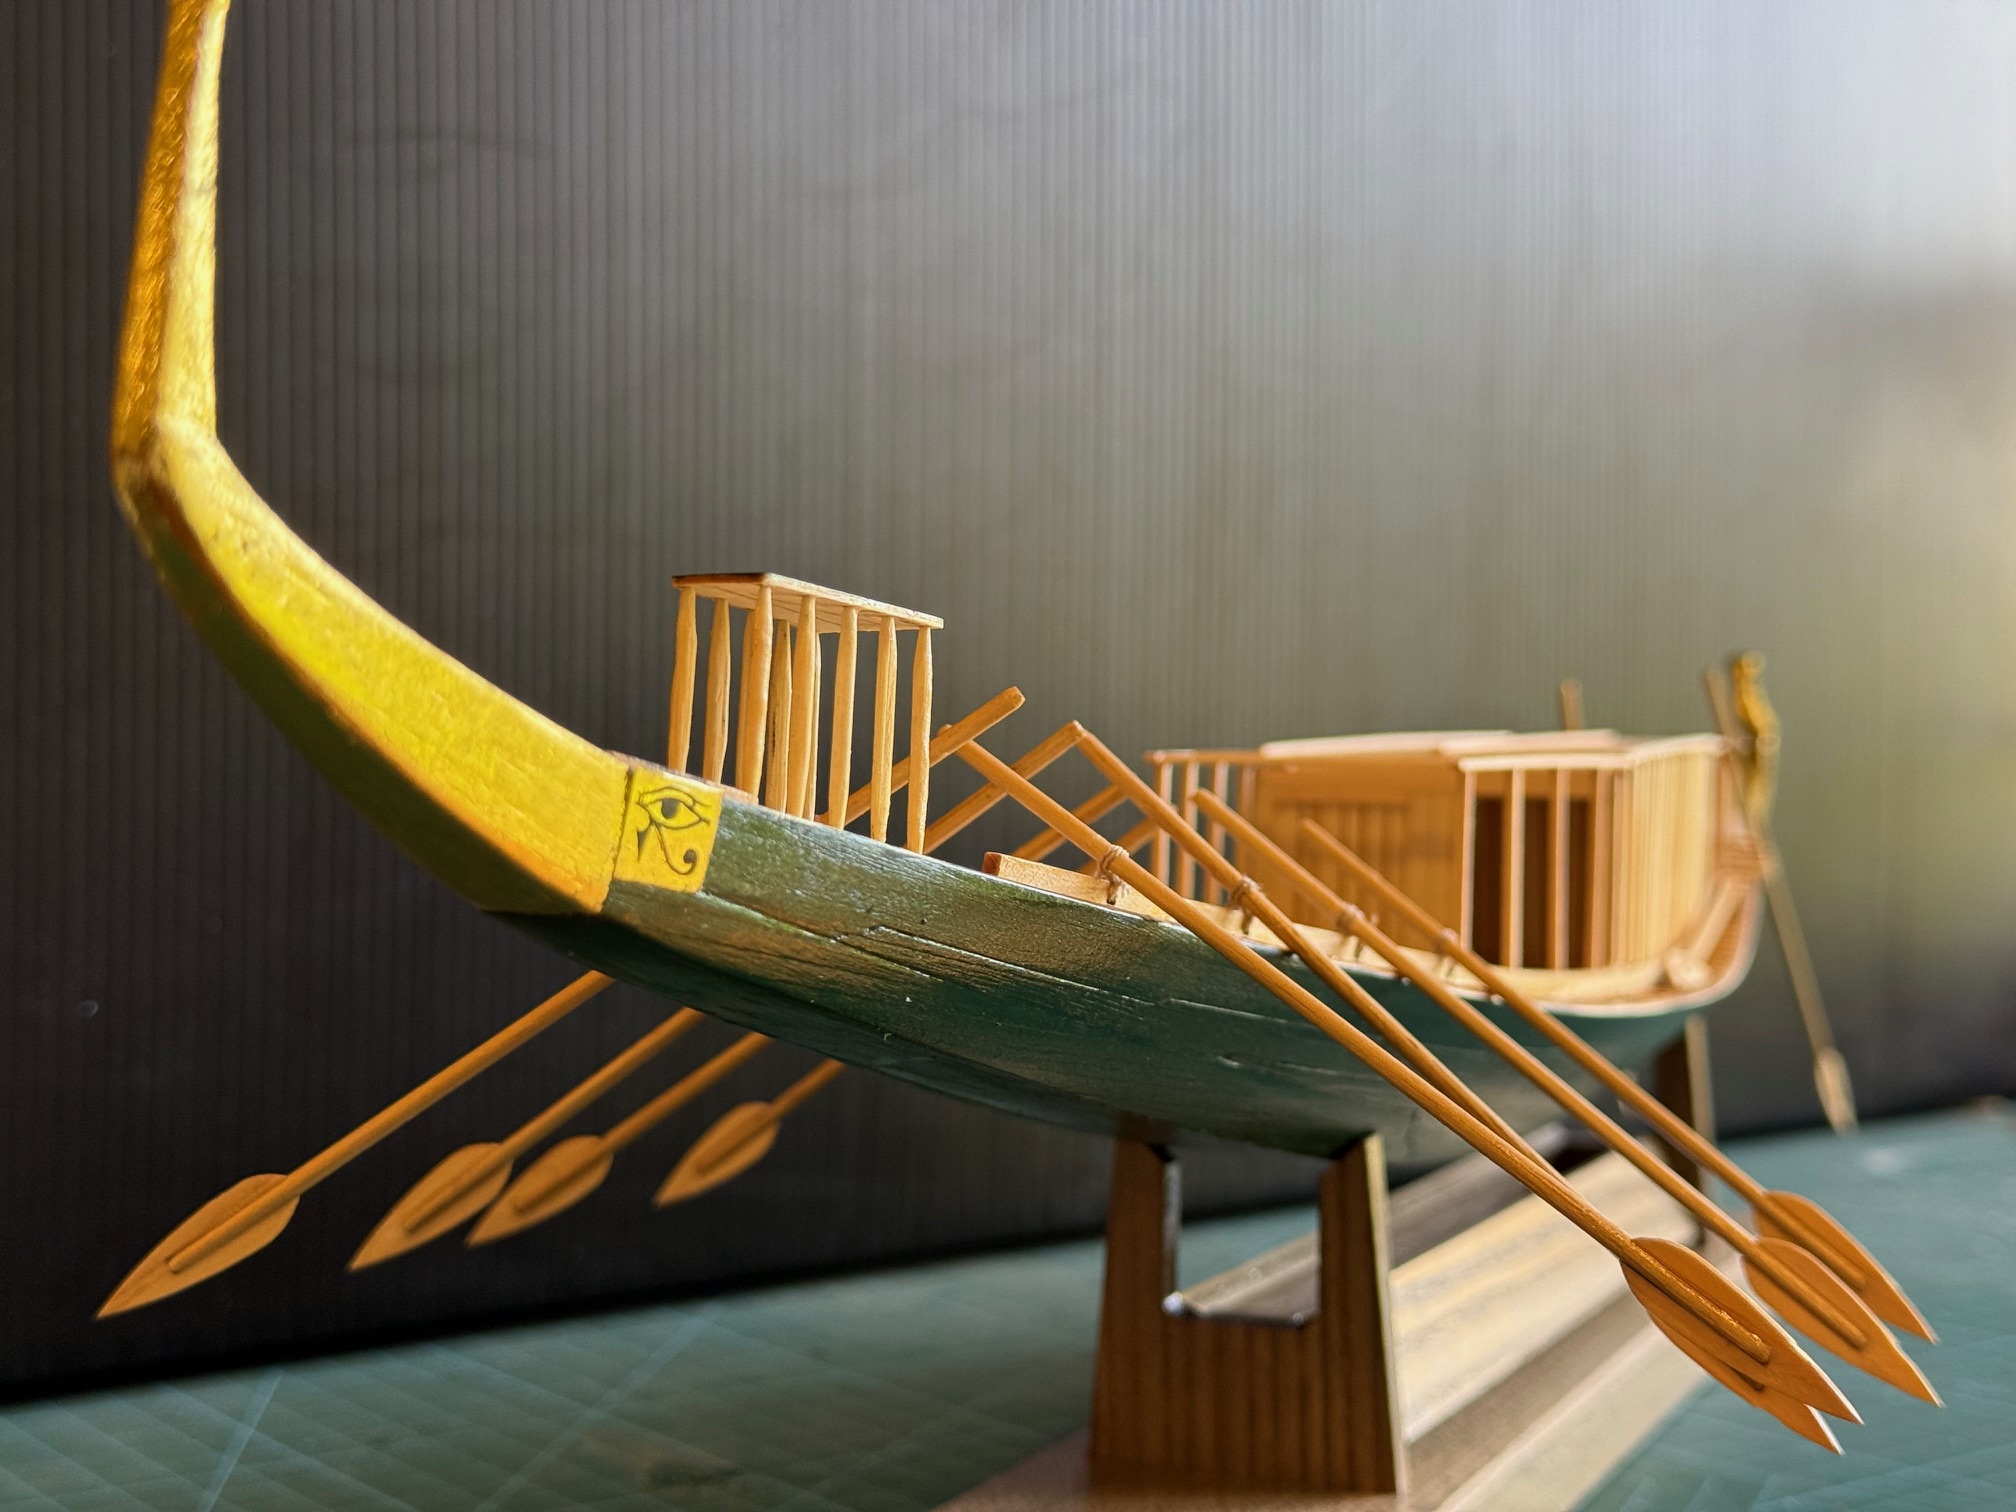
The model of the 4500 year old ship is made, painted, gilded.

CA and Gorilla glue used to hold the planks together, as specified in the Woody Joe Japanese kit, instead of the original rope and twine bound planks.

And I added some gold foil to the bow and stern pieces. I thought that I was adding actual gold gilding, but the AI revealed that “gold foil” is actually a copper and aluminium alloy. I did eventually buy some real gold leaf, but stripping off the foil and replacing it with real gold seemed too much so I am left with the foil, with and an artist grade varnish.

In the original Khufu pyramid ship there is some evidence of gold leaf being used, but hey, this is a model.

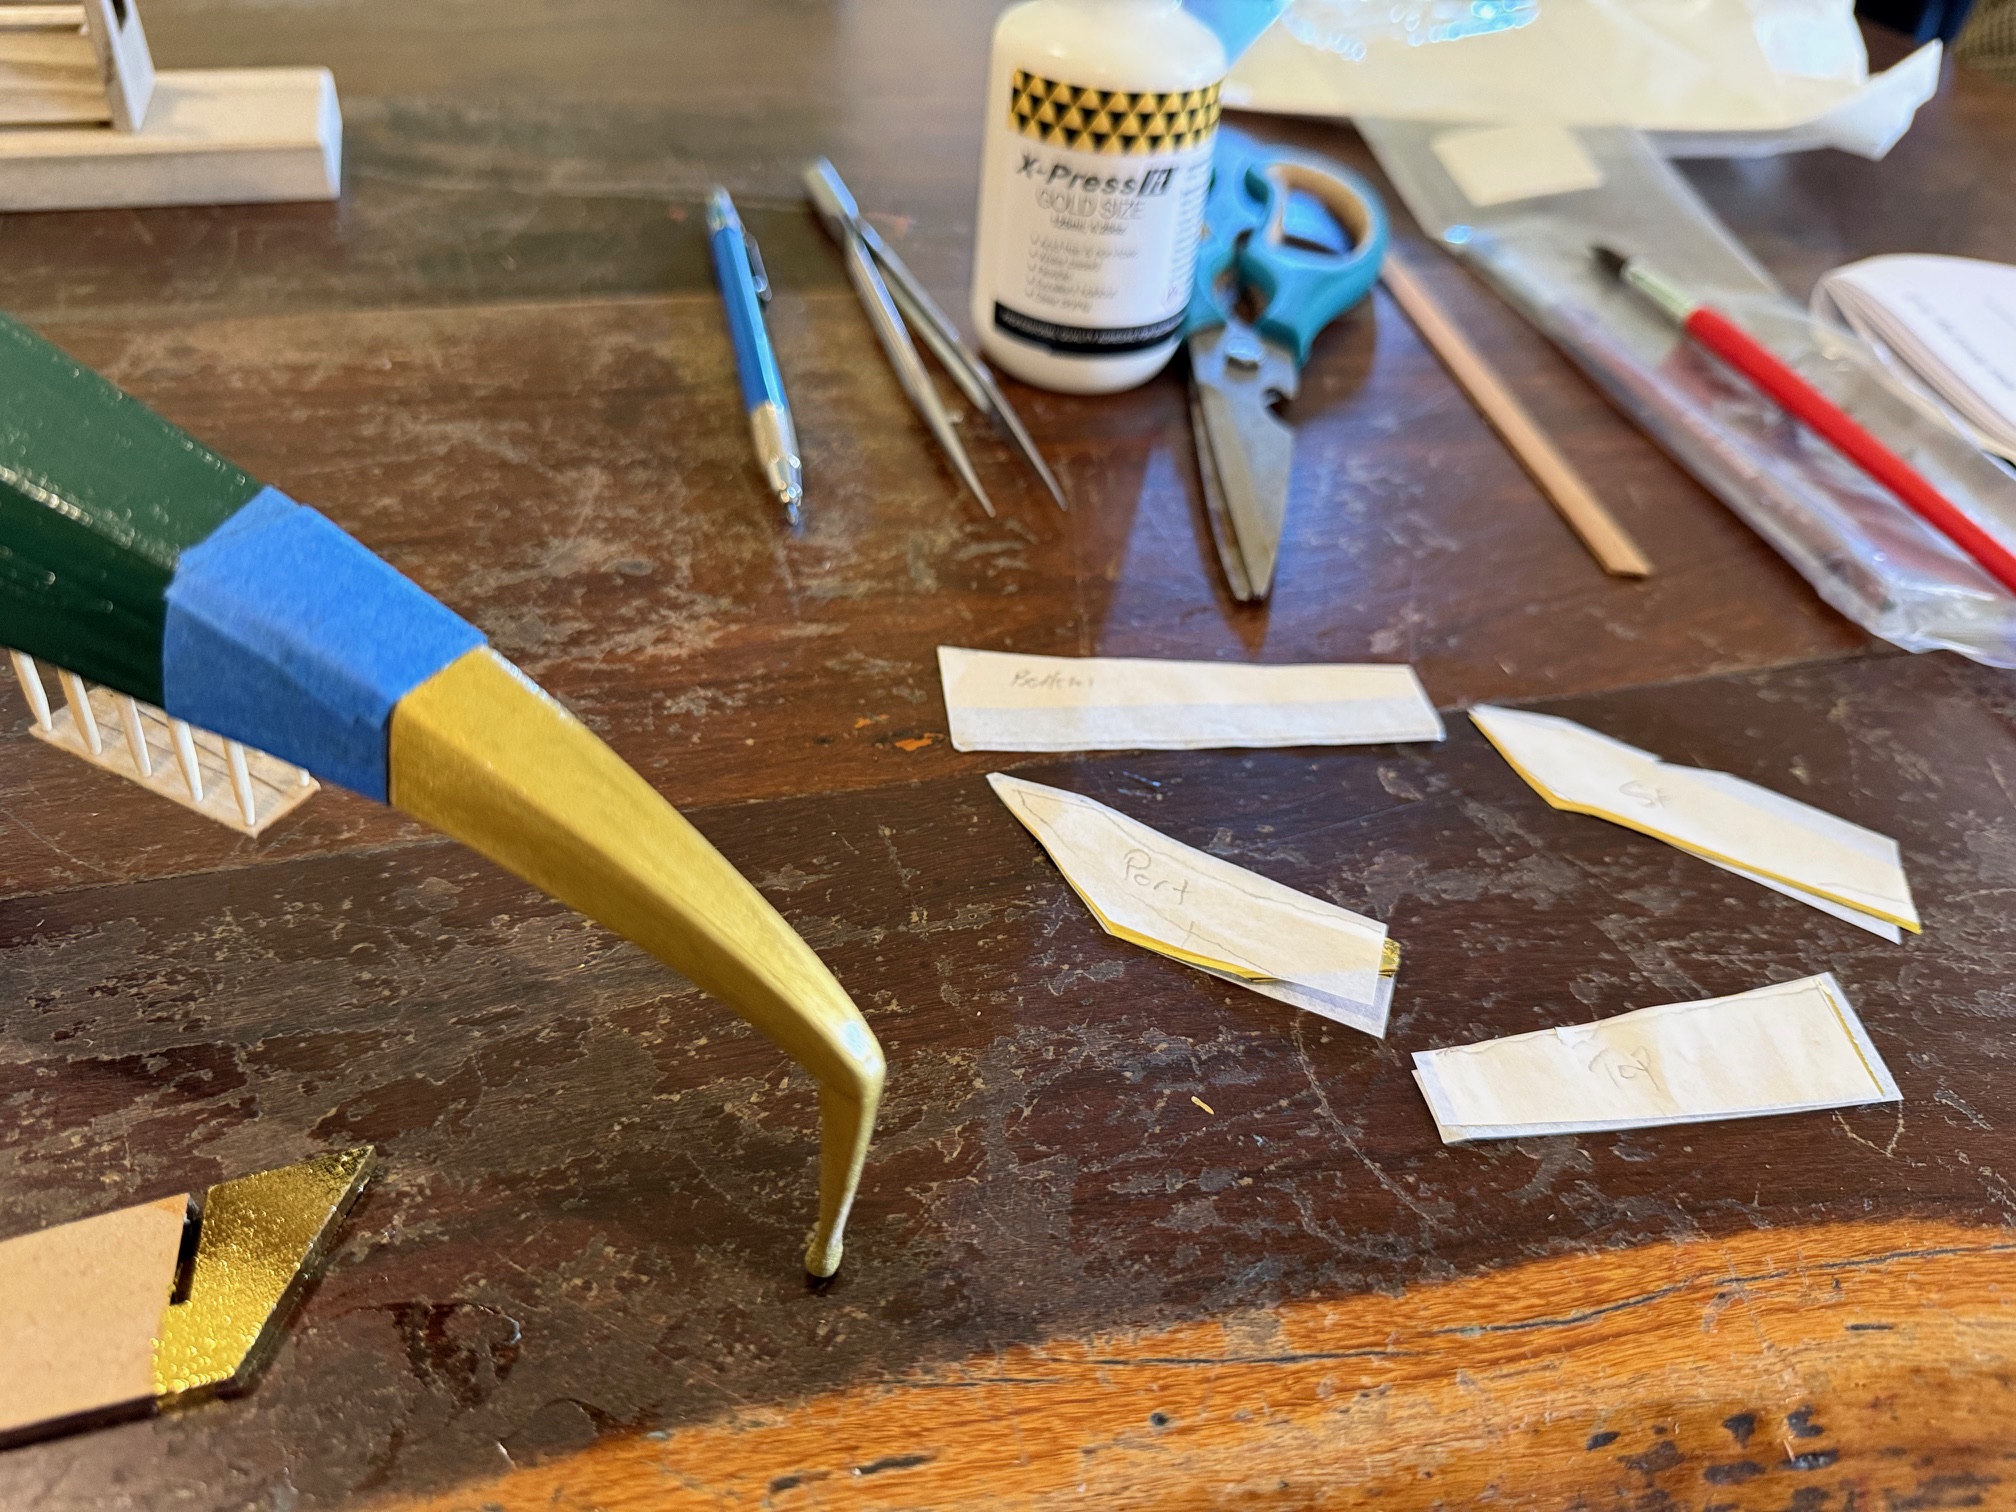
At the bow of the ship there was probably an “eye of Horus”. So I agonised how I was going to make and install that essential component. The kit maker offered an optional transfer, but I decided to make my own version. Fortunately Google Images had a nice pattern.

Google Images Eye of Horus.

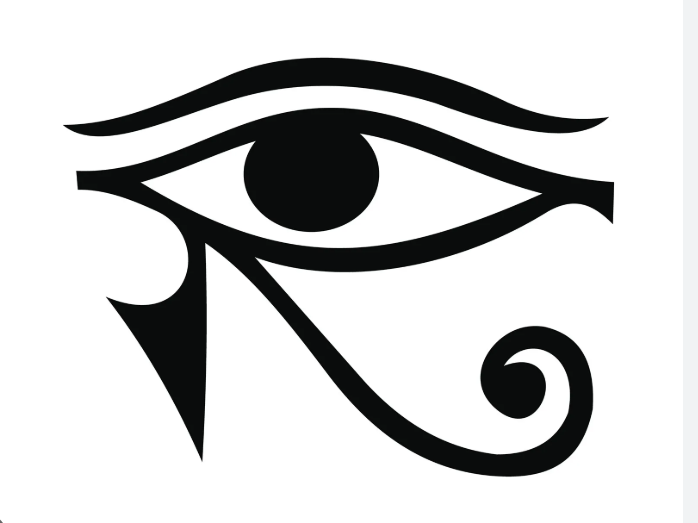
At a believable scale on the model ship, the “Eye” would measure 10x8mm overall. And the thickness of the black strokes is only 0.5mm thick. No way that I could paint that.

So off I went to my friend Stuart, who had fired up his 30watt fibre laser. And he lasered the 6 eyes from 0.2mm thick brass, in about 30 seconds! A bit of extra time adding fine bars so the eyebrows would not be lost. And some backing brass plates from the same 0.2mm brass shim, and I ended up with 5 good copies of the eyes, 2 left and 3 right.

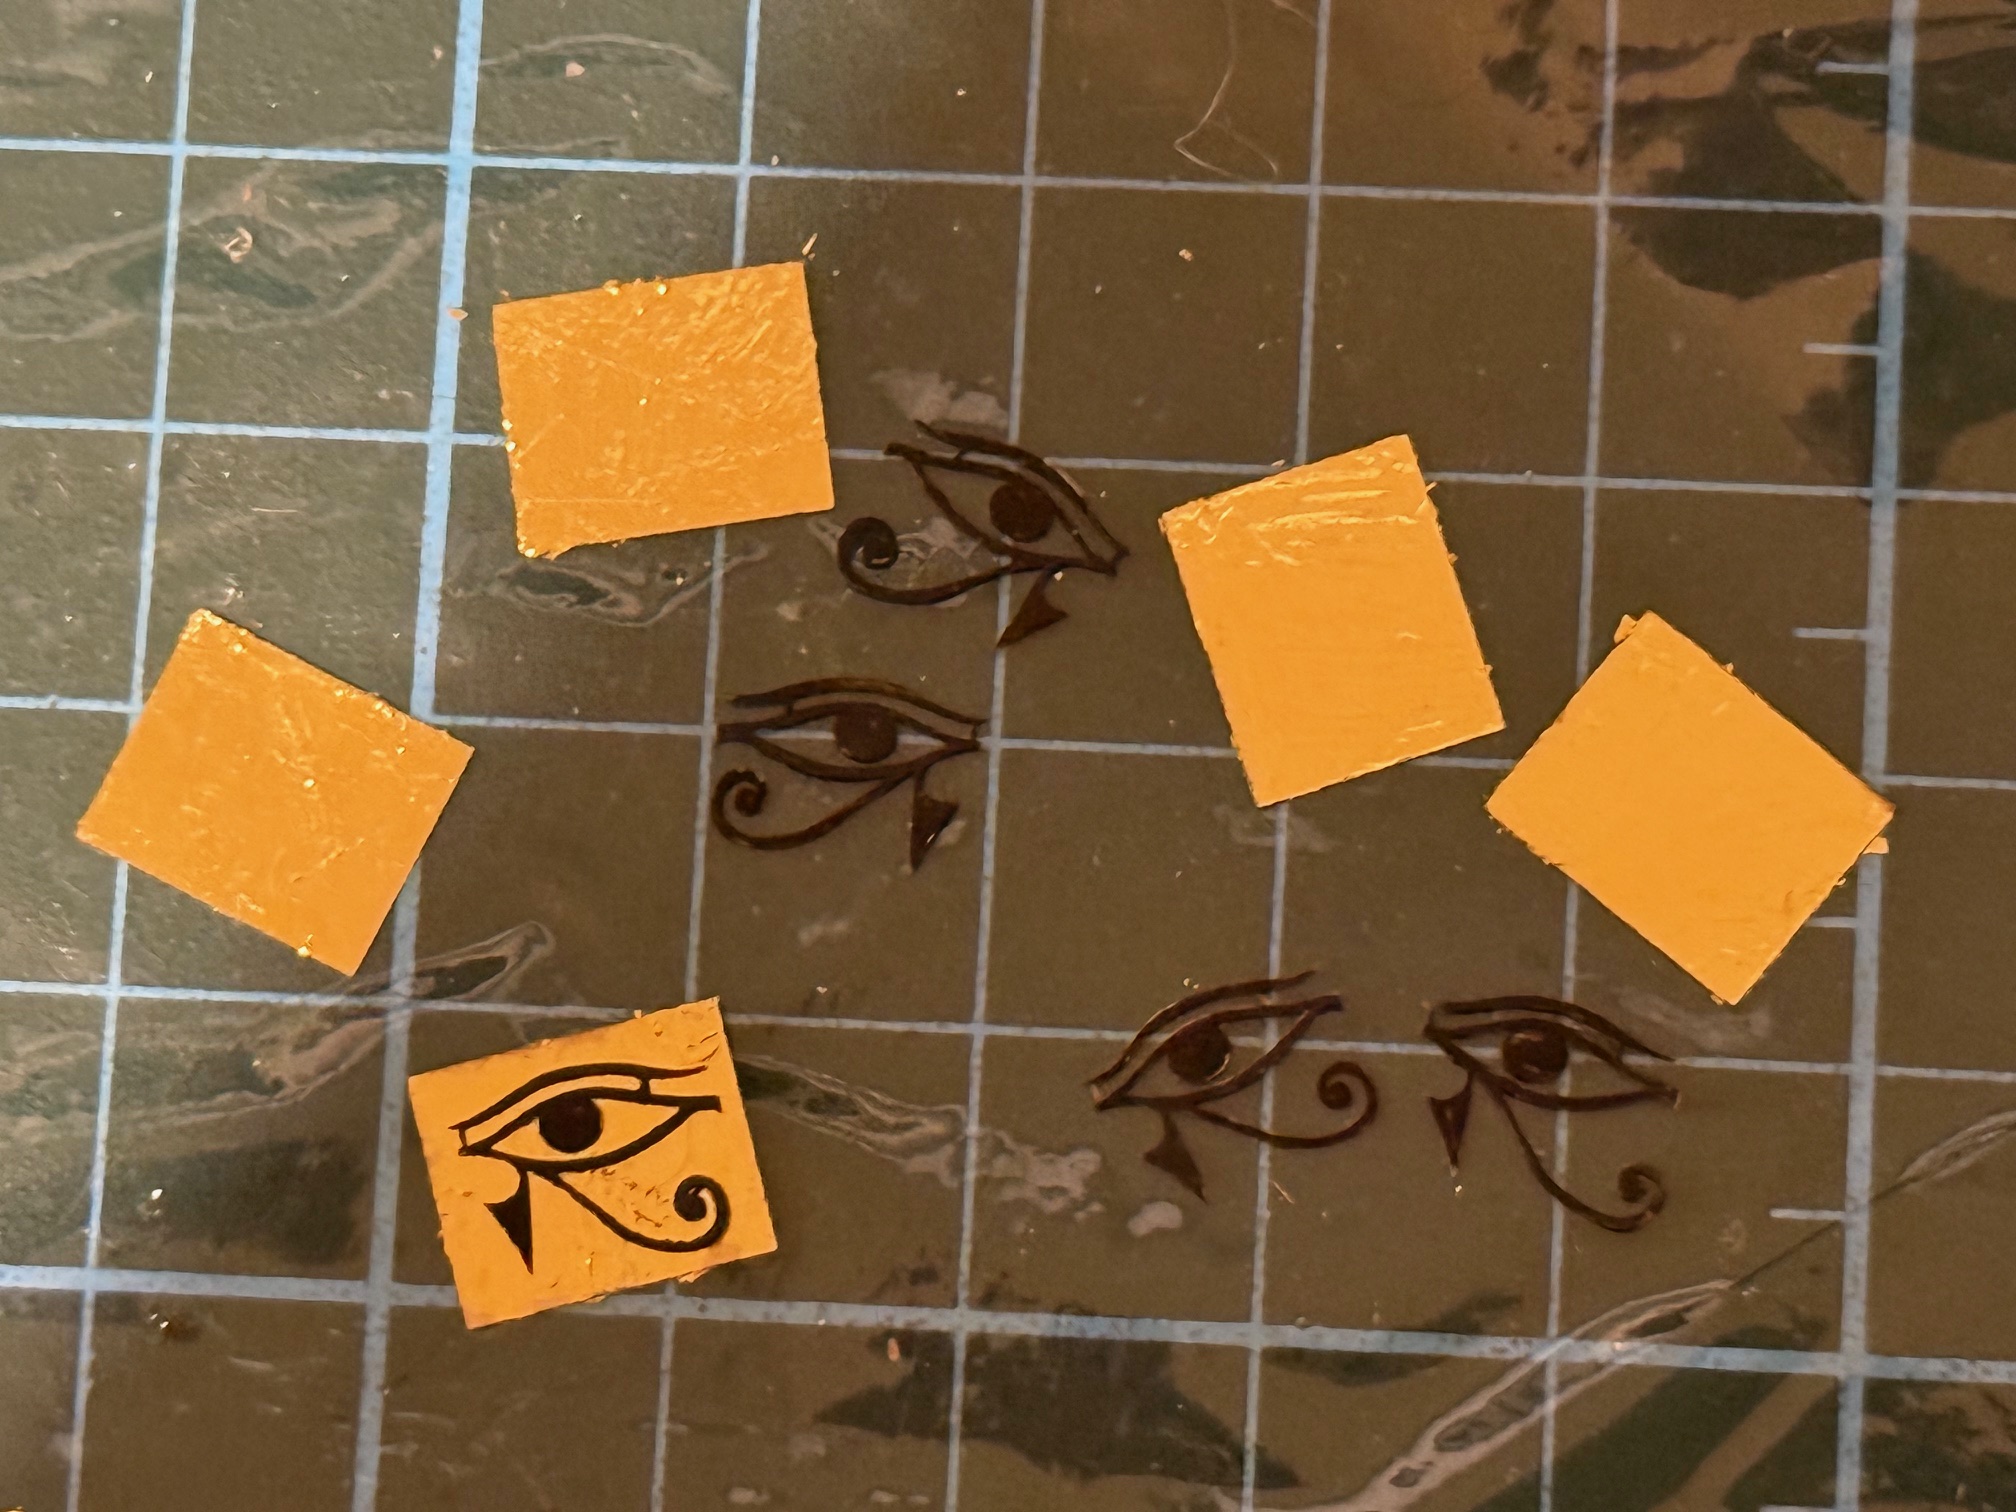
I gold foil covered the backing plates, and painted them with artist grade varnish.

I painted the Eyes with black acrylic artist’s paint, and left all of the articles a day or two to dry and cure.

I glued the eyes to the foil coated backing plates with a fresh coat of the artists varnish, and left them to dry for a further day.

Then today 27 Dec, I glued the assembled Eyes of Horus to the bows of the starboard and port sides, using CA glue, after scoring the painted ship sides and back of the backing plates, with a sharp scalpel.

Oh, forgot. also made the oars and tied them to the front of the ship. Only 10 or 12 oars for a 45-50 ton ship. Probably for fine manoeuvring only. The model plans also call for 4 steering oars, but I have seen no pictures of Egyptian ships of the era with more than 2, so that is all that I have installed.
There is an eye on both sides of the bow.

So. That model is finished as far as I am concerned. It has been interesting, and the model is quaintly intriguing. Not sure where it will end up. Maybe one of the grand children will become interested in Egyptology.

Khufu Pyramid Ship -4

I am currently waiting for plans to be printed for my 74 gun ship so I can start on that build. I regret to say that I have been messed around by my normally prompt scanning/printing service, and still waiting more than 3 weeks despite weekly reminder calls.

So meanwhile I have been working on the Viking Oseberg ship, and the Khufu pyramid ship. This post is about the Khufu ship. The hull, deck cabin and baldechin are made and installed. still to come are the oars, and shade structure. So I have painted the hull exterior and varnished the deck and hull interior. I painted the hull a dark green, and the bow and stern pieces gold. The green is as I planned, but the gold was quite dull.

The gold painted prow with masking tape applied. Not enough bling for my taste. Also the test piece (lower left), some cut up foil in the paper wrapping, pencil, fine tweezers, gilding glue, gilding brush in the plastic sleeve, and glue brush.

So, I explored the possibility of applying gold leaf over the gold paint. I have no experience of applying gold leaf, so I asked my AI how to do it. It sounded straight forward, so I purchased some 24 karat gold leaf sheets, 65mm square. There was no mention of them being gold alloy, or “golden” foil, just 24karat gold foil. So, is it 24k gold, or is that just an advertising title for suckers like me? After a long wait it arrived from China. I also purchased some gilding glue, and a gilding brush, which was incredibly soft and fine. I also needed a small paint brush to apply the glue.

The AI suggested practicing on some scrap, which I did, and the test turned out quite well.

The prow section seemed more straight forward than the bent -cocked forward stern piece, so started at the front.

First I masked the green painted section of the hull with masking tape, and firmly applied the tape without gaps.

Then cut one of the foil squares into pieces, some for the vertical bow pole, and some for the hull prow extension, making sure that each piece was labelled (top, port, starboard, bottom, post top, post sides, post rear, and cut at least 2mm wider than needed.

Then brushed on the glue, making sure that there were no drips, or thick areas. Waited about 15 minutes, and tested the glue on a test bit of waste, waiting until the glue became tacky. I do not know what the constituent of the glue is, but it could be a watery version of PVC.

When tacky I applied the first piece of foil in an inconspicuous region, under the prow piece. Several things about handling gold foil. It is weightless, and incredibly thin. If dropped it floats slowly to the floor. If removed from its surrounding piece of paper it tries to coil up like a snake. It seems to be attracted to my skin, possibly by static electricity. And as soon as part of the foil touches the glued area it grabs, and cannot be removed, so positioning is crucial. If a misguided attempt is made to reposition it, it falls apart like a wet tissue.

Fortunately, if a piece of foil is misapplied leaving a gap, another piece of foil can be attached to the gap, and later some gentle brushing with the gilding brush breaks off the non glued sections leaving a patch with invisible joins.

The timing of applying the foil is also crucial. Well, not timing exactly, but degree of tackiness which is assessed with a test piece of wood and finger touching.

Anyway, enough words. Here is a photo of the finished foiling.

Like all of my jobs it is not perfect. But good enough for SWMBO so good enough for me. I do like the gold gleam.

Next to make the pergola at each end of the cabin. It looks and probably is rather flimsy so I have left it almost until last. Then to make and attach the oars.

And somehow to paint or make an Eye of Horus on each side of the hull near the bow. Not sure how I am going to do that. I am quite sure that my painting-calligraphy skills are not up to that job, so it will somehow be CNC’d, printed, or 3d printed.

p.s. Here is a link to my “conversation” with the AI on the subject of gilding the Khufu model ship. It is more informative and sensible than most conversations that I have with humans! https://chatgpt.com/share/693badc9-4210-8009-8cef-6e33623dc878