machines which I have made, am making, or intend to make, and some other stuff. If you find this site interesting, please leave a comment. I read every comment and respond to most. n.b. There is a list of my first 800 posts in my post of 17 June 2021, titled "800 Posts"
In a previous post I showed an early stage of this component. Yesterday I completed it.
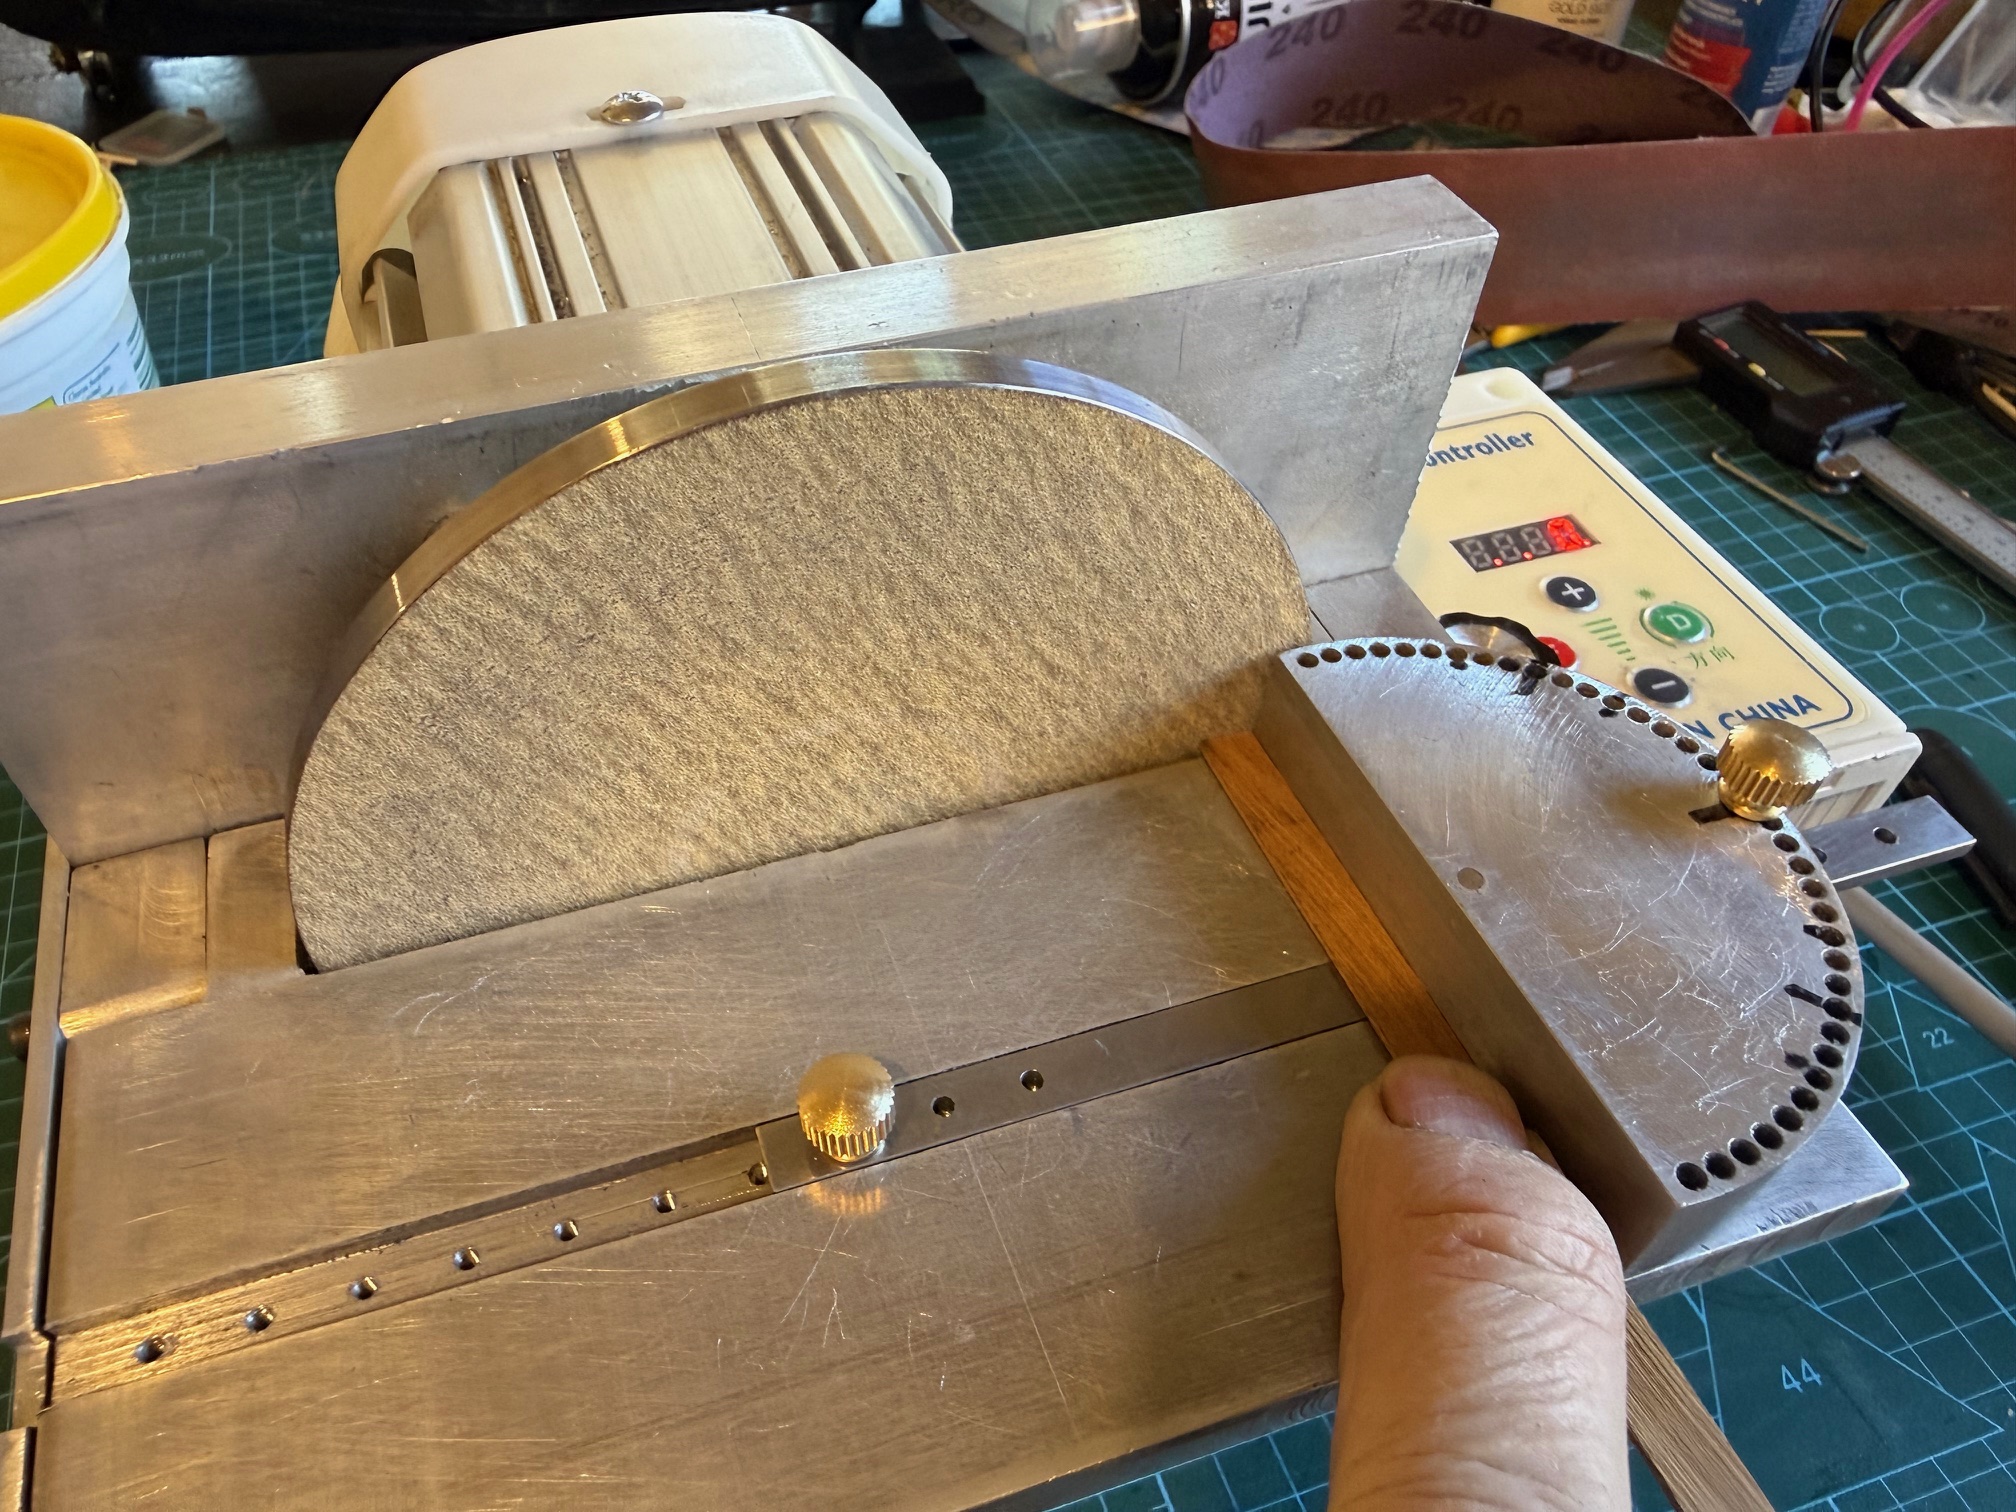
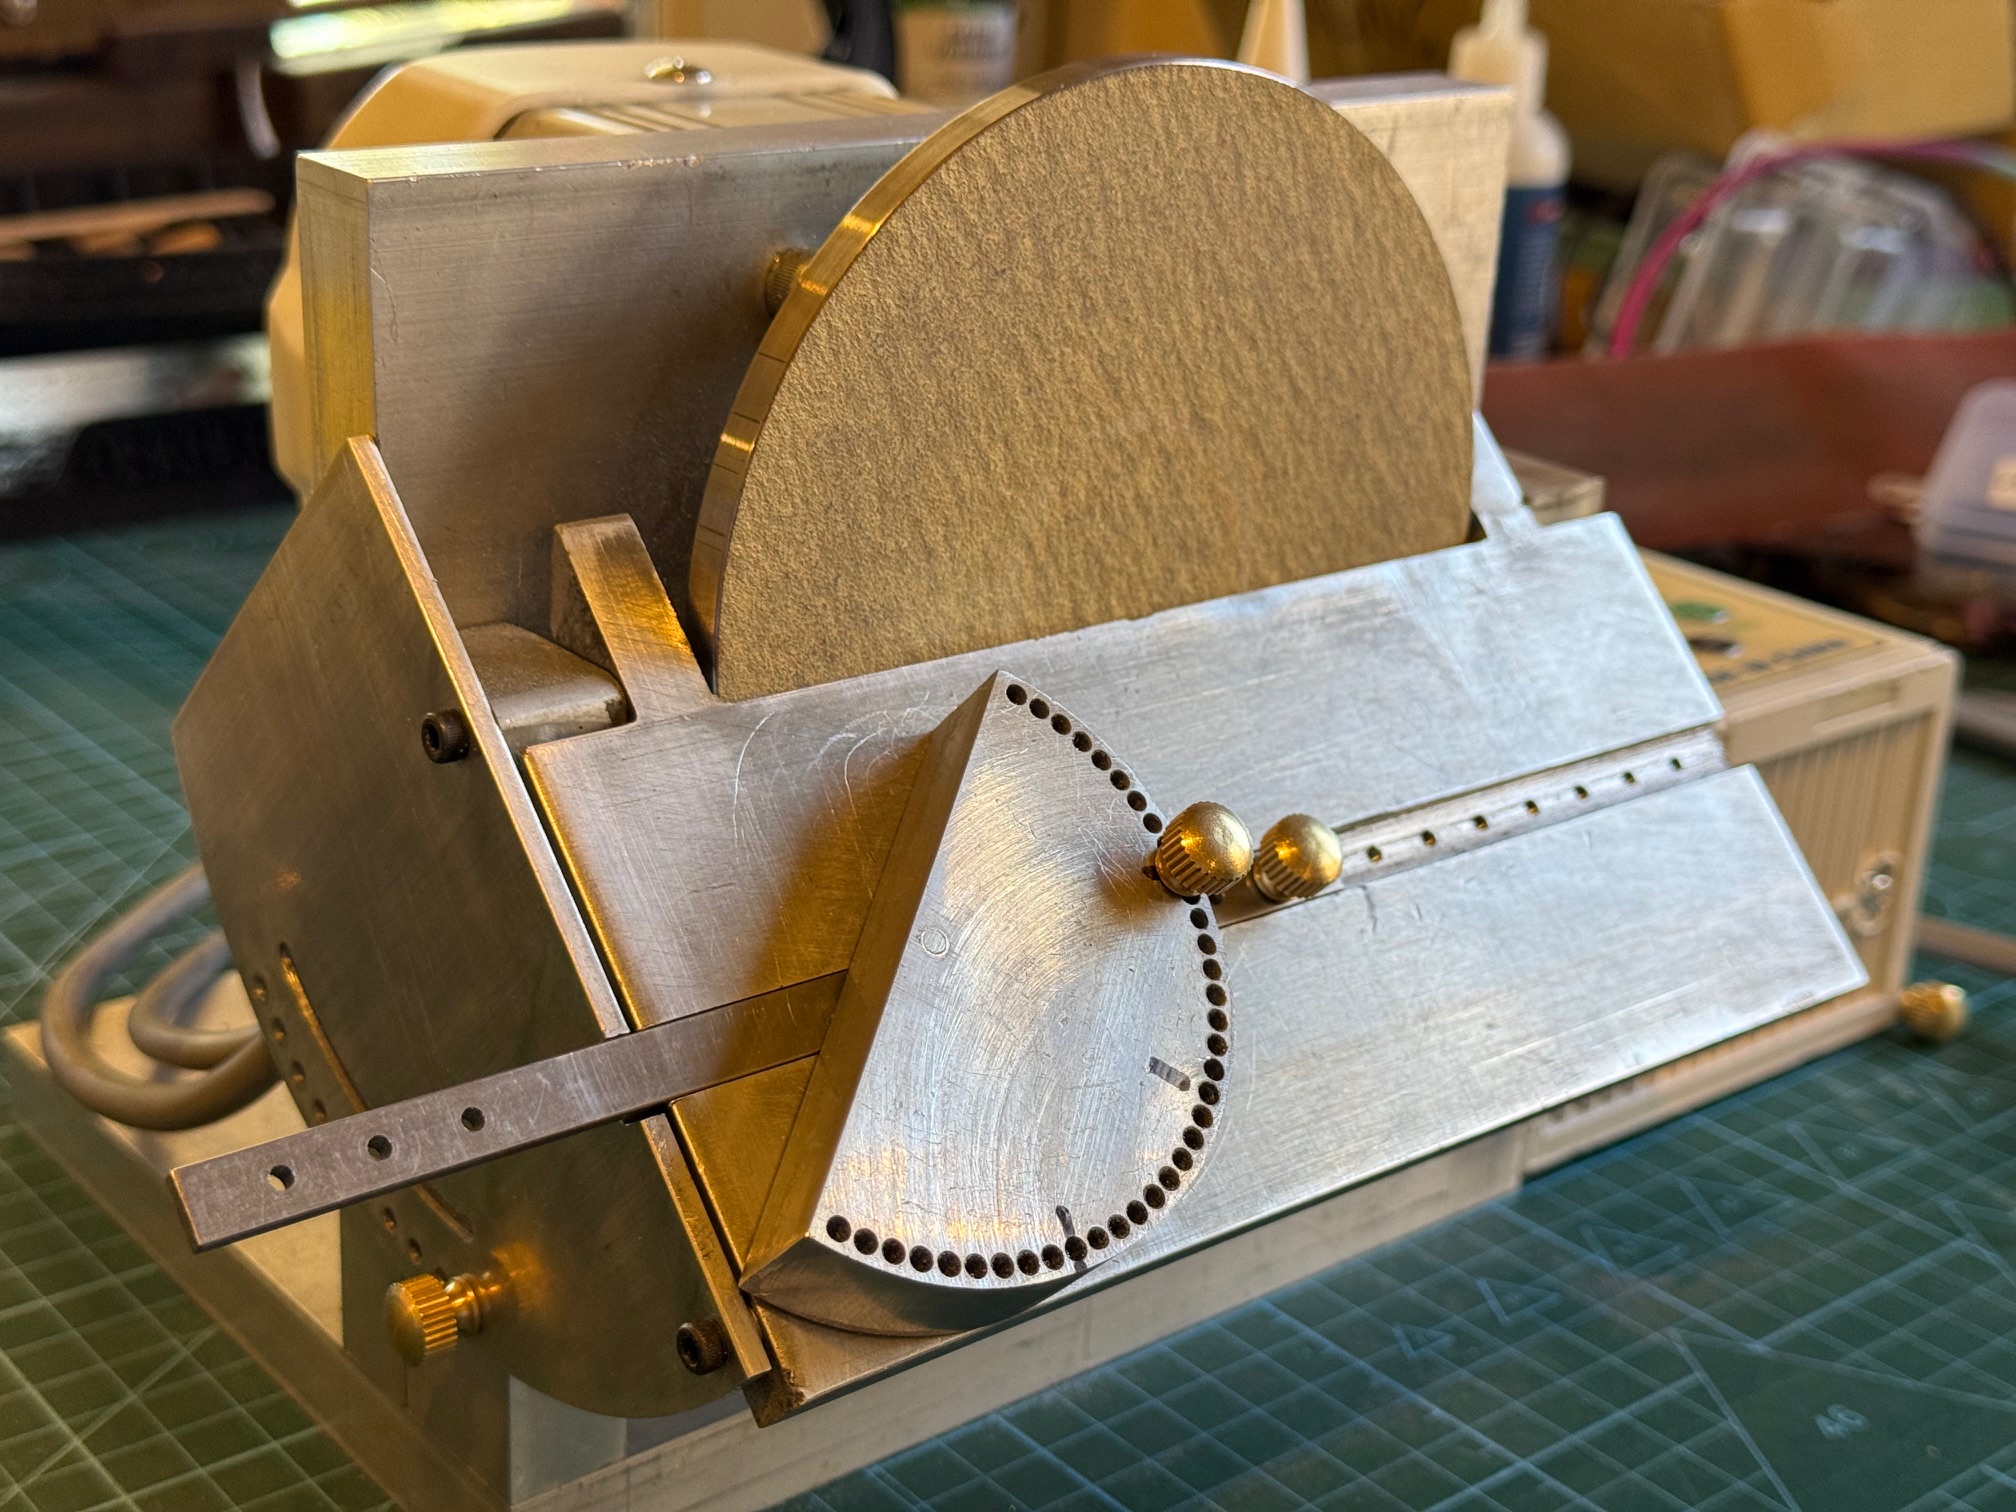
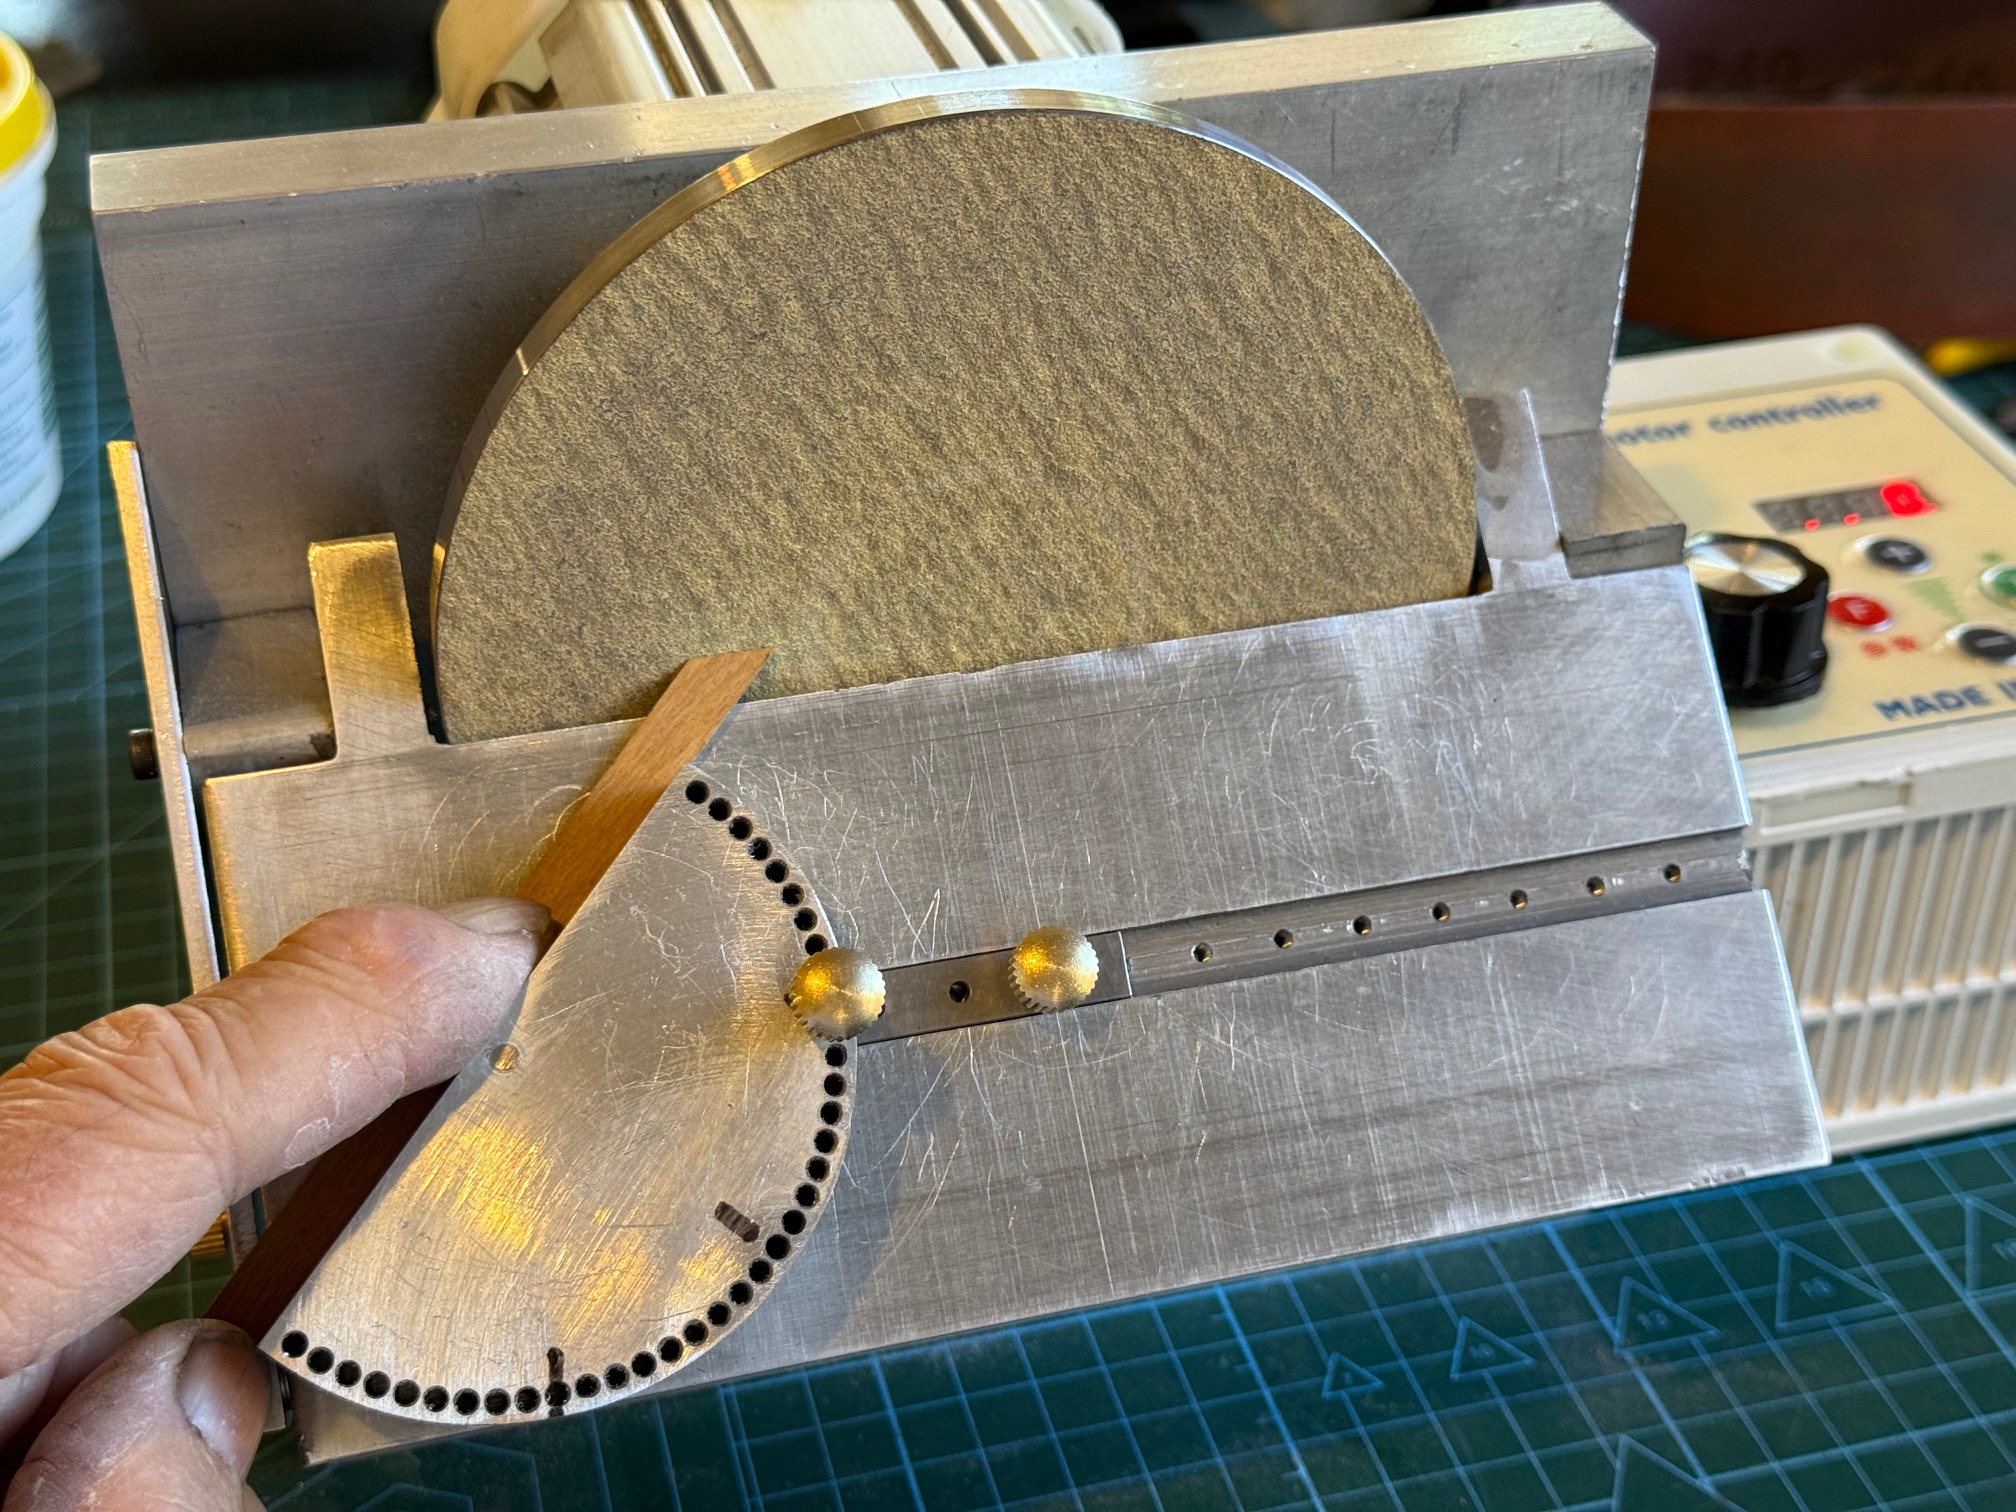
The table now has a central slot, and a series of M2.5mm threaded holes at 10mm spacing. The protractor fence slide also has some 2.5mm holes, allowing the slide to be fixed anywhere along the slot. The motor is reversable, so either end of the table can be used. The protractor fence has holes at 5 degree intervals, and some felt pen marks at 30,45,60 and 90 degrees. I will ask Stuart T to laser some more permanent markings. The brass knob fits neatly into the holes. In this position the sander machines a neat square end in the wood.here table is accurately held at 45 degrees and the fence is also at 45 degrees, allowing a compound cut.Sanding a compound cut. All of the angles are accurate to a fraction of one degree. Pretty nice hey?
It occurs to me that the holes in the fence could be used to rotate a piece of wood to make a disk, or an arc from about 5mm diameter up to 150mm dia. The disk could have sloping sides, in the form of a truncated cone. Hmmm….. all sorts of possibilities when you make your own machines.
So this machine is almost finished. I just need an attachment for a vacuum hose, and/or a dust collection container.
I was making a fence for the disk sander, using my CNC mill semi manually, i.e. issuing commands from the keyboard, when I re-zero’d the Z axis. But forgot to hit enter. And proceeded to the next command which was a Z movement, and watched in horror as the 3 jaw drill chuck headed rapidly towards the workpiece in the mill vice.
I hit the big red panic stop as the chuck with a 2.5mm drill bit hit the vice. The drill bit was buggered, and the chuck jaws, still rotating, made an ugly pattern in the hardened mill vice jaw.
After cursing my own stupidity, I raised the Z axis, and tried to release the chuck jaws to remove the stump of the drill bit, but the the keyless chuck was jammed.
This was not good. I hate to admit it to my readers, but this is not the first 3 jaw chuck to suffer this fate. I have had to replace 2 or 3 chucks over the years, for exactly the same type of mishap.
So, I tried my usual tricks. With the chuck in a large vice, and a large Stillson wrench I tried to undo the chuck. But it was really jammed. Bugger. bugger. bugger. I had tried first with a large but more delicate and kinder pin wrench, but that was totally useless, hence the move to the Stillson.
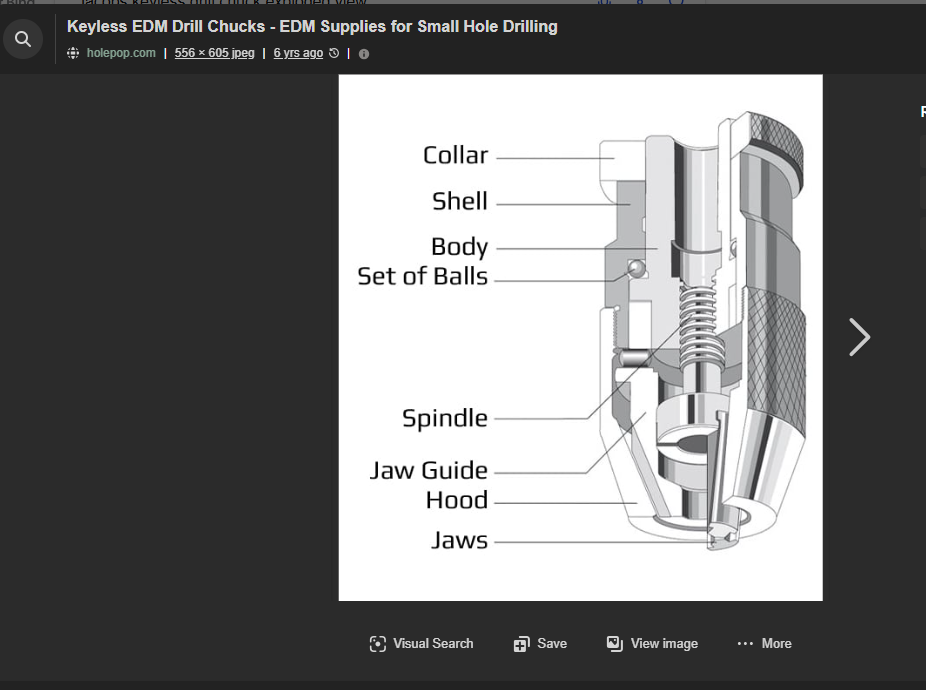
I contacted ChatGPT, and asked for information and advice. By this time I had partially disassembled the chuck, but still could not rotate the knurled ring to adjust the jaw opening mechanism.
Chat GPT was sympathetic and polite, and gave a detailed explanation as to what had happened internally to cause the jam. It even provided a link to a diagram of the chuck mechanism.
It suggested that I just replace the chuck, because something in the mechanism was bent, broken, or brinelled. Not fixable. Chuck manufacturers do not regard these chucks as repairable items.
I had managed to unscrew the hood, and remove the jaws and the spindle, and figured that the jam had occurred between the shell and the body of the chuck, probably at the level of the balls. Maybe.
So I ordered a new chuck.
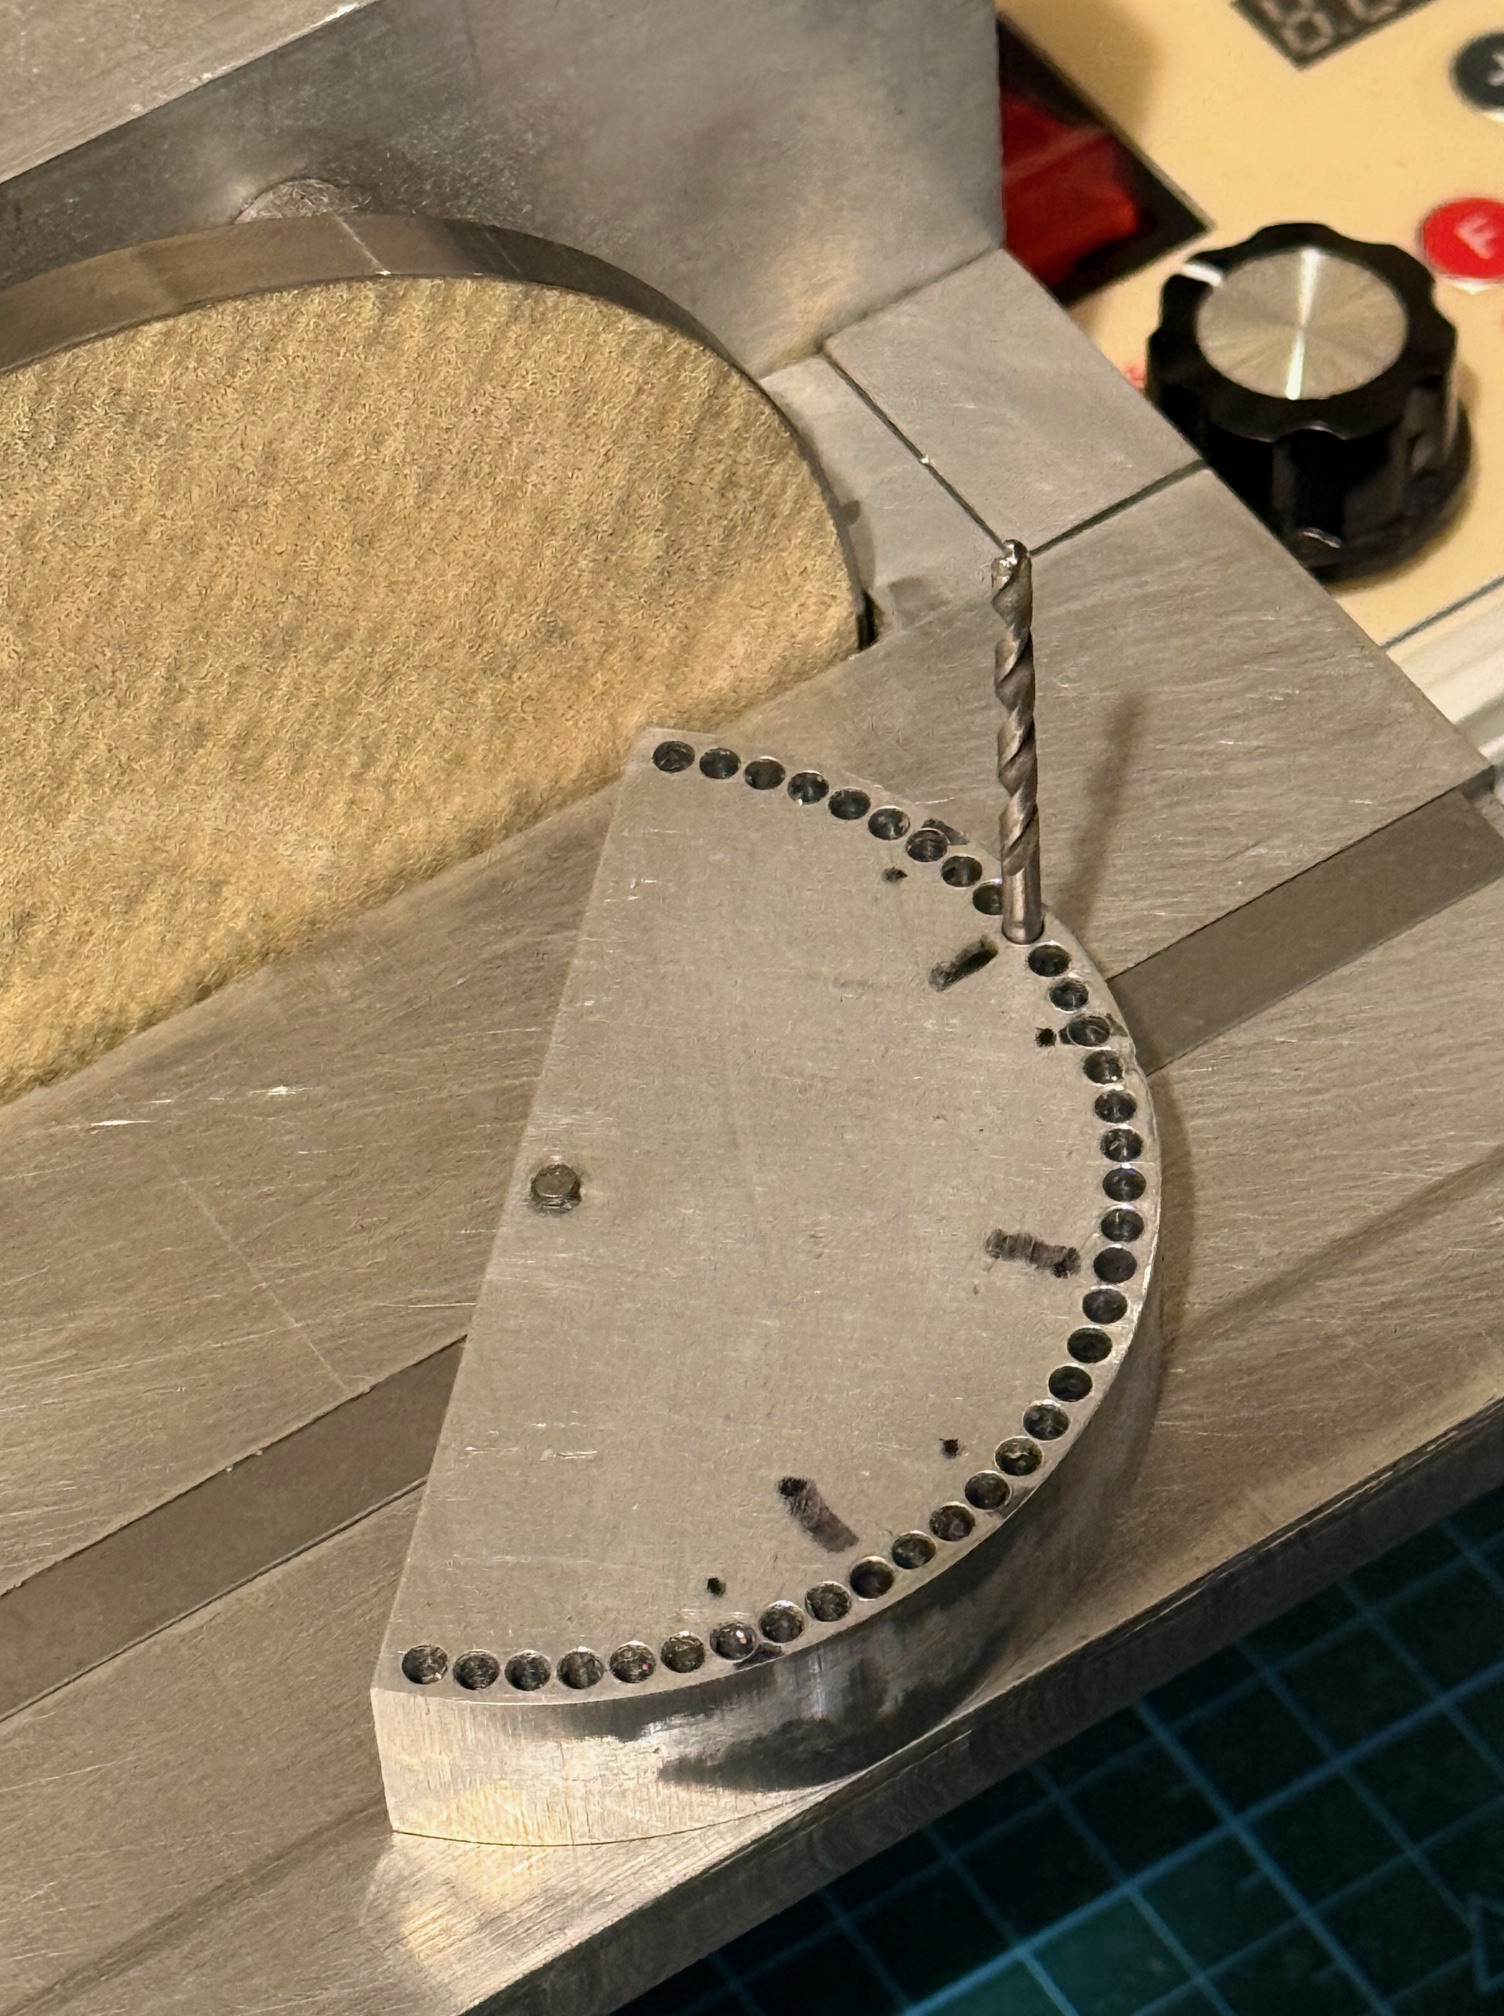
But I still wanted to continue with my job, which was making a protractor fence for the disk sander shown in the previous post. And the buggered chuck was my best one, and the job involved accurately drilling 38 holes, 2.5mm diameter, through 16mm of aluminium.
With nothing to lose, I put the chuck in my biggest vice, and pressed the body of the chuck to release the pressure on the balls. But nothing happened. It was REALLY tight. Should I apply heat?? Nah. I wound the vice handle with all of my strength, and then heard a slight “creak”. Either something had cracked, or something had moved. I hoped that it was not the thread of my 6″ Dawn vice.
So, took the chuck out of the vice, and tried to move the adjusting knurled cover.
And bugger me, it moved. Not only moved, but moved freely.
So I reassembled the chuck, jaws and all, and tried it again. And not only did the adjusting mechanism move, but the jaws operated smoothly, freely, and normally!
But! Is the chuck still accurate enough to finish my job??
PROOF of the PUDDING. 38 holes through 16mm aluminium, with one 2.5mm drill bit. (not the bit in the photo. That one is blunt, and being used as a pin.) The job continues, and pics will appear when it is finished.
In triumph, I sent a message to ChatGPT, Thanking Him/It for the helpful information, and detailing my fix. In the space of one second, ChatGPT congratulated me! And offered a detailed explanation of what must have occurred to explain the sequence of events. And advised me to use the new chuck when it arrives, and use the damaged one only for non critical jobs.
All very polite, respectful, congratulatory, sensible and helpful.
A very satisfying conversation.
Now I am thinking.
That conversation was actually more helpful and satisfying than most conversations that I have had with actual human beings.
And it was with a machine!
p.s. SWMBO’s response to this story was “Well, I am not at all surprised that you are happier to talk to a machine than a human.” !!
My recently made drum sander thicknesser was quite satisfying and successful. And I was particularly impressed with the Chinese made variable speed 750w motor.
My next model builds will include a 74 gun ship, from scratch, and I am sure that the drum thicknesser will get plenty of use.
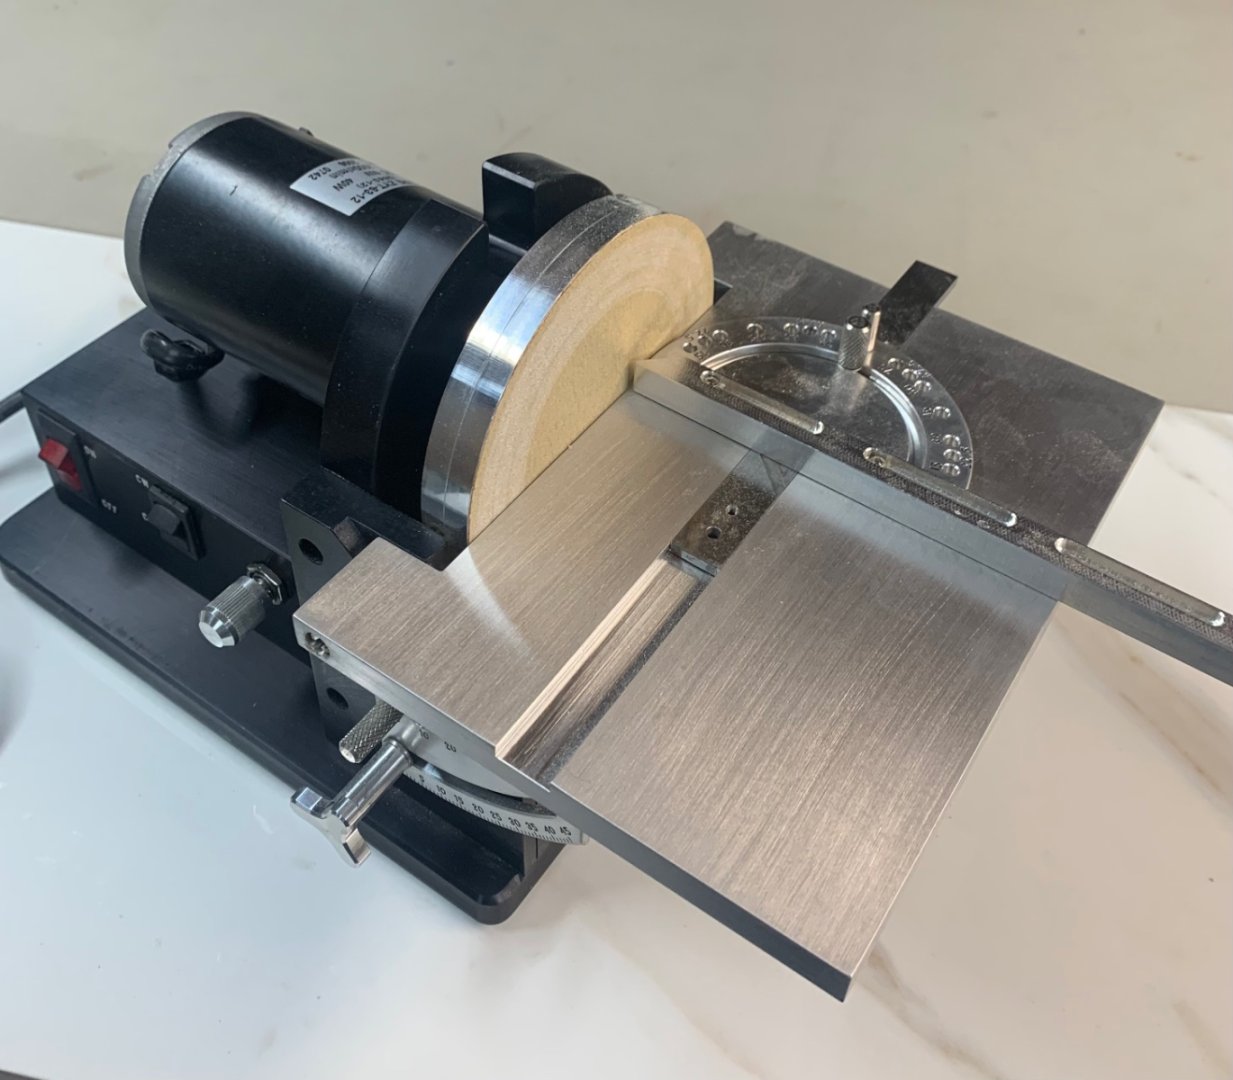
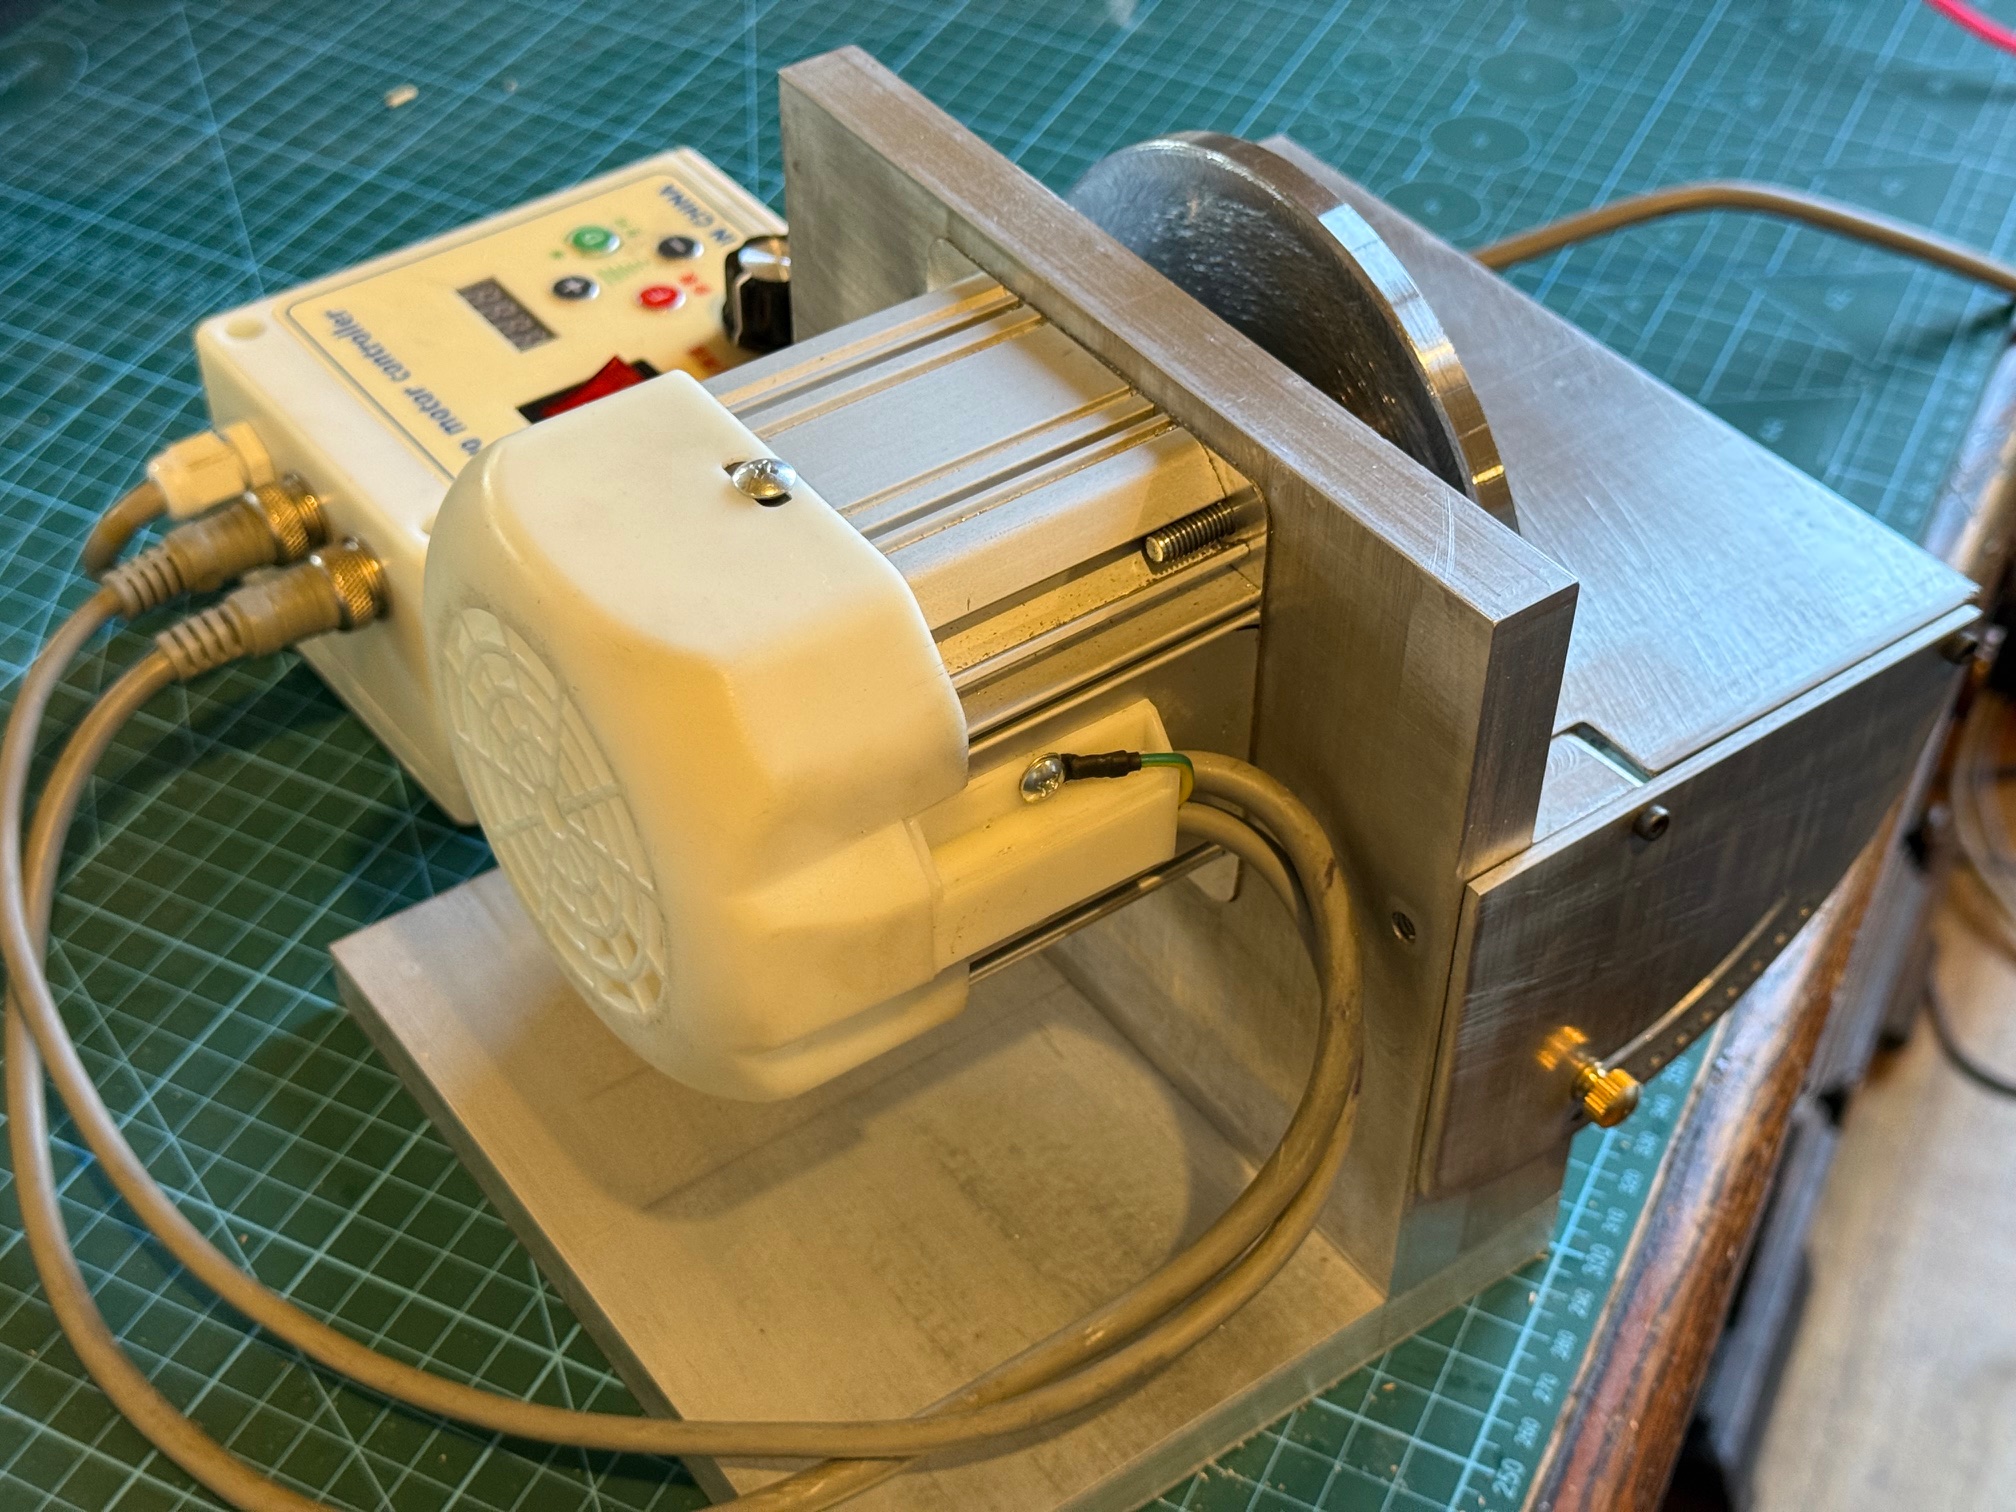
A recent visit to another model shipbuilder, Pat, and a tour of his workshop left me drooling. One item particularly impressed me, and that was his Jim Byrnes disk sander. It is quite compact, very solidly built, variable speed, and has a solid tilting table.
This picture is copied from EbayUS.
They are no longer made, and second hand examples are rare here in Oz, and quite expensive. Ebay US has examples in the $usd 2500-3000 range. Plus shipping to Australia. (p.s. I read in “Ships of Scale” that Byrnes Tools is recommencing production of some of their machines in 2026.)
For obvious reasons I decided to make my own disk sander. I have a 12″ Hairy Forbes version, and it works quite well, but is too big, too noisy and too messy to use anywhere except in the outside workshop.
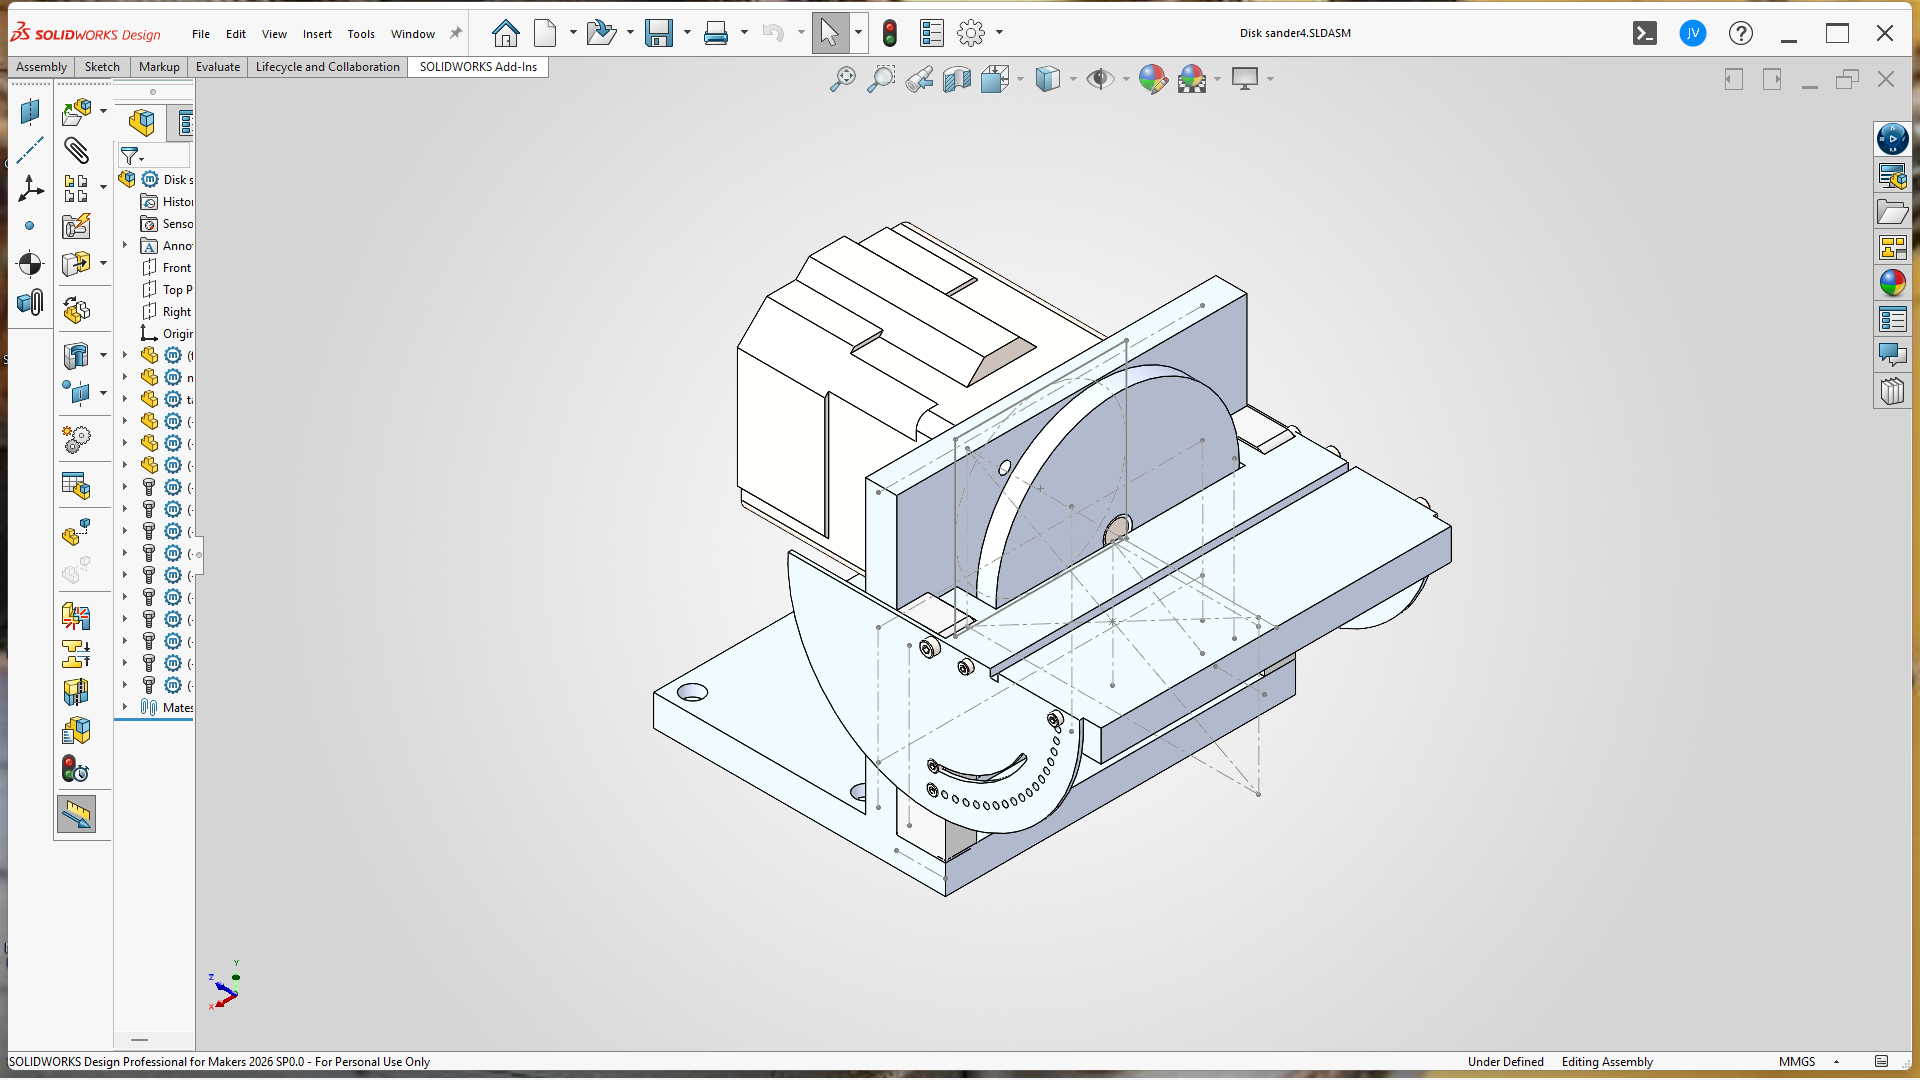
So I spent some time on Solidworks drawing up my Byrnes inspired, smaller version…the tilting table is 75x180mm.
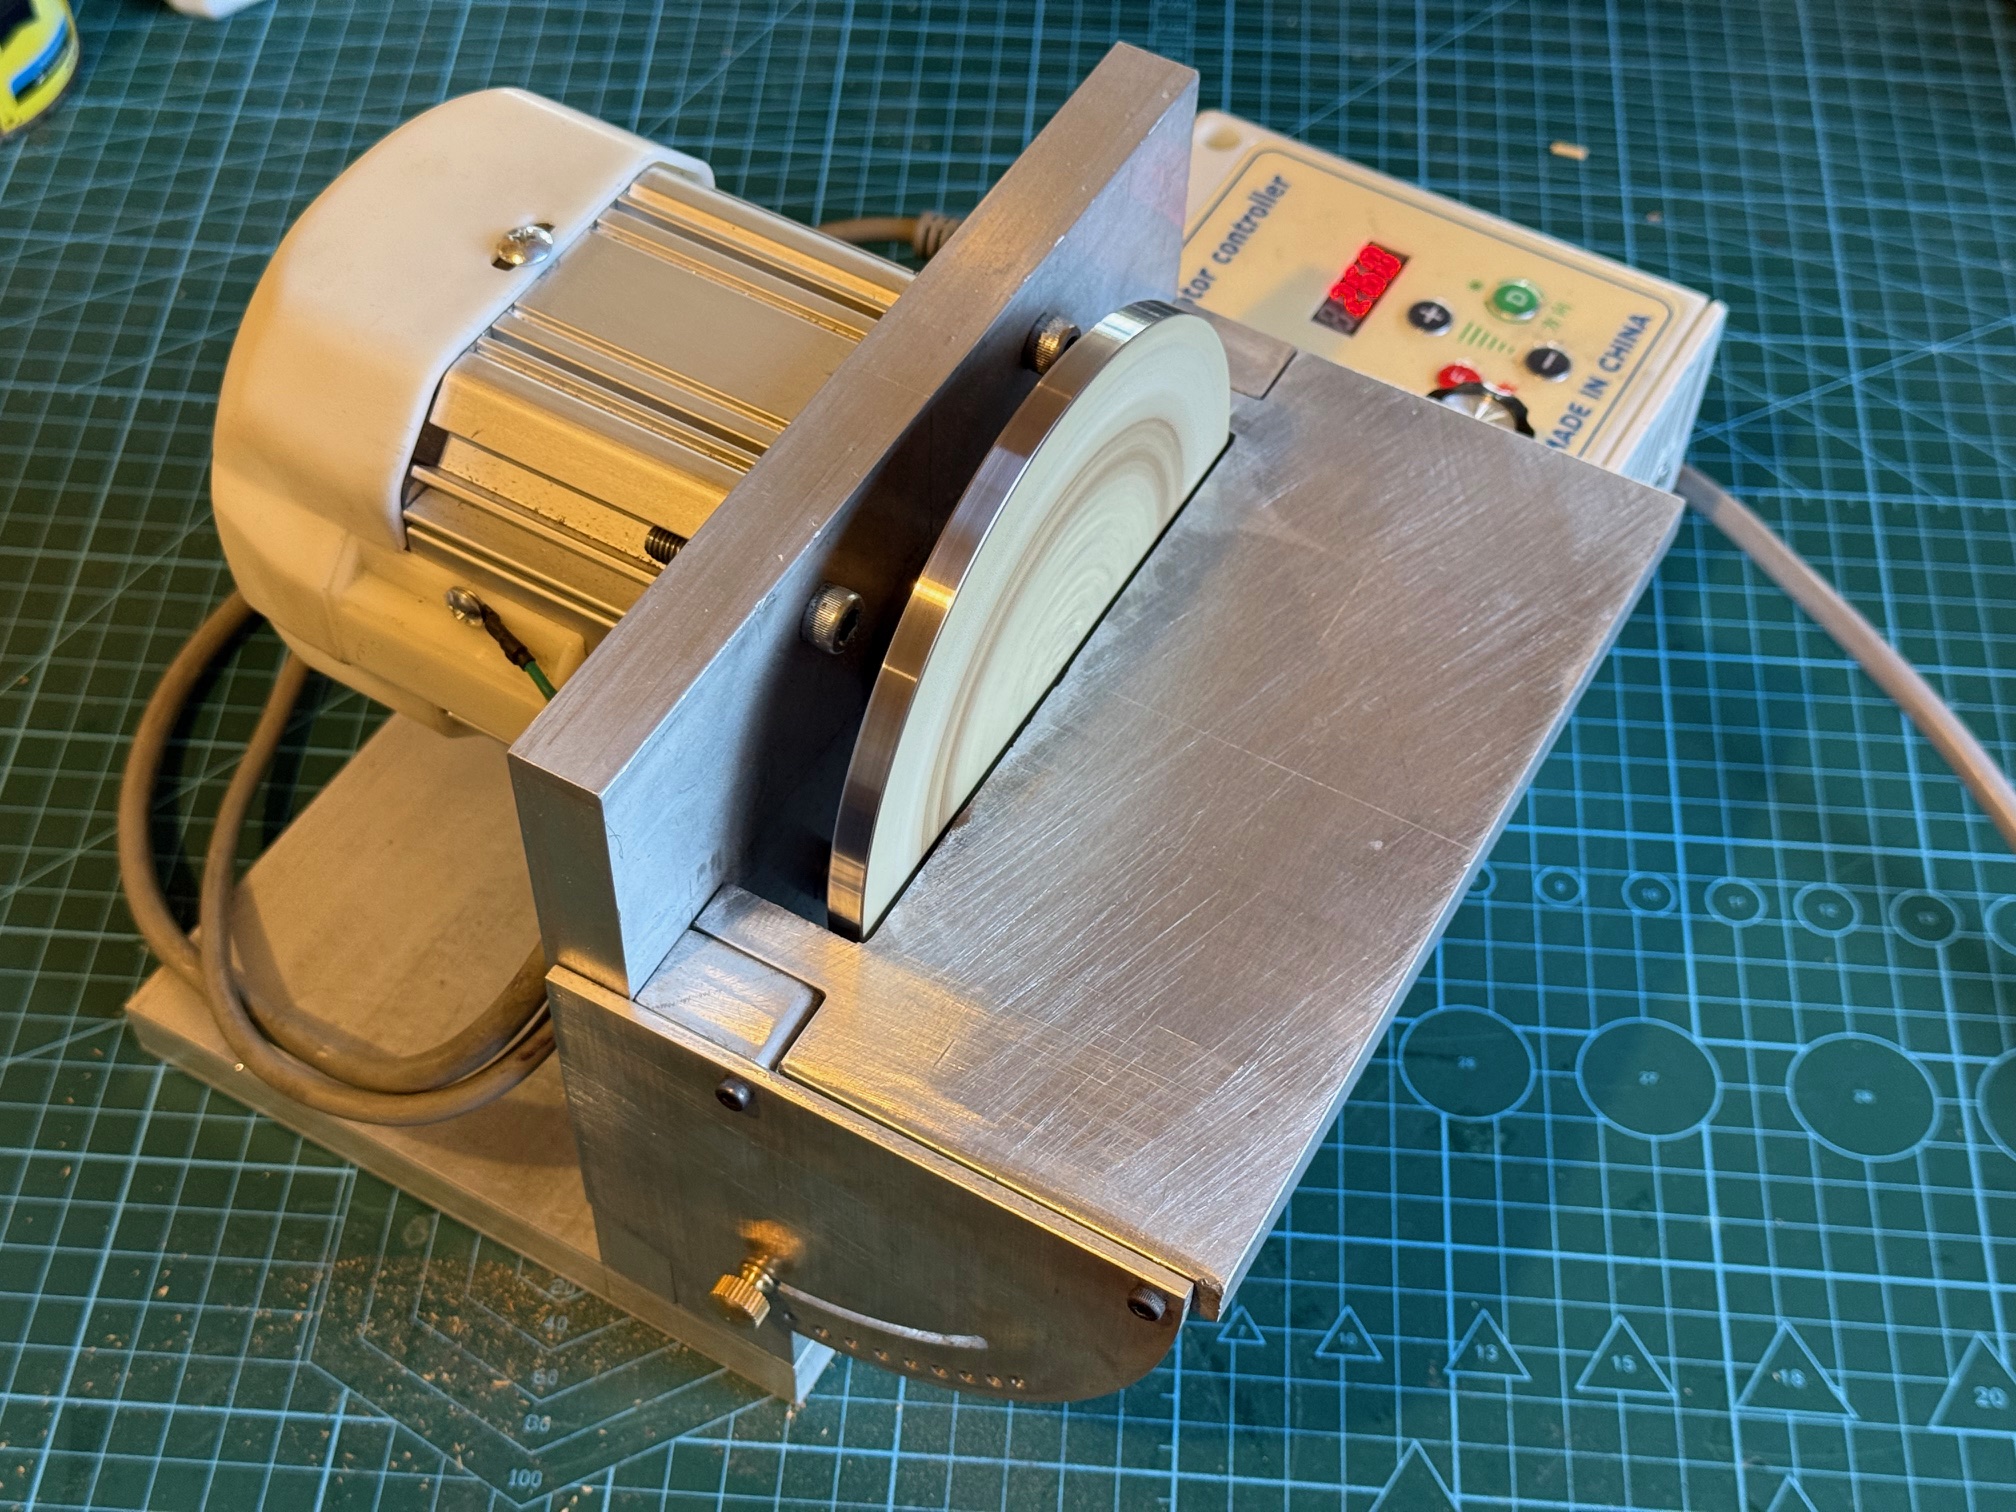
And after a few days in my workshop, here it is, (not quite finished but useable)…..
My version has a variable speed (0-4500 rpm) and reversible 1 hp servo motor, a tilting table graduated in 5 degree pinned steps, plus 0-45 degrees variable, and generally very compact and easily set up. I will get around to making an angled fence in a slot similar to the Byrne model in photo 2. I will also make provision for attaching a vacuum hose. The sandpaper disk is self adhesive and easily and quickly changed.
I made 2 disks. The first was aluminium, but I was not satisfied with it, so made the one shown from mild steel. The boss was silver soldered to the disk, and is held to the shaft with 2 grub screws. It runs very smoothly up to 2000rpm, but the unit needs to be fastened to the workbench at higher speeds. I think that most work will be done at 1000rpm. The 1hp motor is almost impossible to stall, even with big stock firmly applied.
The aluminium structural parts are 16mm thick, and held together with 6mm cap screws, so it seems quite solid. Again, the alu is all from my workshop left overs. So it has been a relatively inexpensive build. Only outlays were the motor ($aud150 approx), and 50 sheets of self adhesive aluminium oxide disks ($aud50), all from China.
The motor is deeply recessed into the vertical plate 10mm. That was a bit of accurate milling! The whole build is accurately square and rigid.