johnsmachines

machines which I have made, am making, or intend to make, and some other stuff. If you find this site interesting, please leave a comment. I read every comment and respond to most. n.b. There is a list of my first 800 posts in my post of 17 June 2021, titled "800 Posts"

Tag: Laser engraving

George the Third.

In 2015 or thereabouts I was persuaded by Stuart Tankard to get into CNC machining. So I bought a second hand Seig lathe which had been converted to CNC. The Seig was really a waste of money. Too small, too inaccurate, too flimsy. And the conversion, I gradually realised, had been done with the cheapest possible components. But it did awaken a world of possibilities. I made some simple shapes…. spheres, tapers,etc, and I started searching for a better machine.

I had offered to buy Stuart’s Boxford TCL127. Not suprisingly he declined. But he did know where there was an identical one which might be for sale. Long story short, it was available and I bought it.

Now, what to make first?

Hmm…. what about a cannon? I had no interest in cannons, but the shape seemed suitable, so I did turn a long gun barrel, and that was fine, but the Boxford has one major limitation. The maximum size object it will handle is 127mm long, and 127mm diameter. So my cannon barrel was a bit pathetically small.

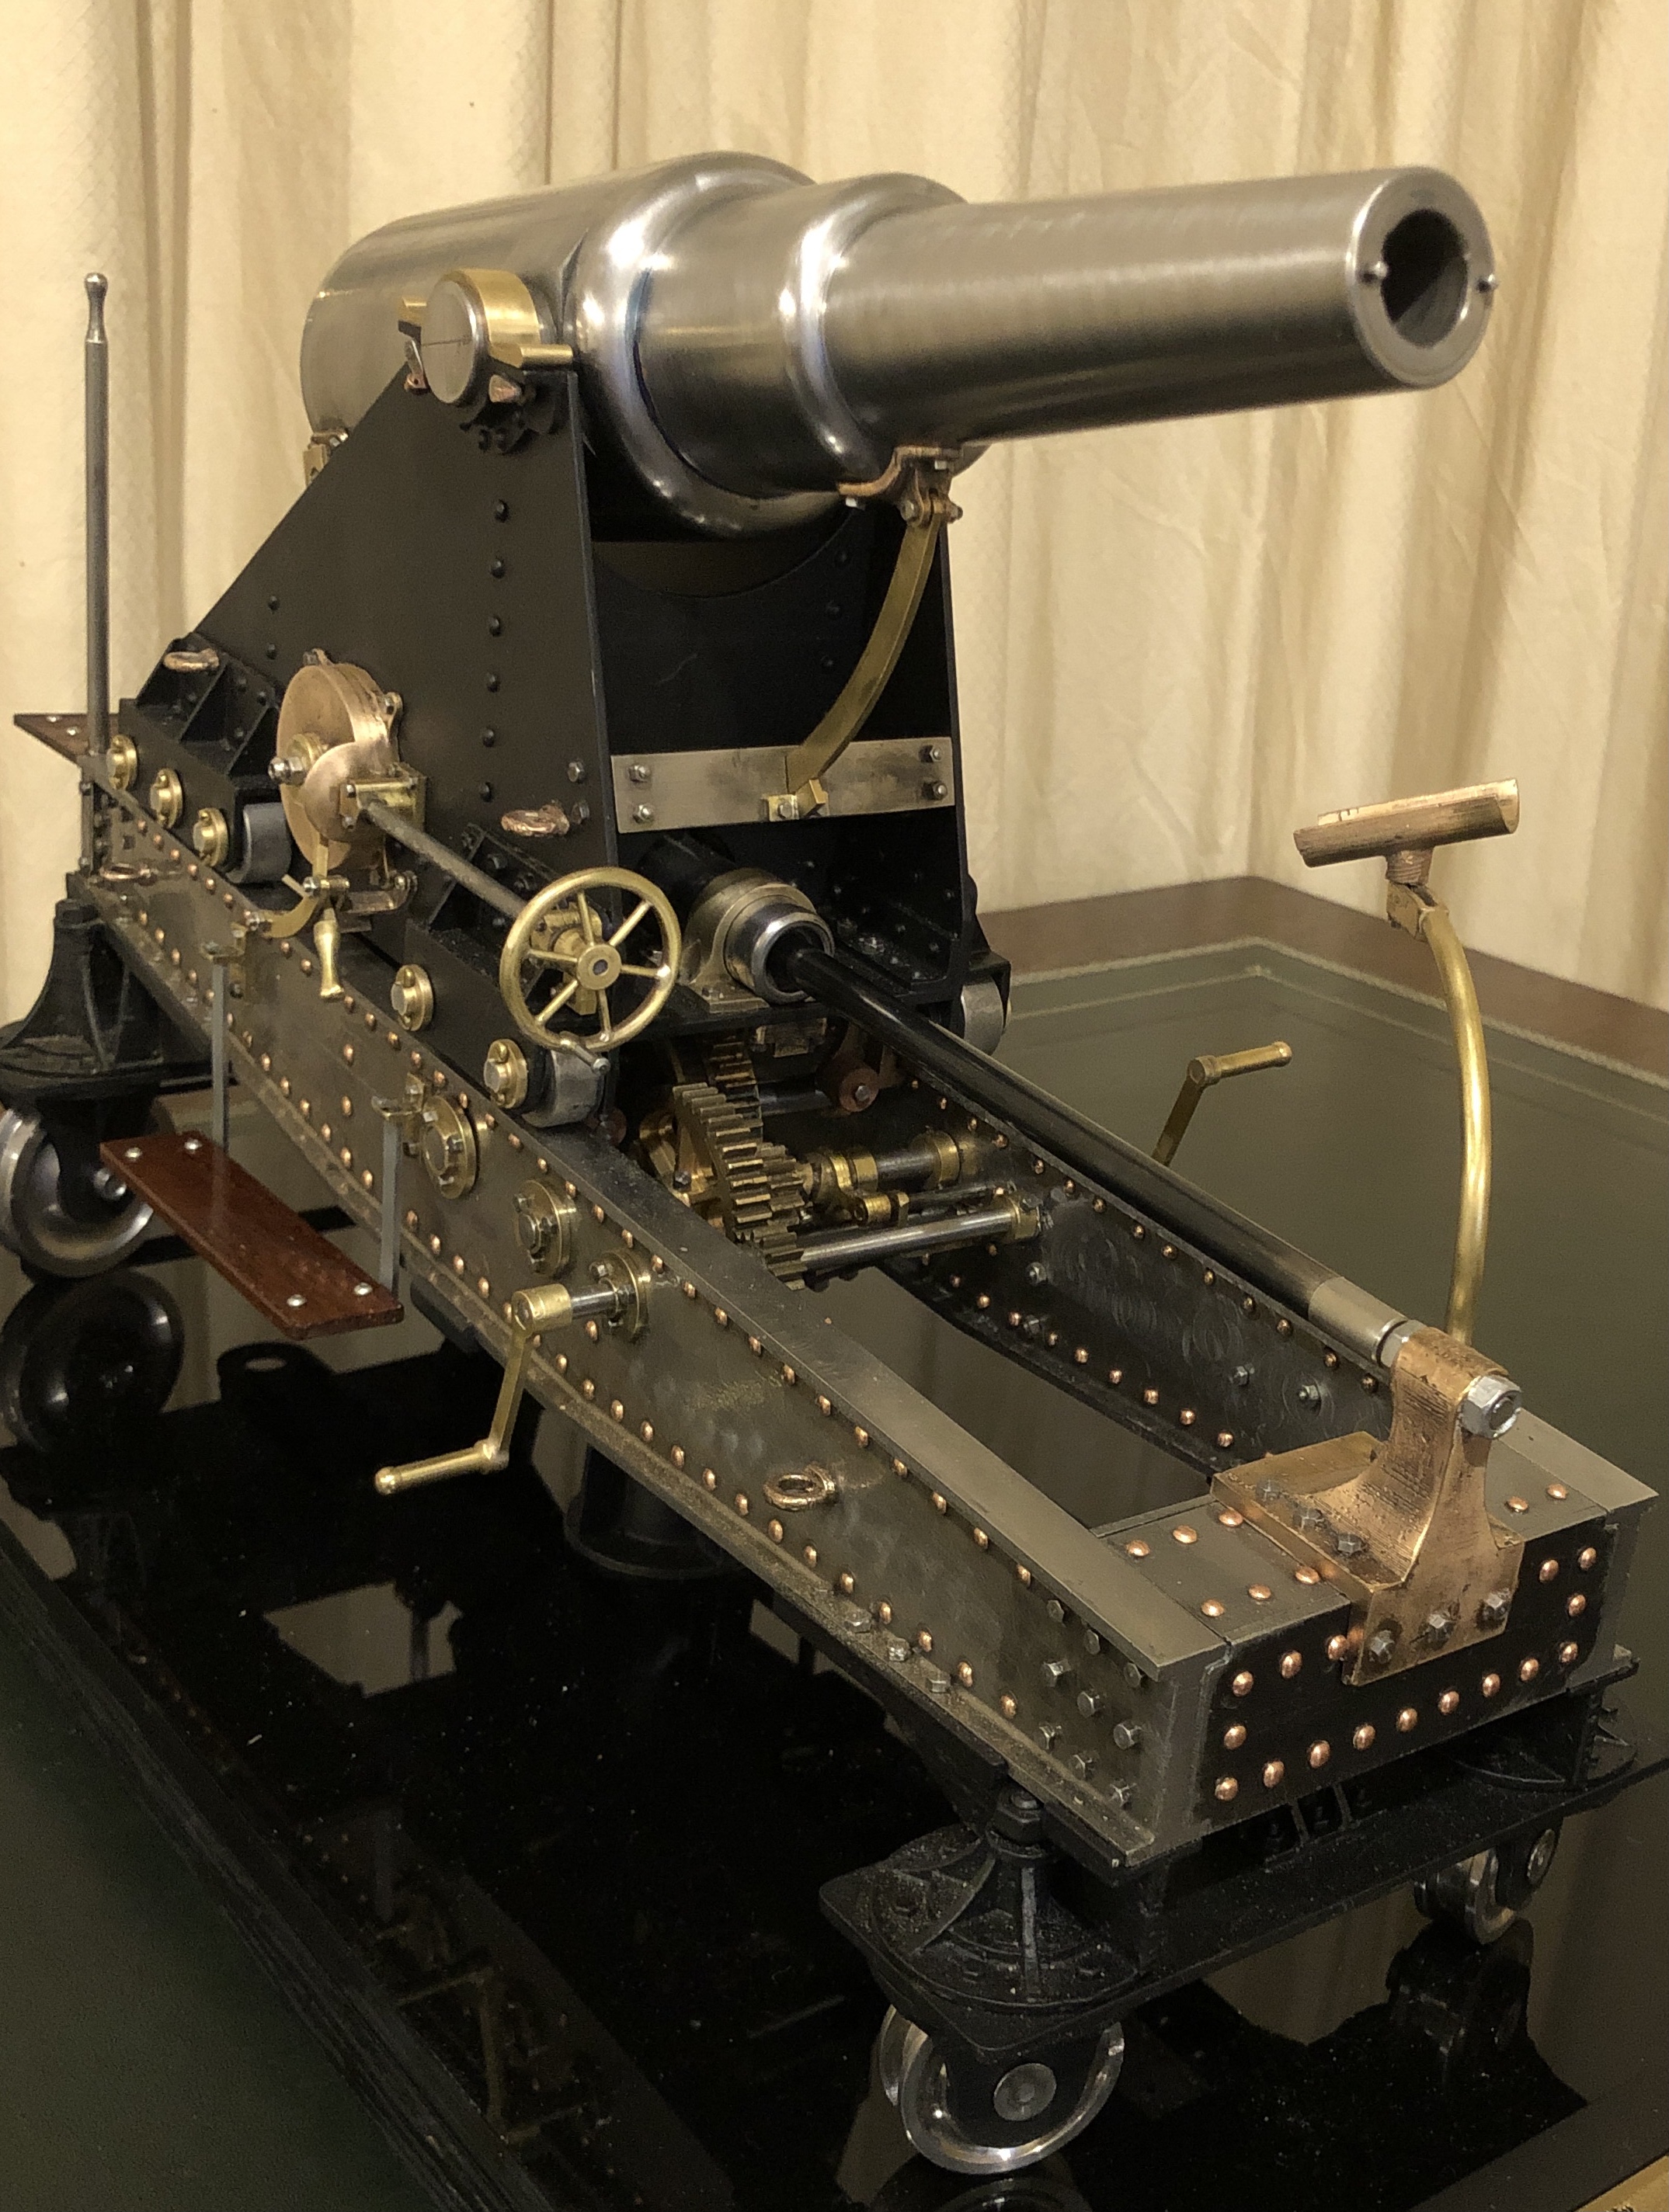
I showed the barrel to my model engineering club, and Bob, a senior member, offered me the use of his CNC lathe. So in 2016, I made a 24 pounder 1779 naval long gun, scale model about 300mm long. It turned out quite nicely, and I became very interested in the history of cannons as well as the machining aspects. Then I made a 32 pounder carronade circa 1805, at the same scale. And then an1866 rifled muzzle loader 80 pounder, and a 110 pounder rifled breech loader, and a1465 Ottoman bombard, and possibly more to come. None of these, I must mention, are capable of being fired.

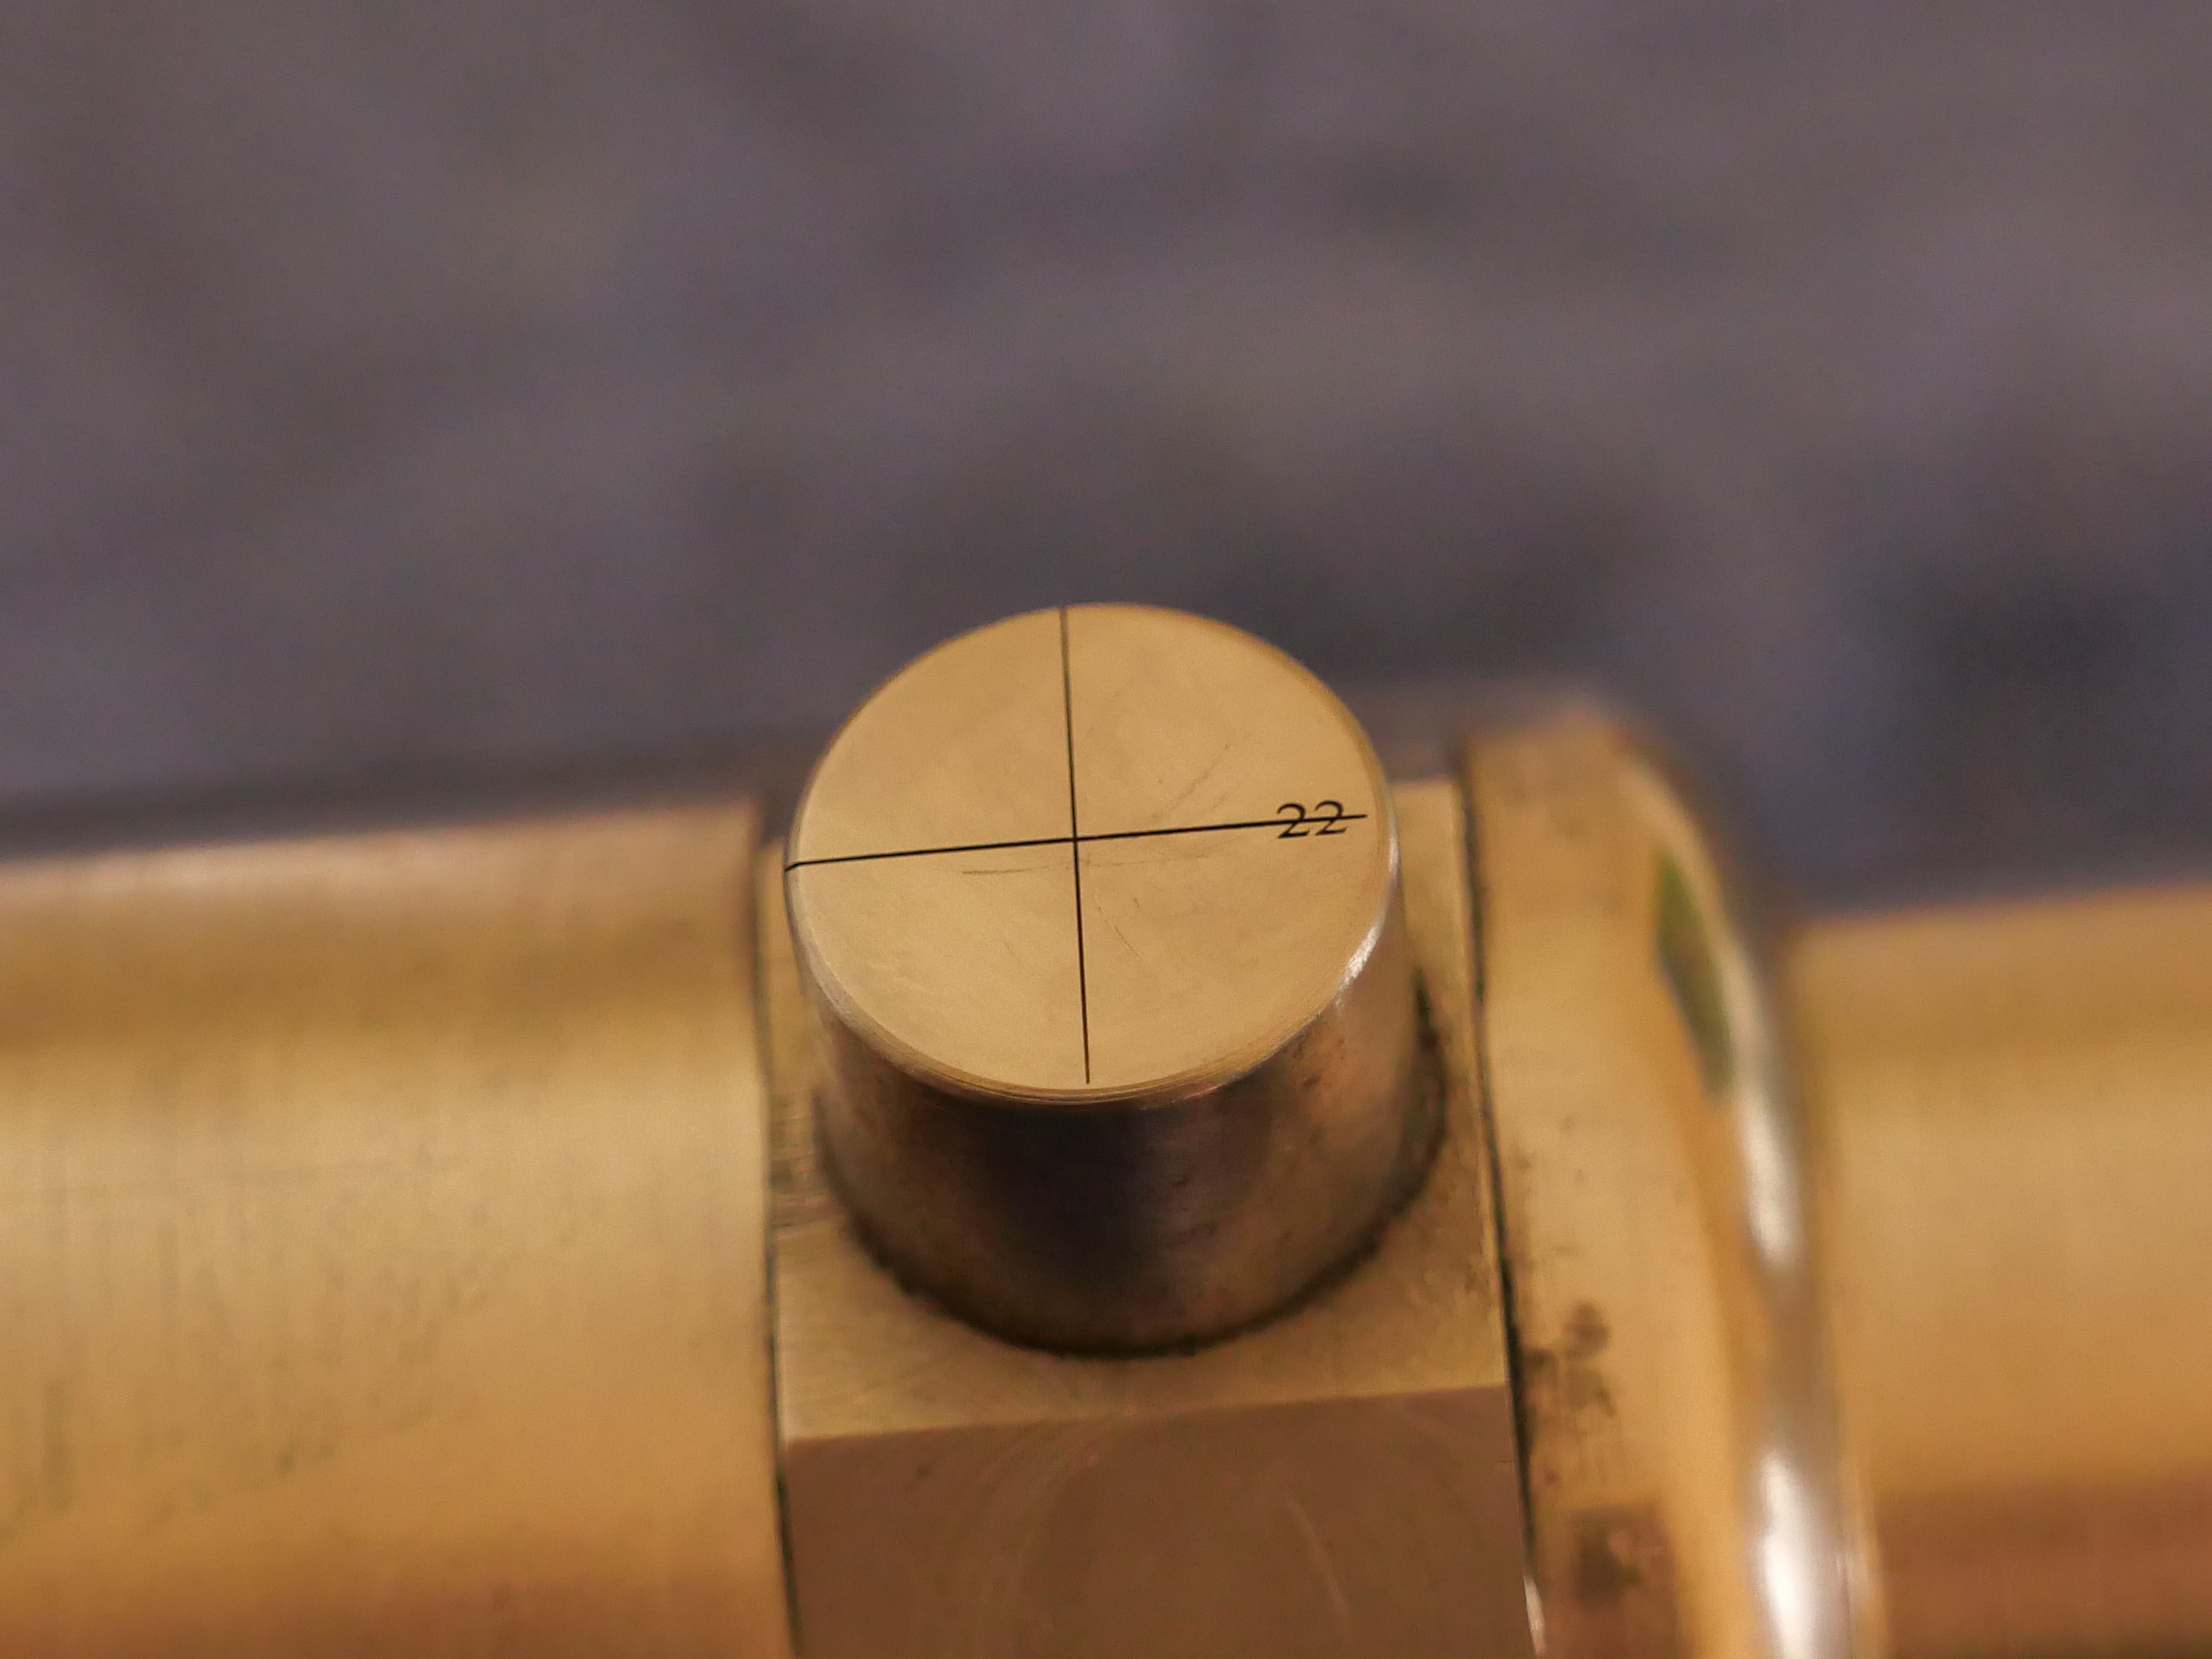
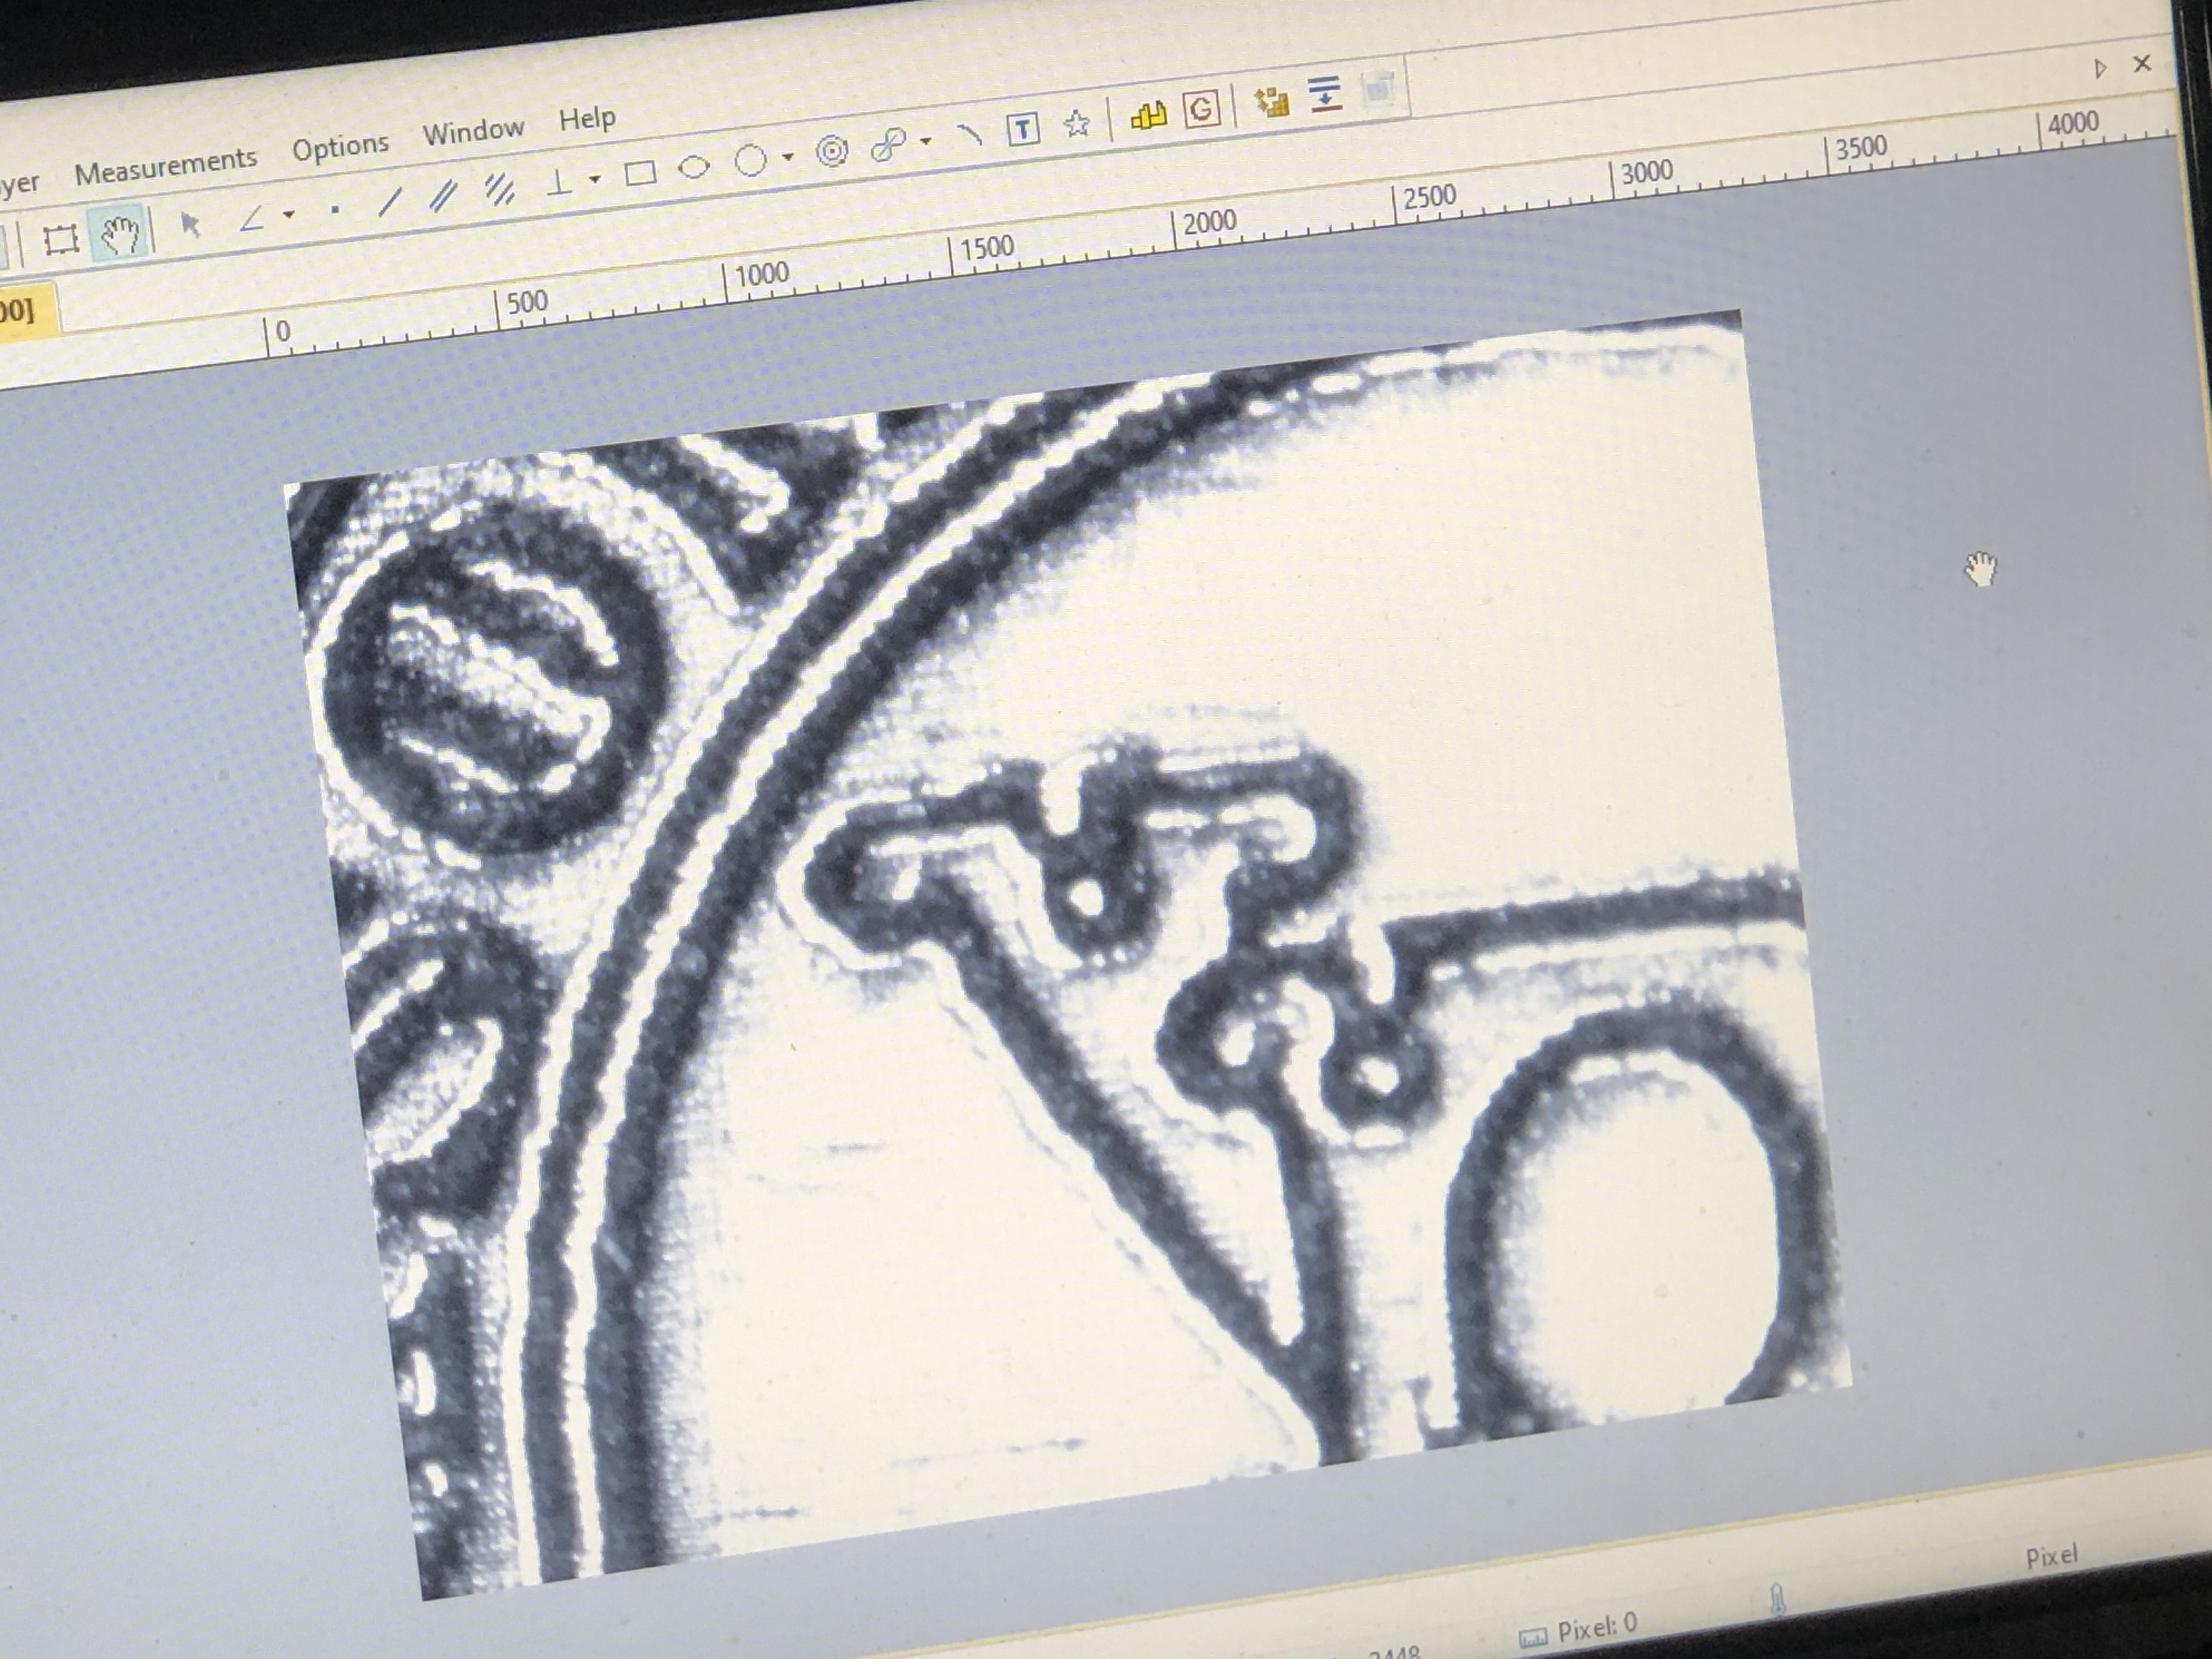
But back to the long gun and the carronade. They were finished, as far as I was concerned, except for the cyphers on the barrels. Royal Navy guns which were made for HM ships always had (as far as I know), a moulded or carved cypher of the reigning monarch. The British monarch in 1779 and 1805 was George the third.

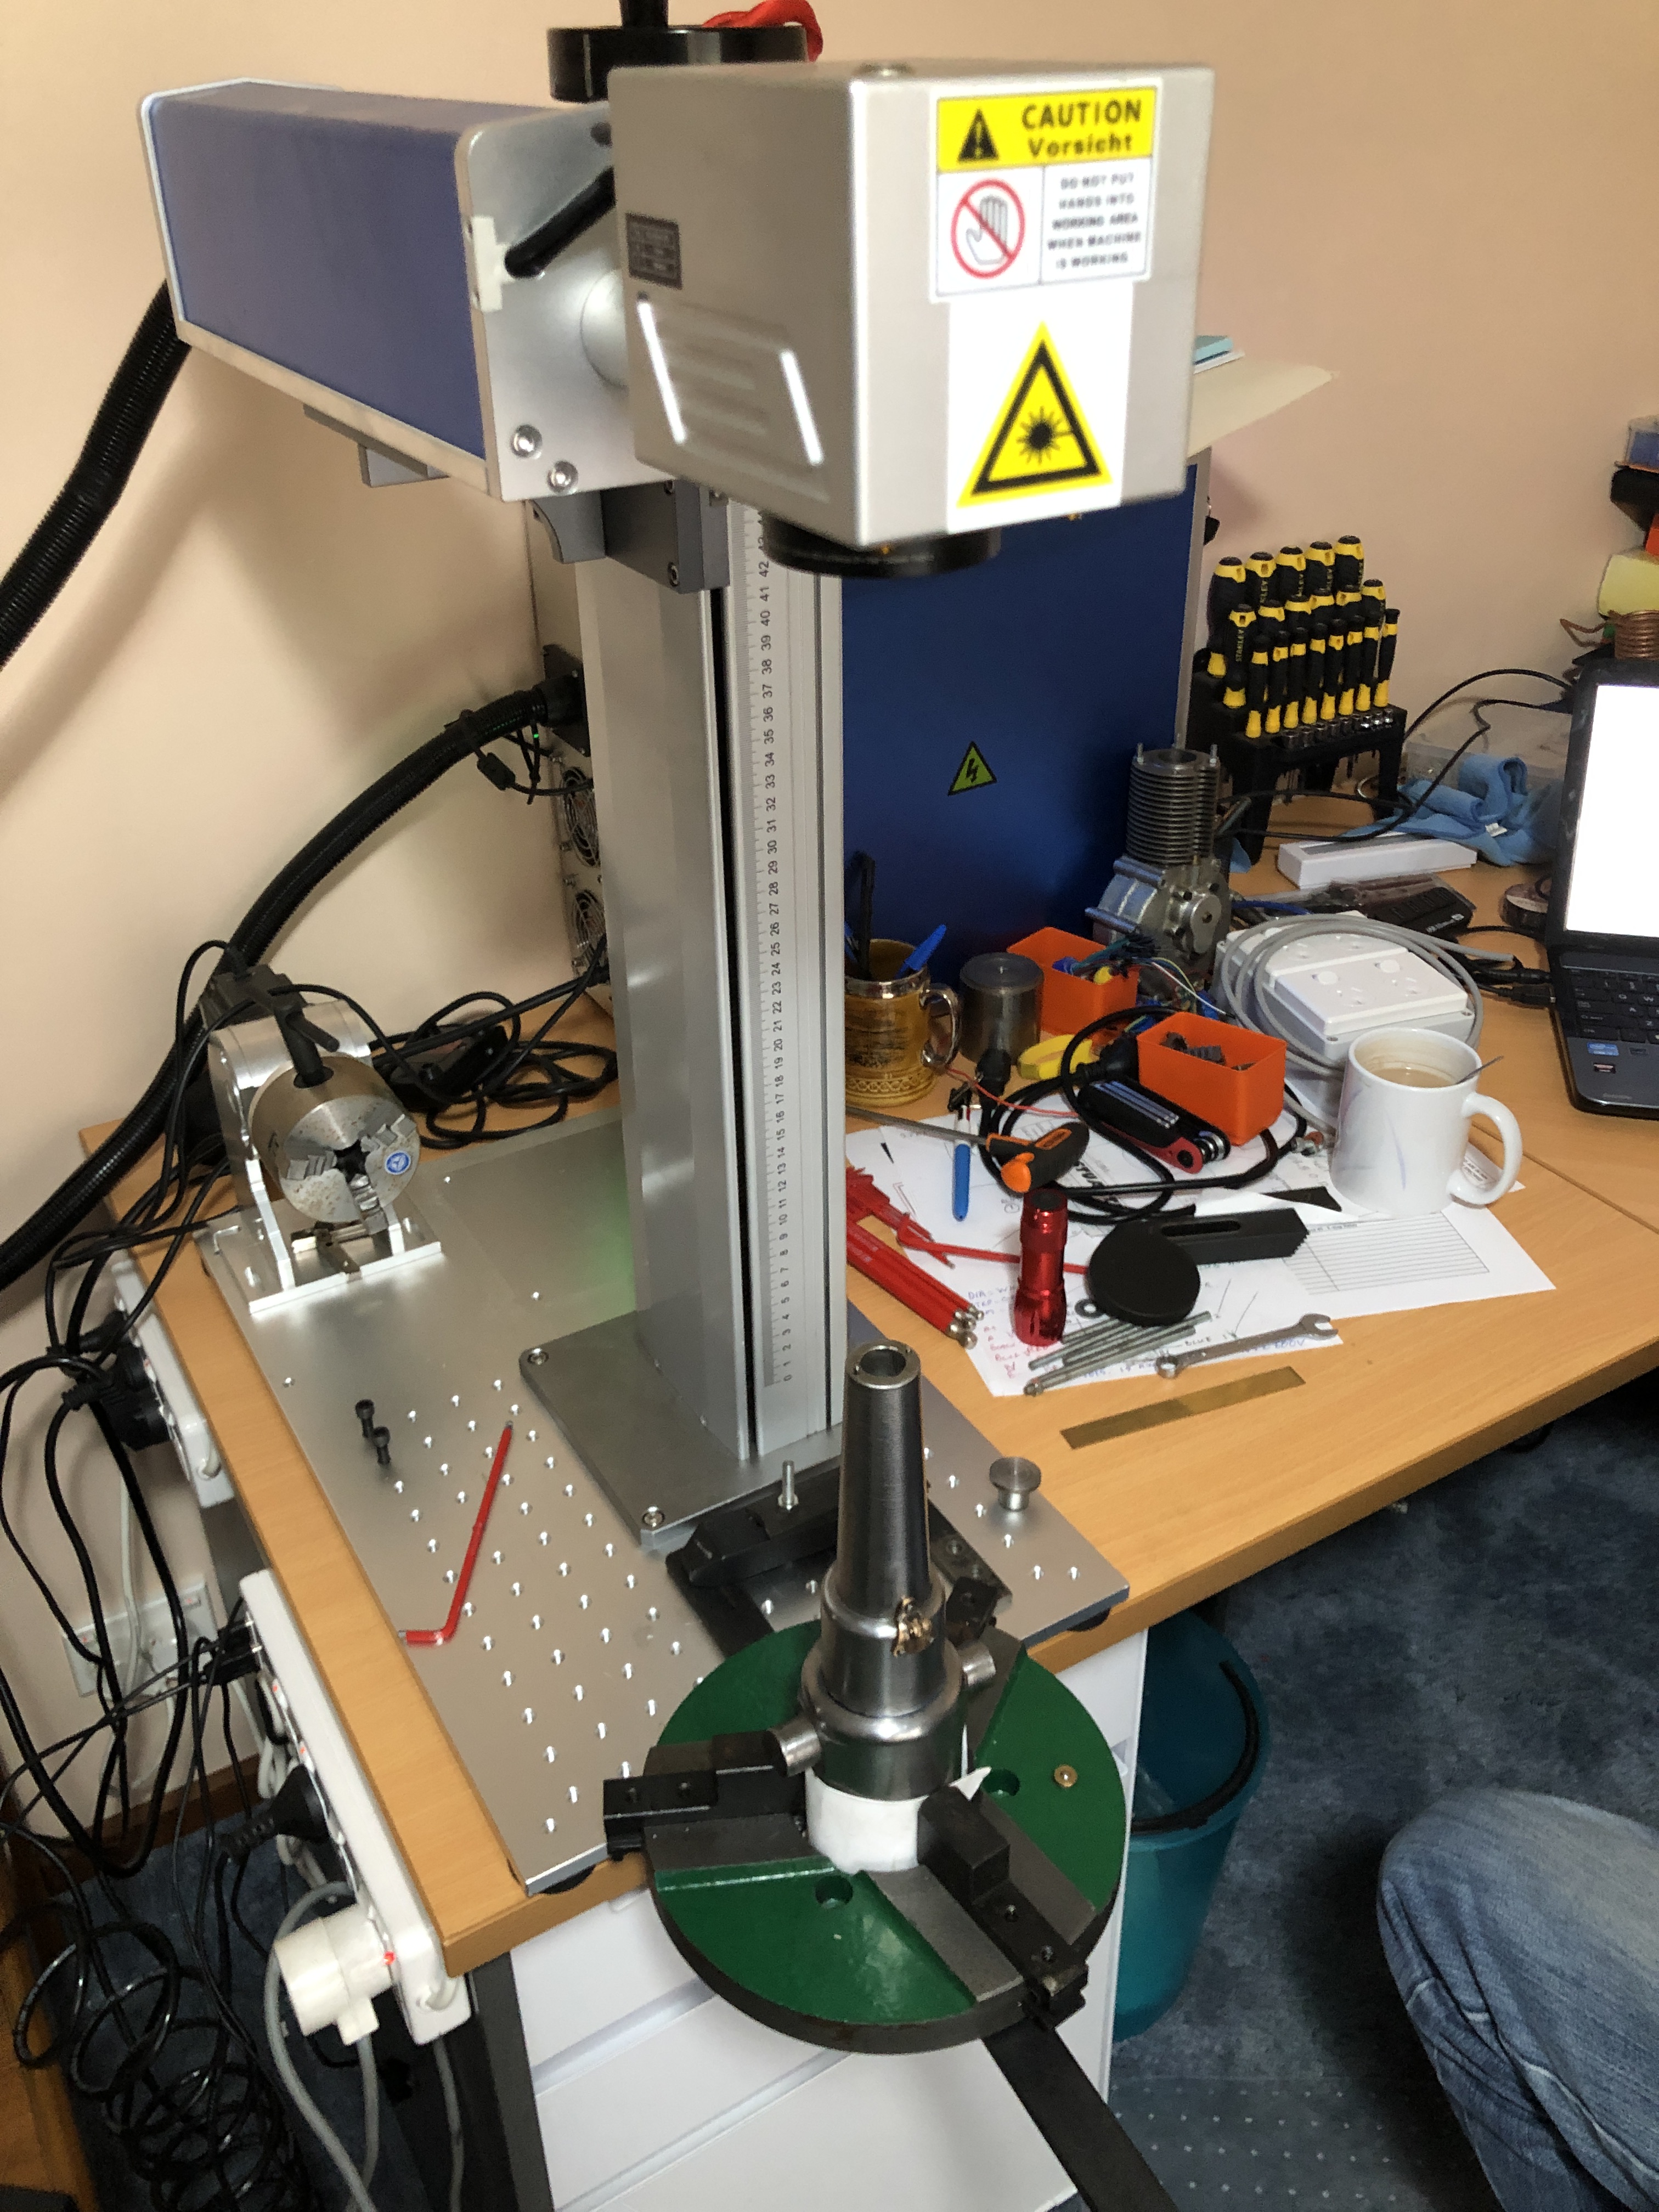
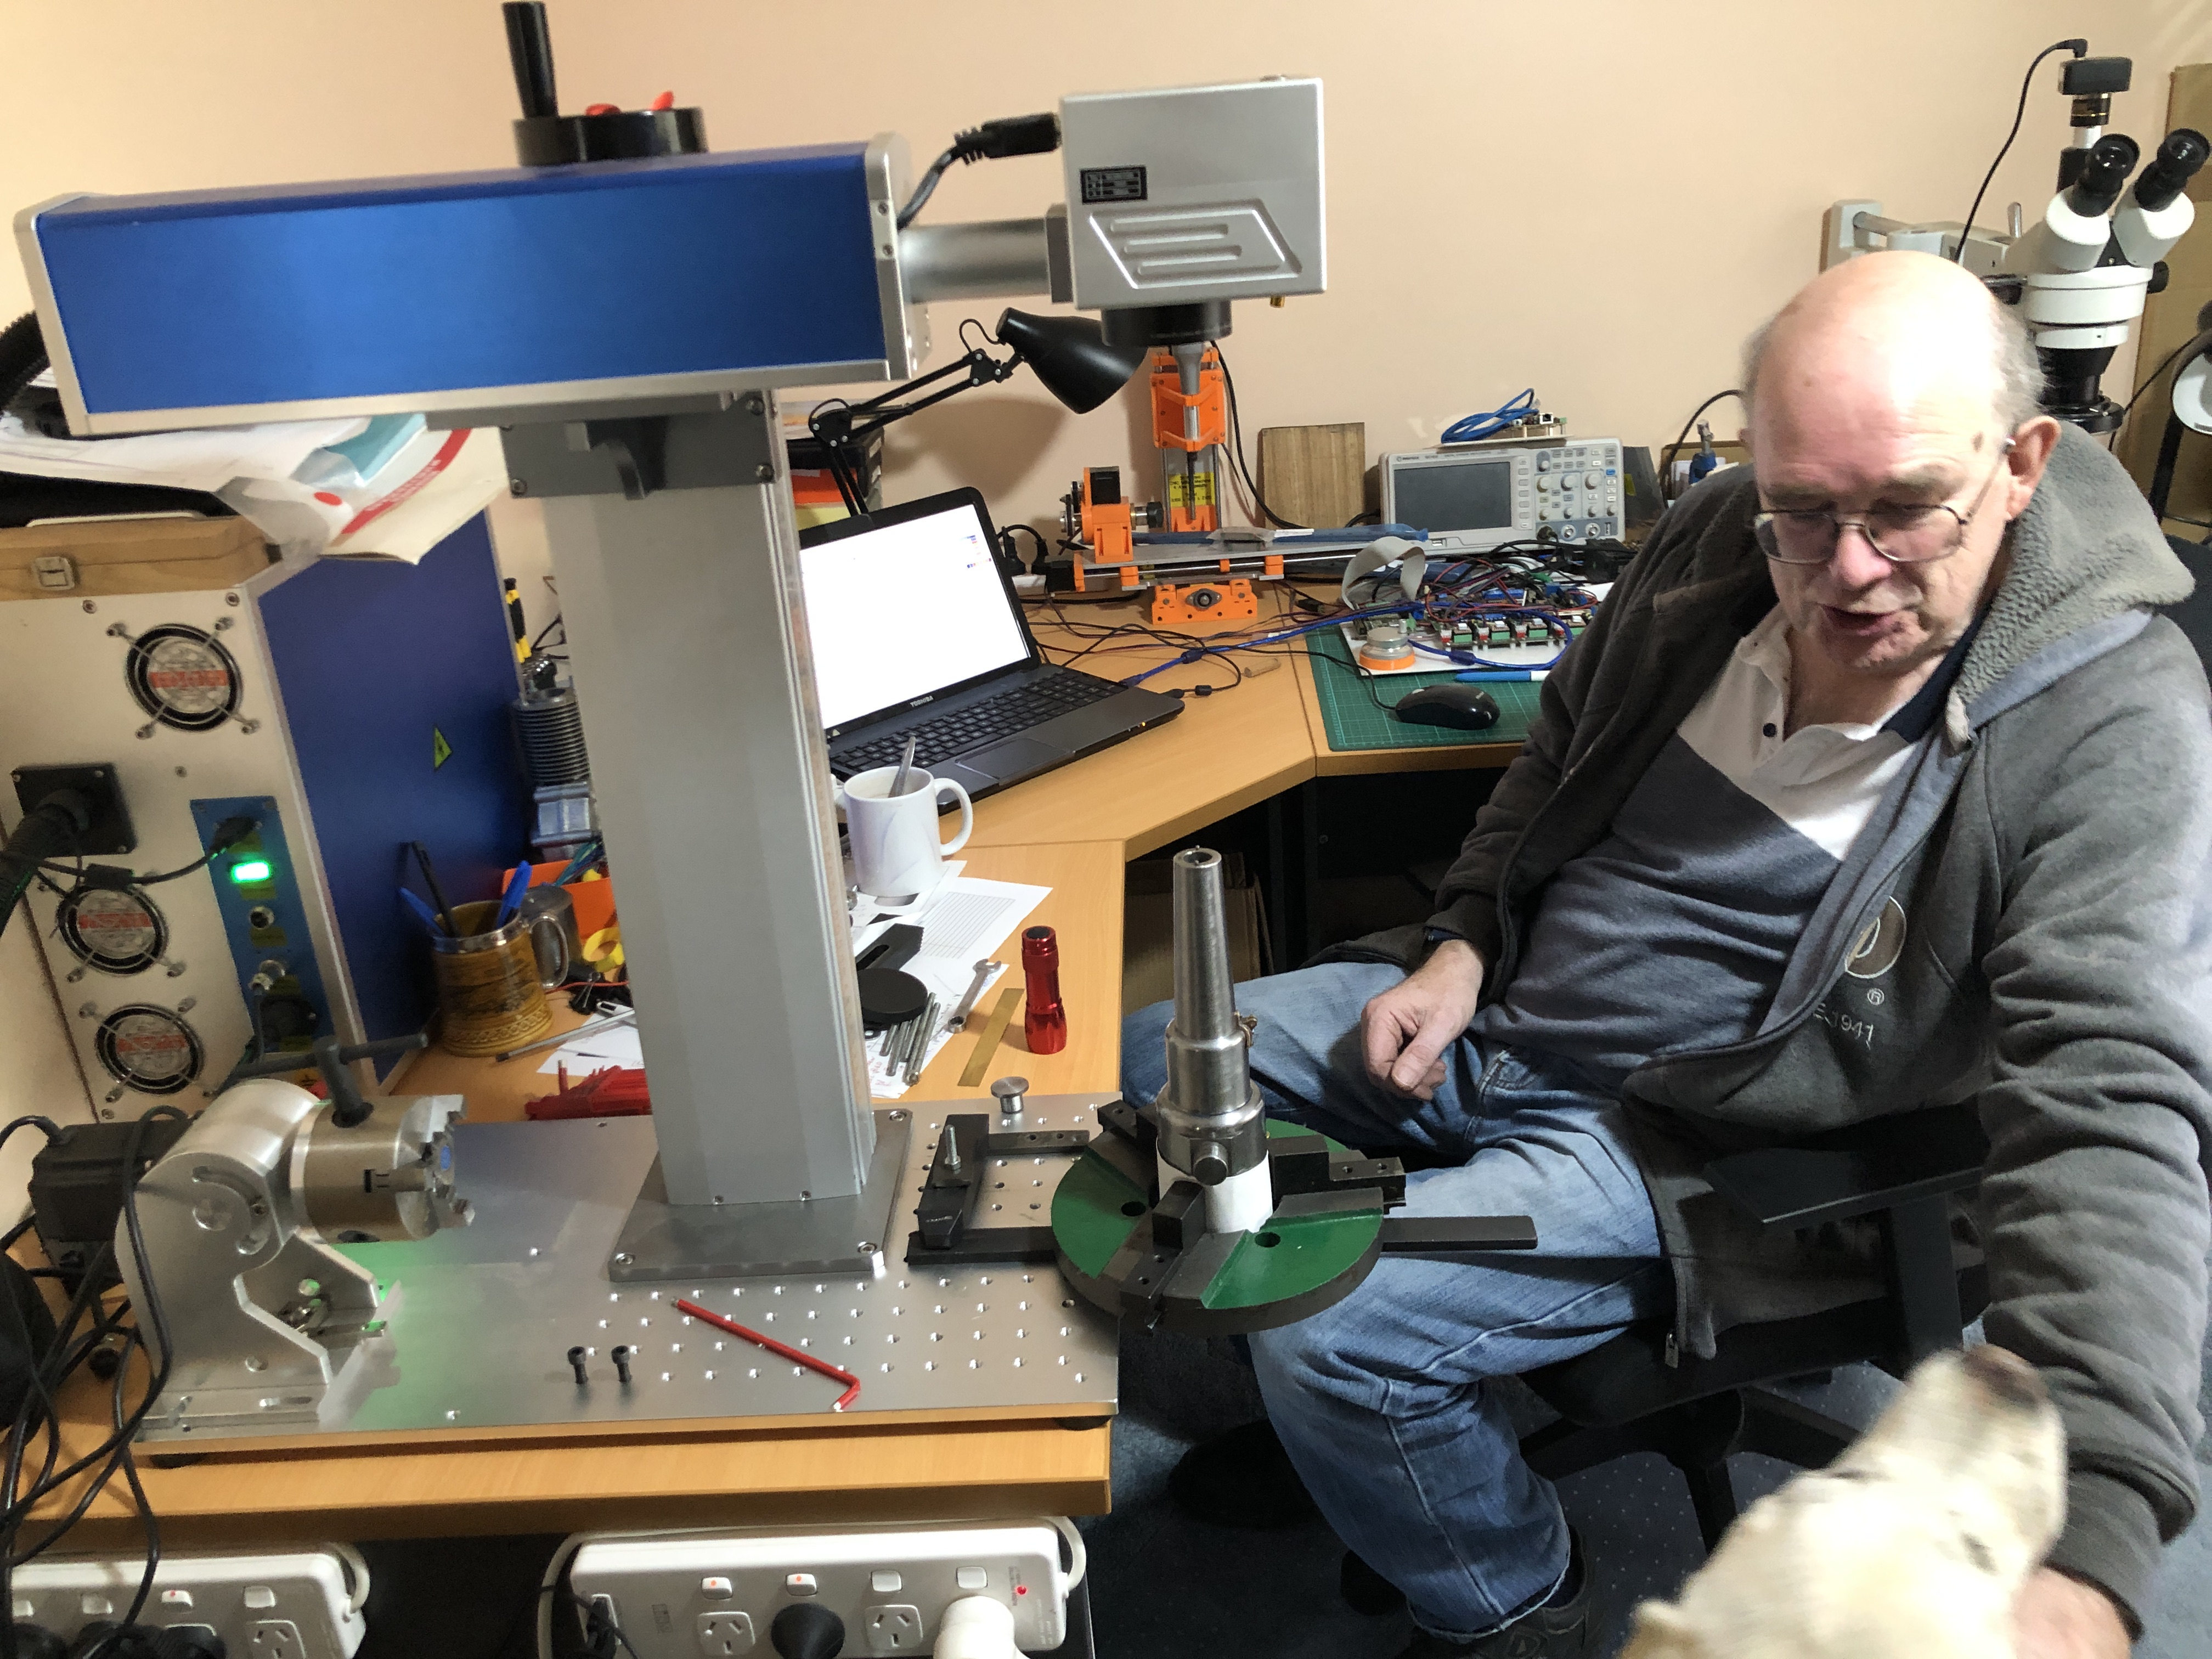
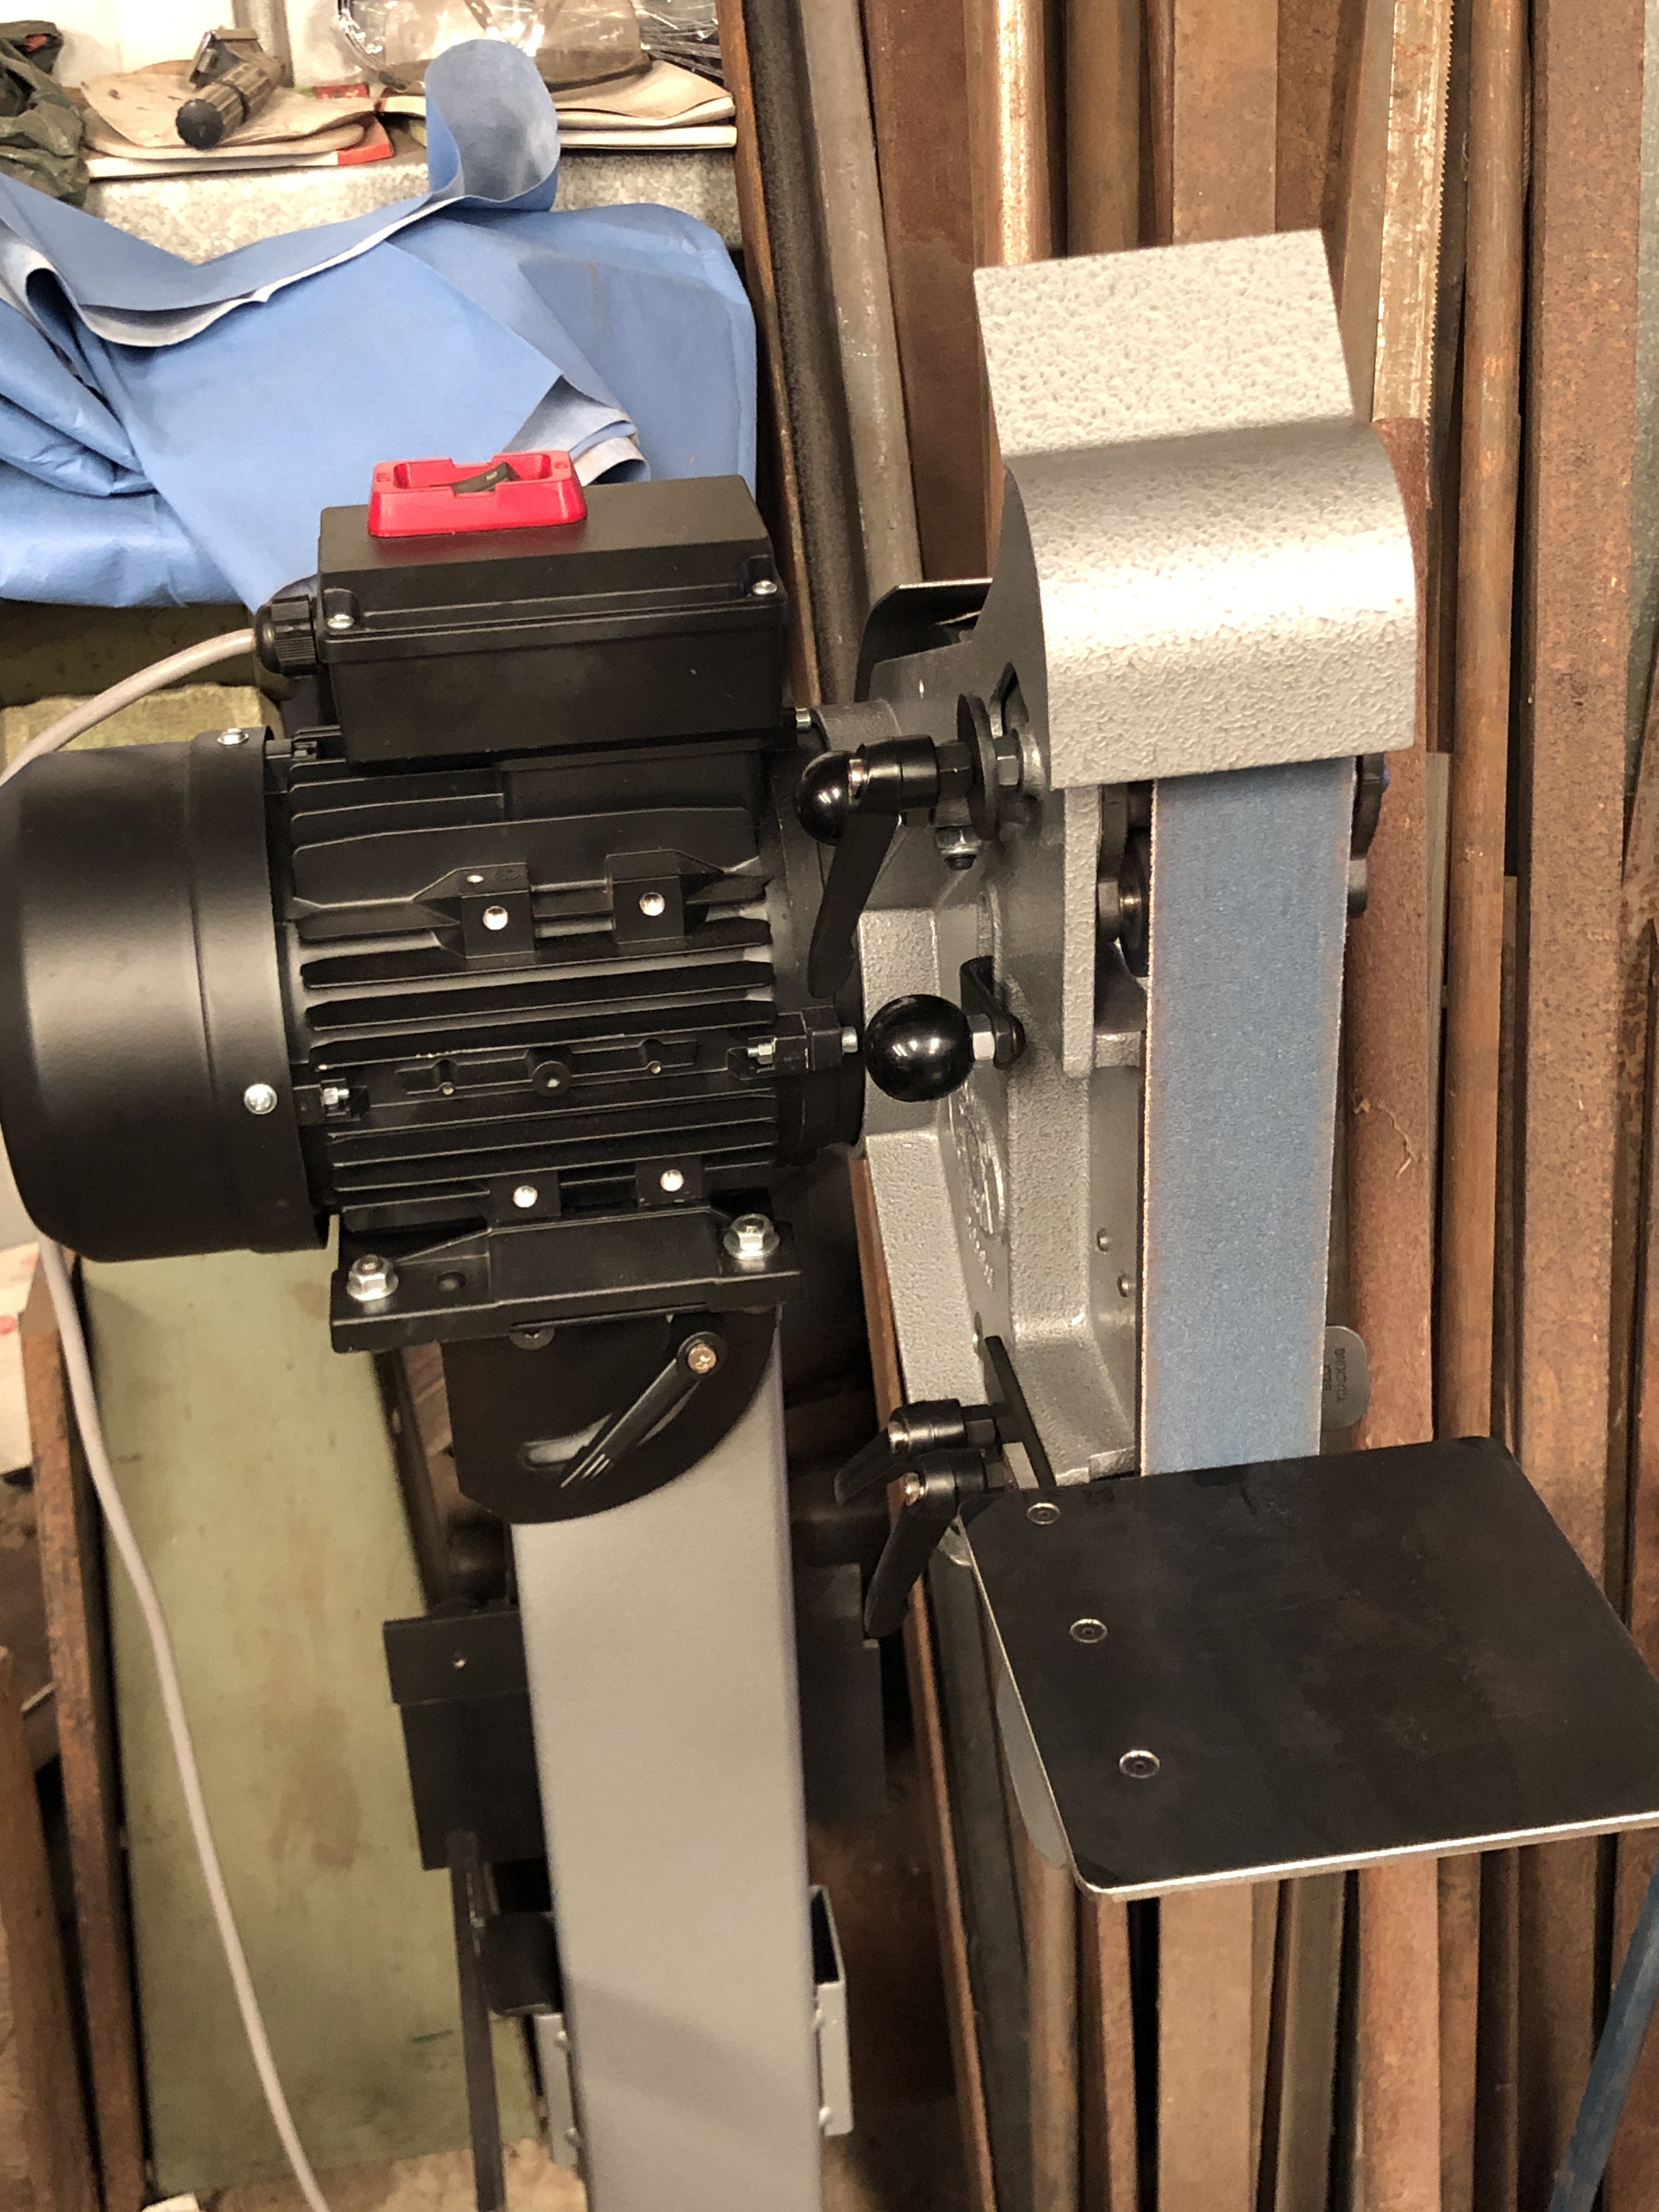
Summer has finally arrived in Southern Australia. 33 centigrade yesterday, and 40+ today. Too hot for the workshop, but not for Stuart T’s 30 watt fiber laser.

The 24pr 1779 naval long gun, with King George 3 cypher, expertly lasered by Stuart T.
The 1805 Carronade with its George 3 cypher.
The cypher is 22mm x 10mm. The lasering took about 2 minutes, after fiddling with the positioning and focusing and settings, and a test run on some scrap. Can’t remember where I found the image. The close up photo shows my substandard finish turning, as well as the superb result from Stuart’s lasering. After lasering, the lasered cypher is blown with compressed air to clear dust from the grooves, then a rub with 1200 grit emery paper, then some Brasso.

“GR” George Rex.

“HONI SOIT QUI MAL Y PENSE”

Description

Honi soit qui mal y pense is a maxim in the Anglo-Norman language, a dialect of Old Norman French spoken by the medieval ruling class in England, meaning “shamed be whoever thinks ill of it”, usually translated as “shame on anyone who thinks evil of it”. Wikipedia

Final Lasering on Armstrong RML model cannon

The lettering on the muzzle reads “Marshall’s Iron”. It refers to the steel bore of the barrel, which was supplied to the Royal Gun Factory by a specialist manufacturer, Marshall Iron. The rest of the barrel was made from wrought iron, as a coil, as described in a previous post.

Stuart operating the fibre laser, and Jamie who runs Stuart.

The barrel is 300mm long, too high for the laser machine to focus. So the setup used a low profile 3 jaw vice, hanging out from the edge of the machine, with the breech of the barrel down the front of the desk/bench.

Immediately after lasering, which took about 20 seconds, (and about 45 minutes to set up the machine/supports). The circle represents the junction between the steel bore and the outer iron coil. The vertical line was used for sighting.

The lines and lettering looked a lot sharper after a quick rub with emery paper. Those letters are less than 1mm high. A very magnified, not well focussed photo.

The cannon is now mounted on a shiny acrylic/wood base. It reflects the underneath details. And has handles.

Thanks once again to Stuart Tankard, for using his fibre laser machine to accomplish the engraving. Stuart told me that he has done more jobs for me than he has done for himself. I call it “getting experience”.

And, WordPress has now improved its program to the point that captions cannot be added to photographs, and a title cannot be added to the post. Well done WordPress. (p.s. 16 June… captions and headings have reappeared. Hooray!)

Model Armstrong Gun Cypher

Yesterday I spent some time with 600 grit emery paper on the barrel.  A bit more elbow grease is required, but I took some pics of the progress….

PANA4062

From the left, the sighting line called the “line of metal”.  There will be a corresponding line on the muzzle.  Next is the weight of the barrel in hundredweight.  81cwt = 4 imperial tons plus one cwt plus 2/4ths of a cwt plus zero pounds.  One hundredweight = 112 lbs, so this barrel weighs 9128lb / 4140kg.   The arrows indicate that the barrel has been “proofed” and accepted for service and also possibly mark the end of bore.  The dot would be where the “vent” would be located (the ignition or touch hole) usually about half way along the powder cartridge.  Then the reigning monarch’s cypher.  In this case, Queen Victoria, with her motto, that of the Order of the Garter.  HONI SOIT QUI MAL Y PENSE.  The translation from French is  “Shame to him who thinks ill of it” (“it” being the Order of the Garter)

PANA4063

The Royal Gun Factory number of this barrel, and axis lines.  One reference stated that they mark the centre of gravity of the barrel, but according to my assessment, the COG is well behind this point.

The other trunnion marks are yet to be lasered.  Maybe late next week.

I am delighted with the quality of the laser “engraving”.  It is sharp, crisp and finely detailed.  Again, thanks to Stuart Tankard for the use of his laser, and for operating it.

Lasering the Model Armstrong Cannon

This is the Queen Victoria emblem and motto on the original cannon at Port Fairy, Victoria.

3349 emblem

The “Victoria Regina” emblem, and Order of the Garter slogan motto.

And this is what is now lasered onto the model cannon..

IMG_8693

Pretty good, Hey?  On the model, the emblem is 20x12mm.    It was downloaded from the internet, edited with Corel draw, saved as a BMP file, and then lasered onto the steel model barrel.   This is a photo of the emblem on the model cannon.  The rectangular background will disappear with polishing.

It was made with a 30 watt fibre laser, driven by its owner, Stuart Tankard.  It took about 30 minutes, 200 passes.   Shows up my substandard turning.

IMG_8678


IMG_8683

Shows the emblem appearing after 100+ passes.

IMG_8694

and this is an enlarged image of part the laser engraving.

I have some videos of the process, and I will make them available after some editing.

This was incredibly exciting.  The model cannon requires more polishing, and colouring with a gun blacking chemical.

We also engraved the cannon weight, sight marks, and year of manufacture on the trunnions.  I will post those photos when available.


Lost hearing aid.

Sorry, no photos with this one.  As I was leaving my workshop I realised that I was missing one of my hearing aids.  It was dusk, raining, and I spent almost an hour searching for it, but no luck.  Then I forgot to bring my camera.  So no photos.  Big cleanup of the workshop in daylight tomorrow.

A half day in the workshop today.  Finished silver soldering the chassis angle brackets, then fitted them, and secured them to the girders with bolts.  In order to make sure that the brackets are correctly located for the drilling, I glued them with Super Glue initially.

The first half of the day was spent on the computer, working on Queen Victoria’s Royal cypher which is on the top surface of the cannon barrel.

emblem

The “VR is for Victoria Regina”.  “Honi Soit Qui Mal Y Pense” is the motto of the Order of the Garter.  It translates from the French as “Shamed be (the person) who thinks evil of it”.

It appears to have been machined into the barrel.  On my model it will be about 12.5 x 20mm.  My friend Stuart has a fibre laser which was used to permanently mark guidelines into 2 steel grinder rests (featured in earlier posts), and I am hoping that it will work similarly to put the cypher onto my model Armstrong cannon barrel.  Another option would be to V carve the emblem, using V Carve Pro.  Whichever method is used, I needed a bitmap file of the emblem.  I found several with a Google Images search, but they were very low resolution.  I should have made a rubbing of the cypher when I was at the originals at Port Fairy.

Screen Shot 2020-01-24 at 8.56.44 am

236×277 but I have spent some time with a drawing program (Corel Draw) tidying up the image, then converting it to vectors, suitable for V Carving.  The laser can interpret a bitmap file.

The curve of the barrel must be negotiated during the lasering or V carving.  Still considering options for that.

So, when the Covid restrictions are lifted, that will be one of the first visits.  To Stuart and his laser.   A practice run on some scrap pipe first.

30 watt Laser in action.

Not mine, unfortunately.  This one is Stuart Tankard’s.  It is a Ytterbium generated, 30w, fibre laser, and the wavelength is such that the 0.01mm diameter beam will burn holes in metal.  Ytterbium, for those who can’t be bothered to look it up,  is a rare earth metal, atomic number 70,  Stuart has used the laser to cut parts from a 1.2mm thick hacksaw blade.  And in the following video he is making marks in a work-tool rest which I will use on my Radius Master sander grinder.

P1053243.JPG

P1053242.JPG

It is a 360º protractor, and grid lines at 10mm intervals.   Looks purposeful.  Time will tell if it is useful.

Watch the video.  I am experiencing tool envy.


Listening to my own voice is pretty painful.  I hope that it doesn’t grate too much on you.


A modification to the Radius Master

The Radius Master is a quality 48″ x 2″ belt sander which is impressively versatile with its 7 work stations.

The work station which is vertical, and against a platten is the one which I expect to use most often.

P1043100.JPG

Vertical belt, and using the backing platten.

But the supplied work – tool rest is a bit narrow for my taste, and I decided to make another one.

I really like the one which was supplied with the Acute Tool Sharpening System (ATSS).

P1043139

The Acute Tool Sharpening System from Eccentric Engineering.

So I bought some 4mm steel plate and cut it to size (150 x 150mm), and CNC milled a support bracket to fit the Radius Master.

IMG_8342.JPG

The Radius Master with larger work-tool rest.

IMG_8343.JPG

The rest is adjustable for angle and distance from the belt.  Copied from the original.  The bracket is screwed to the plate.  I did not want to risk heat distortion by welding the join.

Then the penny dropped.

Why not use all of the ATSS fittings and fixtures on the Radius Master?  So that is what I have done.

IMG_8344.JPG

The ATSS system looks quite at home, yes?

IMG_8345.JPG

Hey Gary Sneezby, maybe you should do a deal with Radius Master.

I can quickly swap the ATSS fittings and fixtures between the CBN grinding wheel and the Radius Master.  It will be interesting to see whether the cubic boron nitride wheel or the belt is preferred for different applications.  I expect that the belt will be best for quick removal of material and the CBN wheel for tool sharpening, but we will see.

Oh, and by the way, the bigger work plate does not interfere with any of the other work stations.

And I will ask my friend Stuart to laser engrave some guide lines on the plate.  I have a new design to try.

And finally, here is a link to the video of using the ATSS, by Eccentric Engineering.  It is worth considering.  If you have not done so, I suggest that you look at Eccentric Engineering’s other tools too.  They are very interesting.  The lathe parting tool is the best one which I have used.  And the Diamond lathe tool gets more use on my lathe than any other.