machines which I have made, am making, or intend to make, and some other stuff. If you find this site interesting, please leave a comment. I read every comment and respond to most. n.b. There is a list of my first 800 posts in my post of 17 June 2021, titled "800 Posts"
The thumbscrew adjusters as originally installed were always a probable item to be upgraded later. But they looked crappy and although they worked ok they did not inspire confidence.
So I designed and made a better height adjuster.
It works in the middle of the sloped aluminium platten, and is controlled with a large knurled knob.
This is my working drawing of the adjuster..
It has a cranked arm which is pulled or pushed by an M4 screw thread, and a 16mm OD bearing which rolls along the underside of the platten.
The height adjuster does reduce the maximum thickness of work which can be passed through, from 50 down to about 25mm, but should cope fine with model ship planks unless I dramatically increase the scale!
One turn of the knurled knob raises the end of the platten by 1.2 – 2mm, which means 0.6 – 1mm at the sanding drum, so the adjustment can be controlled with adequate precision.
Actually, it will probably be useful for any wood working, such as furniture making. But the impetus for making the drum sander is that I have decided to make another model sailing ship. And at the age of 75 I am aware that my modeling days might be uncertain. And my aim is to do a scratch ship build as far as possible, including machining and cutting out all of the planks etc.
So, I could have purchased a commercially available drum sander, but the cheapest one available was $aud1000 second hand, and it would not make planks at the sub millimeter thickness which my ship model would require.
Various ship modelers have made their own drum sanders, and looking at all of the photos I could find on “Ships of Scale”, and Google Images, I settled on this one…
You will see that mine ends up very similar to this one. I used plate aluminium and a sloped feed plate in the same way.
But I decided to use a more powerful motor with a dedicated controller, from ebay au……
It is a 750 watt AC servo motor (1 hp), which is about 4 times as powerful as required for model ship planks, but will be useful if I use it for other woodworking projects later. It has a soft start, reversible, and speed control up to about 4000rpm. Plus all connections, Au plug, and rpm display. A very nice unit, and cost quite reasonable at $aud160.
The construction details were pretty basic, so I did not photograph them. This is the almost finished result…..
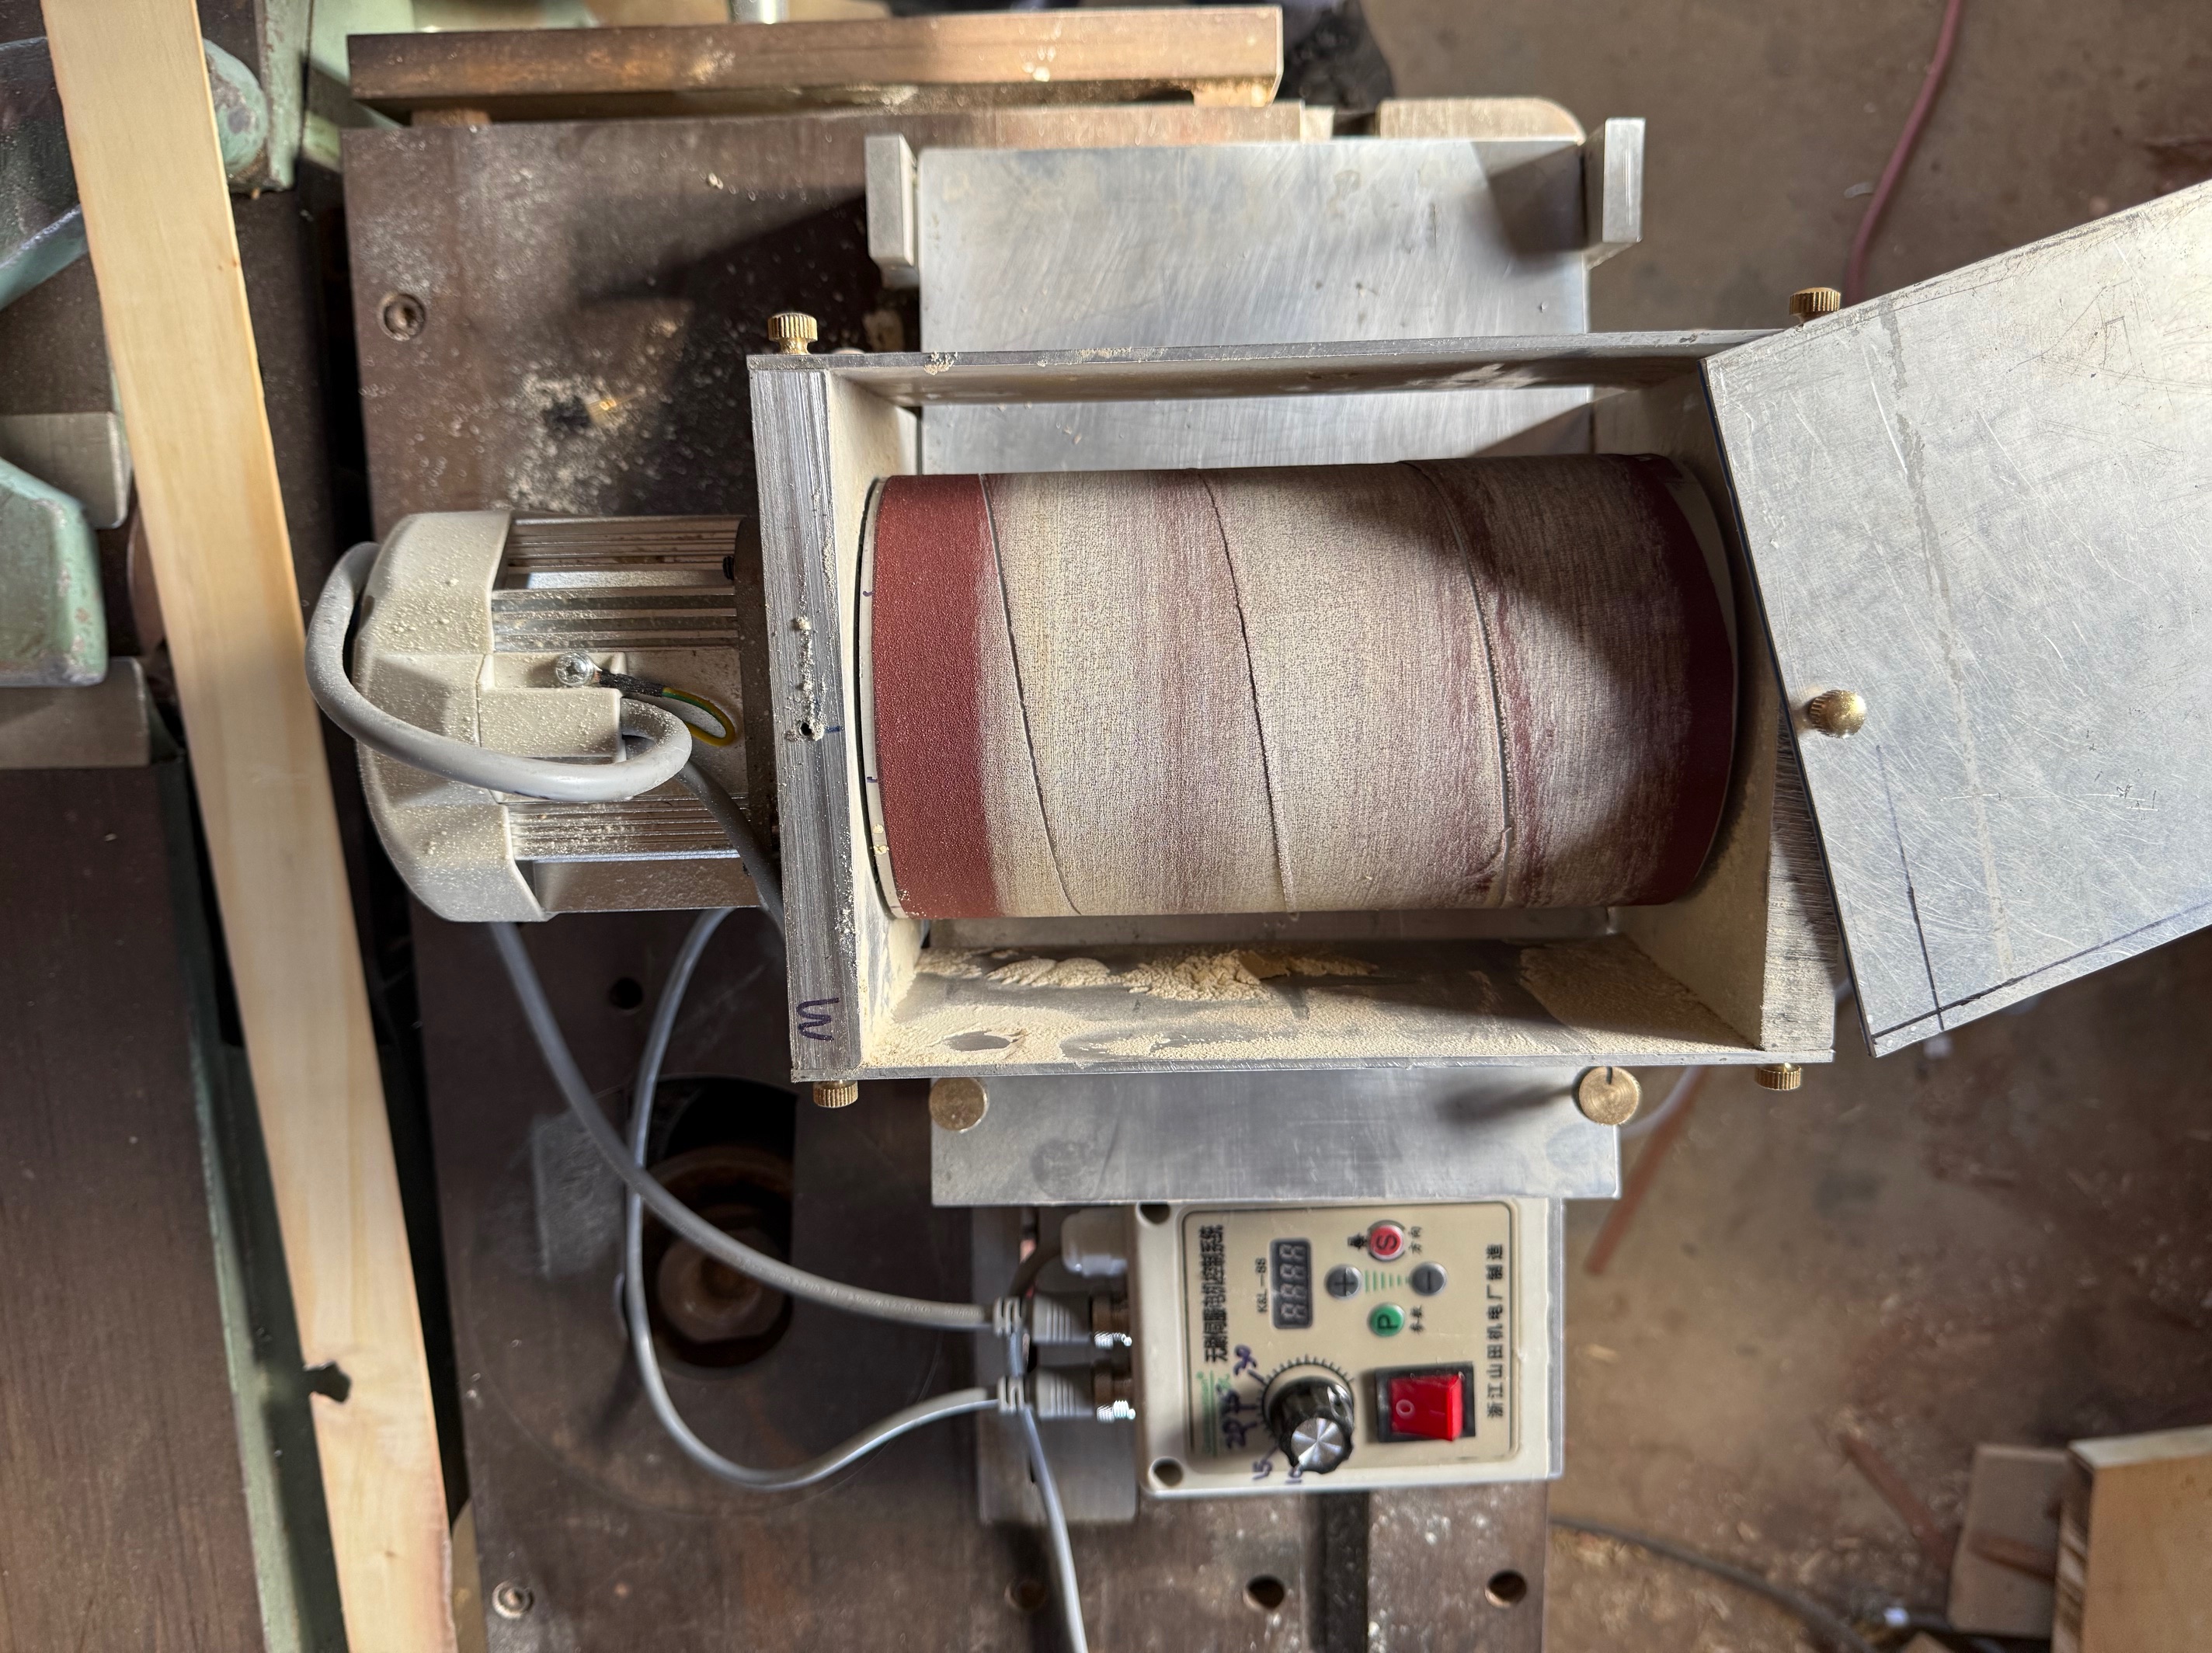
You can see that I have virtually copied the other design. The dust extraction on top is an old vacuum cleaner nozzle. The bearings are from my workshop stock, as is all of the aluminium plate. The unit will handle stock up to 50mm thick, 180mm wide, and I have thicknessed planks down to 0.5mm.
The feed is manual push and pull against the drum rotation, at about 1500rpm.
There is almost no vibration, and the unit does not require clamping or fixation of the base to the bench. I did not include powered feed rollers as originally planned, and now I consider that they are not required.
The dust extraction was added after an initial trial without it. Clouds of fine dust convinced me that it is indeed required. And it is very effective.
The drum is 110mm diameter, and is aluminium tube about 5-6 mm thick. Actually, it is hydraulic cylinder material which I acquired somewhere sometime, and it required NO machining of the interior or exterior surfaces. I did have to make internal ends for the cylinder to fit the 25mm shaft. I 3D printed those.
It took 3-4 workshop sessions to make, and evening time to design the machine on AutoCAD.
Yesterday a ship modeling friend gave me a lump of old Huon Pine, after I mentioned that I was considering using HP for the planking.
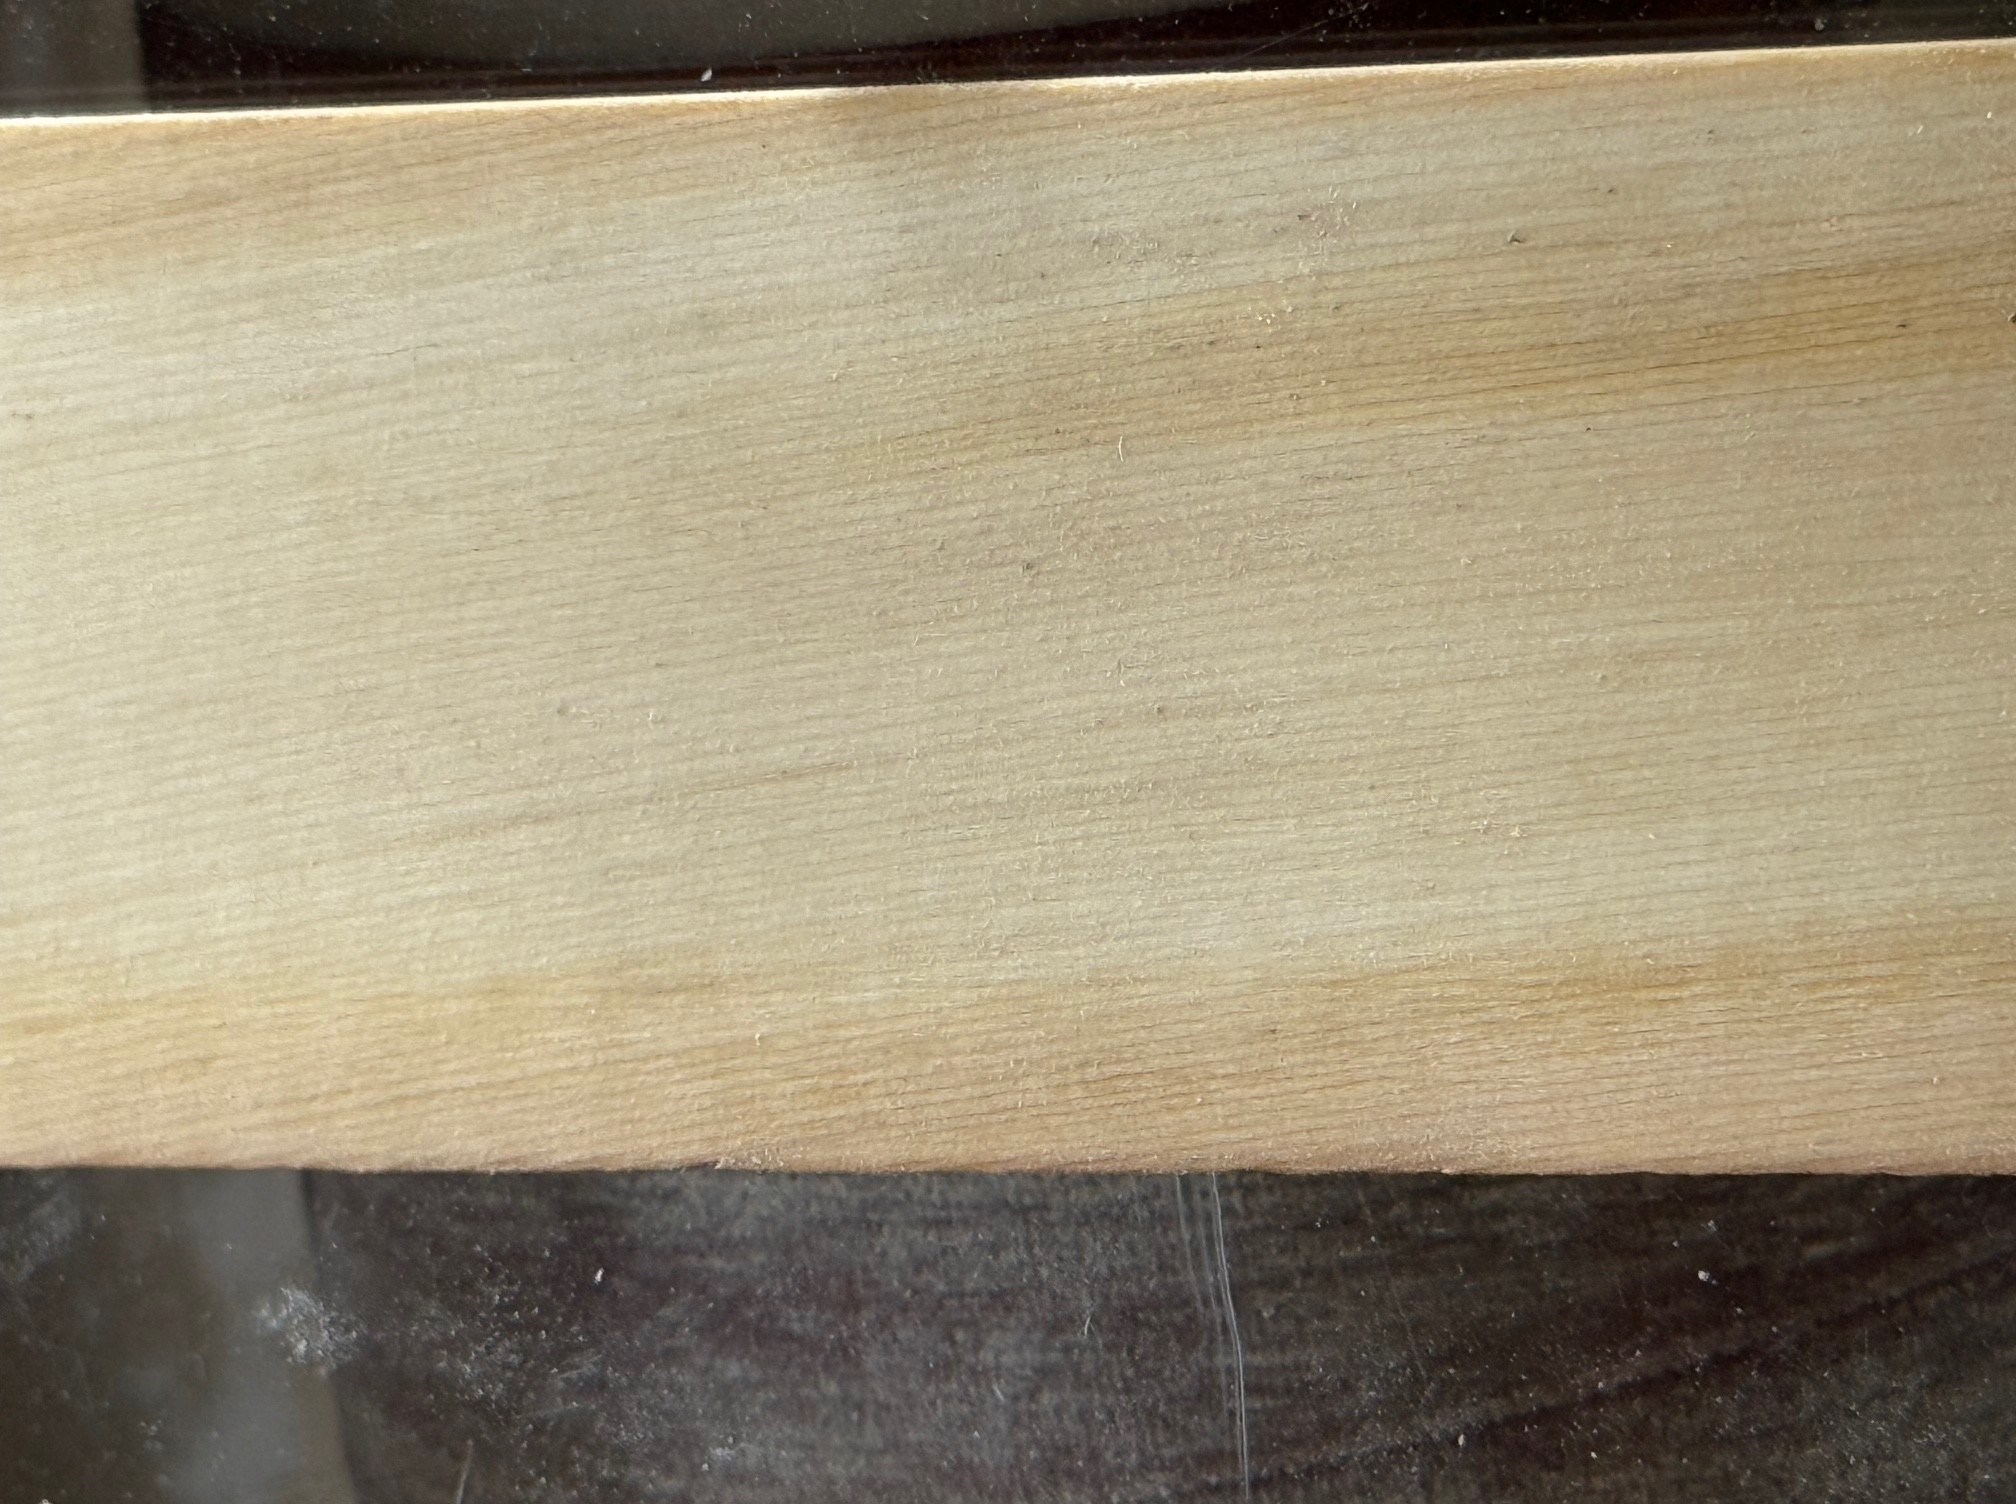
Here is a photo of a 44mm wide strip of Huon Pine being sander thicknessed down to 1.6mm. The machine gave a perfect surface, and the thickness dimensions at various points on the piece did not vary by more than 0.02mm!
The sandpaper strip is 50mm wide and about 1.8m long. It is secured by countersunk screws at the ends, plus a dab of superglue at the tips. I only had 240 grit, which is lovely for finishing but a bit too fine for thicknessing, so I have ordered some 80 and 120 grit.
My brother has used a drum sander many times, and he told me that they are fine, except that changing the sandpaper is a pain. So I made the end and top panels easily removable with thumb screws for plenty of access to the drum, and my one sandpaper change so far was easy and quick.
It is a very nice feeling to have a prototype machine work so well so quickly!
I do intend to replace the alu top with a piece of acrylic perspex so I can make sure that I insert the wood strip AGAINST the rotation, and not with the rotation. If it is inserted with the rotation it is grabbed violently and shot out like a spear. Quite impressive! Guess how I know.
Another refinement will be to the height adjusting mechanism. The 4mm all thread thumb screws work OK but are a bit daggy. So I will make a moving wedge like the one pictured below, again copied from “Ships of Scale”. SOS is a great site incidentally…. I refer to it every day.
Not exactly like this, but similar. The downside is that it limits the maximum thickness that can be sanded, but the advantage is that thicknesses could be repeated with a scale on the wheel. I will post pictures of my mod when I have made it. (this picture from Steef66, Ships of Scale).
Another mod… the perspex top.
And a shot to show the countersunk screws holding down the end of the sandpaper. The screws are still a little bit proud, but as long as they don’t foul on the inclined plate they are OK.
…and a close up of the 44mm wide Huon pine board showing the quality of the finish sanding.