machines which I have made, am making, or intend to make, and some other stuff. If you find this site interesting, please leave a comment. I read every comment and respond to most. n.b. There is a list of my first 800 posts in my post of 17 June 2021, titled "800 Posts"
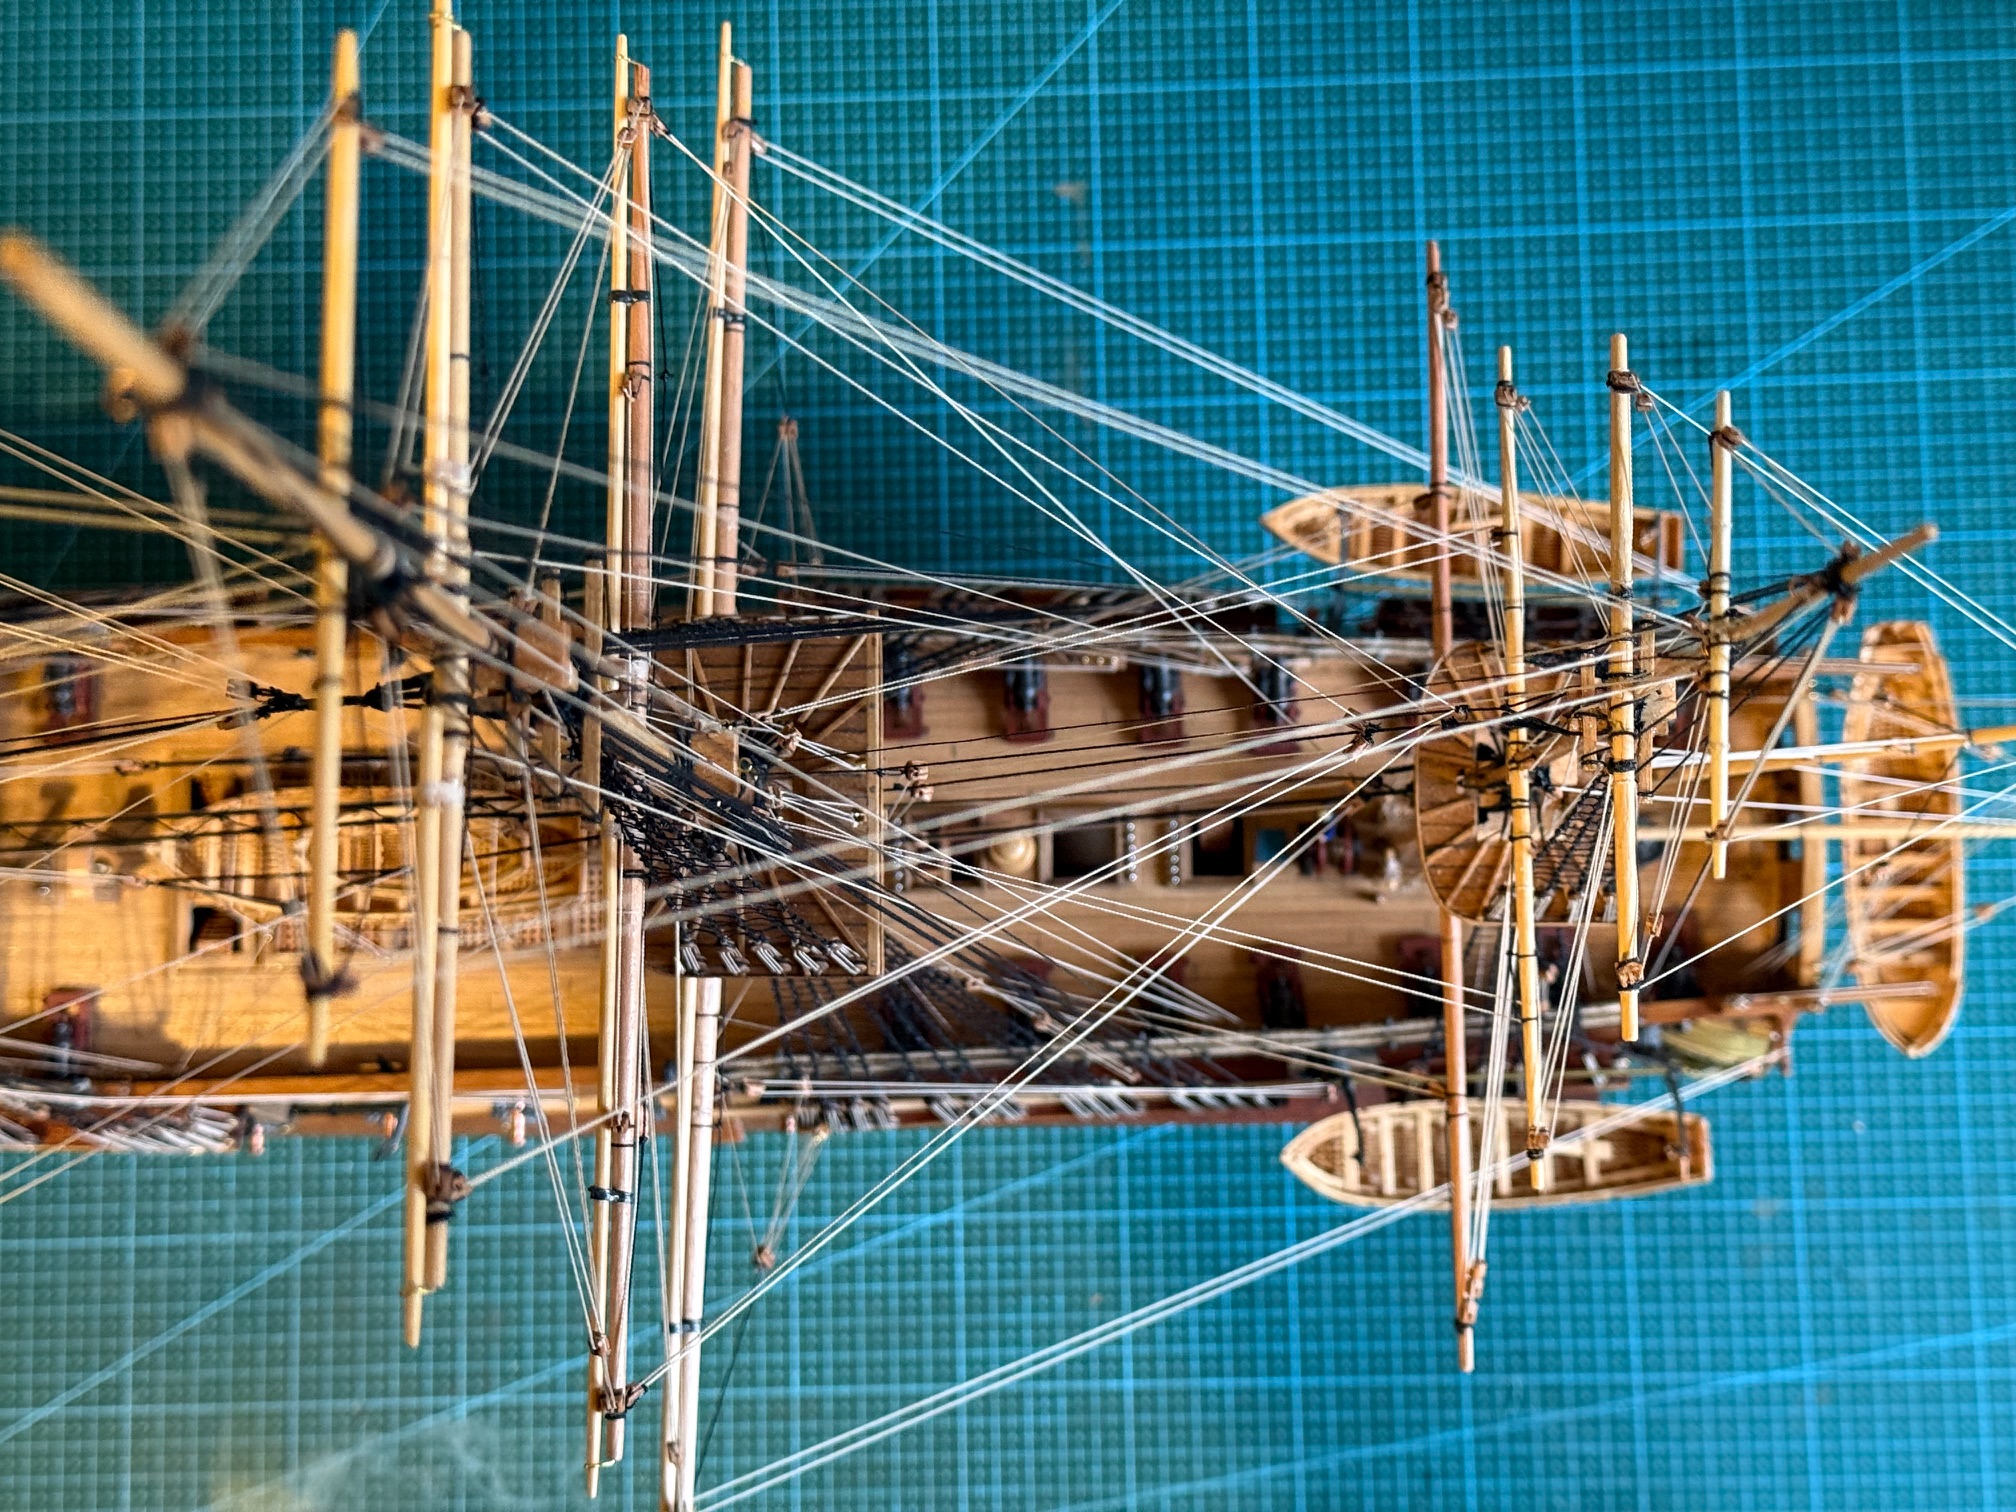
Well, almost completed. Completed enough to take and post some pictures. I still have to make a dust proof case, install carronade breech ropes, and make rope coils.
So here a some photos. And probably without extra comment.
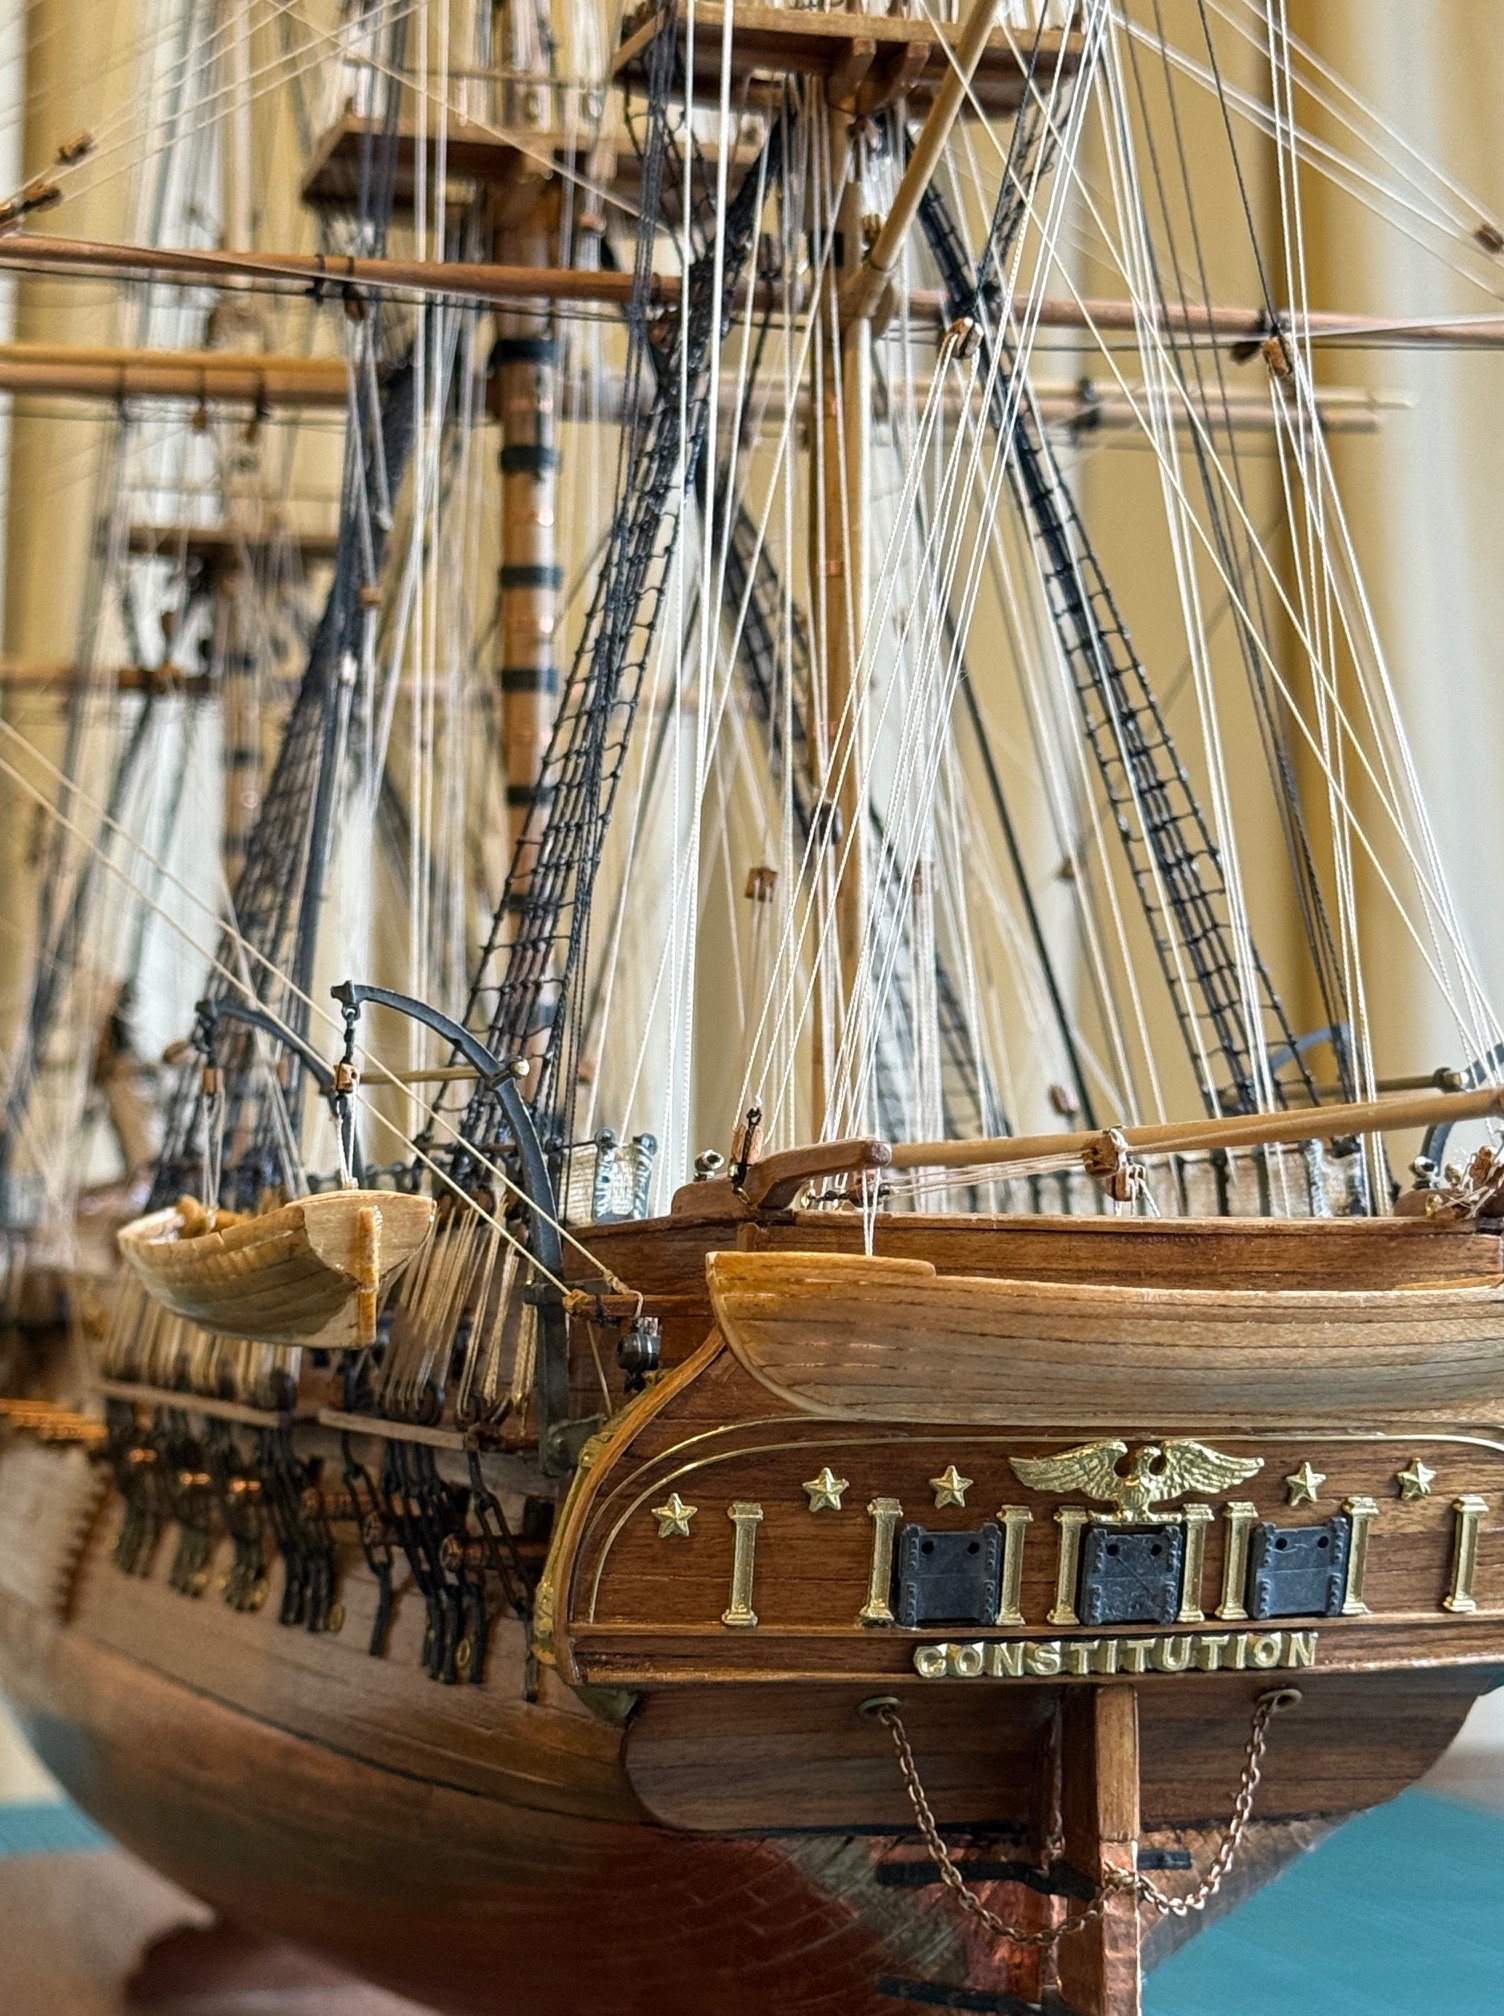
OK, I will break my “no comments” intention already. The rigging is black for standing, and light fawn for moving ropes/sheets. The black background (just a sheet of cardboard) looks good, but the black cables are almost invisible. The running rigging ropes likewise disappear with the fawn coloured curtains as background. Despite that, this one of my favourite shots.
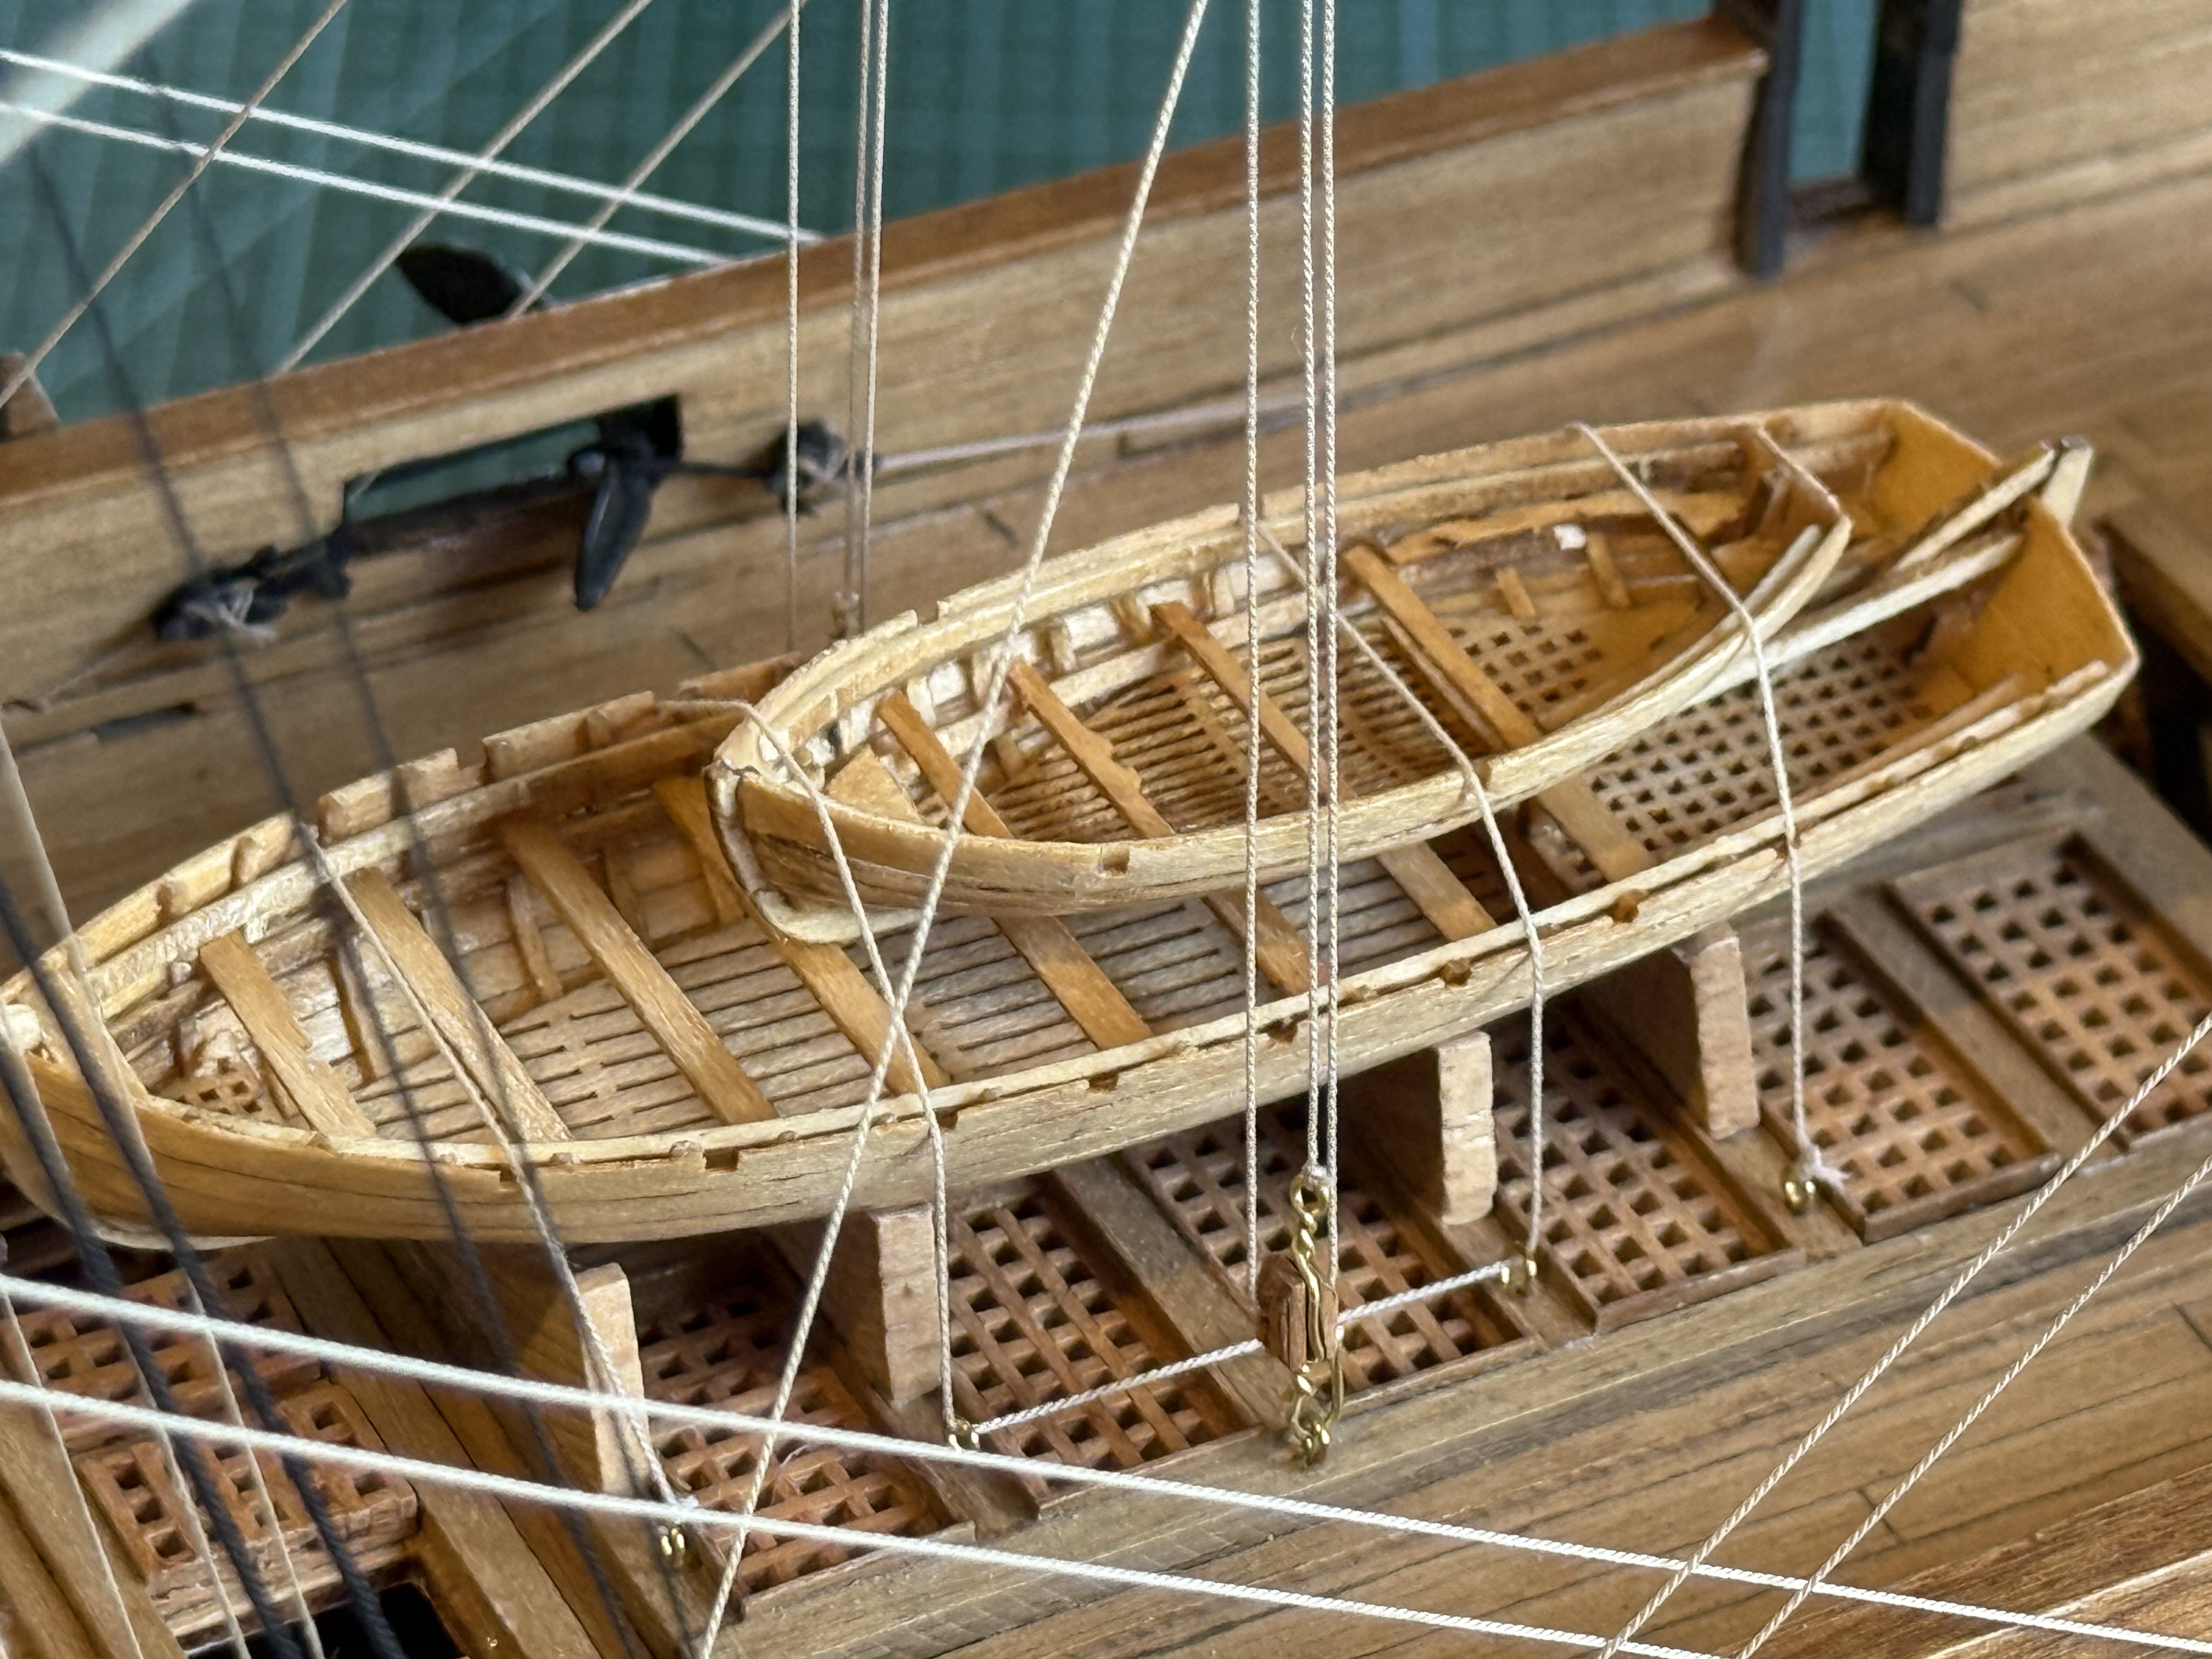
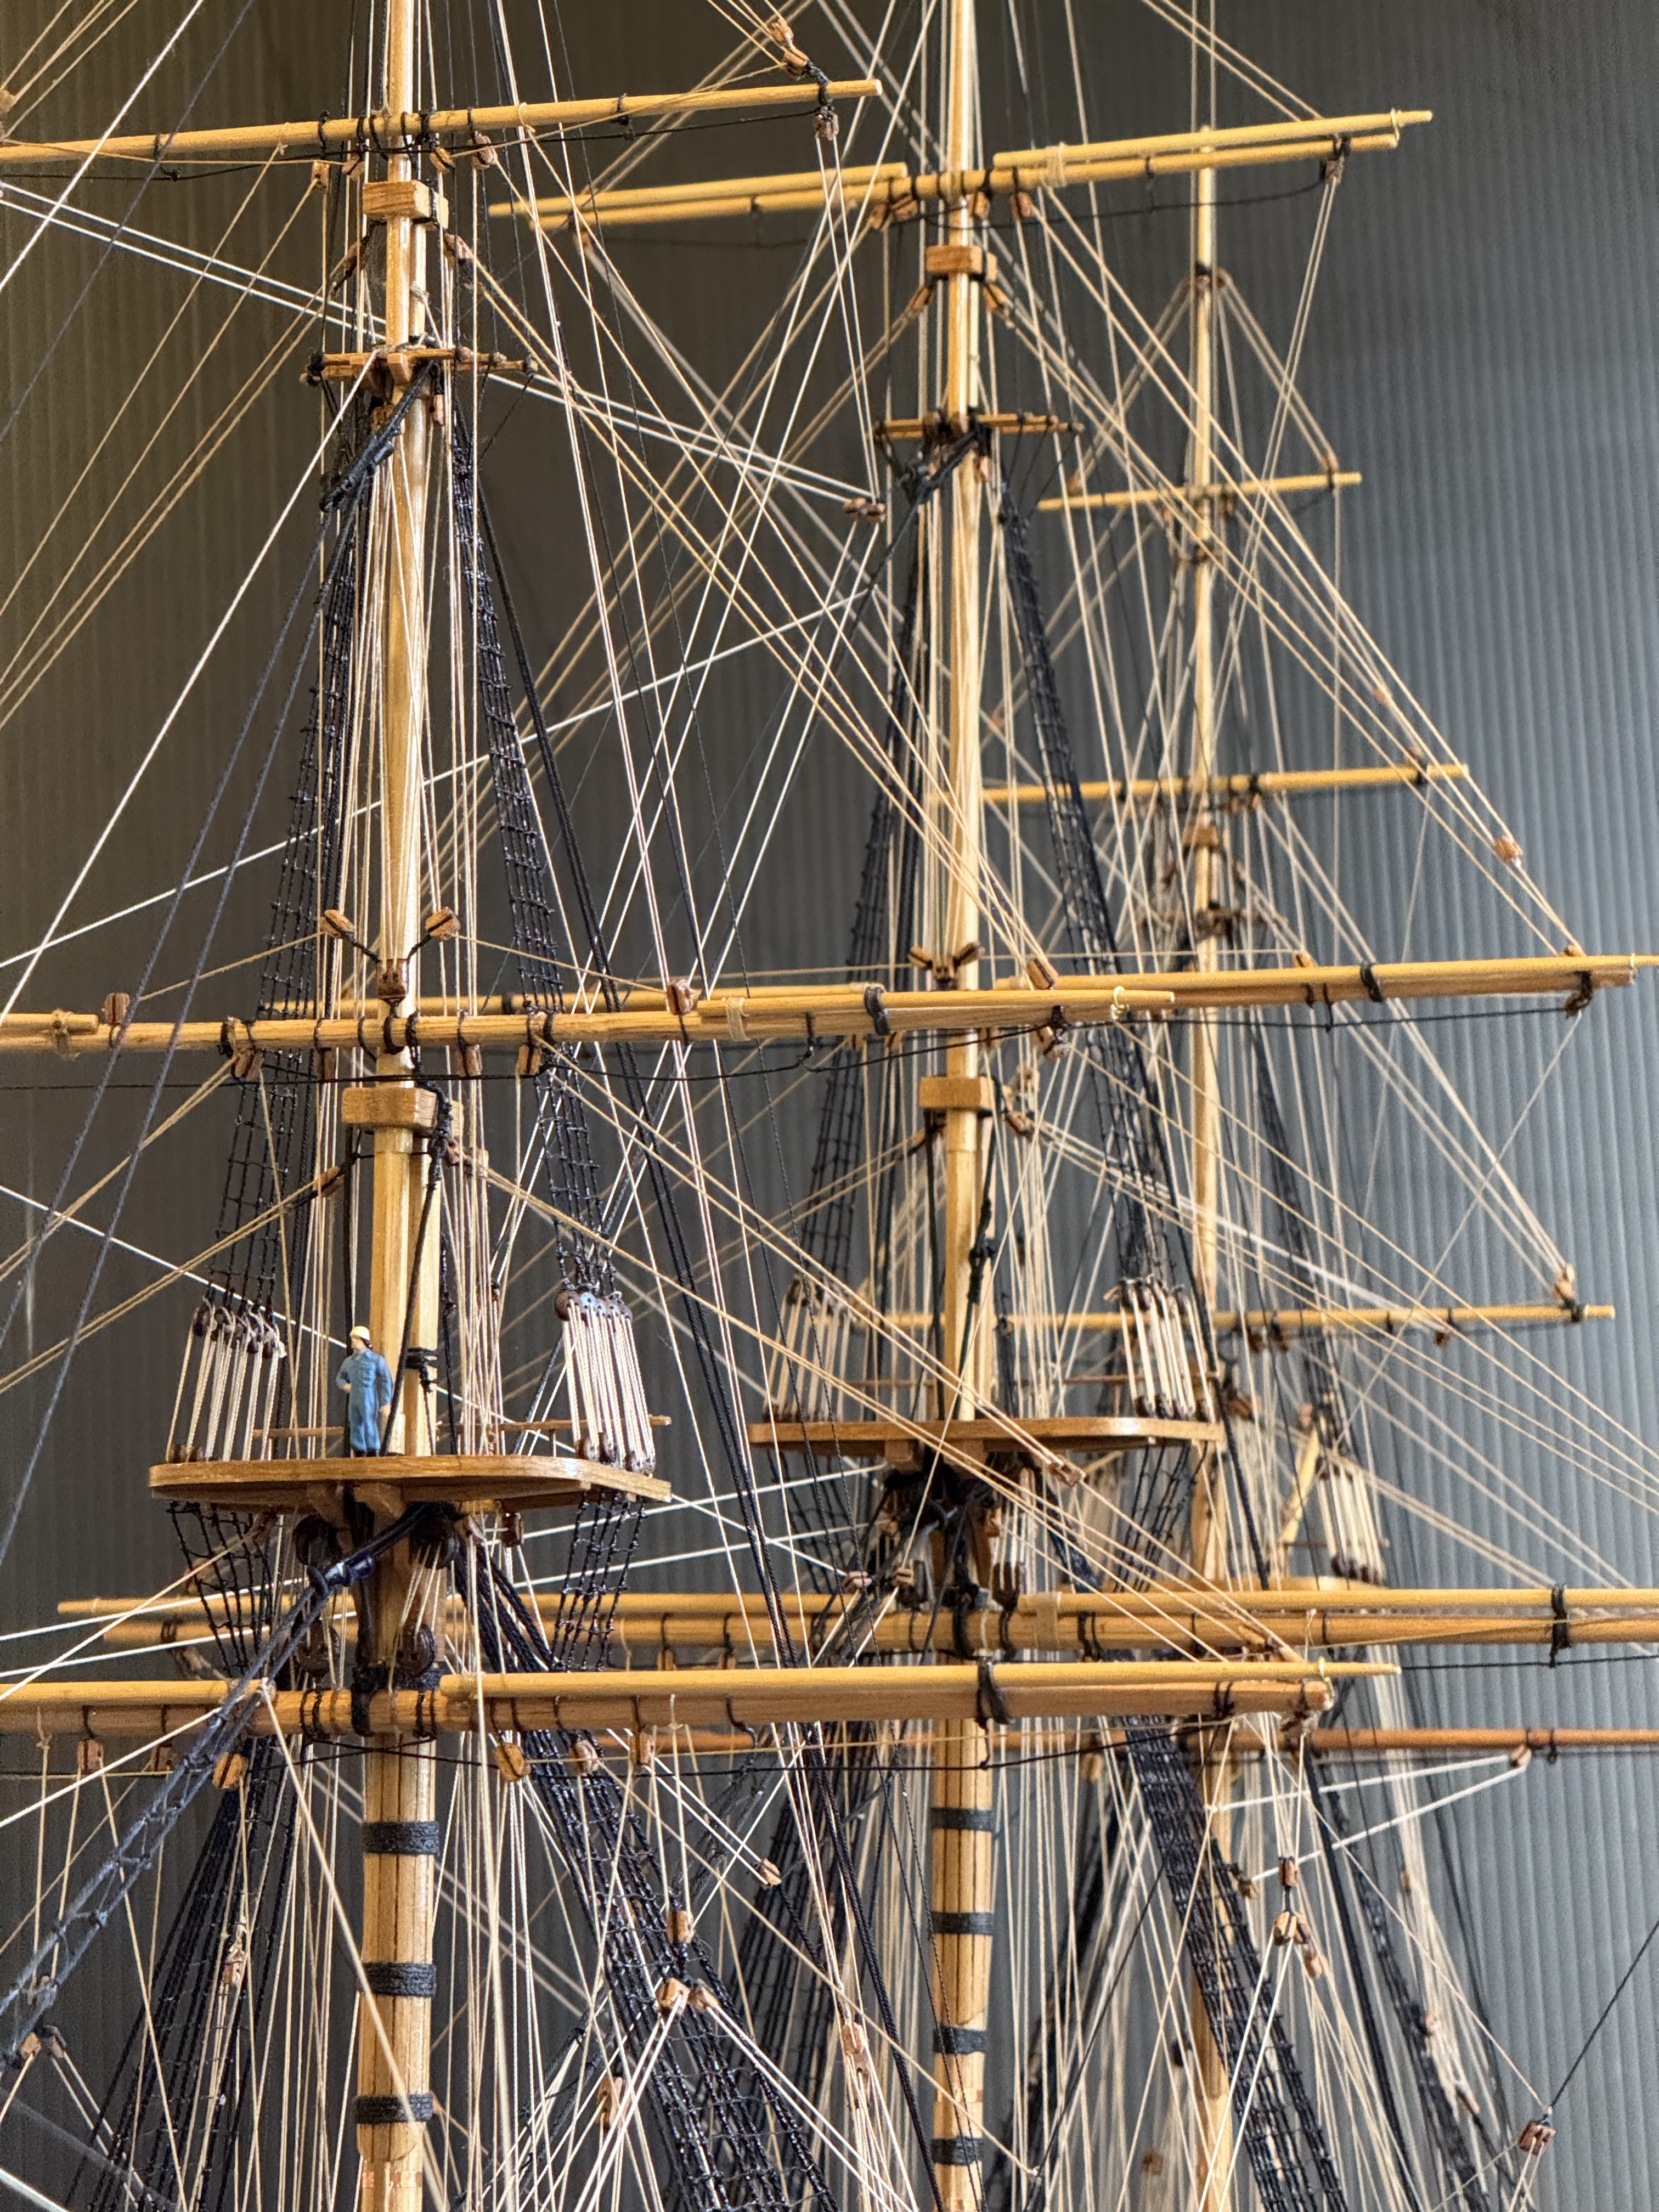
There is a figure on the fighting top, for scale. Approximately. Actually at the scale the figure would be almost 7′ tall. And forget the no comments. I cannot help myself.
The ropes are to scale.
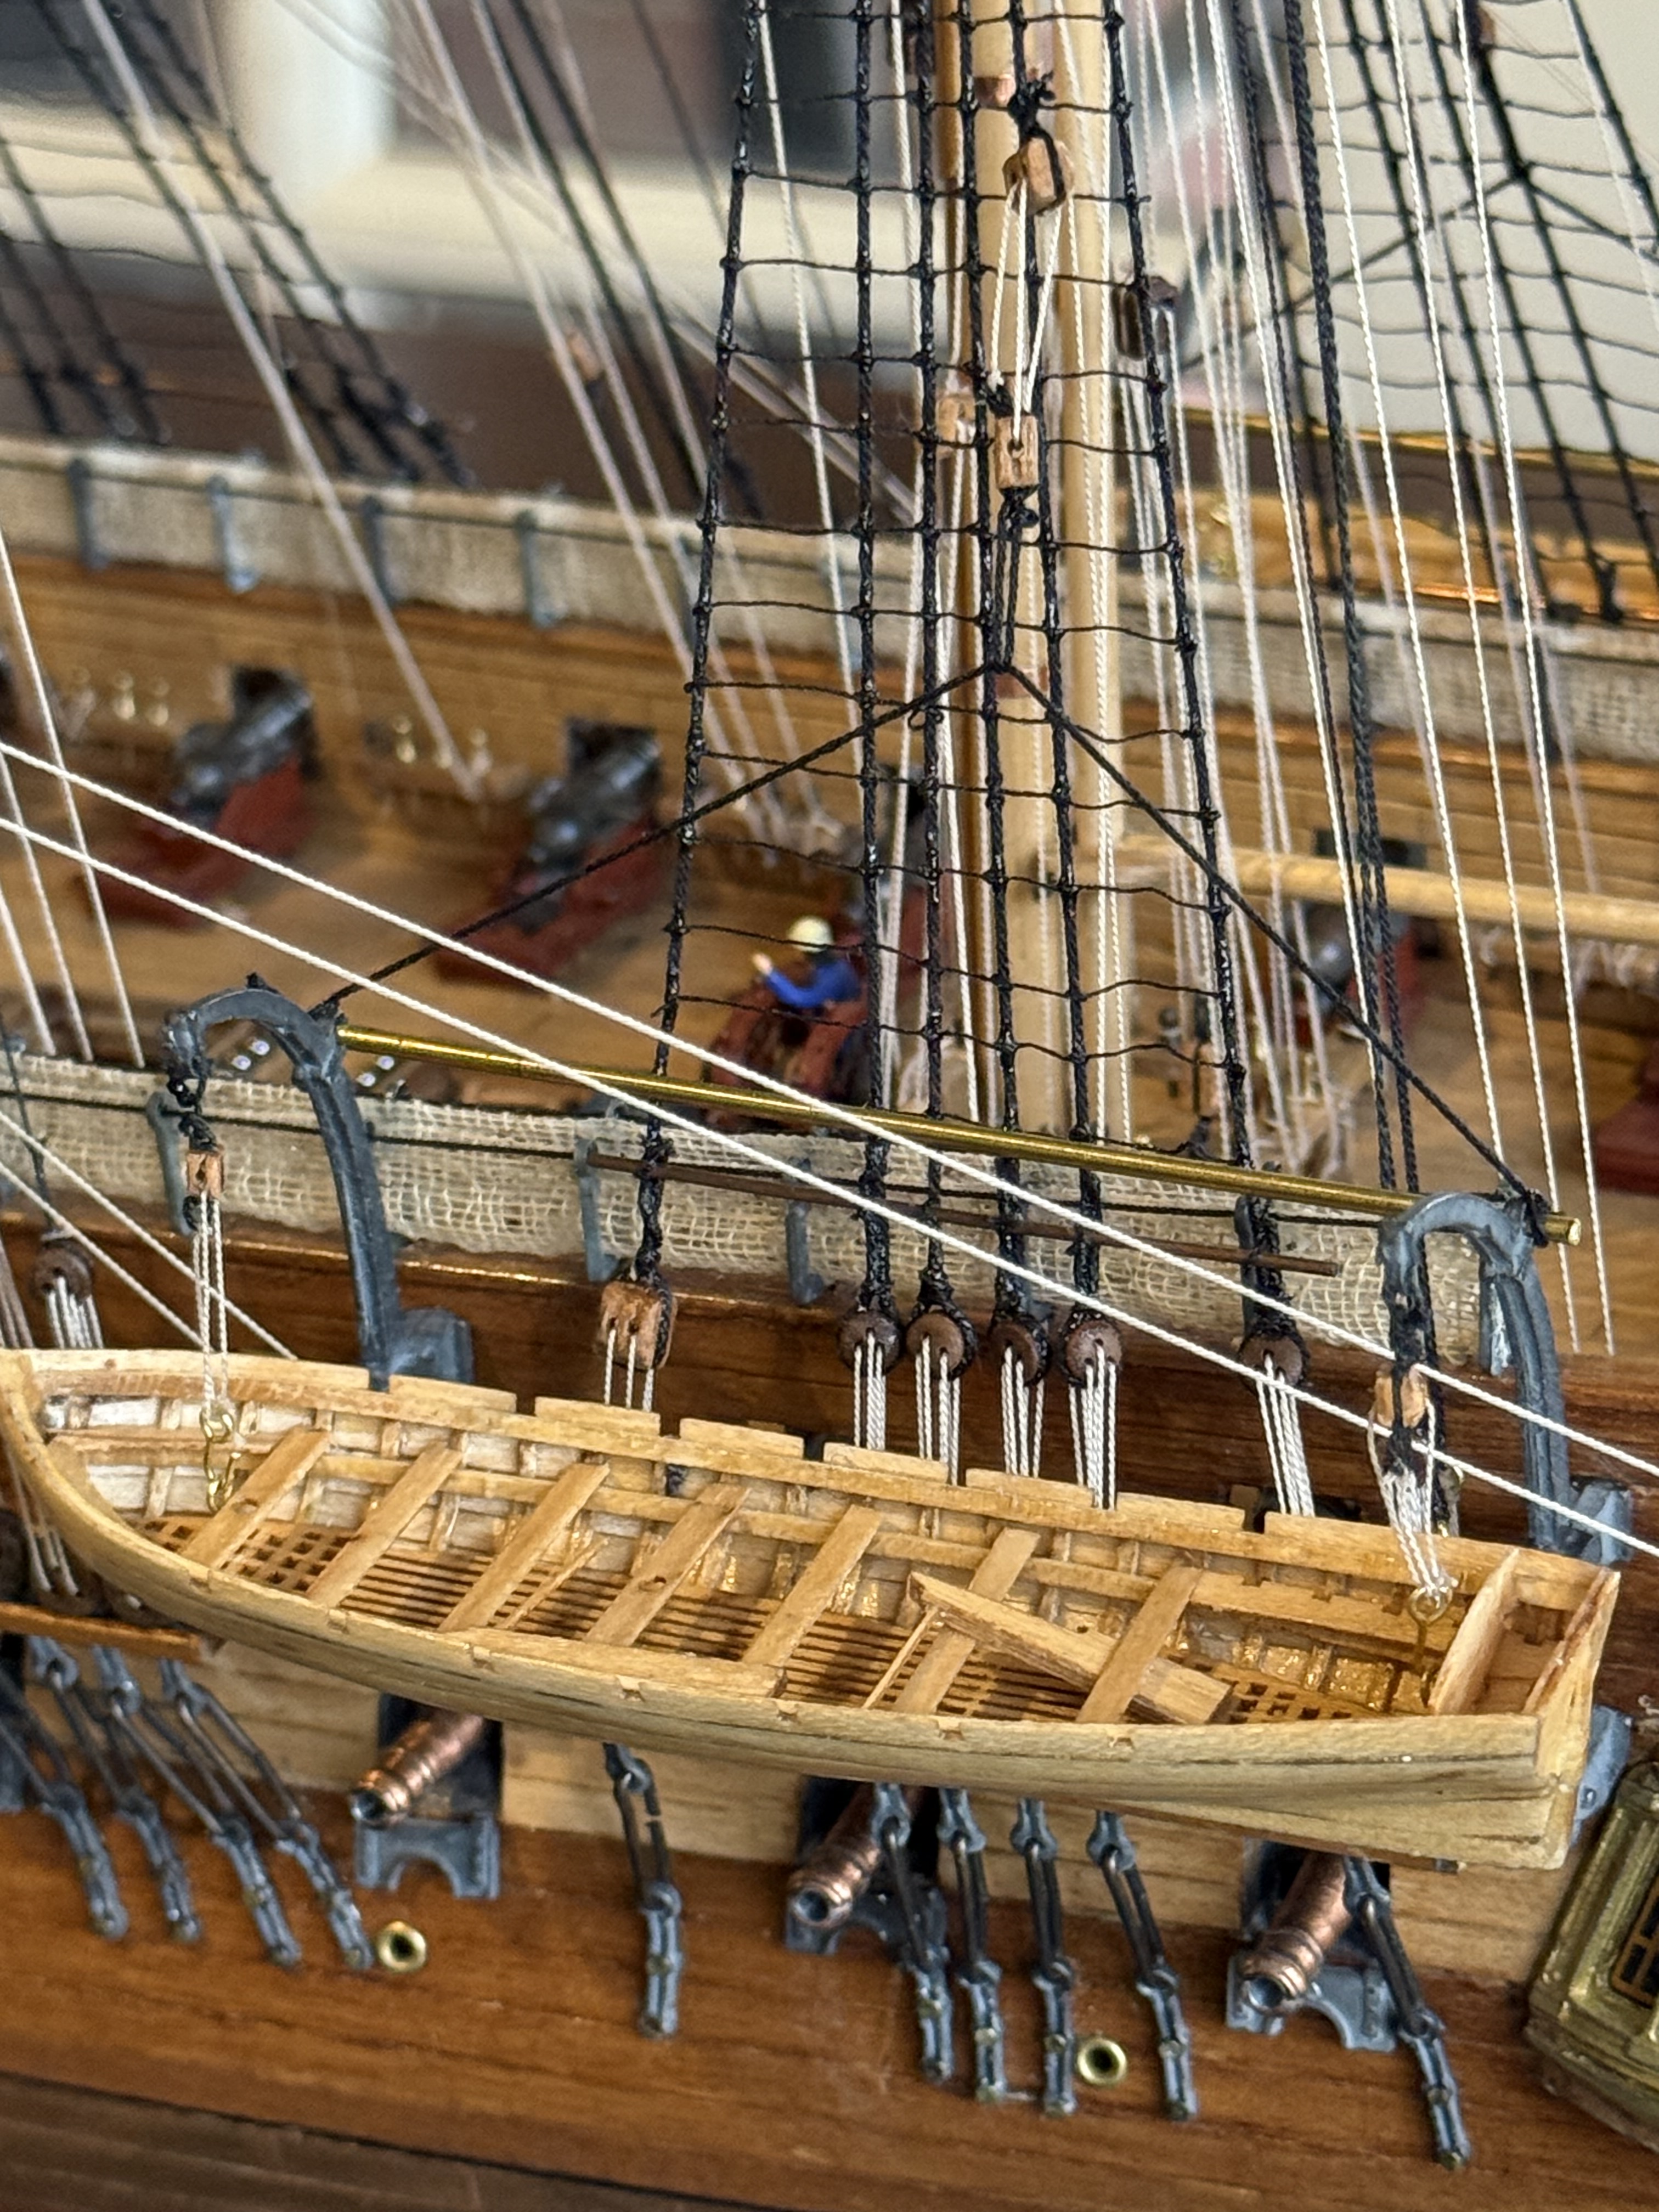
You possibly did not know that 1797 sailors wore modern overalls and helmets?Another large fireman (1:87) pretending to steer the ship (1:93) The copper sheathing IS to scale and IS real copper.
As mentioned in the previous post, Constitution and most sailing warships had netting racks on the bulwark where the crew could store their rolled up hammocks when not in use. That permitted the hammocks to air during the day, get some sun and probably reduce the bed bug population in the hammocks. The racks were sited above the spar deck guns, and provided the gun crews with a degree of protection from snipers and cannon strike splinters.
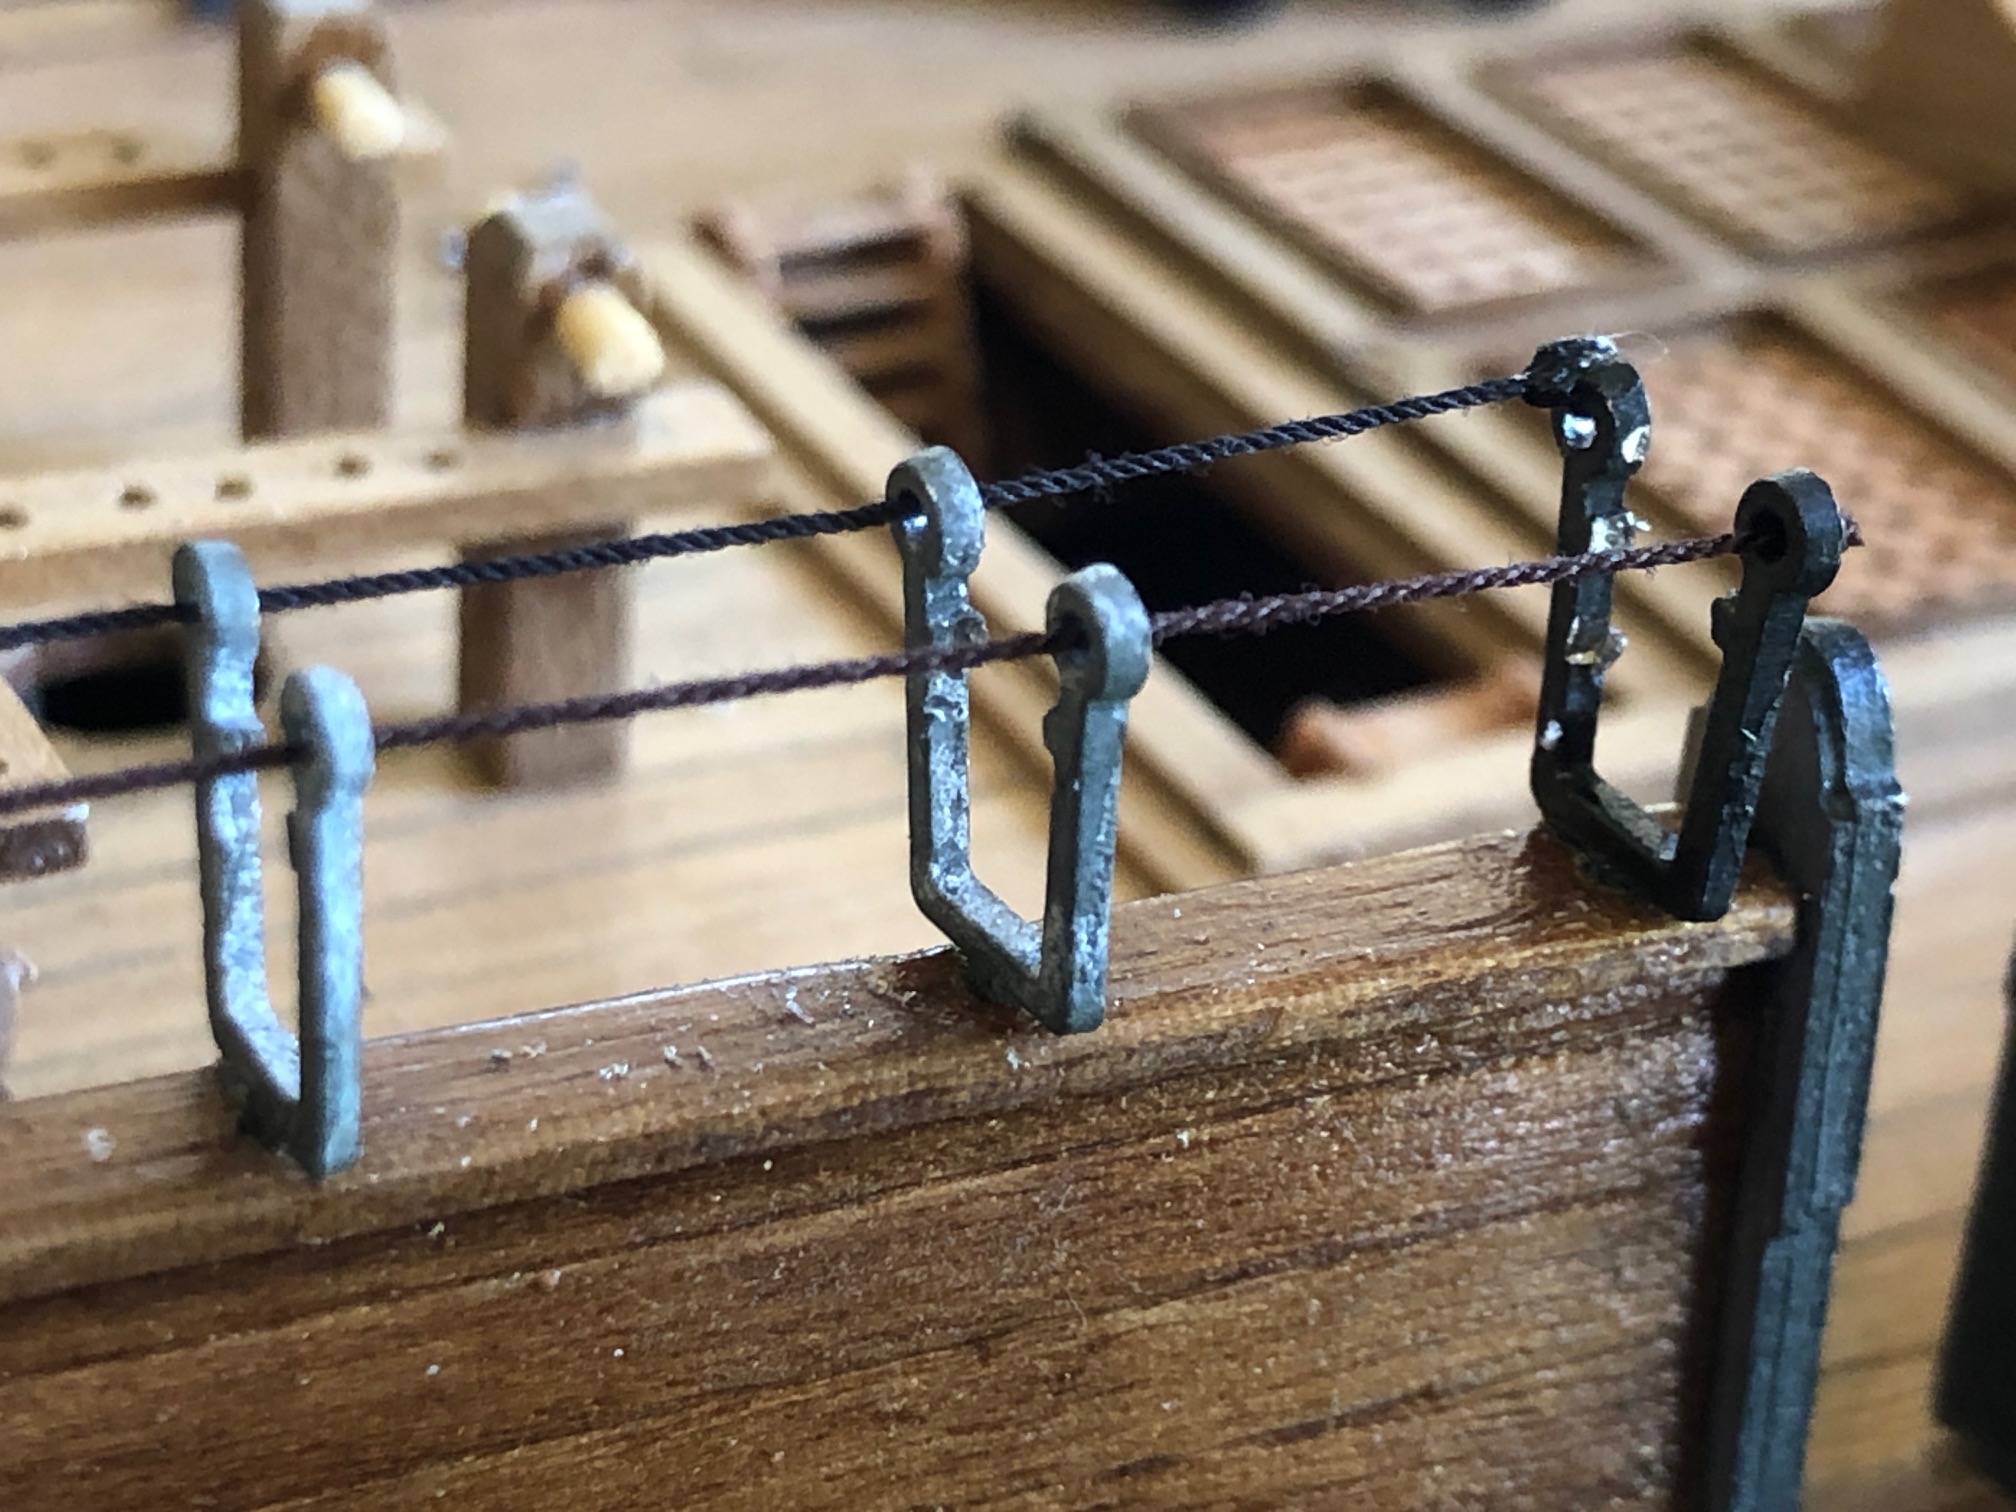
Yesterday I inserted the rope rails into the metal U supports. Initially I used the ropes provided by Mamoli, but they looked too thready thin to me, and the wrong colour (fawn) so I changed them for some of my own slightly thicker and black home made ropes. I threaded the “rope” on a needle and slowly and laboriously passed it through the stanchions. Then I had a small brainwave, and applied some CA glue to the end of the “rope”, formed it into a point, and when it dried a minute or so later, the point had hardened and passed easily and quickly through the stanchions.
I had prepared the cheese cloth netting as suggested by Mamoli, by painting it with diluted PVC glue, which when dried made the cheese cloth stiff and flat. In order that it was indeed flat, I pinned the stretched out cheese cloth to a cork board and waited for it to dry.
Then I installed it, after folding over a 1mm wide seam at the top so the rough cheese cloth edge did not show and appear unsightly.
The metal stanchions glued into the bulwark railsThe homemade rope added. ).6mm diaFolding the edge tuckHeld into position, and glued to the stanchionsAnd trimmed.
No, I have not made mini hammocks to put in place. Not yet anyway. I am not that obsessive. I think.
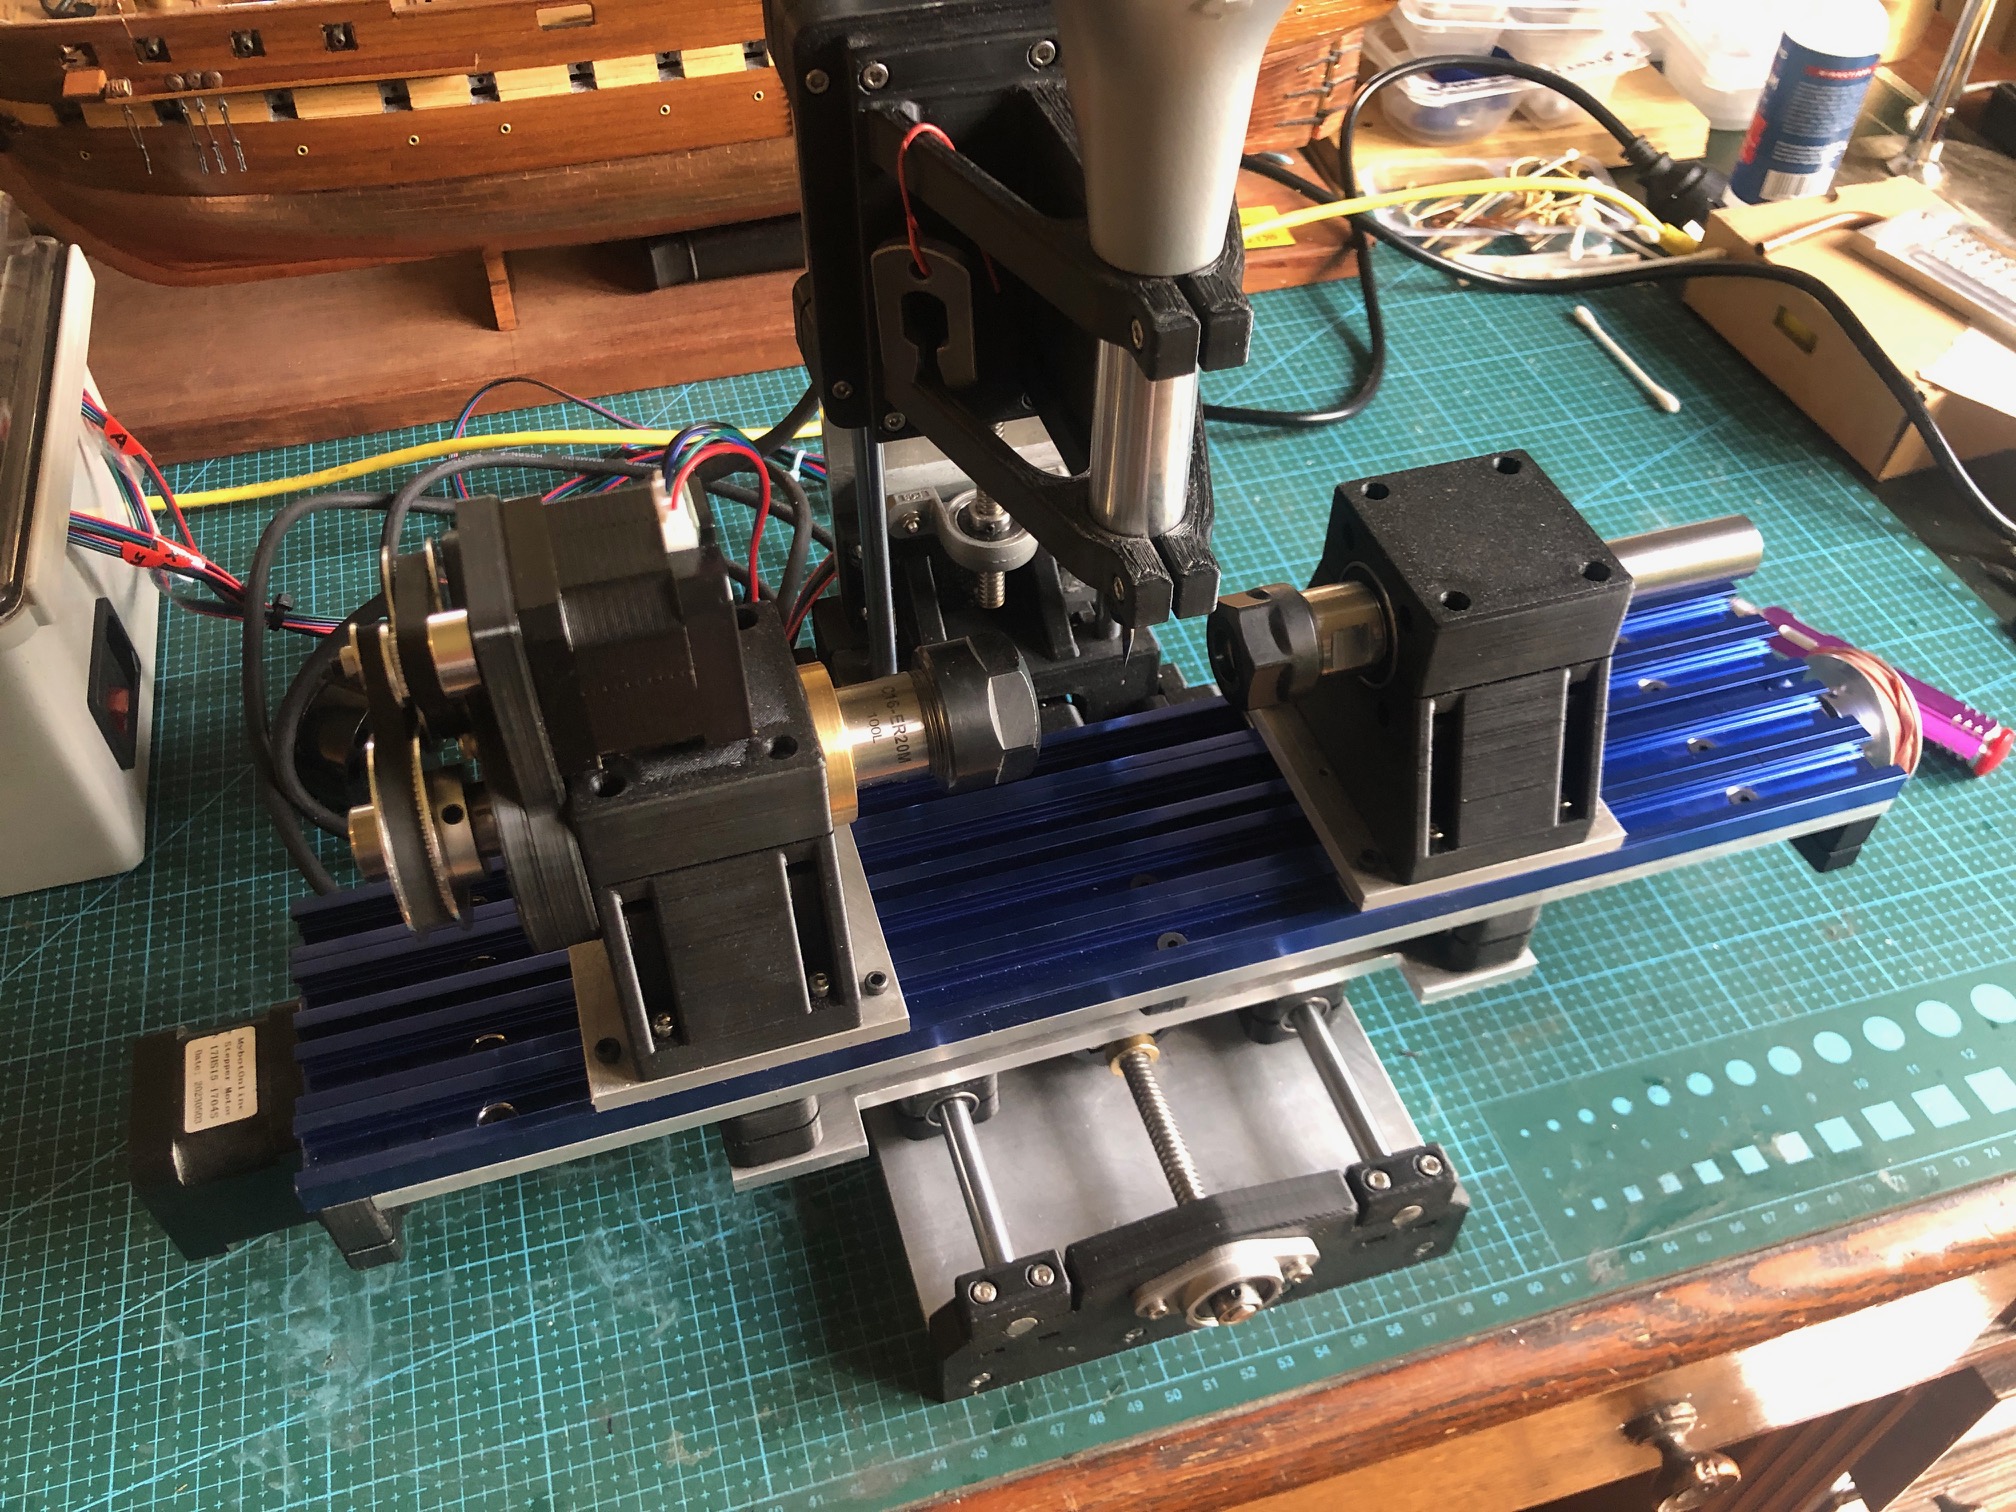
Now that the CNC seizing serving machine is functioning properly I have turned my attention back to the CNC Mini Mill and USS Constitution model.
The masts and bowsprit are sitting in place, but not fastened, except with temporary, fine, copper wire stays so I can measure the length of shrouds and stays for the permanent standing rigging. They need to be removed again so I can apply iron hoops or facsimilies to the lower sections. Even then the masts will be removeable, in case future repairs are required.
But in a couple of sessions I used the CNC mini mill to make the spars. There are 24 of them varying in length from 60mm to 310mm, and diameters from 2mm to 7mm. They are all tapered, and 3 of them have central octagonal or hexagonal sections, so making them on the CNC mini mill seemed like the ideal tool for the job.
The home-made CNC Mini Mill.
There was some testing of the depth of cuts with a 3mm end mill in the Proxxon spindle at 16-20,000 rpm. The limiting factor was the power of the Nema 17 stepper motor rotating the headstock at about 100rpm. The steppers moving the X,Y and Z axes had no issues. The other limiting factor was the small diameter of some spars. At 1 to 2 mm diameter they sometimes flexed and started whipping, and in one case broke completely. I had to steady the workpiece sometimes using my finger as a steady, to absorb the vibrations and stop the whipping. I counted my fingers after each run, but none seemed to be missing.
Another factor to consider was the mill maximum distance between centers of 150mm. The bigger spars had to be done in 3 sections, repositioning the spar position each time. Not difficult, but increased the time taken for the job.
I was pleased with the surface finish after milling. A quick light hand sand, taking under a minute for each spar was all that was required.
The plans for the spars. Each one ticked off when made. All of the spars. The one which I am holding is the largest, and it has a hexagonal center section. (probably should have been octagonal. Will I remake it?). Not enough dowel was supplied in the Mamoli kit, so I bought some from Bunnings. lack of 2mm dowel was a problem because the wood merchants do not carry such tiny stock. So I used some bamboo food skewers. Still had to reduce the diameter from 2.5mm, but the end result was acceptable. There might be some colour difference from the other spars, but hey, in the day I bet that frigate captains would have used whatever they could obtain when on a voyage to distant lands.
The mill worked very well. Return to dimensions was accurate, and the finish was good. It took a while to get a production run going, re- learning the commands and G codes, and the first spar took a couple of hours, but after a while I was producing one every 5-10 minutes.
Next step for the spars is to attach the footropes, blocks, and other fittings. I will lacquer them. No paint.
USS Constitution and the American heavy frigates outclassed British frigates in the 1812-1814 war between USA and Britain.
The British were in a very long and costly war with Napoleon’s France, had won every significant naval battle to date, and were probably feeling a little bit complacent about their naval superiority.
The British were therefore rather shocked out of their complacency when their ships lost almost every encounter with the American frigates in the 1812 -1814 war. There were several reasons for the losses.
American frigates (including USS Constitution) were newer, heavier, had thicker wooden sides made of “live” American oak, had larger crews, who were all volunteers, and they had more powerful guns, and more of them on each ship. To mention a few of the reasons.
In my model of the USS Constitution there are 54 guns. 32 long guns and 22 carronades. In older posts I have detailed making models of a 24 pounder long gun and a 32 pounder carronade. Photo below.
1:10 scale models of a 24 pounder long gun, and 32 pounder carronade . The long gun was more accurate, had longer range, and required more gunners to operate. The carronade was cheaper, smaller, lighter, and quicker to reload. The carronade was devastating at the close range of most naval battles of the era.
So last week I assembled the top deck (the “spar” deck), long guns (2 of them) and carronades (22 of them).
First the long guns on the spar deck…then the carronades.
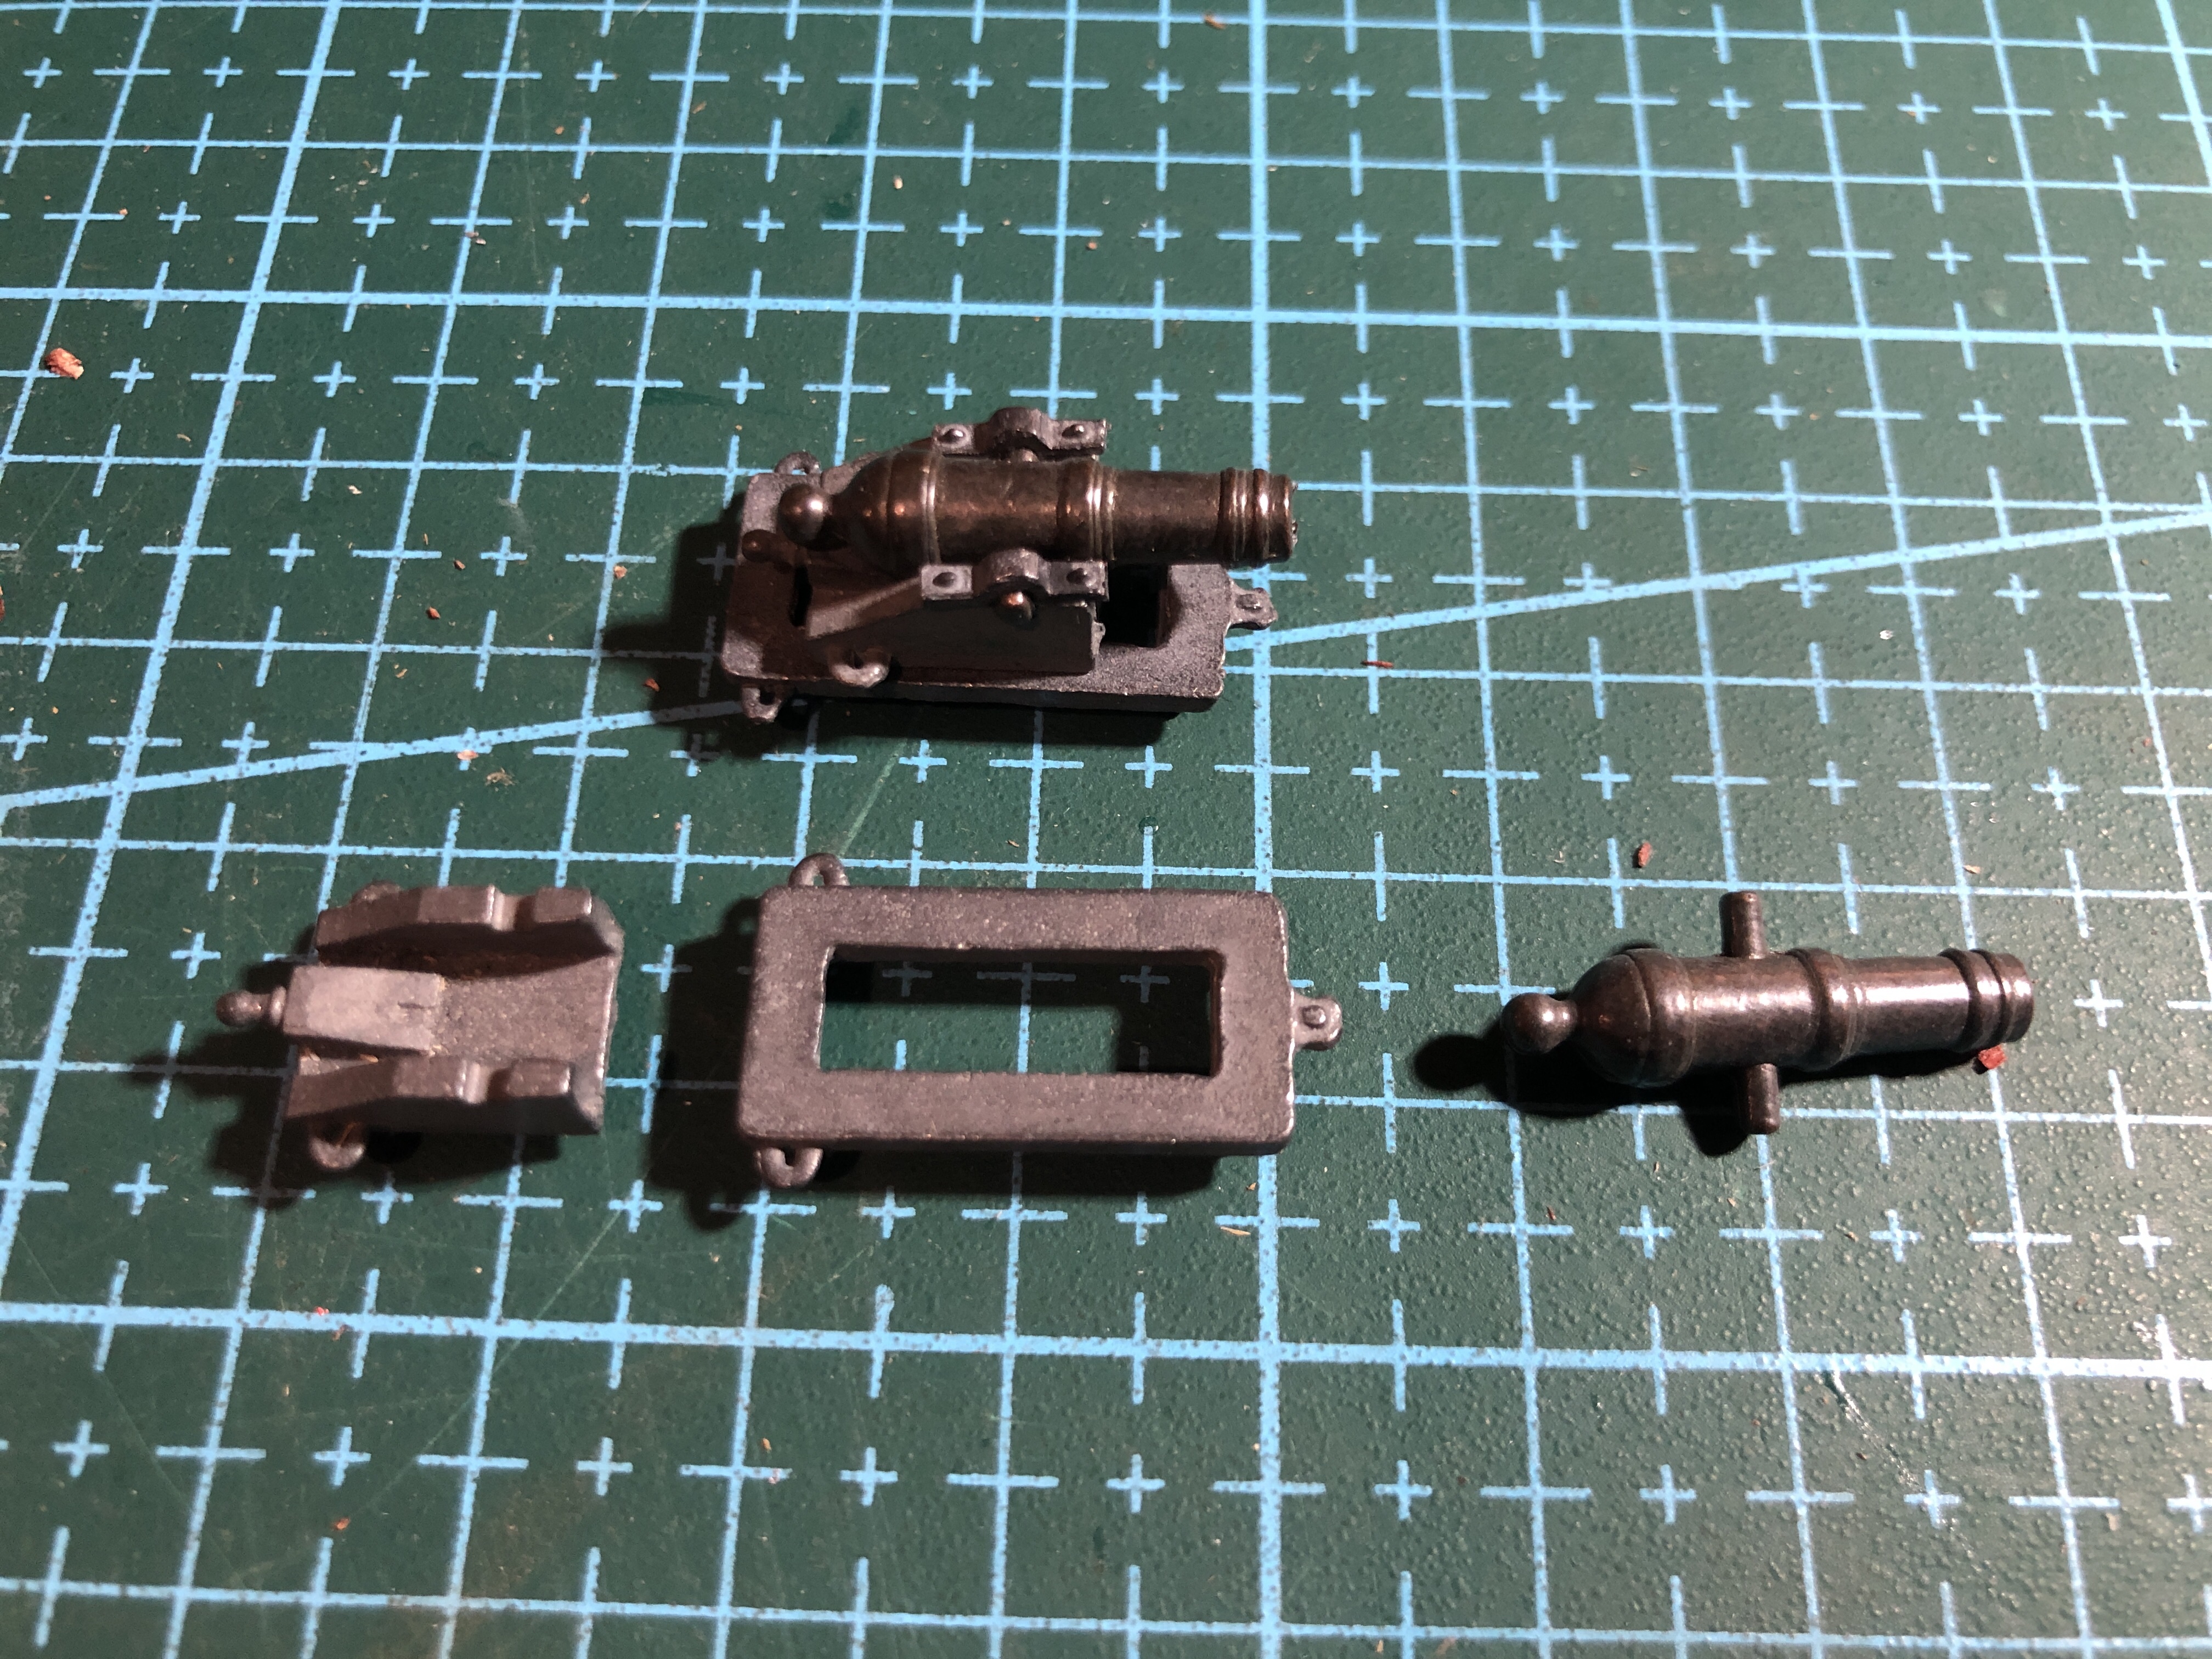
In 1797 all of the guns would have been mounted on wooden carriages. The guns in the Mamoli kit were cast metal, including the carriages. So I painted the carriages dark red, to look a bit more like wood, and because they were probably painted red in 1797.
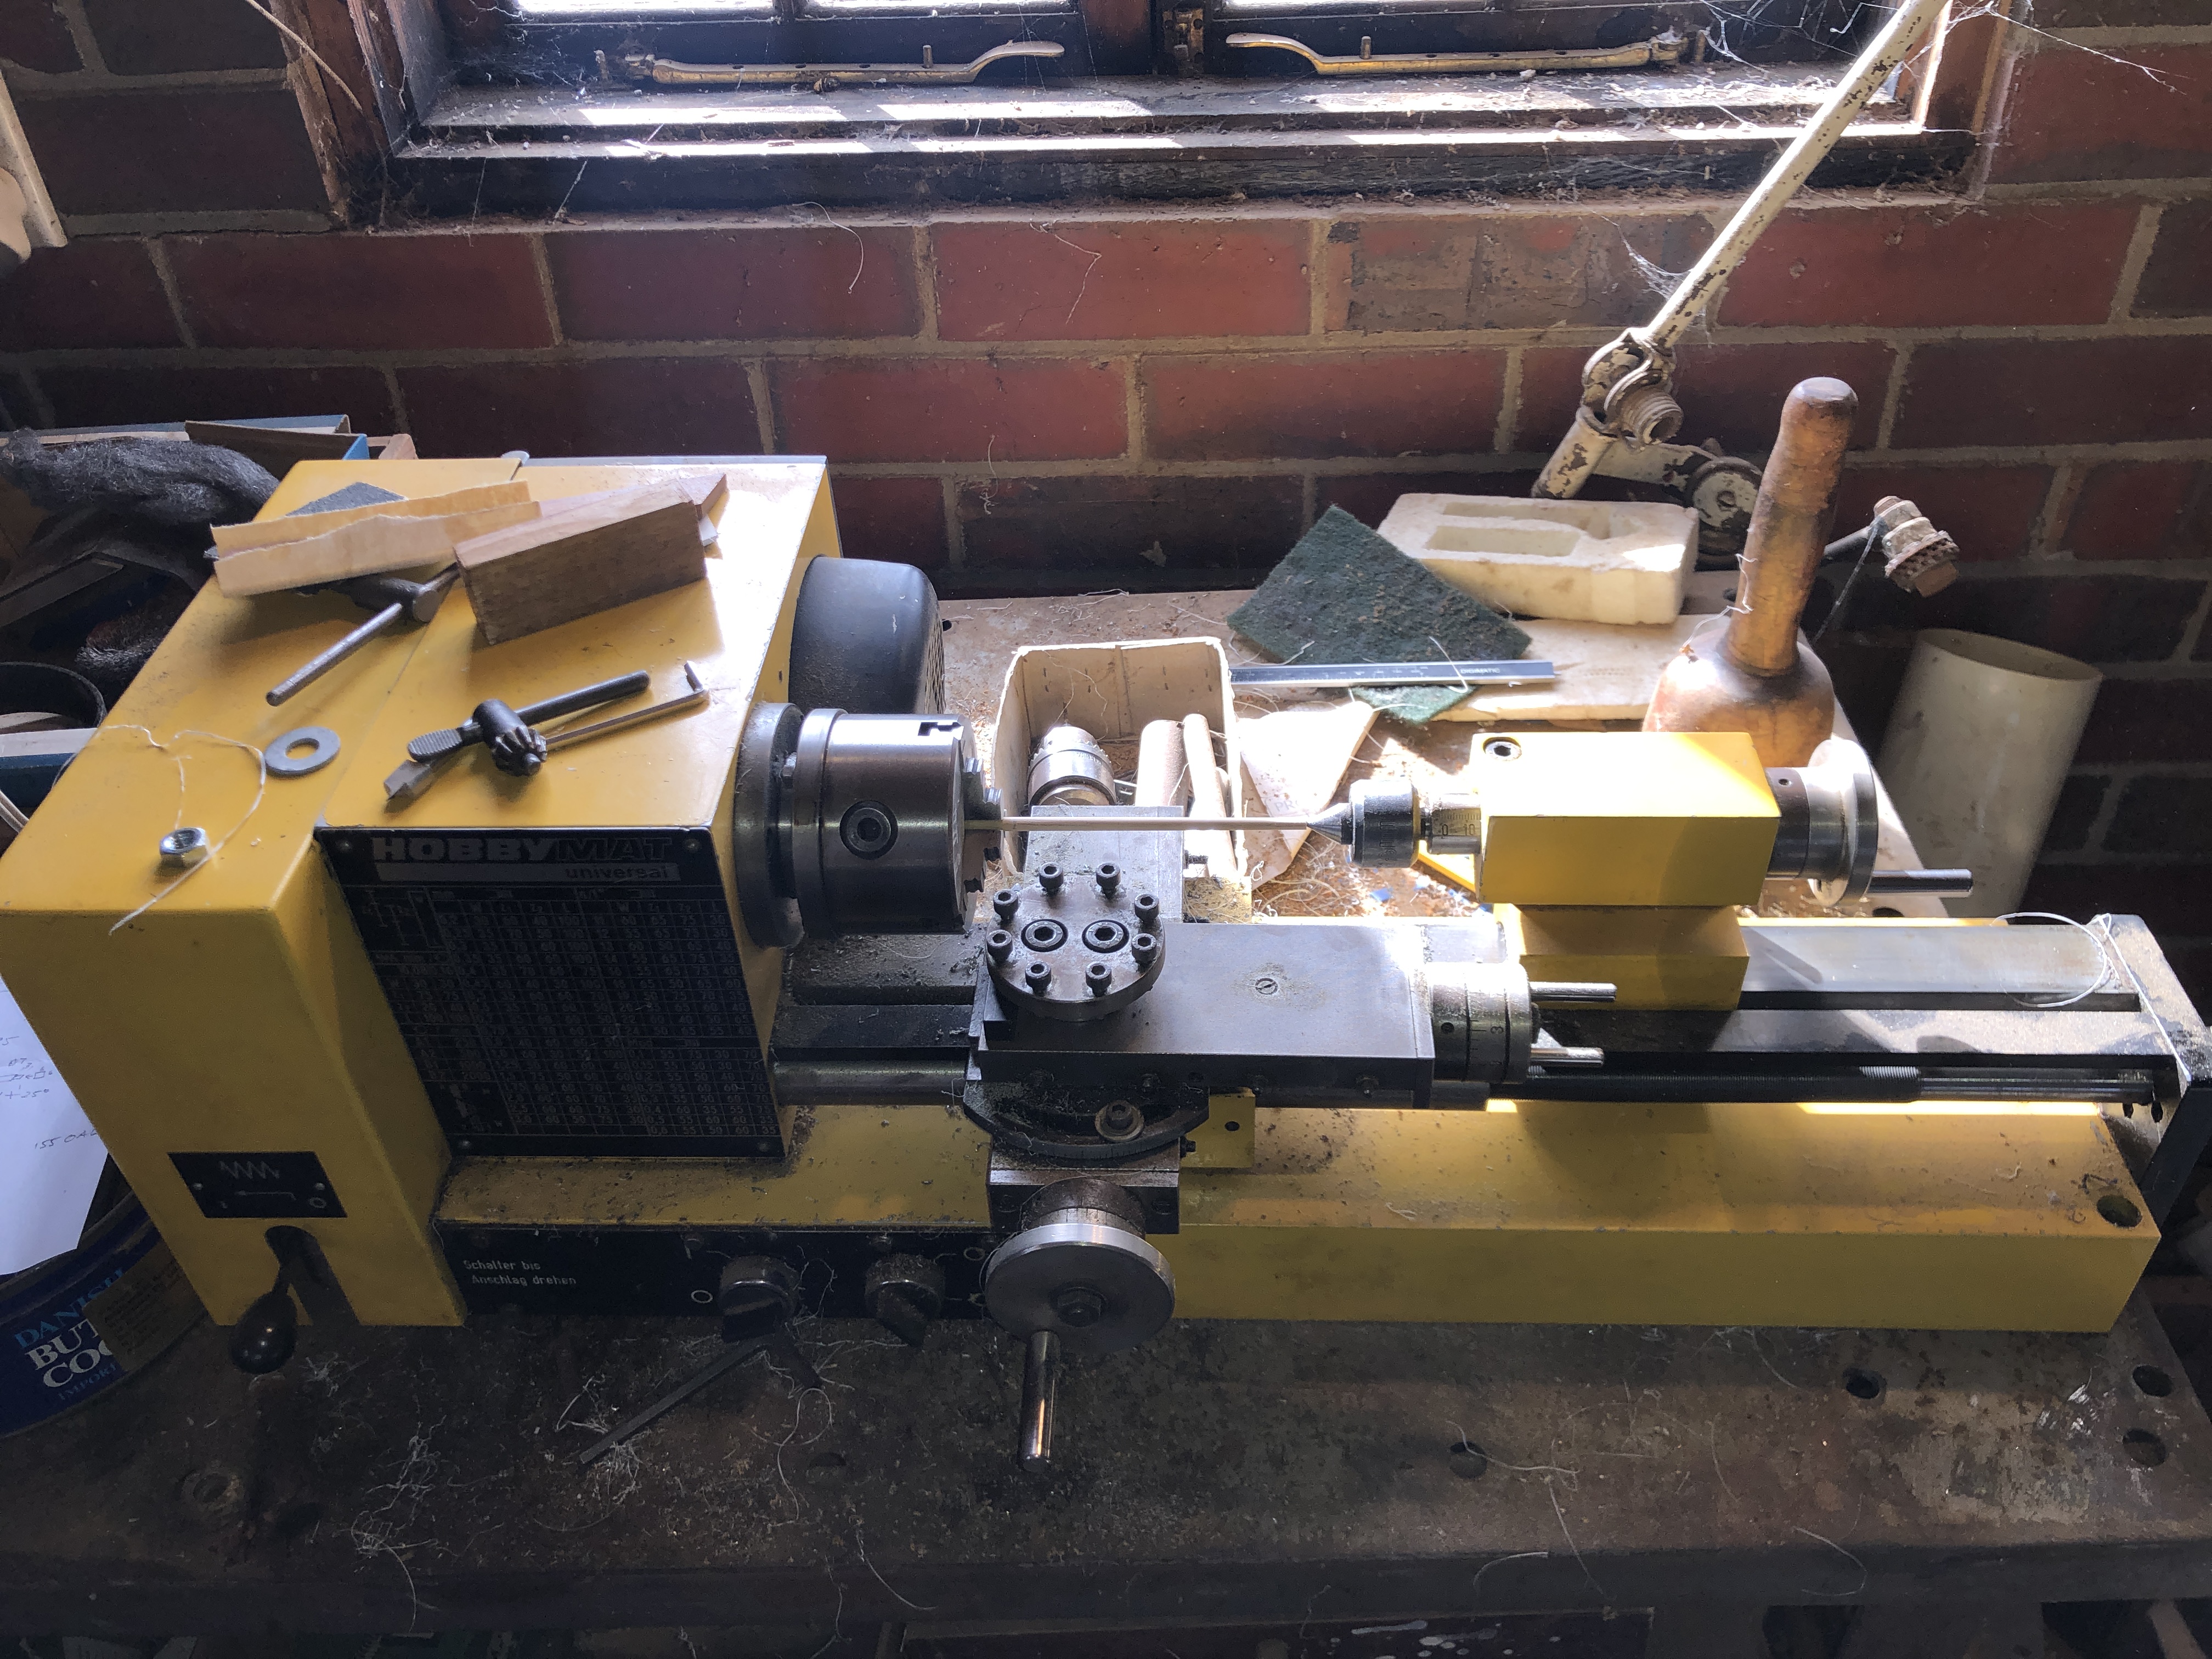
The carronade components were quite nice castings and required no finishing except for the carriage and slide painting. The assembled carronade is seen. The rectangular slide pivots at the front, and there are small wheels at the back for traversing. Ropes for traversing attach to the rear loops. Elevation was adjusted with the wooden quoin. Trunnion caps are glued in place .And this is my little Emco lathe which is a perfect size to drill the long gun bores. In this pic I am tapering the bowsprit. (ps. sorry, not an Emco. It is a Hobbymat MD65. Same design as a Proxxon. I do also have a tiny Emco. Just confused.)2mm bore. 1:93 scale.
There are another 30 long guns on the gun deck below, but I have yet to deal with them.
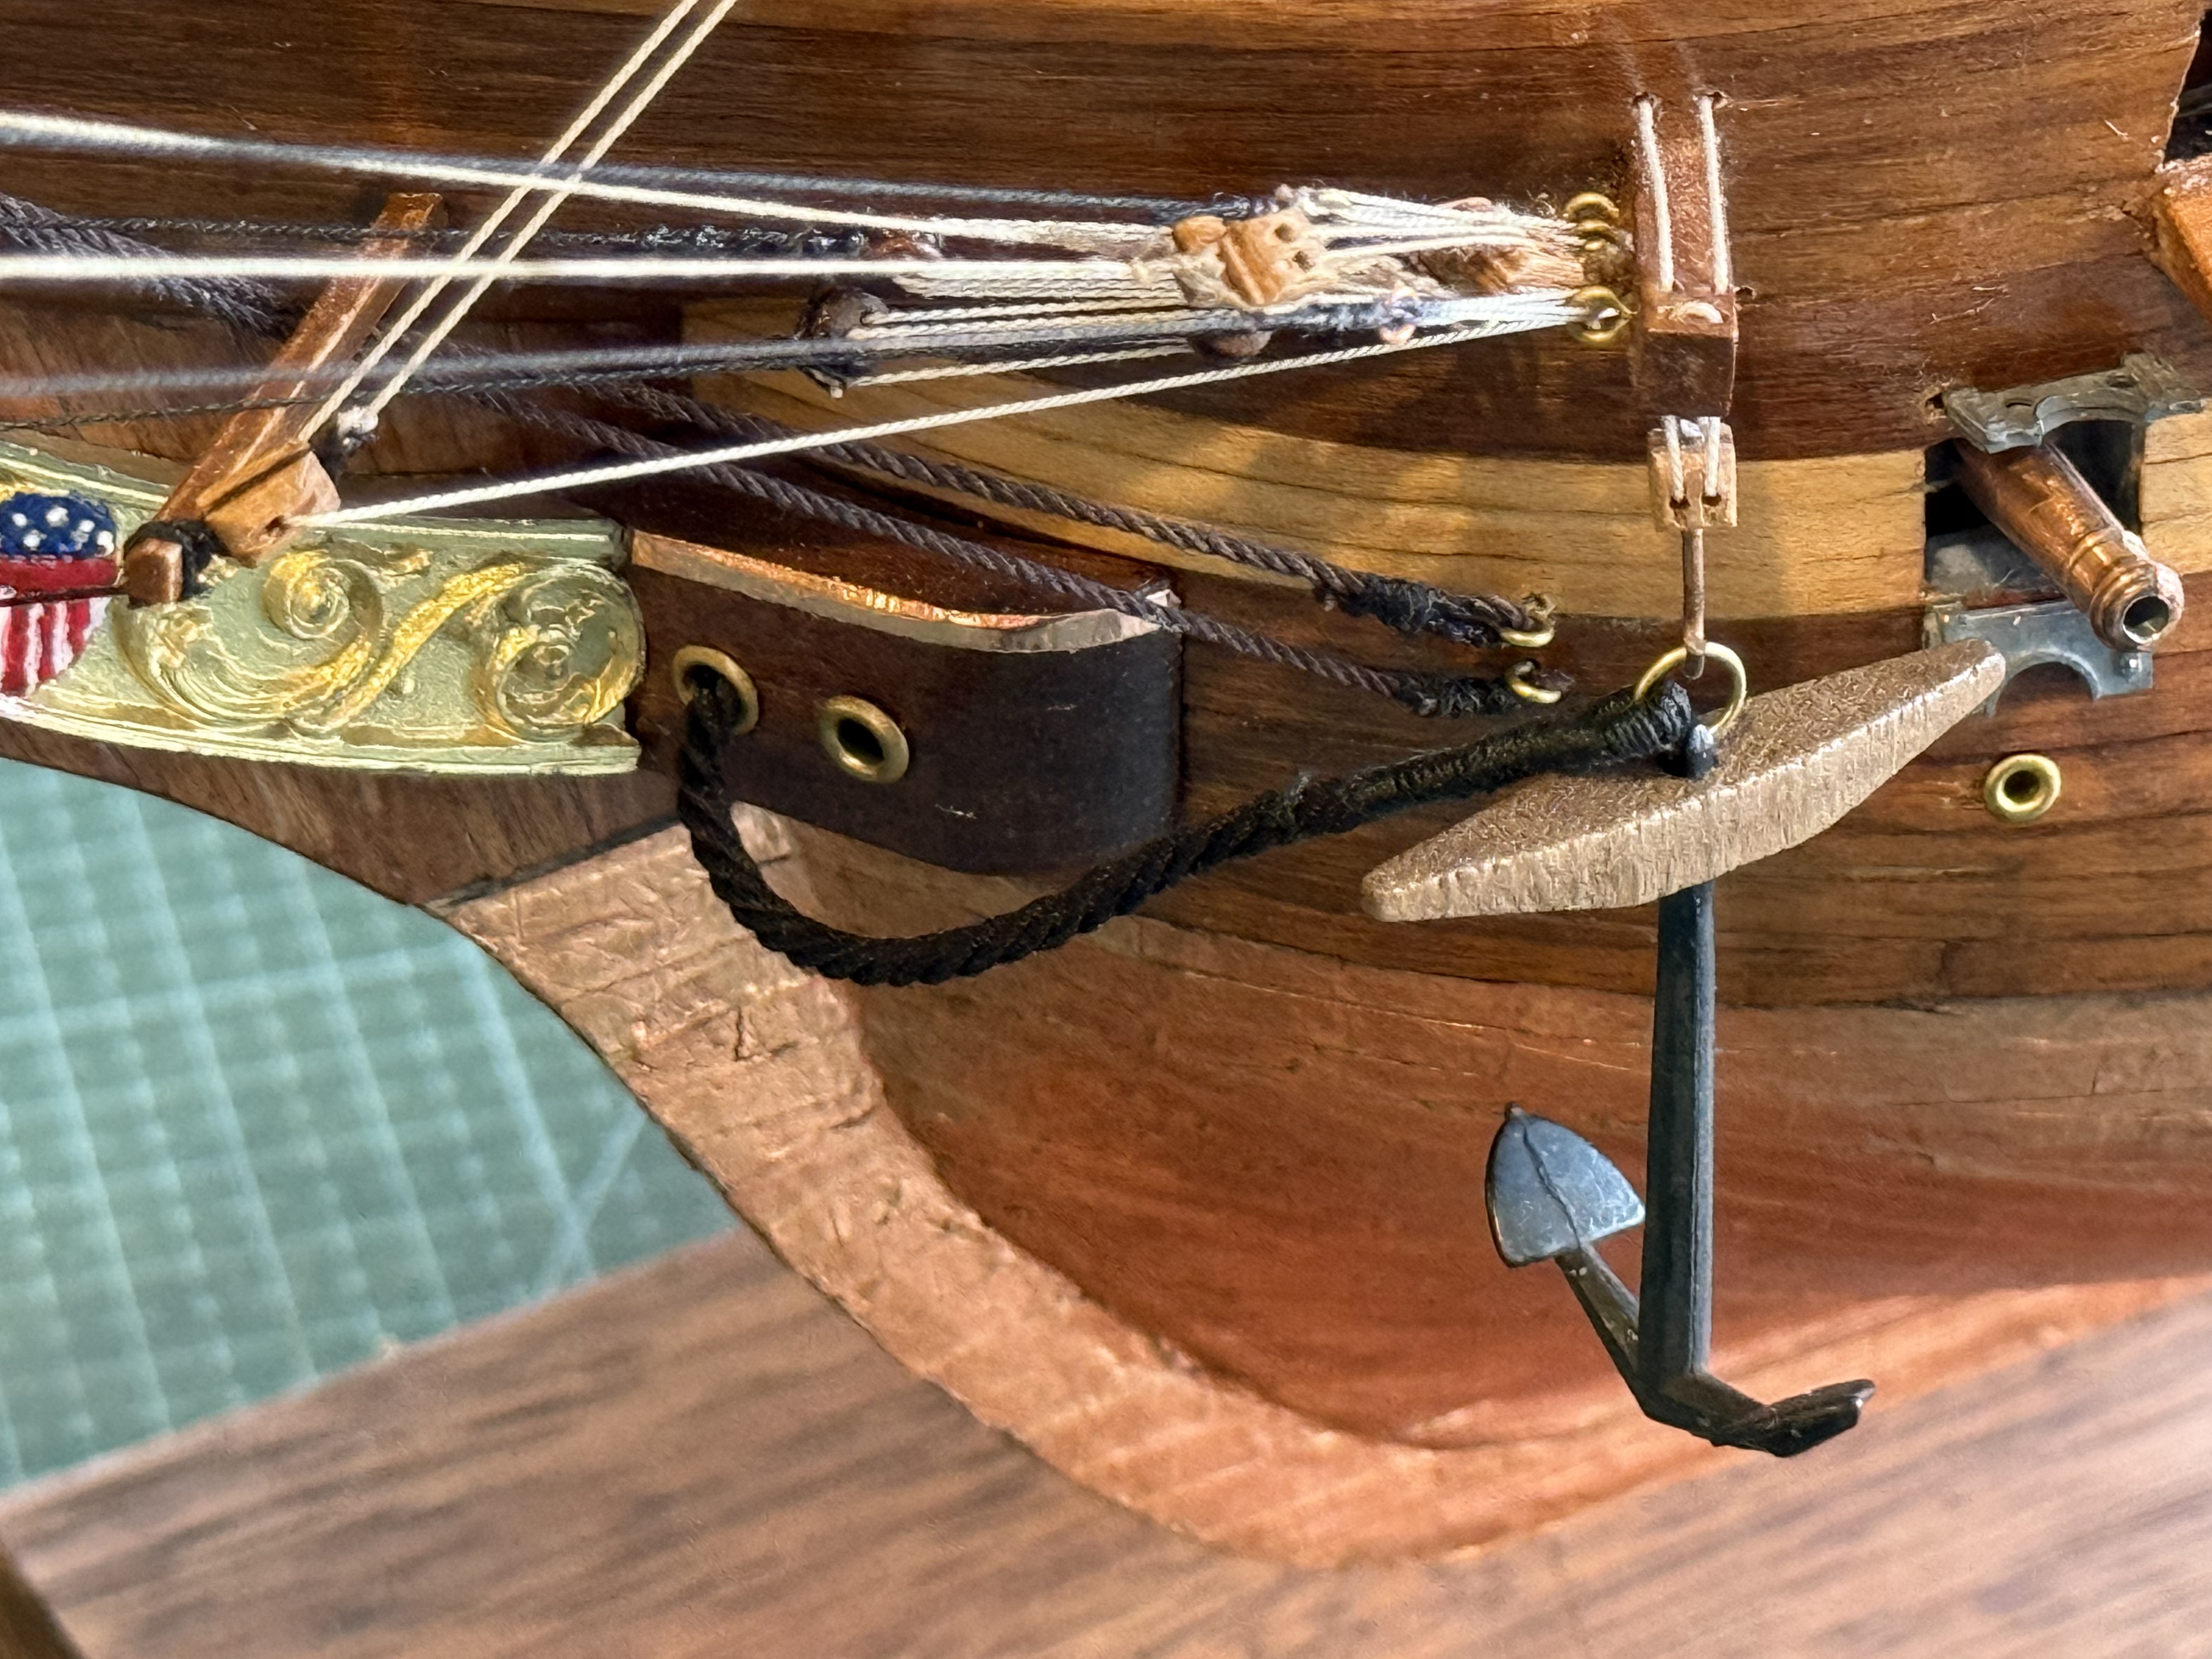
Oh, and BTW, the guns in the above photo are not yet attached. Just sitting there for the shot.