
Armstrong Cannon Chassis Wheel Assemblies
The steel chassis is virtually finished, although I am delaying inserting the final rivets which join the girders together, in case I need access to the individual girders for more machining or drilling.

The 2 chassis’ are not identical. Can you spot the differences? And still waiting for more rivets to arrive. The copper colour on the front one resulted from dipping it in well used sulphuric acid after some silver soldering.
Considering how to model these wheel assemblies…..
The front wheel assemblies

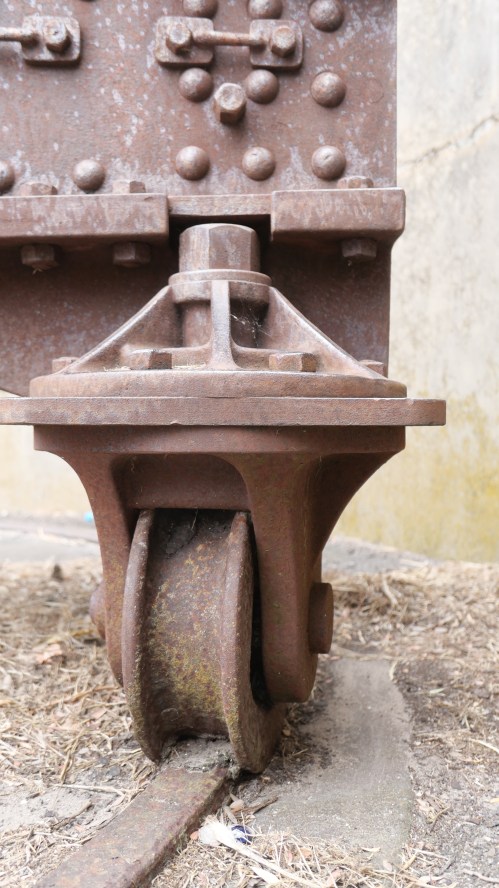
The rear wheel assemblies
The rear wheels and supports are larger than the front ones. But the top views are essentially the same. The wheels themselves present no difficulties. They will be turned from 50mm diameter steel rod. And the axles will be all identical.
But, those supports are complex, and will need to be silver soldered parts, or possibly cast from 3D printed lost PLA bronze or brass. Just drawing them was challenging.
This is a complex project, and the parts are complex.
Considering that the original cannon barrel was made in 1866, and the steel/iron chassis made approximately 20 years later (the original barrels were mounted in a wooden carriage), the standard of the workmanship in the originals is simply superb. Even at 1:10 scale, and using modern equipment including CNC machinery, I am struggling to match the standard of fitting steel pieces together so neatly. I am in awe of the original engineers.
(and by the way. Neil M, who very kindly loaned me the rivet gun which died, has loaned me a replacement gun. The replacement gun is a bit bigger, and more fierce. It requires more care in not overdoing the hammering, and bending the steel parts or producing “two-bobs” in the work piece. “Two-bobs” will be understood only by older Aussies? They are unintended dents in the workpiece produced by hammering.)
