machines which I have made, am making, or intend to make, and some other stuff. If you find this site interesting, please leave a comment. I read every comment and respond to most. n.b. There is a list of my first 800 posts in my post of 17 June 2021, titled "800 Posts"
One of my readers made comment about the pliers which I used to hold the domes of 2mm copper rivets while I threaded them.
The pliers are worthy of comment, so I decided to say a bit more about them, and also some other pliers which are often used when I am working with tiny fasteners.
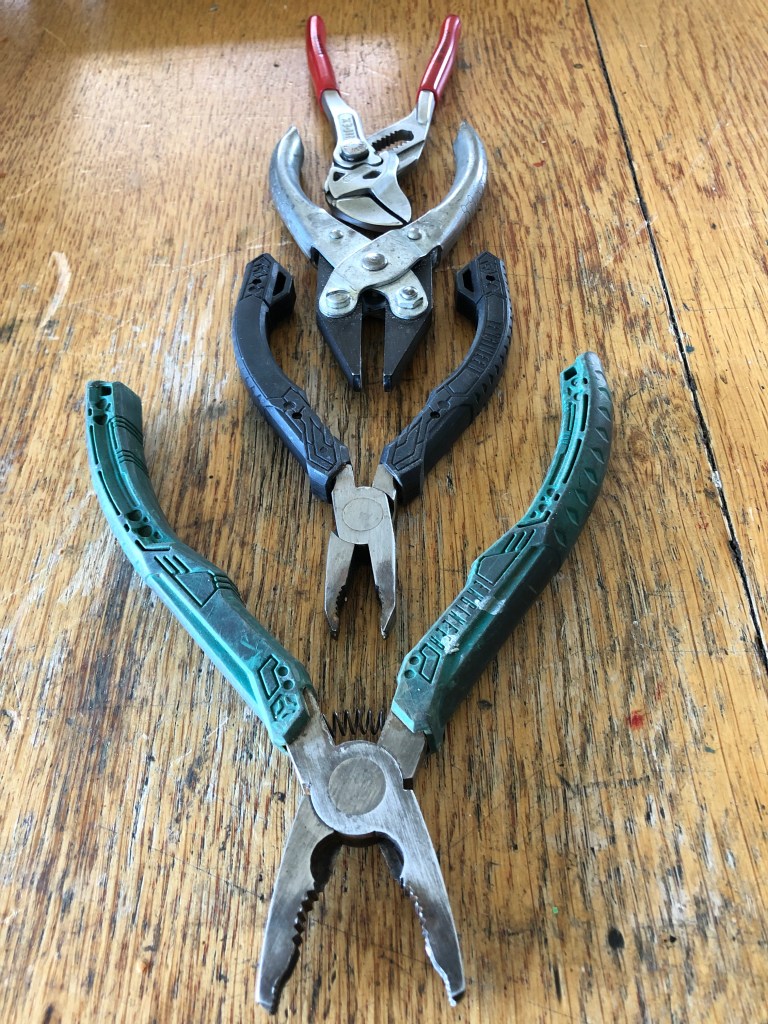
These are the pliers which started this line.
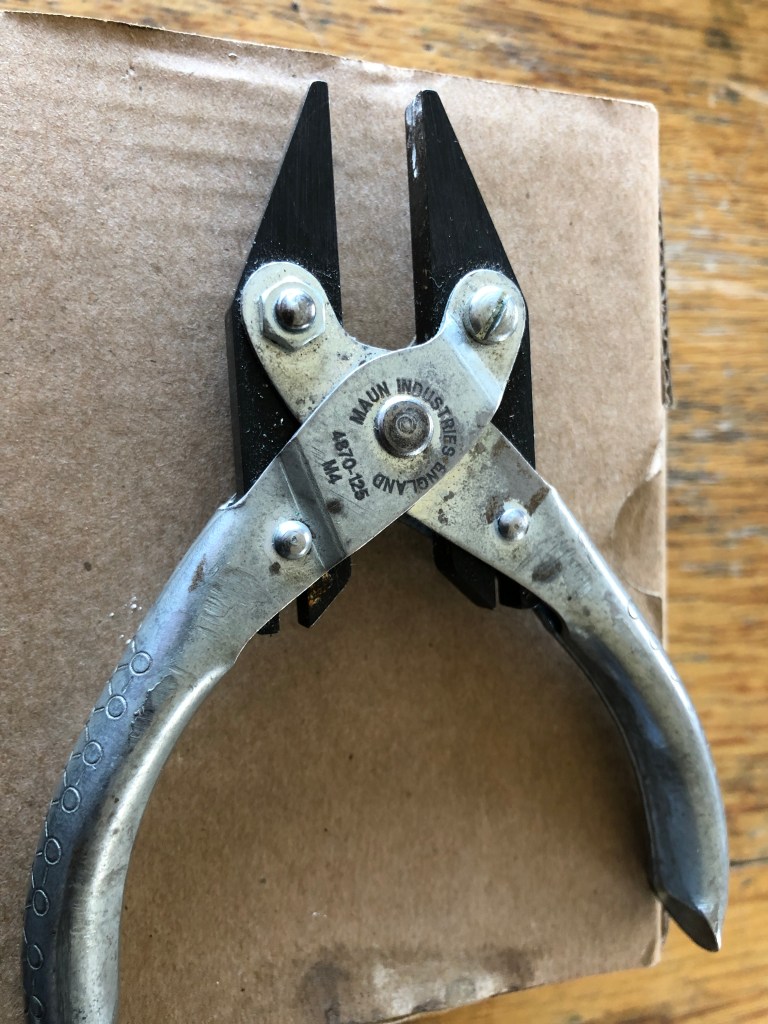
They are Japanese, not as expensive as some German brands, but beautifully made. And not inexpensive. “Engineer” brand.And these are the jaws. Note the transverse, and longitudinal hardened grooves/ridges. The longitudinal grooves are in cylindrical contours, so they will grip cylindrical objects such as screw heads and small cap screws, with ferocity. And not let go. These are the ones which I use to hold copper dome head rivets, with plastic tape covering to protect the copper.They come in various sizes. I purchased the two smallest. They are indispensable. Behind them are two other small pliers which I also use frequently.These are Maun parallel pliers. They also come in various sizes. These are the smallest. Incredibly useful. Do not damage tiny nuts or bolt heads. And will hold sizeable objects.……..and tiny objects.
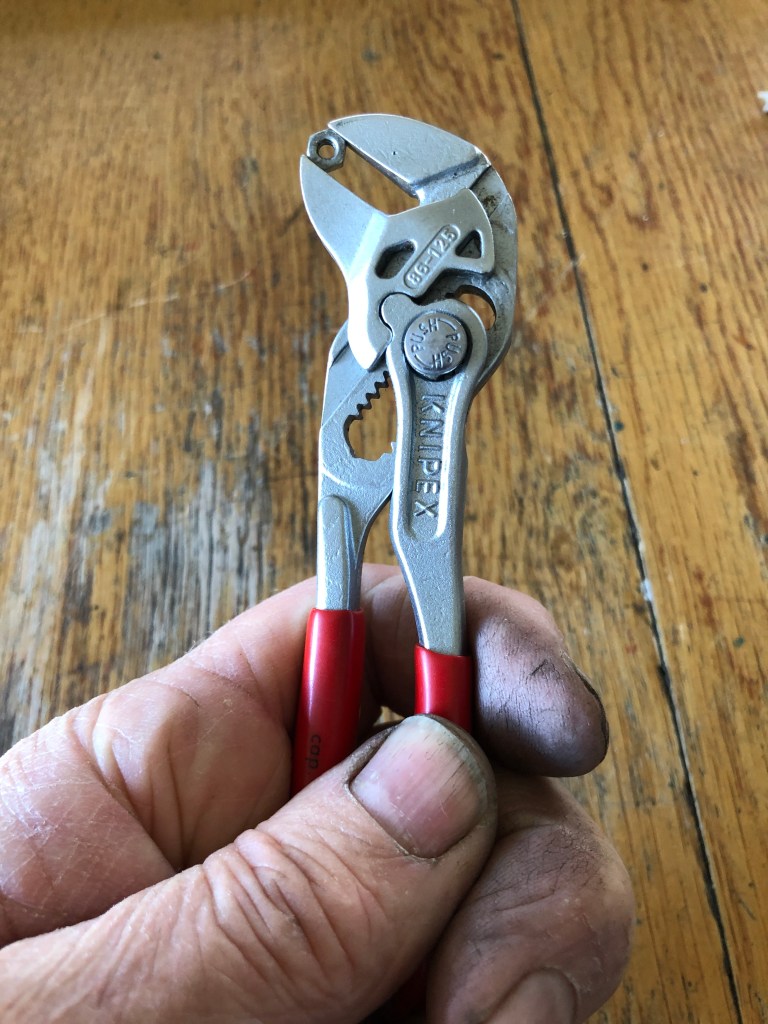
Finally, the most expensive tiny pliers which I own……and probably the best…
Knipex Miltigrips, holding a 2mm nut. Parallel jaws. Incredibly strong. Beautifully made. Very expensive. totally indispensable. You should save up and buy a pair.
All of the above tools, and many others in my workshop, were purchased over many years at Qualitool Tools, 77a Mercer St, Geelong 3220. tel 035221 8915. David, the proprietor/owner is incredibly knowledgable and enthusiastic about tools, and was a supplier to the aircraft industry, and also to auto mechanics. He stocks only good quality tools. I often pop in there to ask “what is new?”, and invariably he will demonstrate some fabulously useful (read “expensive”) tool which I cannot continue to live without buying. If you are in Geelong, you should visit for a wander around Qualitools. David has no idea that I have given him this rap. Nor do I have any pecuniary interest in his business, except that I hope that it continues. I am happy to support it.
Another small bronze pour yesterday, and it was my best one yet. No bubbles. No voids. And excellent surface definition. What did I do that was different?
First, the 3D parts were printed already attached to the tree. So the trunk and branches were 3D printed with the parts attached. That meant that I could determine more accurately the bronze flow, the gaps, the spaces. The only “failure” was that I added some wax air vent sprues as an afterthought. And those wax parts were the only part of the pour which failed. Fortunately, the absence of the gas vents did not seem to matter.
The 3D printed tree. There are 9 PLA brackets ready to be replaced by bronze. I increased the height of the trunk for extra melt pressure. The air vents failed, and were not needed anyway.
Next, I painted the tree with a slurry of investment. The slurry was much more watery than the normal investment, but it was thick enough to leave a thin layer of investment on the surfaces, paying particular attention to the corners and internal edges.
Then I used my new, 1 hp vacuum pump to degas the investment mixture. It took about 15 seconds to reach maximum negative pressure, compared with about 1-2 minutes which the 1/4 hp unit was taking.
Then, after pouring the investment, I placed the full flask containing the tree and investment, and degassed the entire unit. I was shocked at how much extra air bubbled out.
The rest of the process was as usual, drying for 4 hours (except that this time it started at 6am, having put the process on an automatic start timer), burnout 2 hours, and baking 3-4 hours.
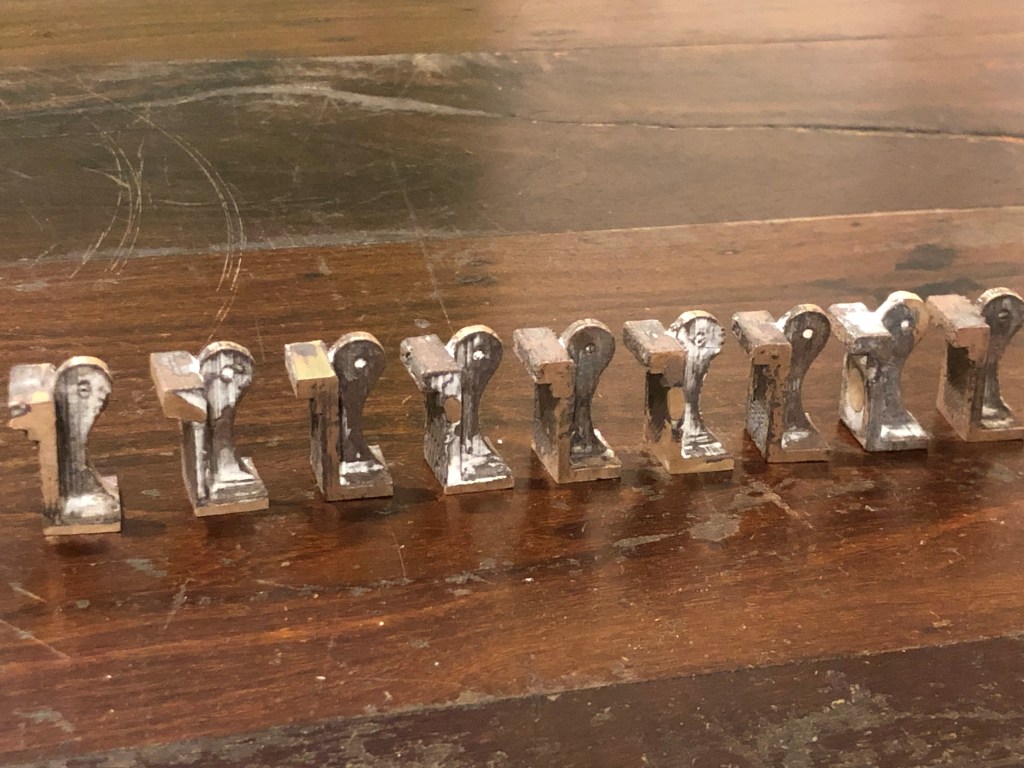
The cast tree was looking hopeful. And not much surface oxidation to see. (I had given the 15% phosphor copper a full 2-3 minutes to work this time.) ….and there are my brackets. 9 ducks in a row. They need a bit of filing, and some time in the gemstone tumbler.
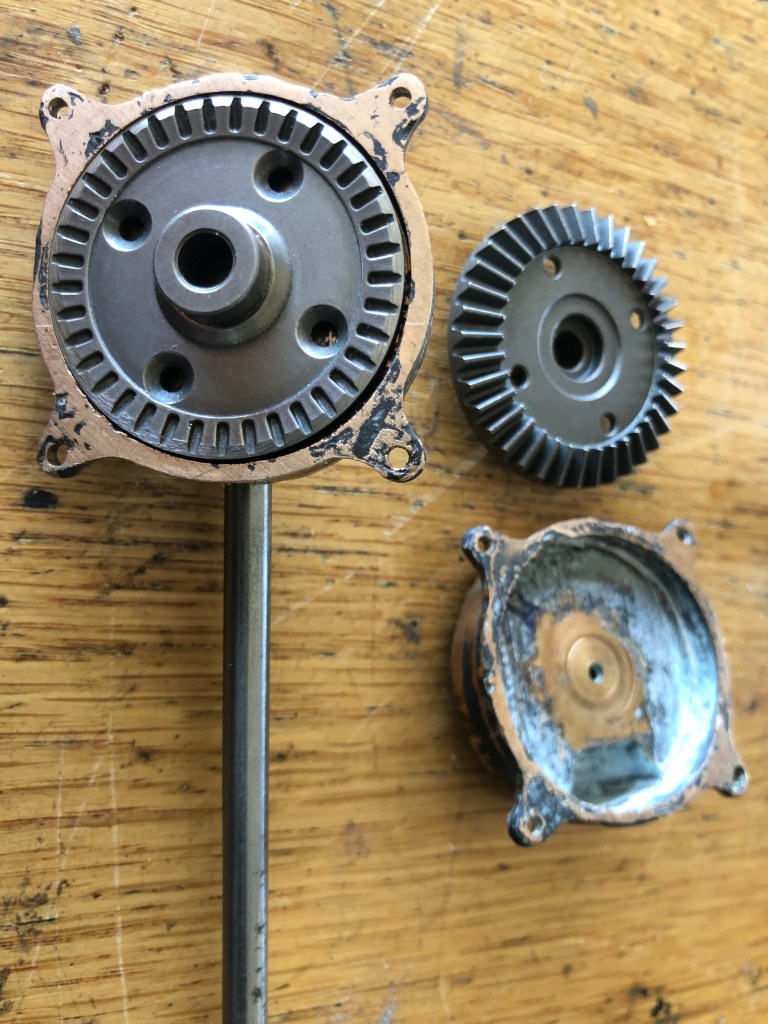
BEVEL GEARS
Top is a bevel pinion as it arrived, and a mandrel which I made. Middle row is an unmodified bevel gear which is too big for the case. Bottom row is a machined bevel gear which now fits into the case, and a pinion on shaft, which also fits into the case.
While the investment flask was cooking, I experimented with the bevel gears which move the cannon barrel elevation. I had cast some bronze gears, teeth and all, some weeks (or was it months?) ago, but was not happy with the result. So, I had bought some bevel gears on Ebay. They are spare parts for an RC model car. Not quite the correct size, but close. The metal is HARD. Sintered? But, machinable with carbide cutters. (ps. added weeks later. Even carbide cutters struggled with machining these gears, so for the second set I used a tool post grinder on the lathe. That worked well, and produced a better finish.)
It all now fits.
Now before you all start shouting at me to make the bevel gears from scratch, let me just say that I might do just that. Not yet decided.