
Look What Santa Brought ME for Xmas!
by John
Actually, I bought it myself. 71 years of experience has taught me that Santa has little clue what I really like. And although it was justified on the basis of being an Xmas present, it did not arrive until New Year’s Eve, thanks to Australia Post. It sat in a clearing facility for 10 days, about 5km from from my house. They were too busy to bring it the 5km. Maybe APO executives are still really pissed off at missing out on their Rolex watch bonuses this year, or whatever.
Anyway, it did finally arrive, and I enjoyed unboxing the bits, and reading the instructions.

IT is a resin printer. An Anycubic Mono X, which converts liquid into plastic objects, with an incredible degree of accuracy and surface detail. 0.05mm layers, which are invisible to my eyes.
On the left is a semi automatic alcohol washer, and an ultaviolet hardening light, which was strongly recommended by various users. After 2 days of use, I am SO glad that I paid the extra $$ for it.
So, why have I moved from a filament 3D printer, to a resin based printer? And paid over $AUD1000 for the gear? (if I had waited until after Xmas I would have got the gear for $100-150 less).
Well, the promise of greater surface detail, absence of visible printing lines, waiting hours rather than days for prints to finish for starters. And it is newer technology, which usually means better. But not always. And the fact that several johnsmachines.com readers have recommended the technology for my cannon parts was quite influential. (thanks guys! You were right.)
There are a few downsides, compared with filament printing.
The liquid resin does have a chemical odour, a bit like rotting fruit, but frankly, it is not too bad. Even SWMBO has not objected to my initial prints being conducted on our breakfast table.
And the resin is said to be toxic. Masks, gloves etc recommended. But I wear neither. I do wash my hands frequently, and I wipe any drops/spills quickly. If I start twitching or talking rubbish or scratching a rash, you will know why.
And the maximum print size is smaller than possible from my filament printer. That had a maximum print size of 300x300x400mm. The MonoX resin printer has a maximum print size of 200x125x245mm. That means that any larger models will need to be split into 2 or pieces, and the parts joined later. But the parts are so accurate, that joining them to make larger models is a real possibility. Bigger resin printers are available, but not at this entry level price.
Resin printing is a bit messy. And cleanliness is essential to get good results and to prevent damage to the machine components. So there are a lot of paper towels, tissues, and alcohol. And I mean 99% Isopropyl Alcohol. I bought 1 litre from Bunnings which cost $AUD29, only to discover that the cleaning machine requires 8 litres. I quickly discovered a firm which sells 20 litres for $AUD100 posted, and bought a container (at $5 per litre).
And what do I have to show you so far?
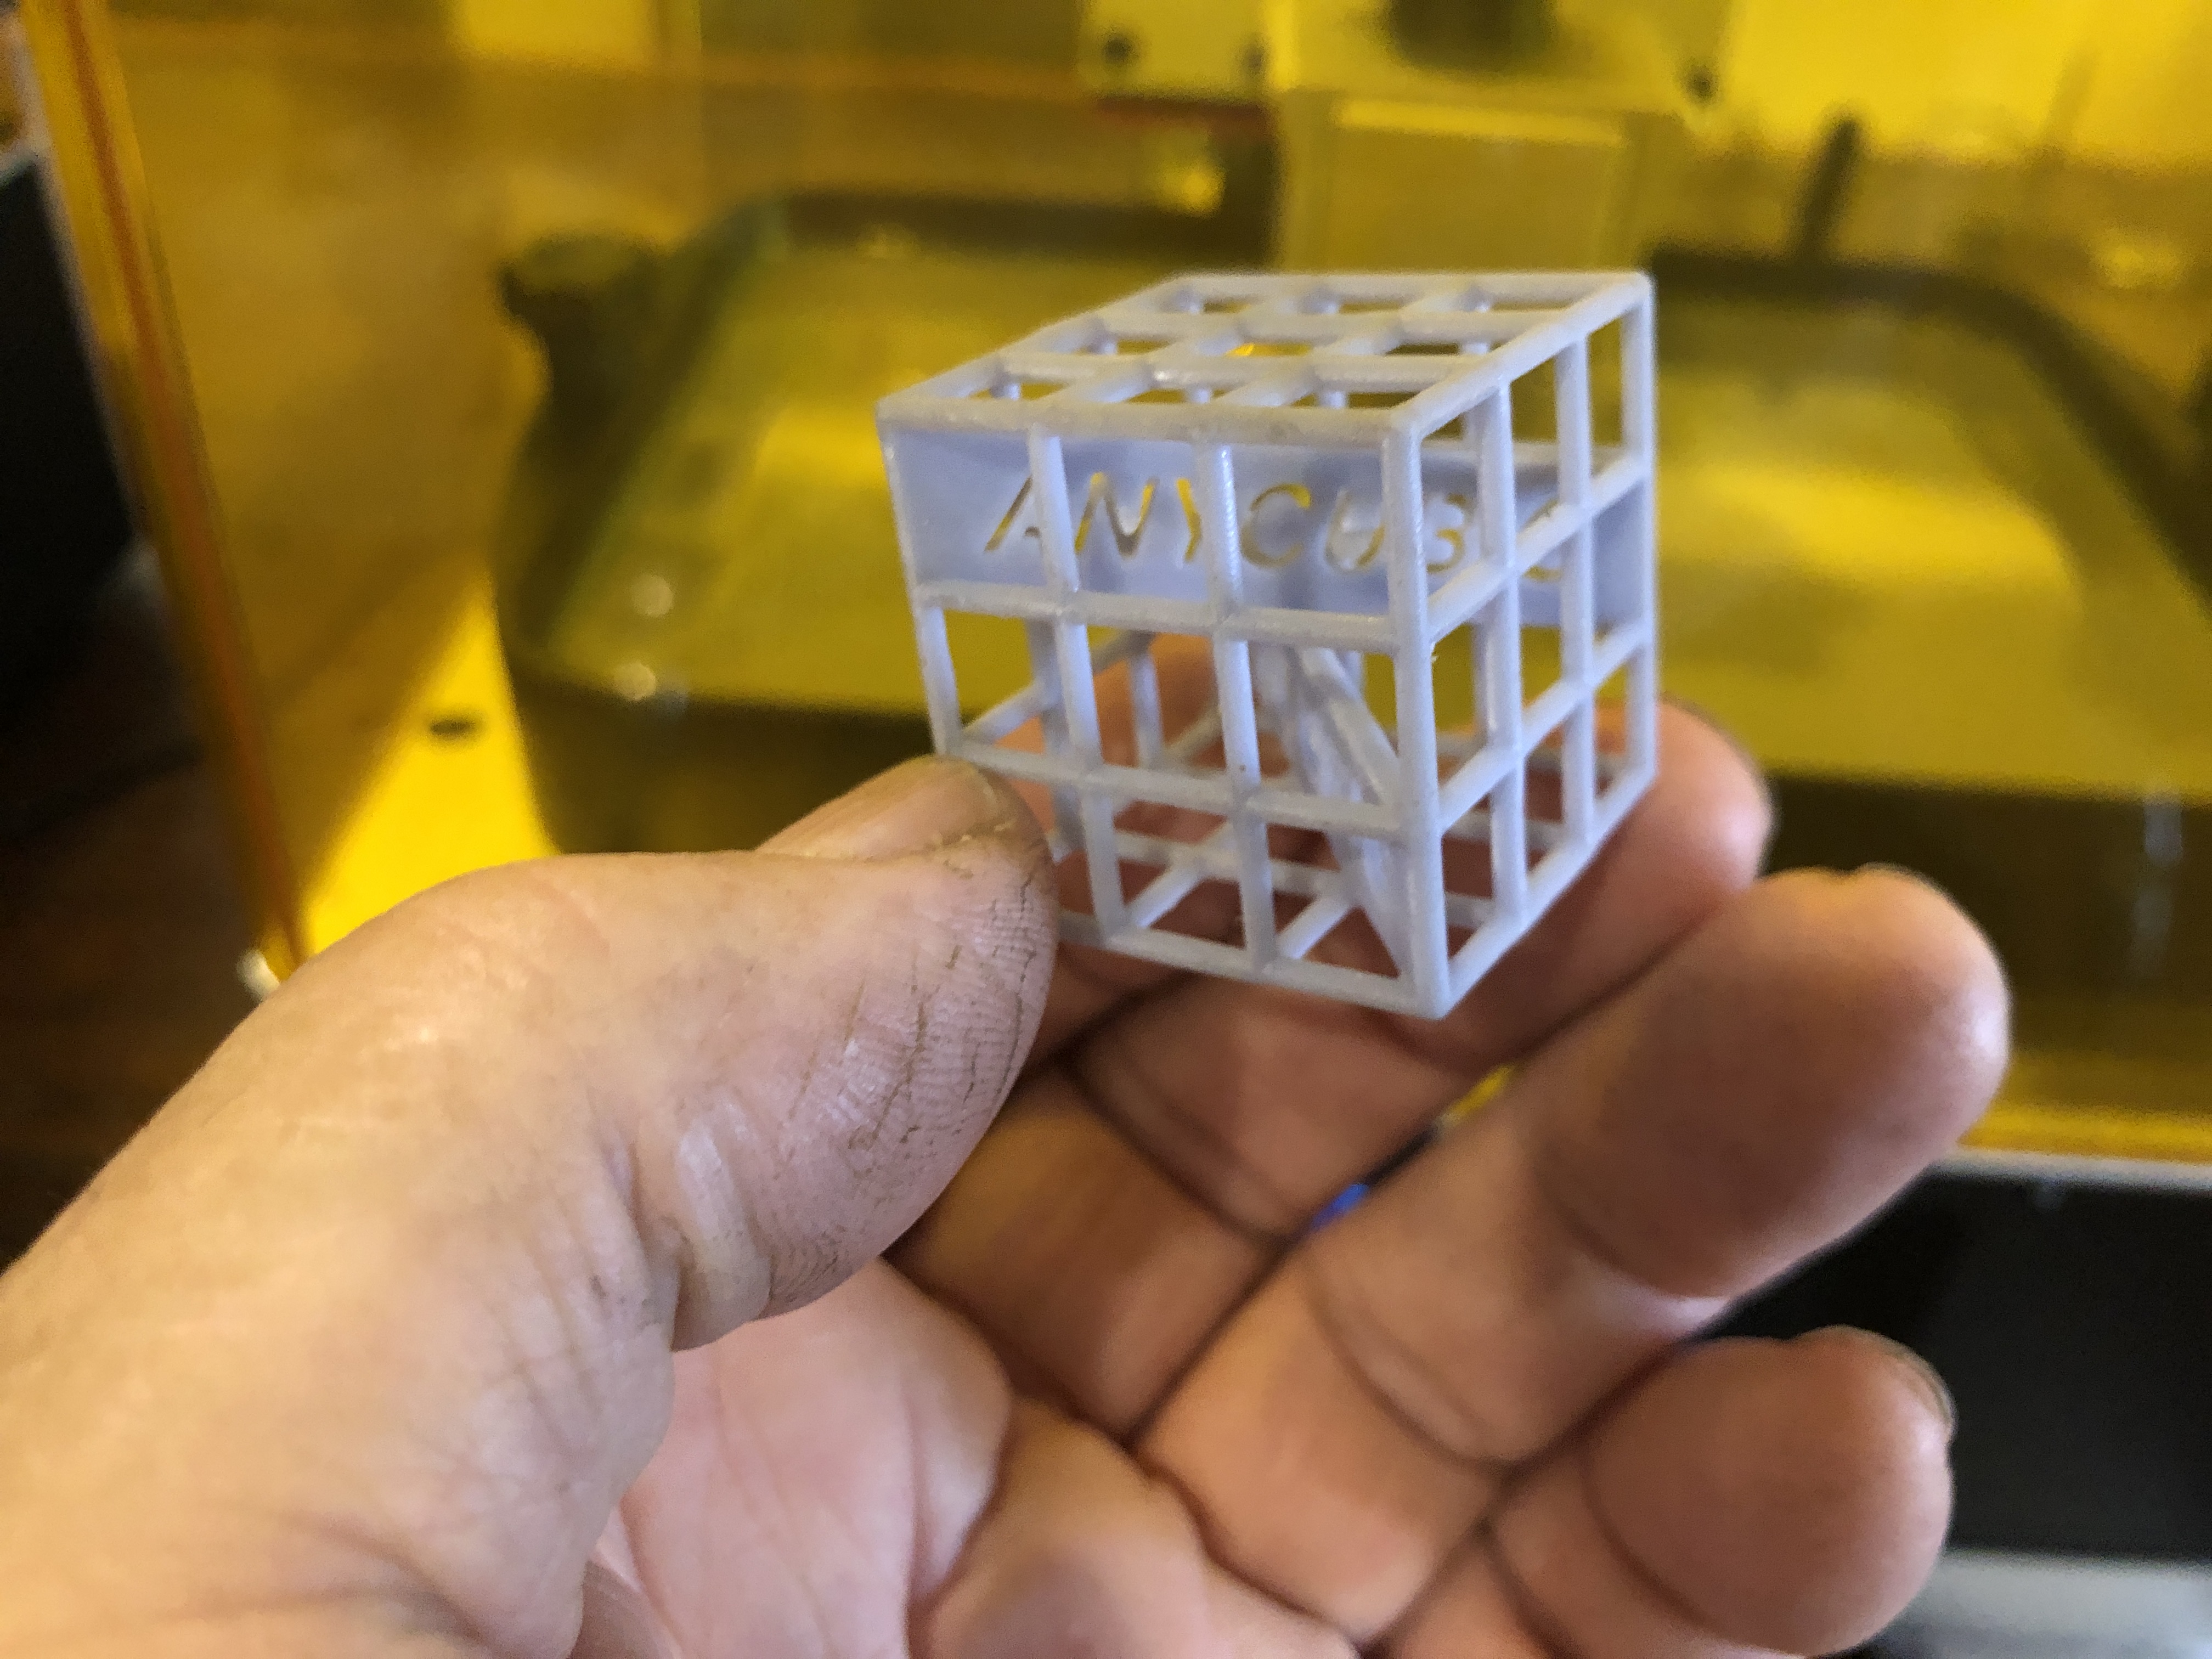
Well, this is the standard test print. It worked at the first attempt. It is quite small, and I used the default settings. Note: no visible printing lines, no lumps or bumps or support marks. Pretty good!
Then, I had a few frustrating failures. Parts which I had designed, refused to print properly. So I went online to the MonoX users group on Facebook, and I got immediate helpful advice, which did not appear in the official operators manual.
For example, my prints were so strongly attached to the build plate, that I had to destroy them to get them off.
The advice? 1. freeze the build plate and attached parts in the freezer for 30″, then heat them under hot water. They separated easily. 2. reduce the intensity and duration of the UV light to 80%, and 20 seconds (rather than the default 40 seconds). Problem solved.


I am currently printing a cannon wheel bracket, as a test. With 1mm wall thickness. I am not interested in making plastic parts, except to use them to cast bronze or aluminium parts from them. The next test is to burn them in the potters oven to see how much ash remains.
Photo to be added…..

First actual part! 36mm diameter, 1mm thick walls. Drain holes added will be plugged with wax before burn out and casting. How perfect is that surface? (it is a wheel bracket for a wooden slide under an 80pr RML Armstrong cannon.)

Excellent John, I don’t think you will be disappointed. I remember saying a while ago you need one of these. It’s exactly why I got mine so I will be watching what you do with a lot of interest. I have printed quite a few bits for my 7 inch RML and hope to lost wax cast them in brass too. It’s all modeled up in solidworks and I just need to clear some jobs out of the way. I wish there was somewhere I could send you some pics we have very similar interests! Hope you have a happy and productive new year. Oh and keep the posts coming.
Rich
LikeLike
Rich, I would be most interested to see your pics. My email is jviggers at iinet dot net dot au. John.
LikeLike
Nice! That really is incredible detail! I’ll be looking forward to hearing how the new prints work.
I’ve done a few prints with my FDM printer and have been quite happy. I’ve got an 8″/203mm diameter astrolabe pattern printed out and now I need to figure out the furnace and required equipment. Your posts about casting have been a big help.
LikeLike