
Coppering the Hull of USS Constitution model.
by John
The Mamoli plans and instructions call for applying wooden rectangles dyed green to substitute for copper metal plates on the hull. On the original ship the plates were 48″ x 14″ x 1/4″ each. And there were 1700 of them, each one fastened with ~100 copper nails.
The wooden blocks in the kit were basic, a bit rough and way too thick for the scale. The scale is 1:93. Let’s say 1:100 approximately.
1/4″ = 6.35mm. At 1:100 the copper plates would be 0.0635mm thick. About 2.5 thou”.
I wondered if I could find some narrow thin copper strip with adhesive backing on Ebay. And sure enough I found multiple suppliers on Ebay and Temu. The thickness was always the same, about 0.05mm, close enough. And pretty close to the scale thickness of 1/100th of 6.35mm/1/4″.. And various widths 3-6mm were available. And 20 meters was only $AUD15 inc postage. So I purchased 2 rolls. About double what I required, I calculated. I figured that if the copper strip was unsuitable I could revert to the wooden blocks supplied.
After finishing the first layer of hull planking, I spent some time sanding the hull reasonably smooth, then used a wood filler to fill some concavities and cracks. I was happy with the curves and contours of the hull. I retrospect I should have been more particular.
When the filler hardened I used a sealer to paint the planks and filler in preparation for the next phase, which was applying copper strips and the second layer of planks.


Next I started applying the adhesive backed thin copper strips. Each strip was 4mm wide, and 0.05mm thick. It did take quite a lot of effort and time to learn how to handle the copper strip. Think of the worst properties of fly paper, fine clock spring steel, and tissue paper. The adhesive backed copper strip has all of them! I had to throw way early efforts. I did gradually improve.
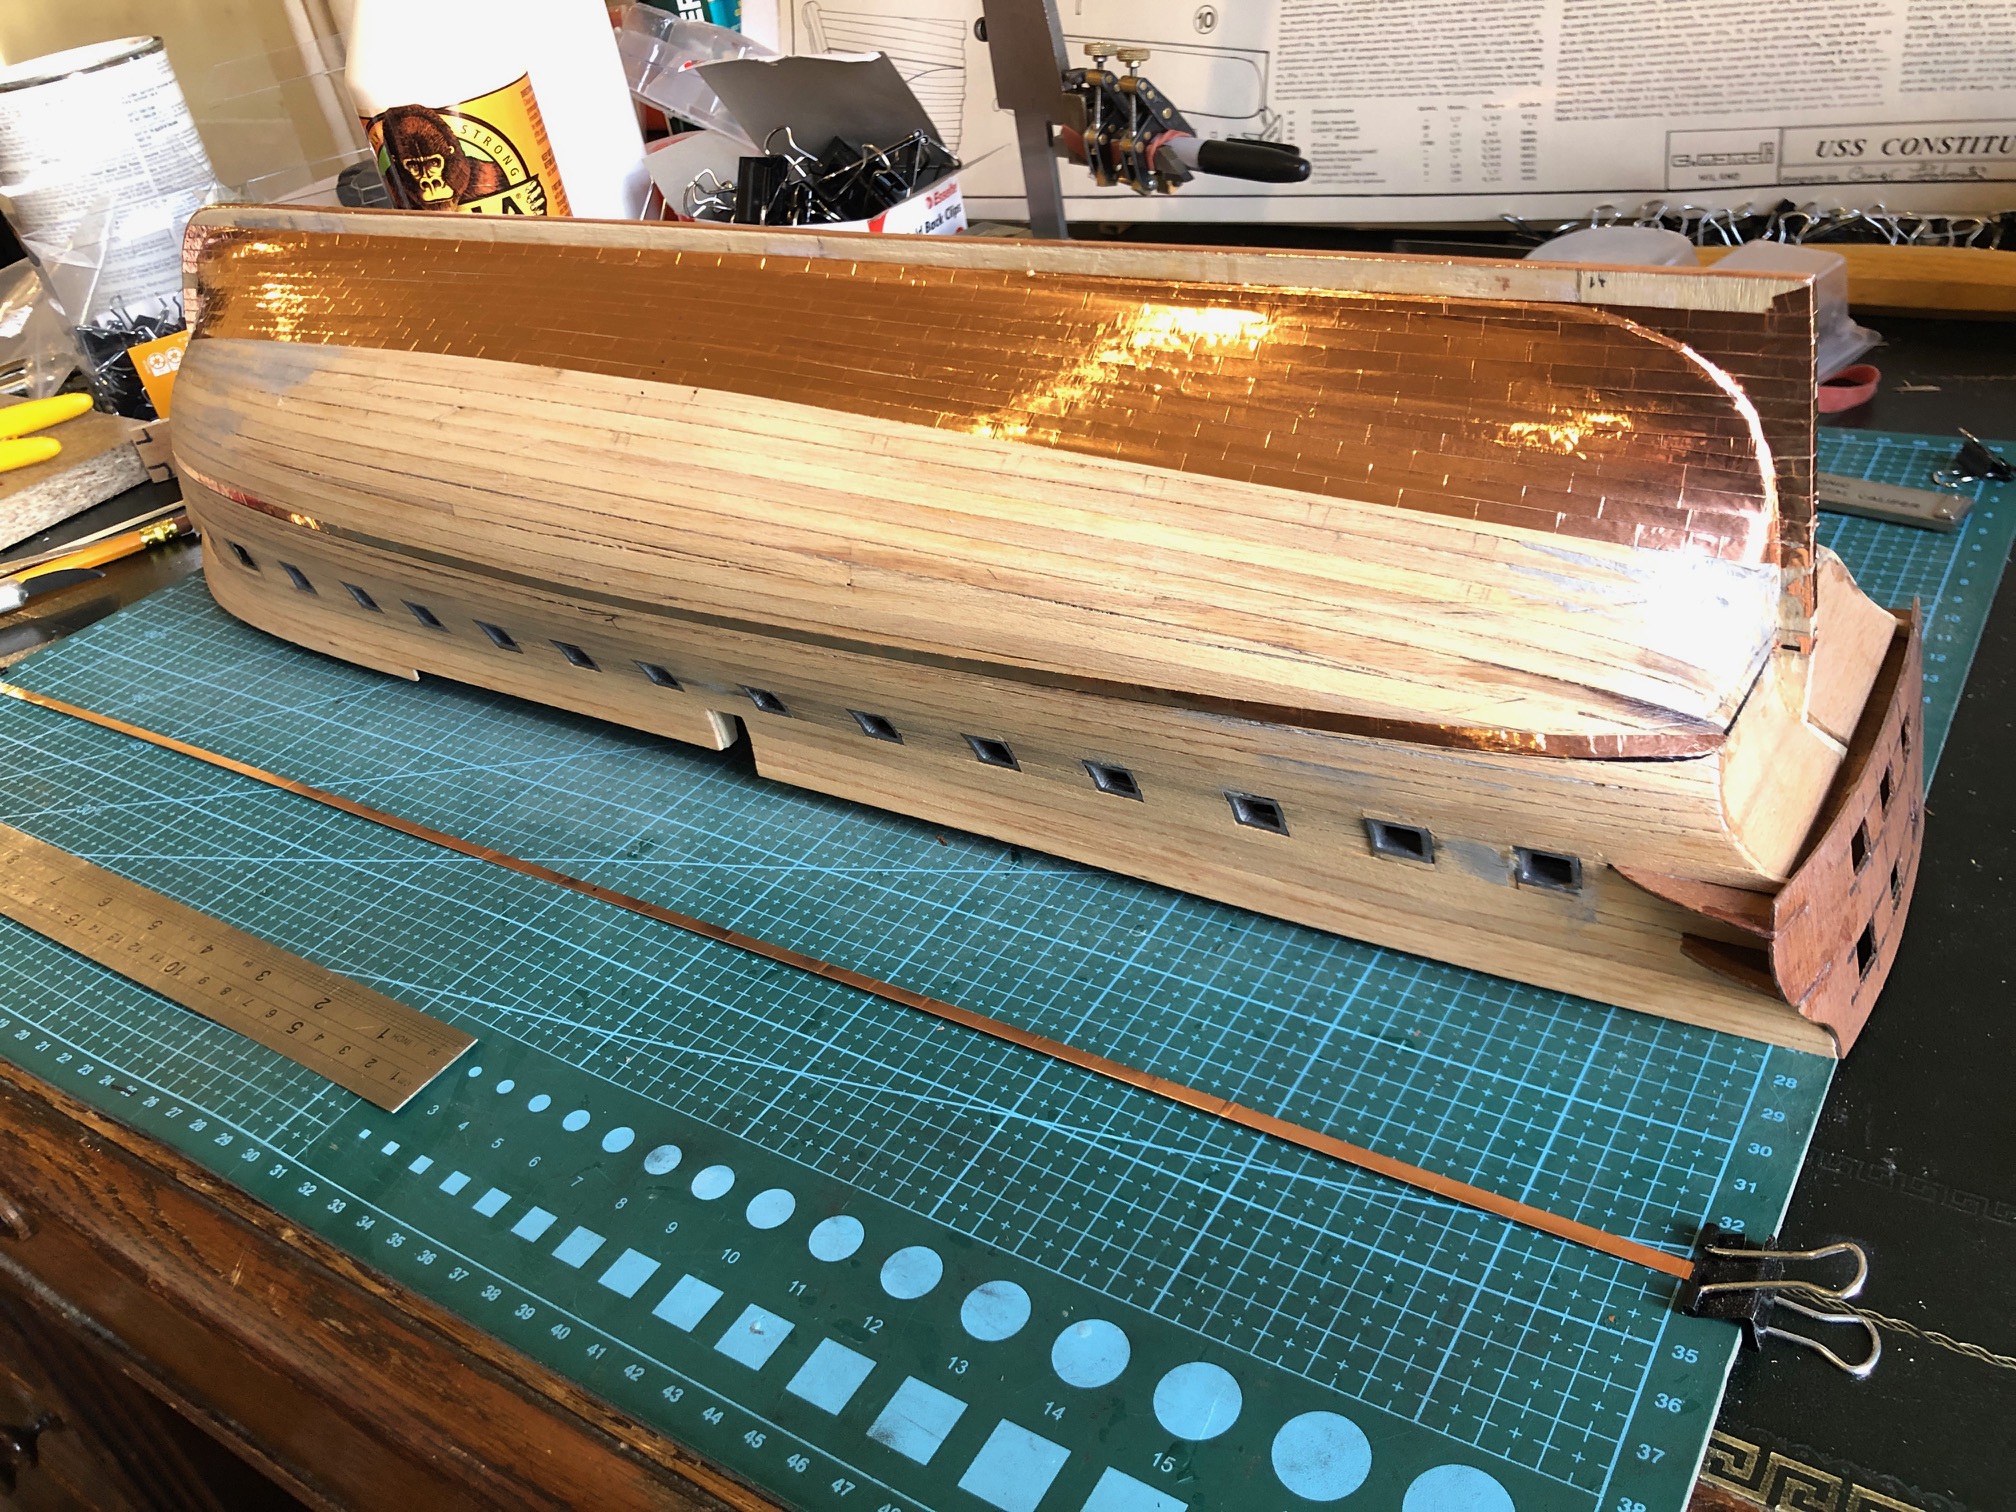


And then end result was not too bad for a first effort!

Next step is to add the second layer of planking to the bulwarks and hull above the water line.

Looking good JV. The glass of red clearly assists model building.
LikeLiked by 1 person