johnsmachines

machines which I have made, am making, or intend to make, and some other stuff. If you find this site interesting, please leave a comment. I read every comment and respond to most. n.b. There is a list of my first 800 posts in my post of 17 June 2021, titled "800 Posts"

Tag: Dardanelles gun

Trevithick Engine by Lumix, and an Ottoman cannon.

Some more photos with the Panasonic Lumix LX100M2.

P1010115.JPG

The Trevithick dredger engine, still lacking lagging and paint.  The chimney has a chimney extension connector, sitting a bit crooked.

P1010119.JPG

I am very impressed by the quality of these photos.

And some shots of the 1:10 model Ottoman Dardanelles cannon, which I made a few years ago.  It was intended as a practice run in wood, before making it in bronze.  The wooden model is 600mm (2′) long, and since finishing it I have not felt the need to make a bronze example.  I plan to visit the original at Fort Nelson, Portsmouth, in a few weeks. Watch out for a video/photographs on johnsmachines.com

P1010107.JPG

P1010102.JPG

P1010112.JPG

P1010109.JPG

I think that you will agree that the quality of these photos is excellent.  The photographer is still learning.

Turkish Bombard. The Barrel Script

Well, I bought a pair of NSK bearings for the Z axis of my CNC mill, and removed the old ones and inserted the new ones.  Cost $AUD 200.  Plus 2 or 3 half  days of  dirty heavy work.    And the problem persisted!!@!@

OK.  Time to get an expert opinion.  Here comes the cavalry.  Thank goodness for my expert friend Stuart T.

Very puzzling.  Even for Stuart.  There was some unwanted movement in the Z axis (about 2mm), despite being apparently properly installed.  Not a problem with the ballscrew or ballnut.  Even Stuart was puzzled.

“have you got any left over bits and pieces?  Is it all installed the way it was before?”

To cut the story short, we installed a thicker washer below the locknuts, and it seemed the problem was fixed.  Or was it?

Today I did another test run of the bombard mouth Arabic script.  Worked fine.  OK.  Time to finish the bombard.

IMG_4559.JPG

Here is the finished result, ready for painting.  I have used a 20 degree engraving carbide bit with a 0.2mm flat end.  There is some loss of fine detail but it is I think, adequate.  When it is painted, the filling putty above the pin screws (the white circles) will be invisible.  The engraving took a total of about 60 minutes, at 500mm/minute, 15,000 rpm.

IMG_4554.JPG

The setup.   A large angle plate clamped to the table.  The work clamped to the angle plate.

The translation of the Arabic script is “Help O God the Sultan Mehmet Khan son of Murad. The work of Munir Ali in the month of Rejeb. In the year 868.”

Turkish Bombard. The Arabic Script.

A little unfinished business on my model bombard is the Arabic script and floral decoration around the barrel mouth.

bombard-mouth

XIX.164 / 19-00164 Detail of muzzle of a great bronze gun. Turkish, dated 1464 Royal Armouries Museum, Leeds LS10 1LT Transparency tr-1185 Imacon Flextight Precision II

This is what I have managed so far….

IMG_4529.JPG

It is a practice run in scrap wood.

Some of the detail has disappeared because I used a milling cutter with an end width of 0.5mm.  Next time I will add another step using a cutter with a sharp point, and a lot more of the fine detail will appear.

That pattern took a total of 80 minutes to CNC mill, with the feed rate set at 500 mm/min.

Unfortunately my CNC mill developed a problem with the Z axis, probably due to a worn out end bearing.  I am hoping that it is not the ball screw nut.  Now in the process of removing the bearing. A heavy, awkward, dirty job.

When the mill is working again I will mill the actual bombard model and post some pics.

Computer graphics is not my strong point.  To get the CNC mill to cut that pattern I did the following..

IMG_4531.JPG

  1. Enlarged the photo, outlined the tracery and the script, then traced the outline onto tracing paper.  That 550 year old pattern is worn and hard to define in many places.  Quite a bit of guess work.  Lucky that almost no-one can read ancient Arabic script these days.
  2. Scanned the tracing and loaded the scan into Corel Draw
  3. Used Corel Draw to smooth the curves, and make 3 copies in an array of the floral design
  4. Converted the drawing to bitmap file (bmp)
  5. Used V Carve Pro to convert the bmp file to vectors
  6. Used V Carve Pro to generate the CNC G codes
  7. CNC milled the scrap wood at 16000rpm, using a 3.2mm carbide cutter

More Scale Stuff

IMG_4482.JPG

There is the 1464 Turkish bombard (black), 17 tons, 307kg granite ball;  the 1779 long naval gun off USS Constitution or HMS Victory 24lb balls; and a 32lb carronade.  All 1:10 scale.  Interesting to see them together on my kitchen table?

TURKISH BOMBARD – the real thing

I have found this video to be particularly useful in my modelling of the Ottoman bombard. The subject of this video is the gun that the Turkish sultan gifted to Queen Victoria when the Brits and the Turks were allies.  It might be one of the guns which fired on the British fleet in 1807, when it (the gun) was 343 years old!

Notice the colour.  It is aged bronze.  I am thinking about how to reproduce that colour on my model.


Length of the assembled gun 5.2m (17′)

Bore 635mm

Breech weight 8942kg

Barrel weight 8128kg

Average weight of shot 307kg

the model is at a scale of 1:10.  photos soon.  being painted.


Bombard Model. Turning the Breech


So if you watched the video, you can see that I have a problem with the big thread between the breech and the barrel, at least in the wooden prototype.  It might work better in brass or gunmetal.

The thread has a pitch of 6mm and a diameter of 60mm.   It is big.

My plan at this time, is to make a brass male threaded section, and glue or screw it into the breech.  Then to make a steel tap using the same G code, and cut a thread into the wood of the barrel.  (p.s.  note 30 Sep…  I continued to experiment with feeds, speeds, and cutter shapes in the wood.  The final result was OK so I did not make  metal threads.  That will have to wait until I do this project entirely in gunmetal or brass…  maybe never)

Turkish Bombard 1:10 scale

Just for fun I will use my newly converted CNC lathe to make a 1:10 bombard.  The original was cast in 1464 and was thought to be a close copy of the bombards which Mehmet 2 (“the conqueror”) used to breach the walls of Constantinople in 1453.  There are several of these bombards still in existence, including one in UK, which was given to Queen Victoria by the then Turkish Sultan.

These bombards were last used, against the British, in 1807, when a British warship was holed with substantial loss of life.  Pretty amazing for a 340 year old weapon.

images

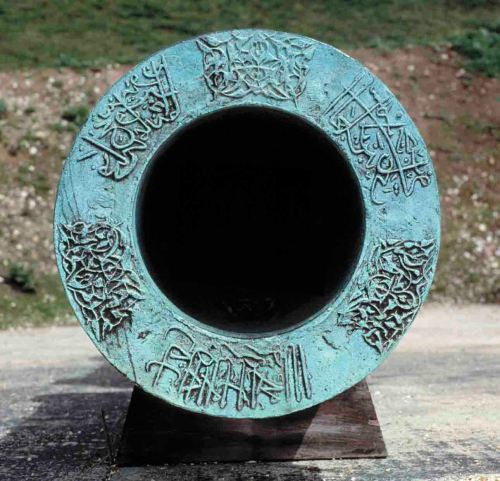
5.2 meters long, 1.060 meter diameter. 16.8 tonnes.

b281d1ba4455df20d7b832411bb00443

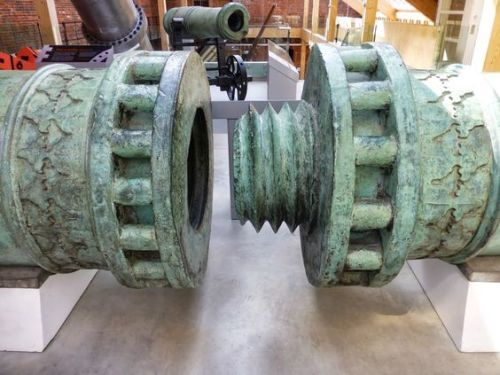
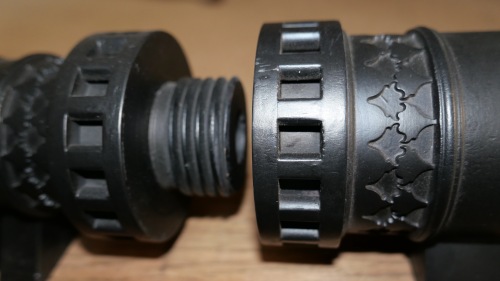
The large thread connected the halves.  Easier transportation, and casting.


images

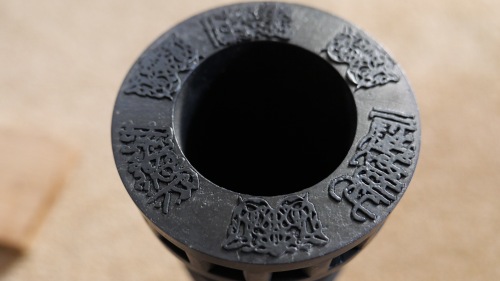
Is this Turkish or Arabic?

images

Granite balls are 630mm diameter.


tembokkotakonstantinopel

A reconstruction of the walls of Constantinople, with moat.  Almost 1000 years old in 1453  

walls-of-constantinople

And as they are today.  Massive.  High.

29962555-Huge-siege-the-final-assault-and-fall-of-Constantinople.jpg

Huge siege cannon used in the final assault and fall of Constantinople in 1453. Diorama in Askeri Museum, Istanbul, Turkey.  The bombards were probably dug in, to manage the massive recoil, and concentrate the aim at a particular wall section.  There is a wooden structure built around the cannon in the background of this modern picture.  As far as I know there are no surviving  wooden structures like this.  Nor have I come across any old pictures, but if anyone knows of any I would be very interested.  The bombards took about 3 hours to cool, cleanout and reload.  

p1090990.jpg

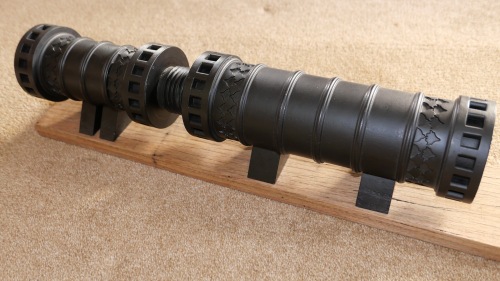
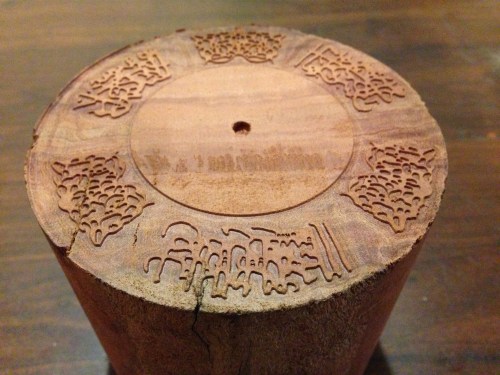
My model will be about 520mm long.  I would like to make it from bronze, or gunmetal as in the original.  Any mistakes will be costly.

So I have decided to make a prototype in wood.  That will test my drawing, the machining procedure, and the final appearance.  Not to mention how the CNC lathe will handle the task.

I will use a very dense, tight grained Australian hardwood (red gum).  The wood was salvaged when my house stumps were replaced with concrete.  Some was used to make parquetry, and the rest was put aside for possible future use.  Such as this.

IMG_4313.JPG

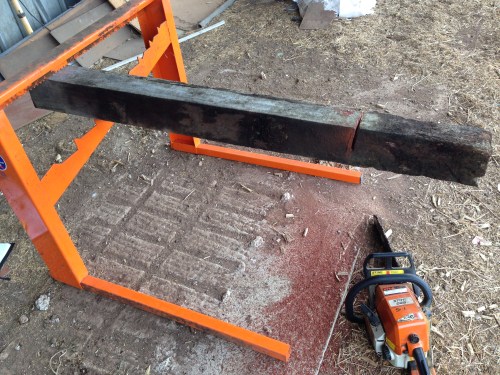
About to cut off the below ground section of a 70 year old house stump.

IMG_4320.JPG

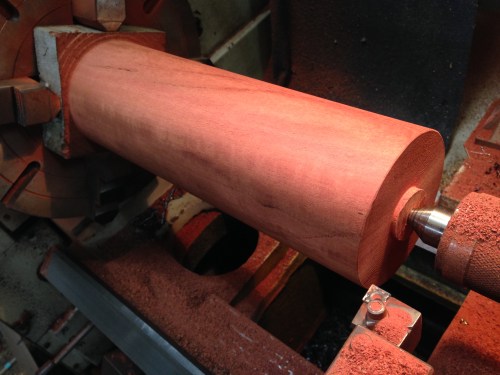
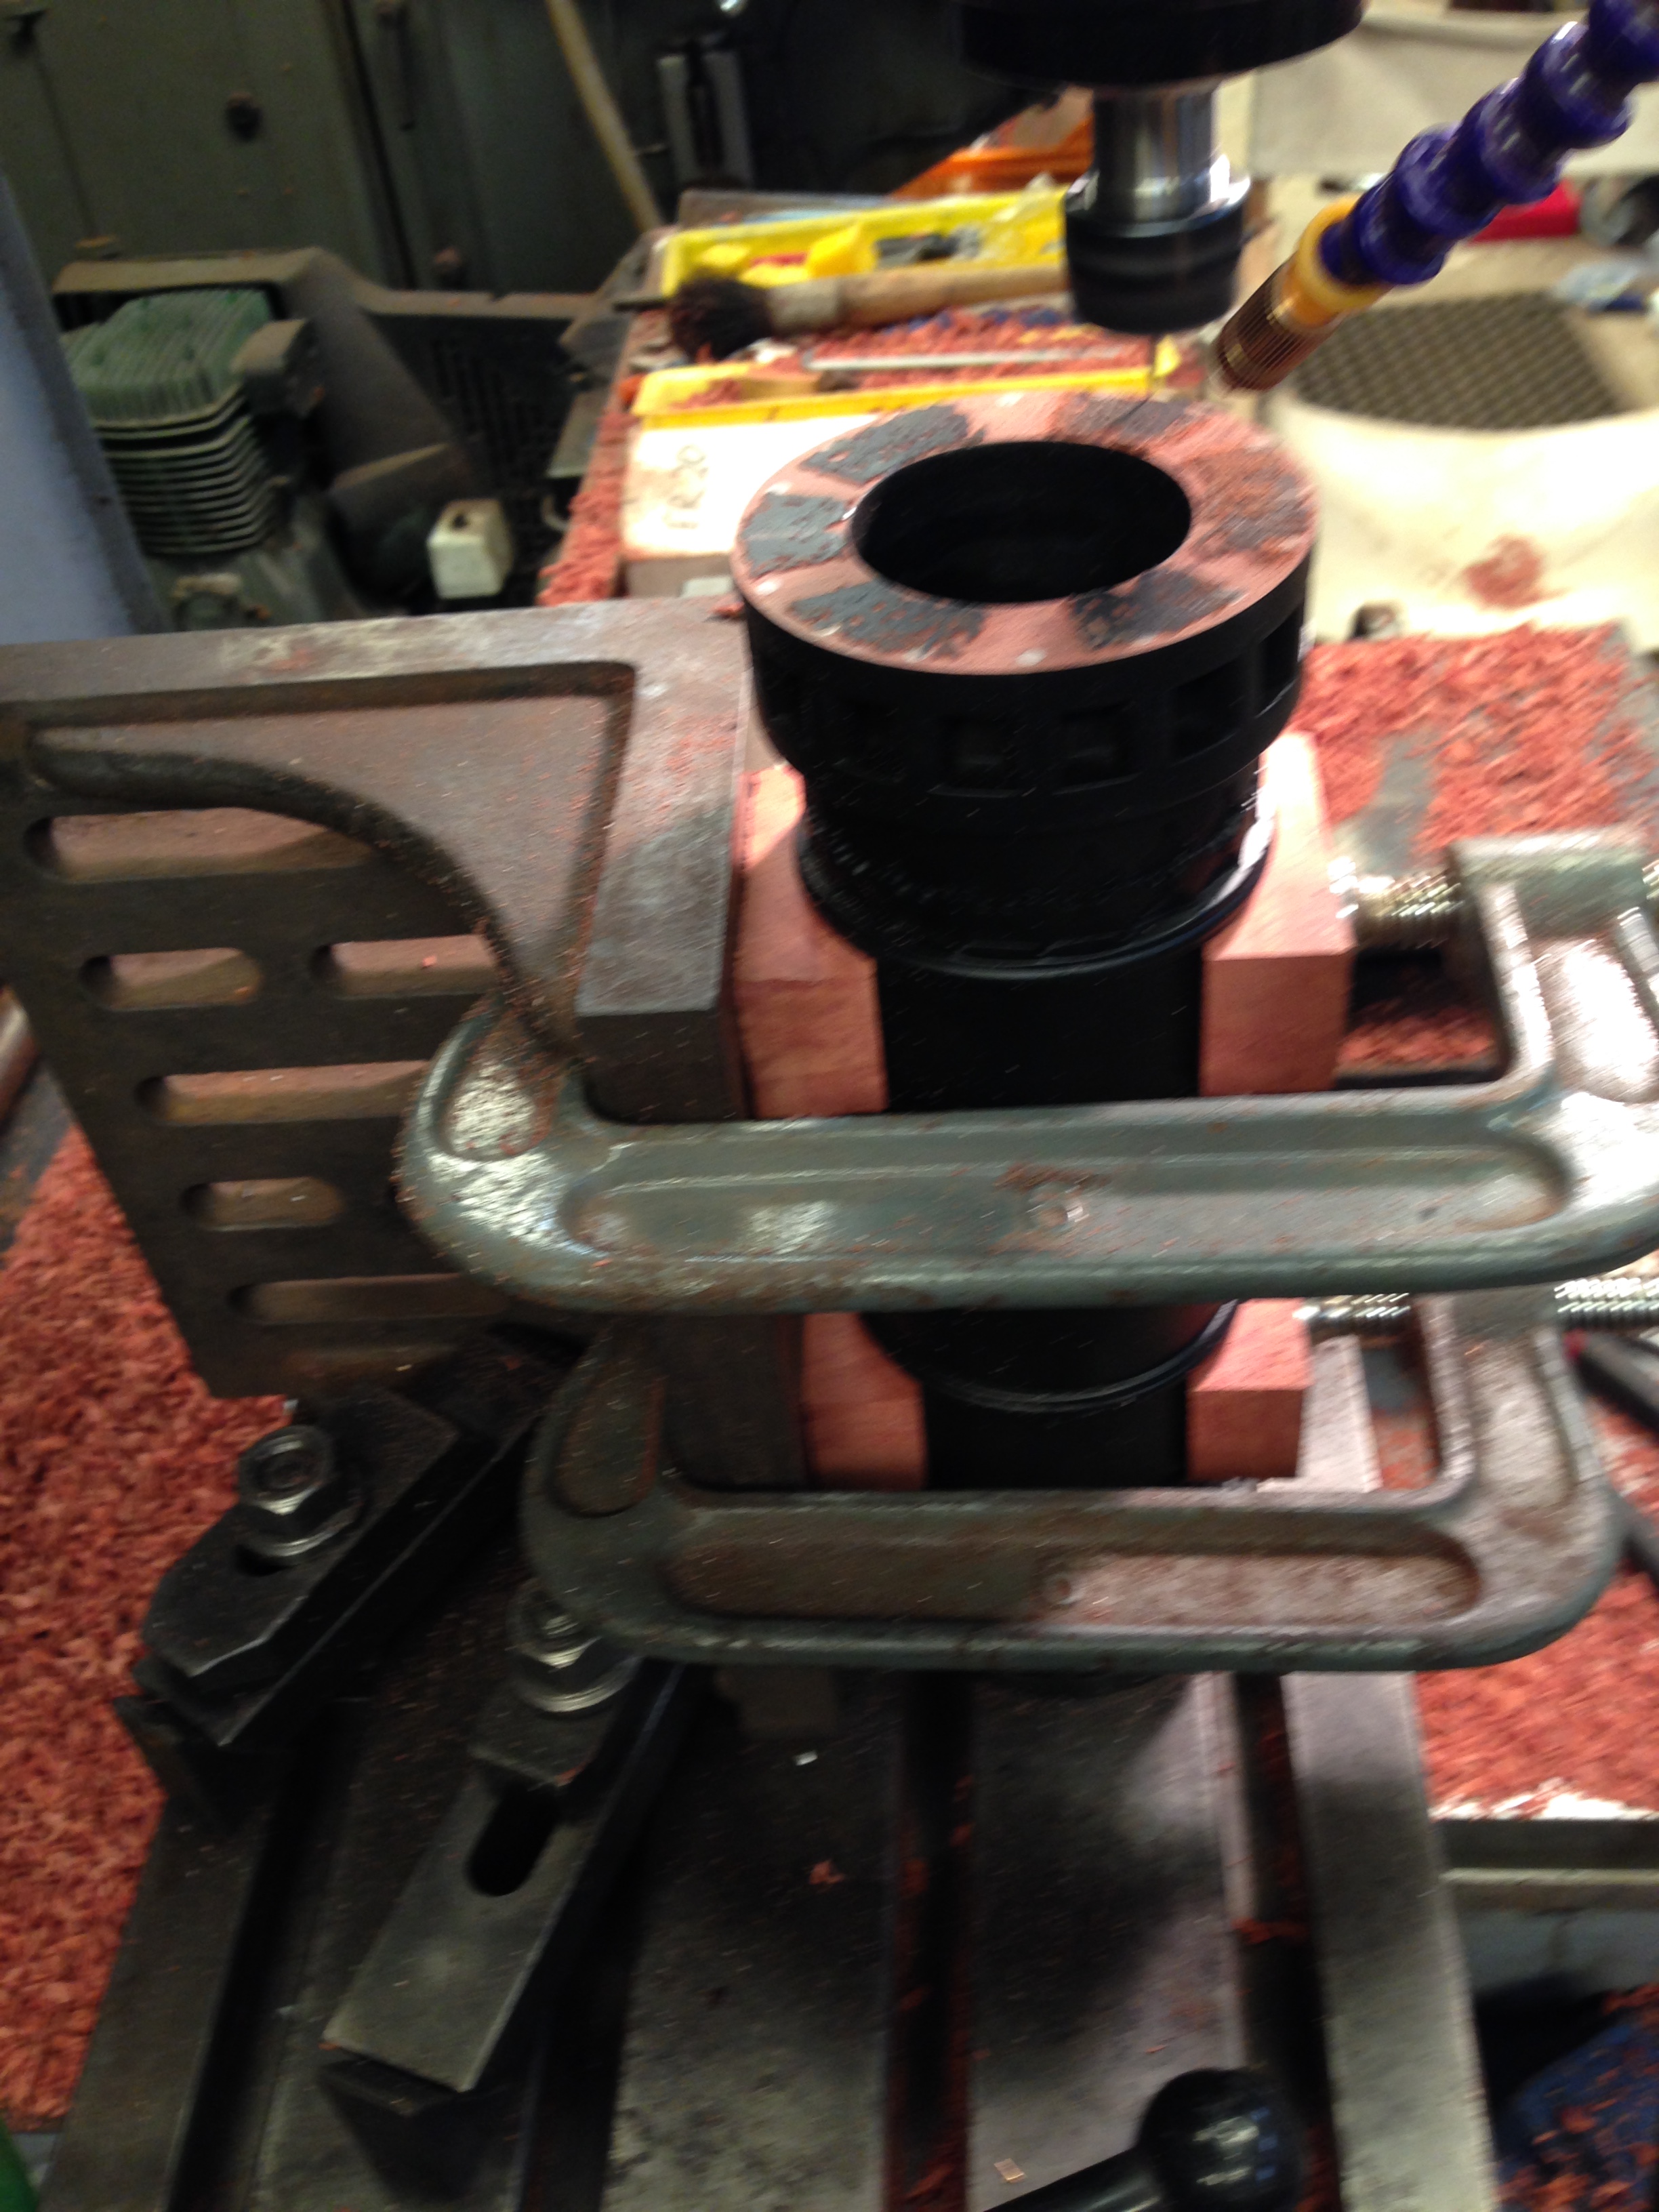
A 5hp metal lathe with a tungsten bit chomps through the hard dry wood.

IMG_4322.JPG

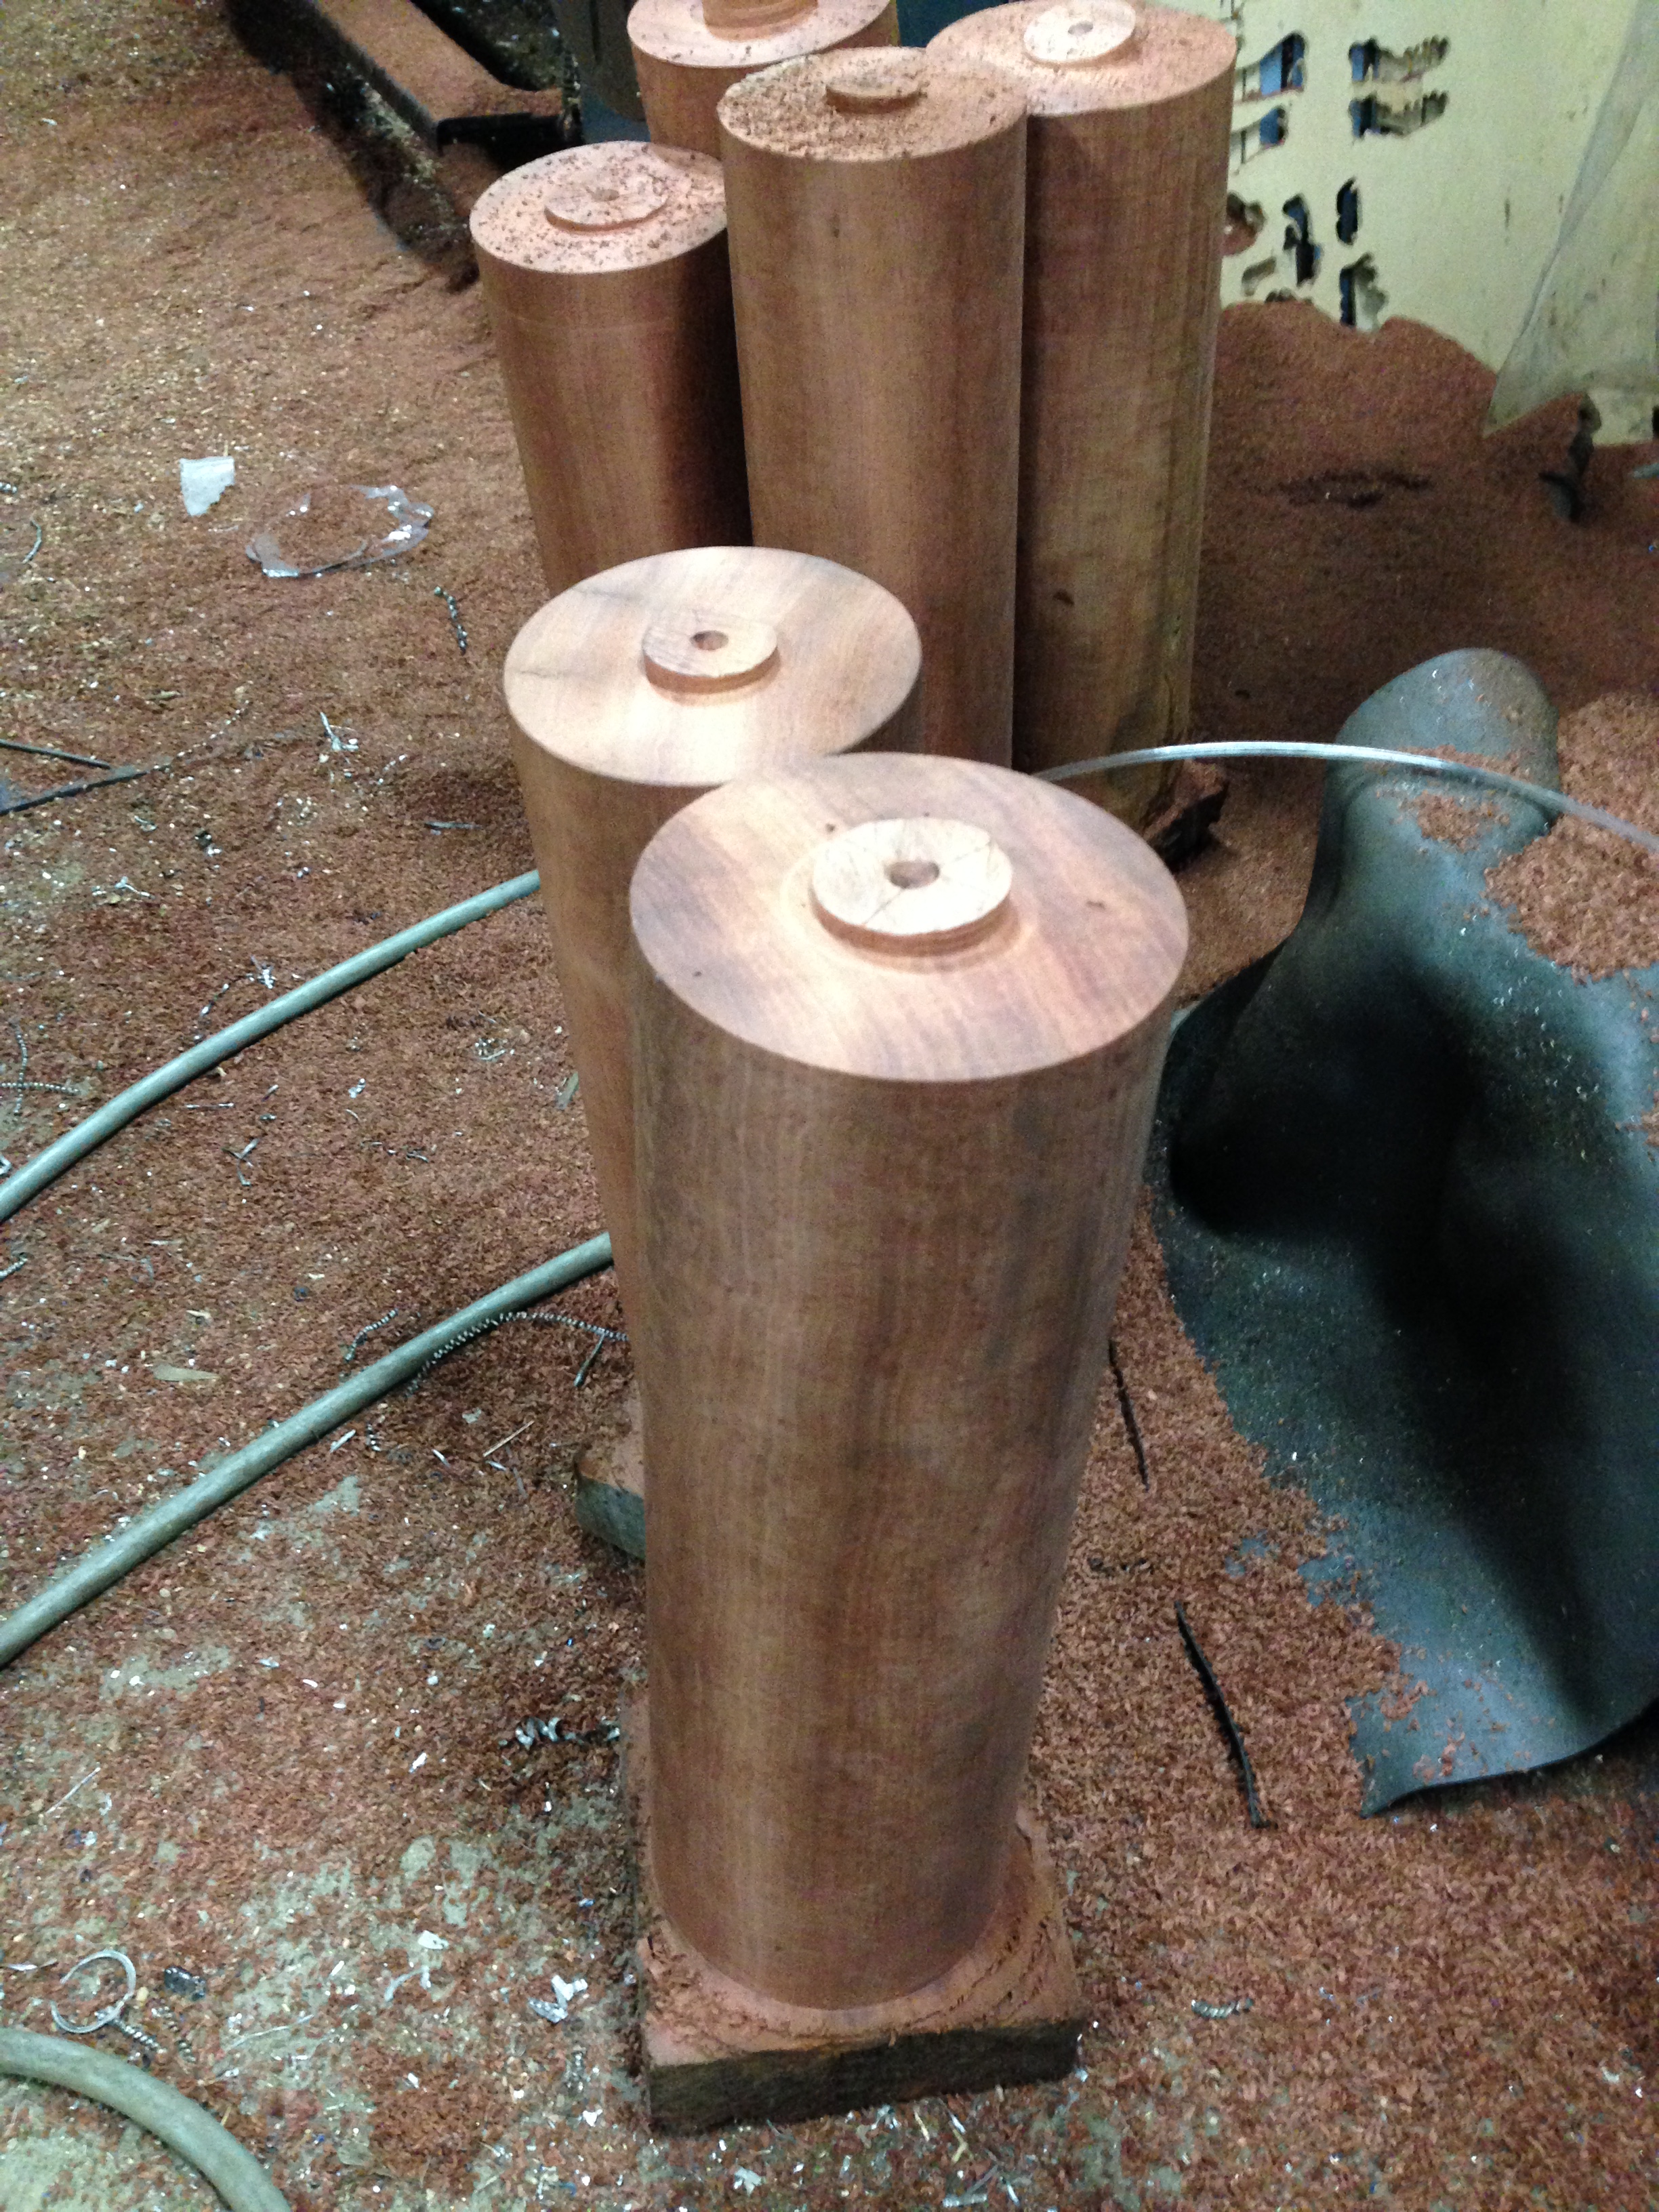
I turned 6 lengths before I found 2 that were satisfactory.  The rest had sap holes or splits.

I have used Ezilathe to generate the G codes.

to be continued….