johnsmachines

machines which I have made, am making, or intend to make, and some other stuff. If you find this site interesting, please leave a comment. I read every comment and respond to most. n.b. There is a list of my first 800 posts in my post of 17 June 2021, titled "800 Posts"

Tag: huon pine

Bellerophon. 2nd Planking Underway.

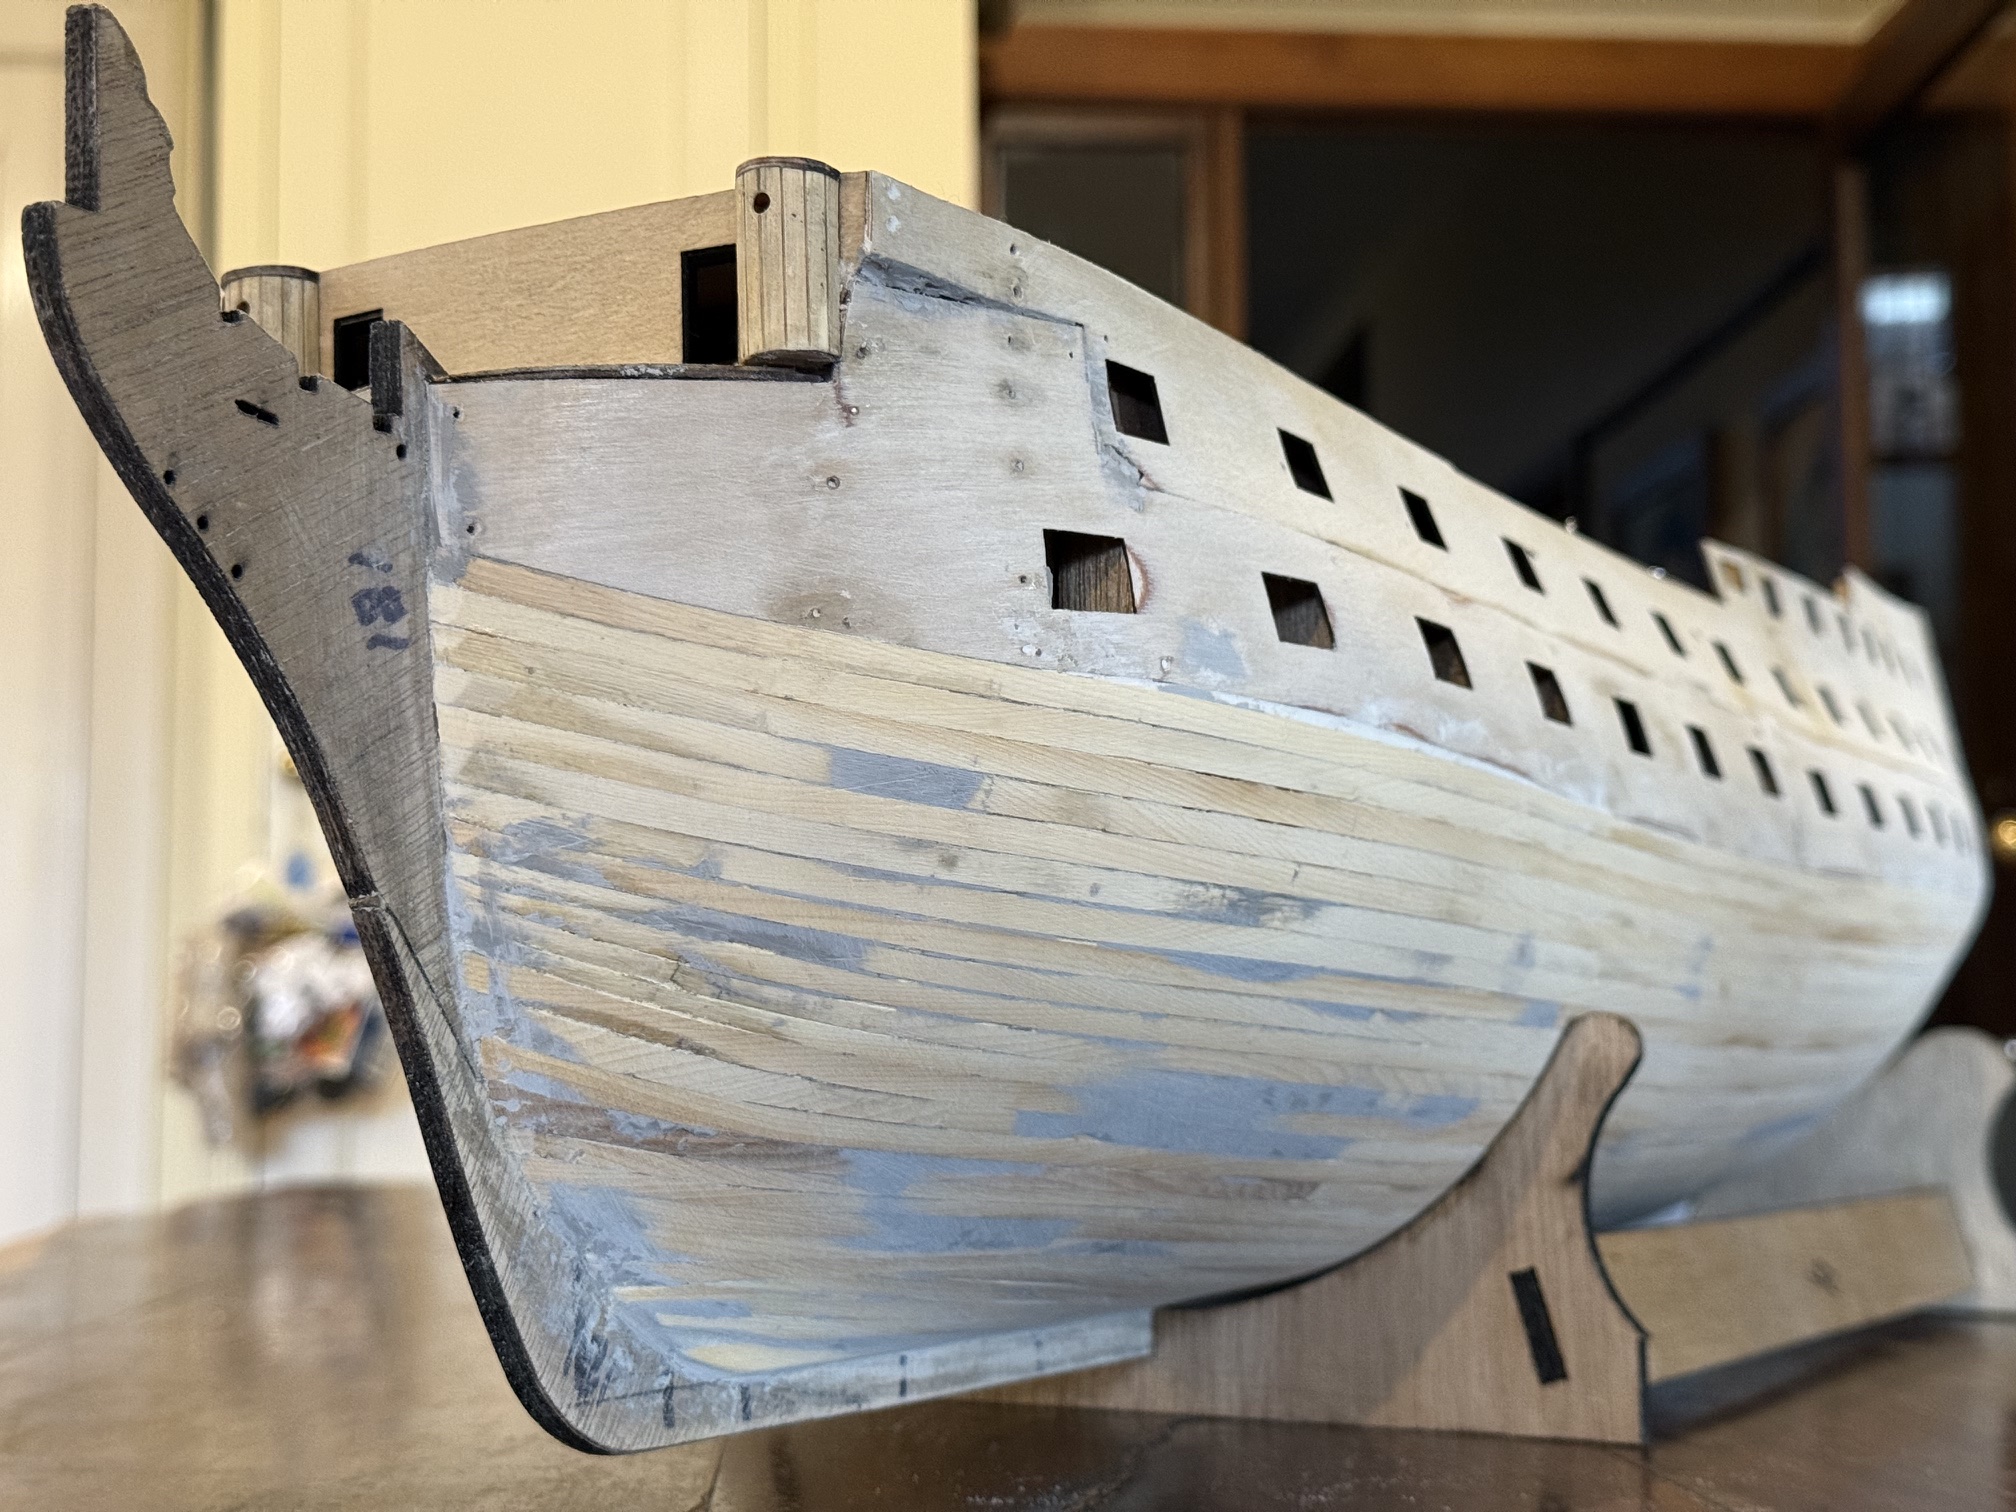
I finished the first layer of planking the Bellerophon hull a week or 2 ago.

Today I commenced gluing on the 2nd layer of hull planks.

The interval was taken up with other stuff. A visit by a relative who was in our region and was keen to catch up with his Geelong rels. He is a very interesting person and highly respected member of the younger generation (well, everyone are members of a younger generation these days..) and we always enjoy his company. He is an officer in Australia’s military, 5 tours of duty to Afghanistan, and other foreign assignments, and a growing young family. Plus we share a love of woodworking and furniture making. So we talked almost non stop for the couple of days here.

And I have been considering options about 2nd layer planking.

The plans which I have been using are based on 2 layers of planking, but my first layer was so curvaceous and smooth that I did considering not adding a second layer. (see previous posts). But some of the early build details were definitely based on the 2 layer method, and eventually I gave in and fully committed to 2 layers.

Having made the 2 layer decision I gave considerable thought to which wood to use. The second layer planks are thinner (1mm thick) , tend to be fully covered by paint or copper, and do need to manage some sharp bends and twists. The plans call for black walnut, which is probably imported from USA. I used walnut on my USS Constitution model, and it is reasonably flexible and quite attractive. I have a few sticks left over from Constitution, and I was tempted to buy some more.

But meanwhile I have been using Tasmanian Huon pine for the first layer on Bellerophon, and it is just superb. Incredibly flexible, tight grained, and smells lovely when machined. Plus I have some left over from the first layer. To use it for the second layer I will need to machine 90-100 more “planks” of 1mmx5mm x 900mm, by sawing, and drum sanding thicknessing. That takes time. I have spent a couple of half days so far, with about 50% of the material prepared.

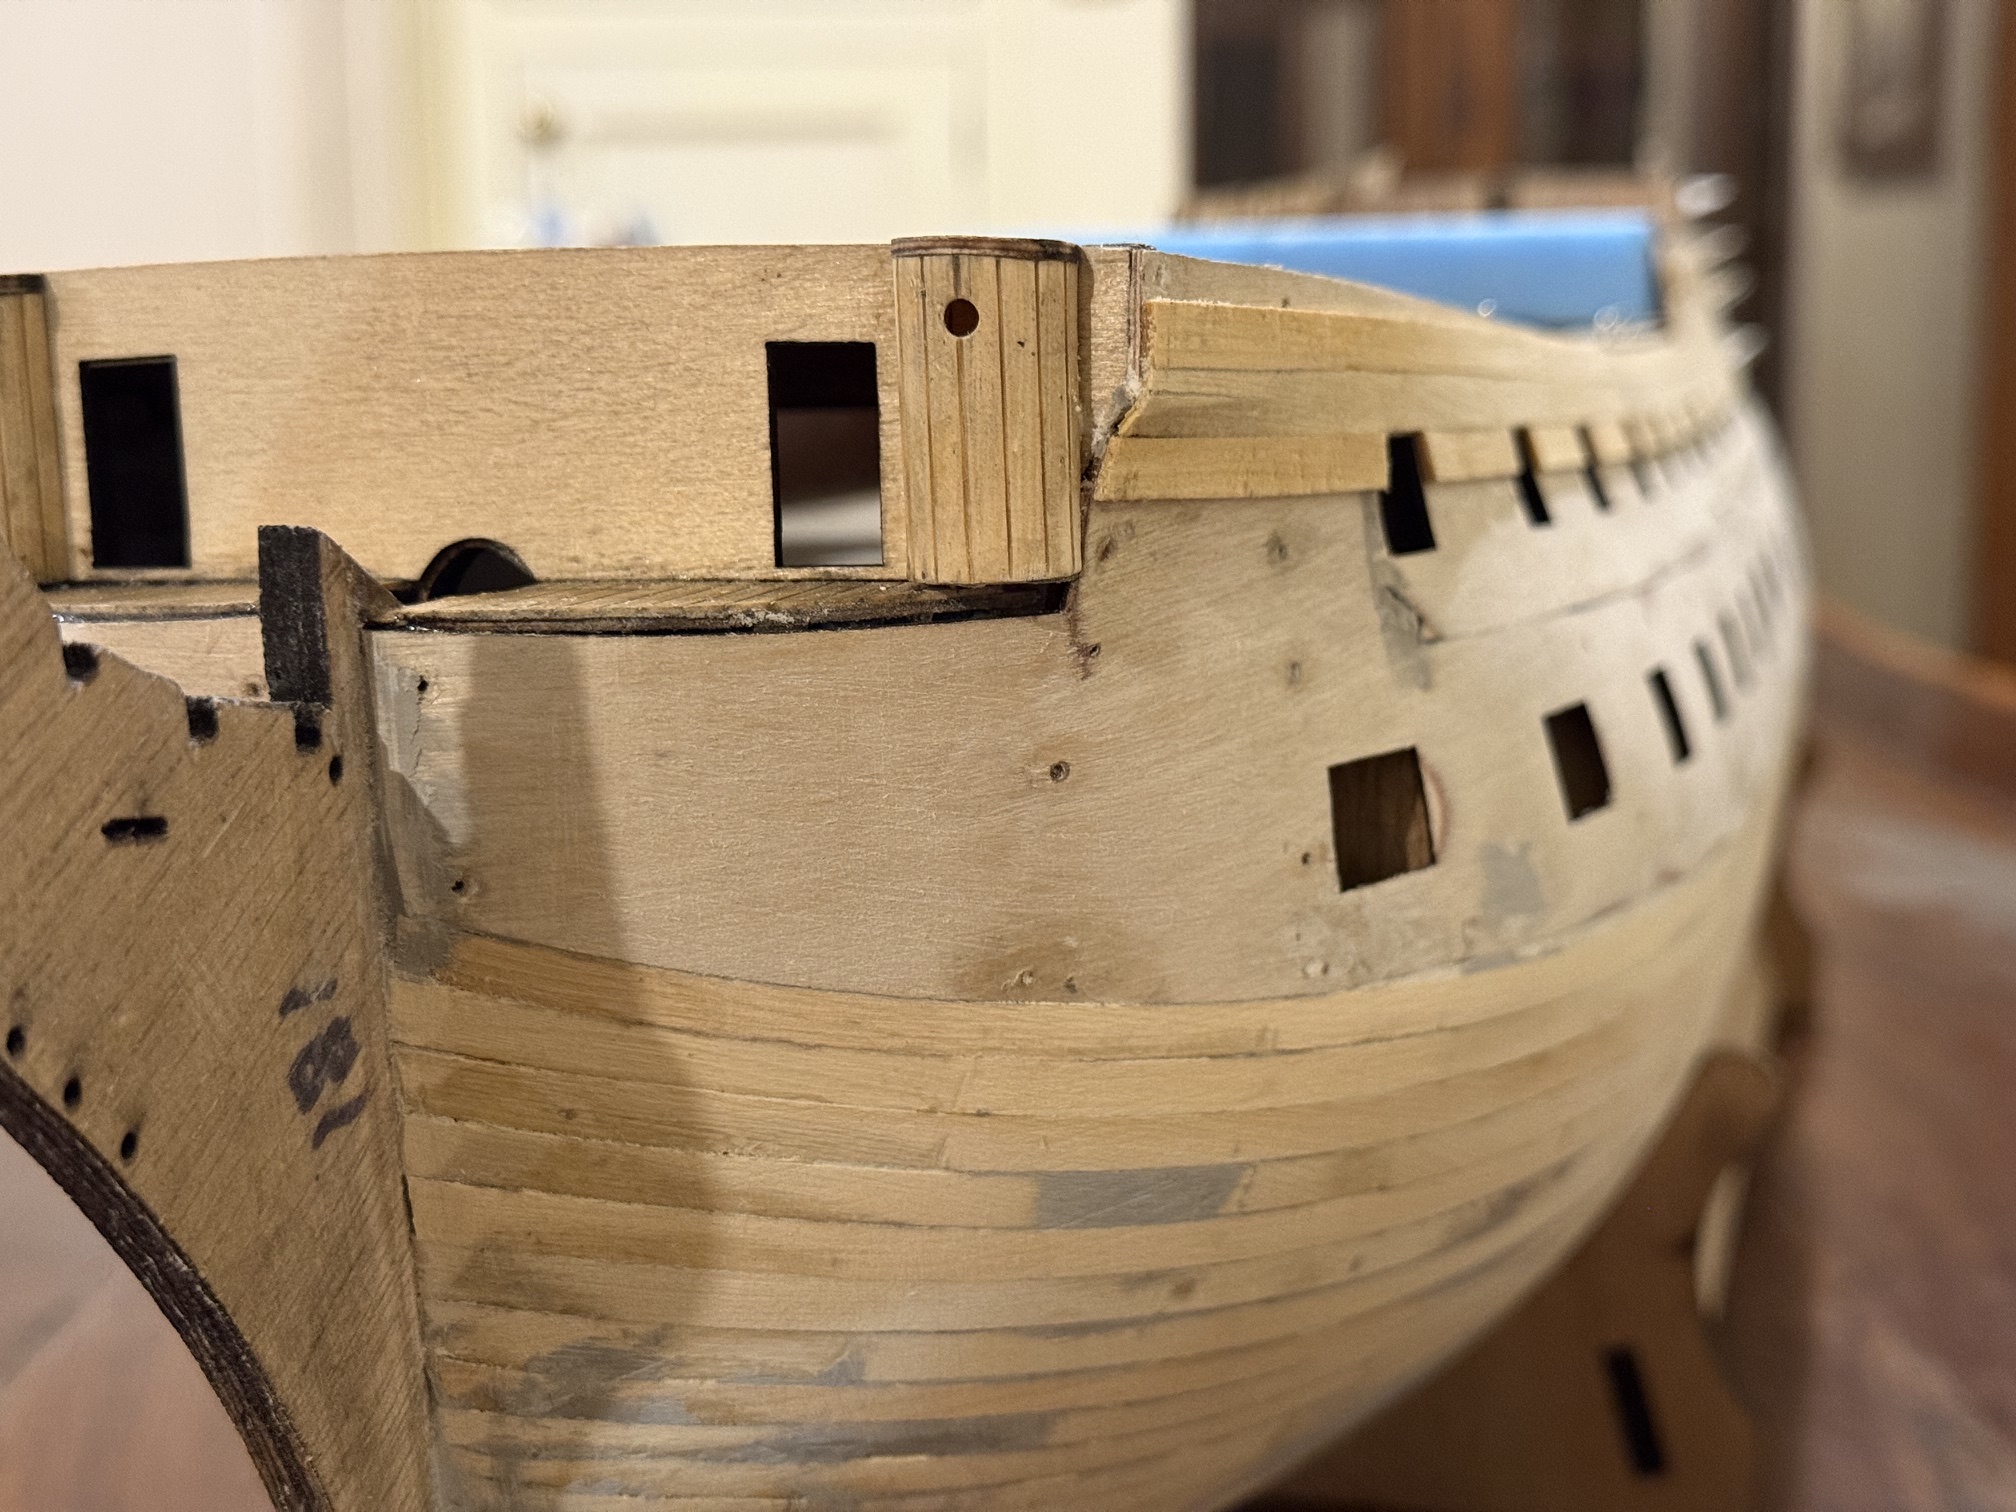
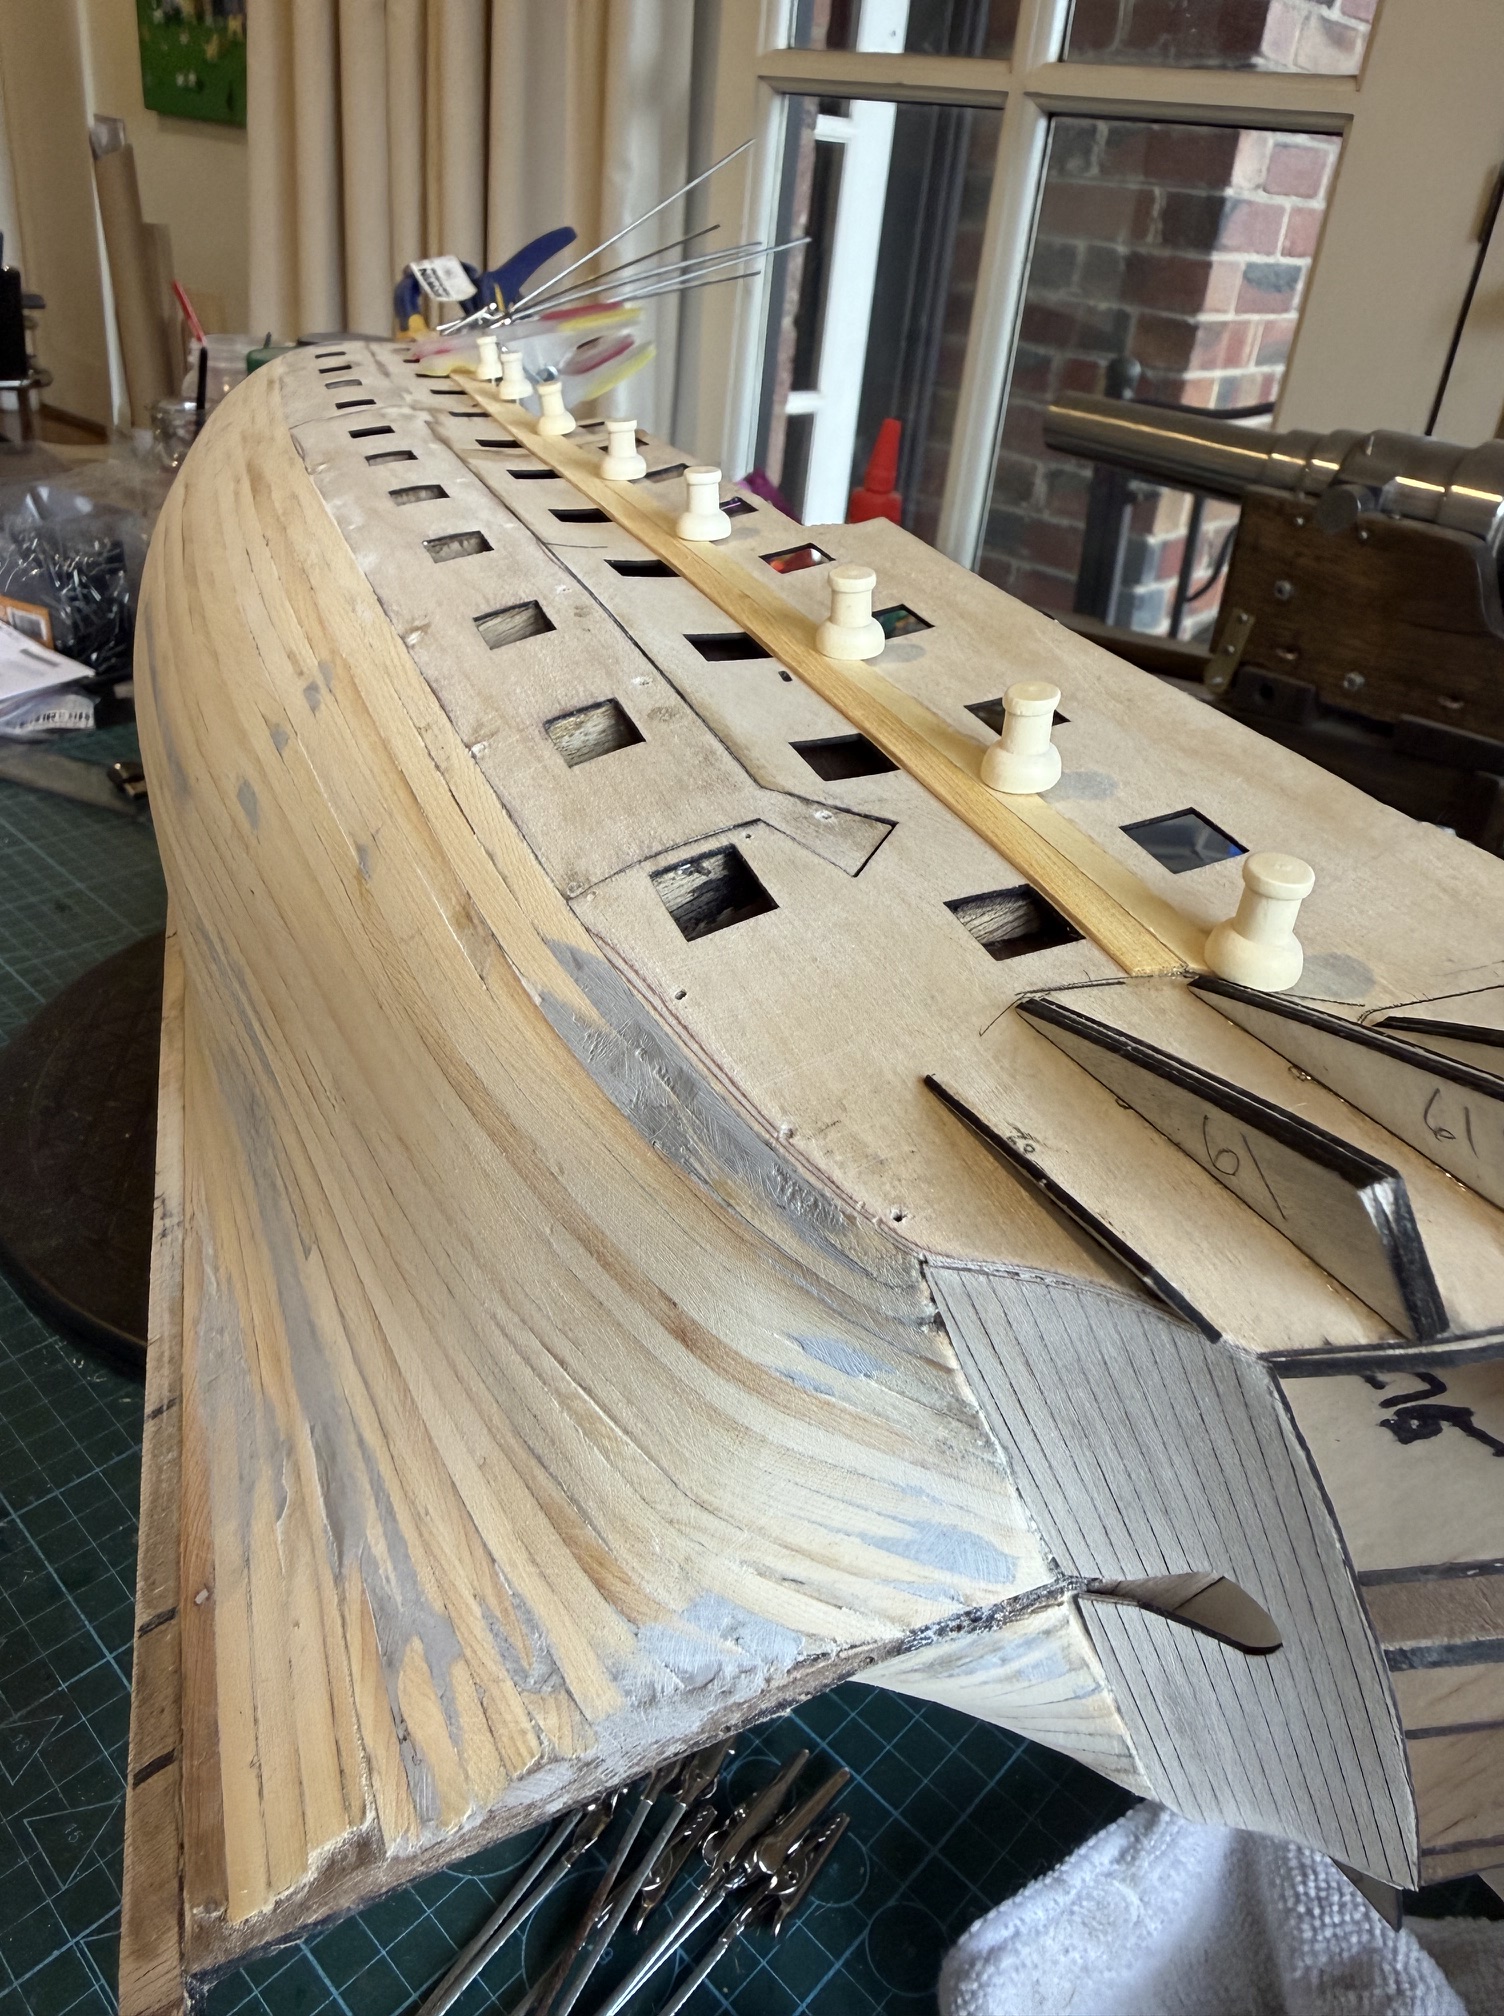
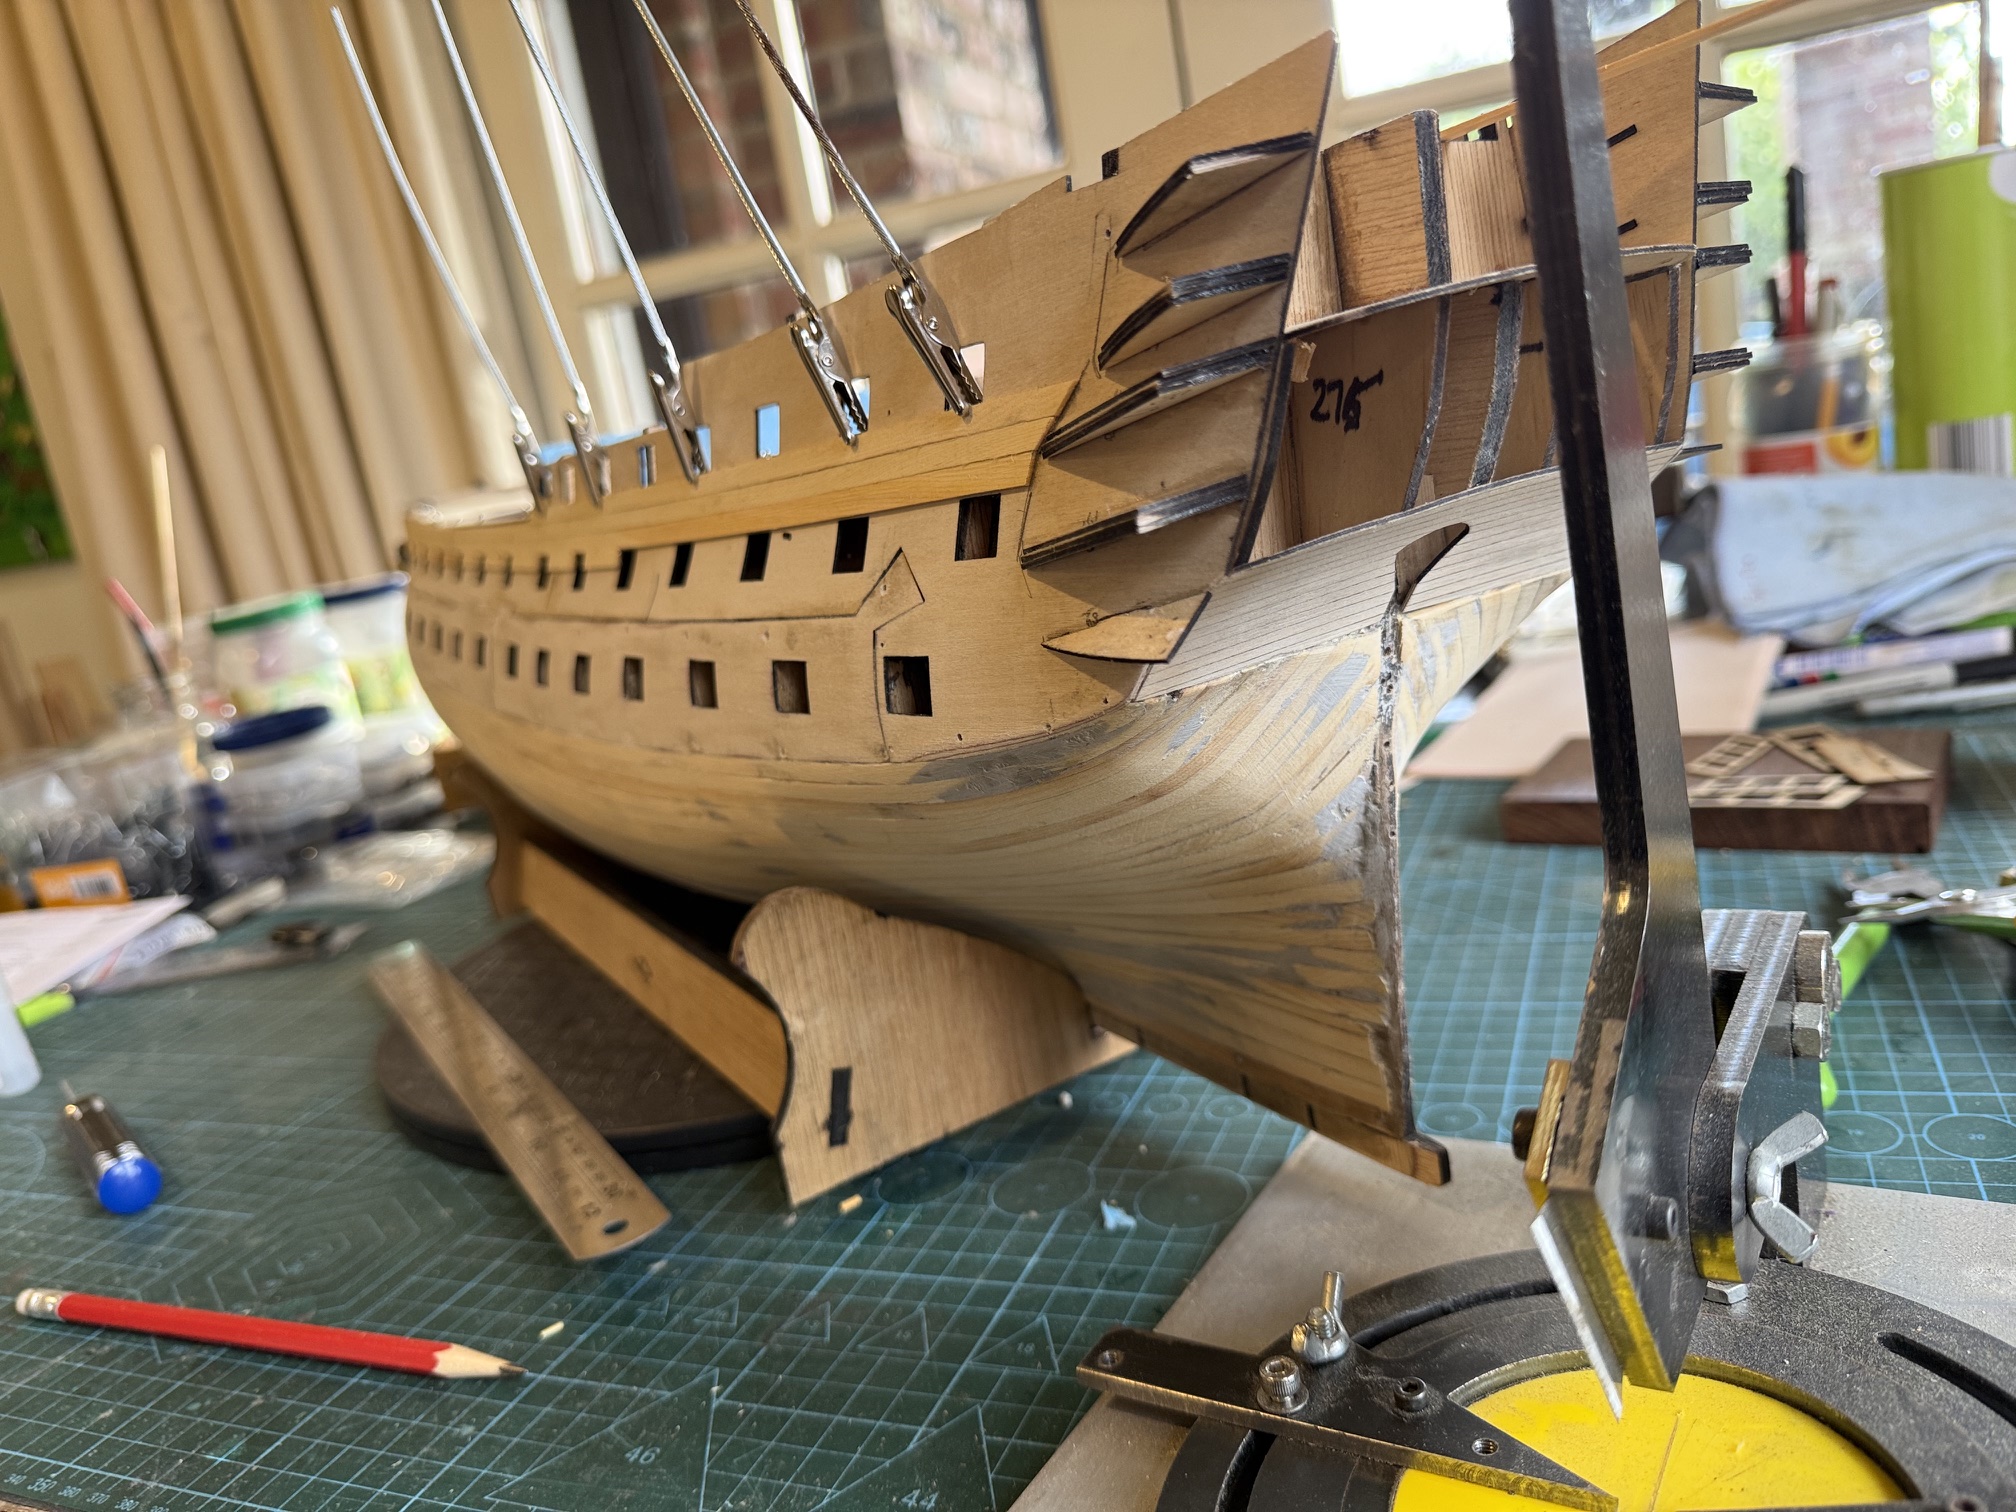
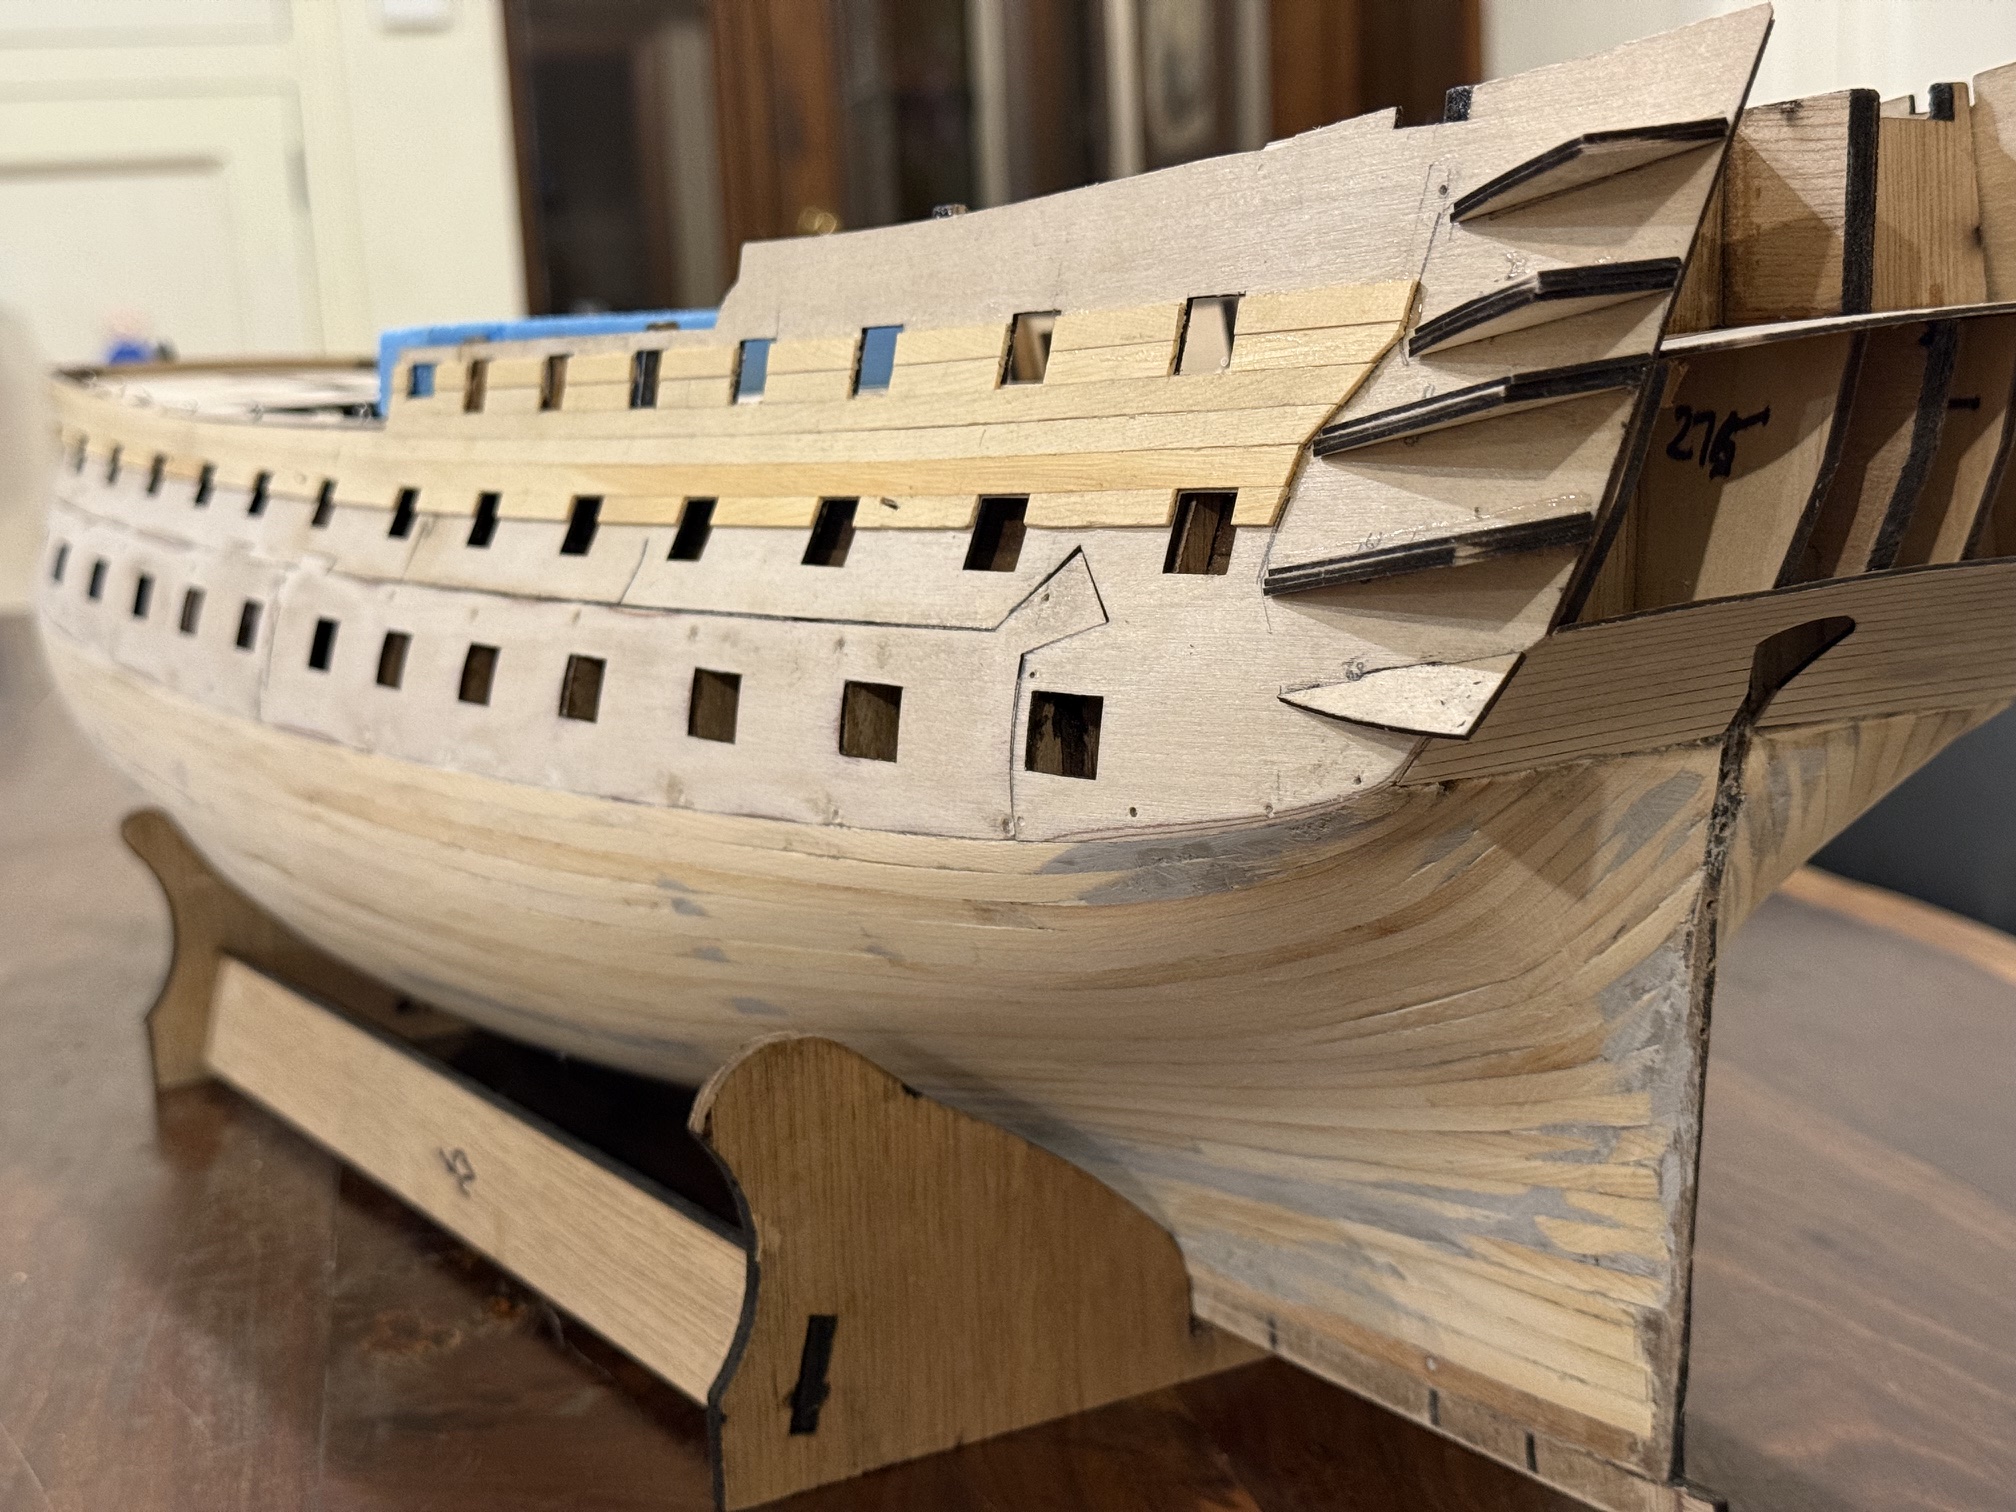
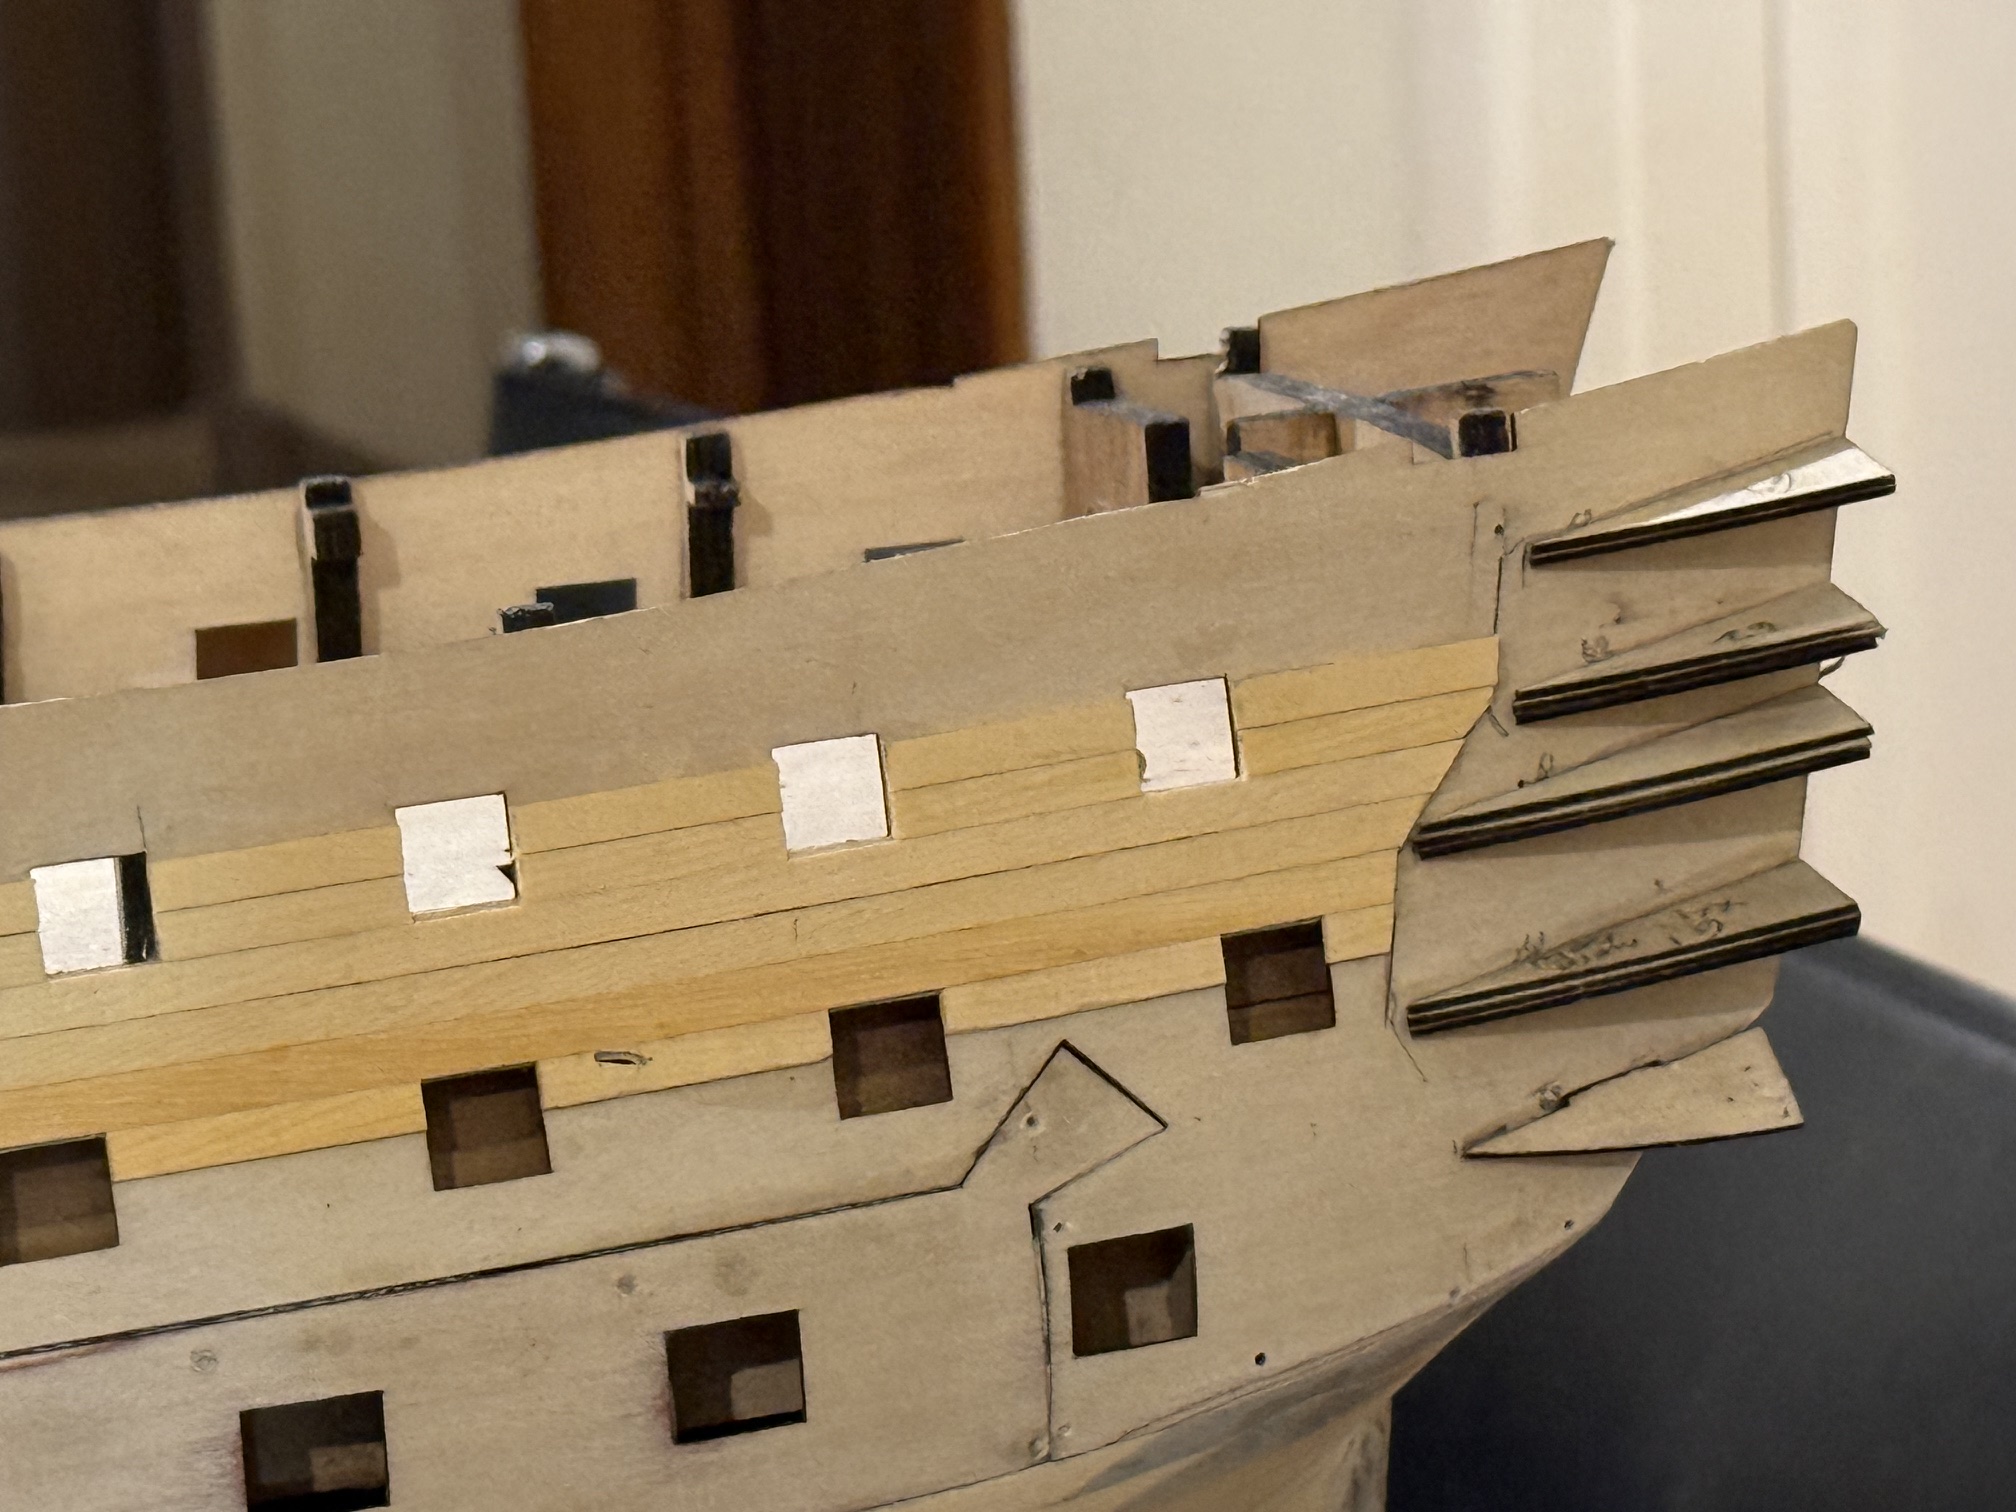
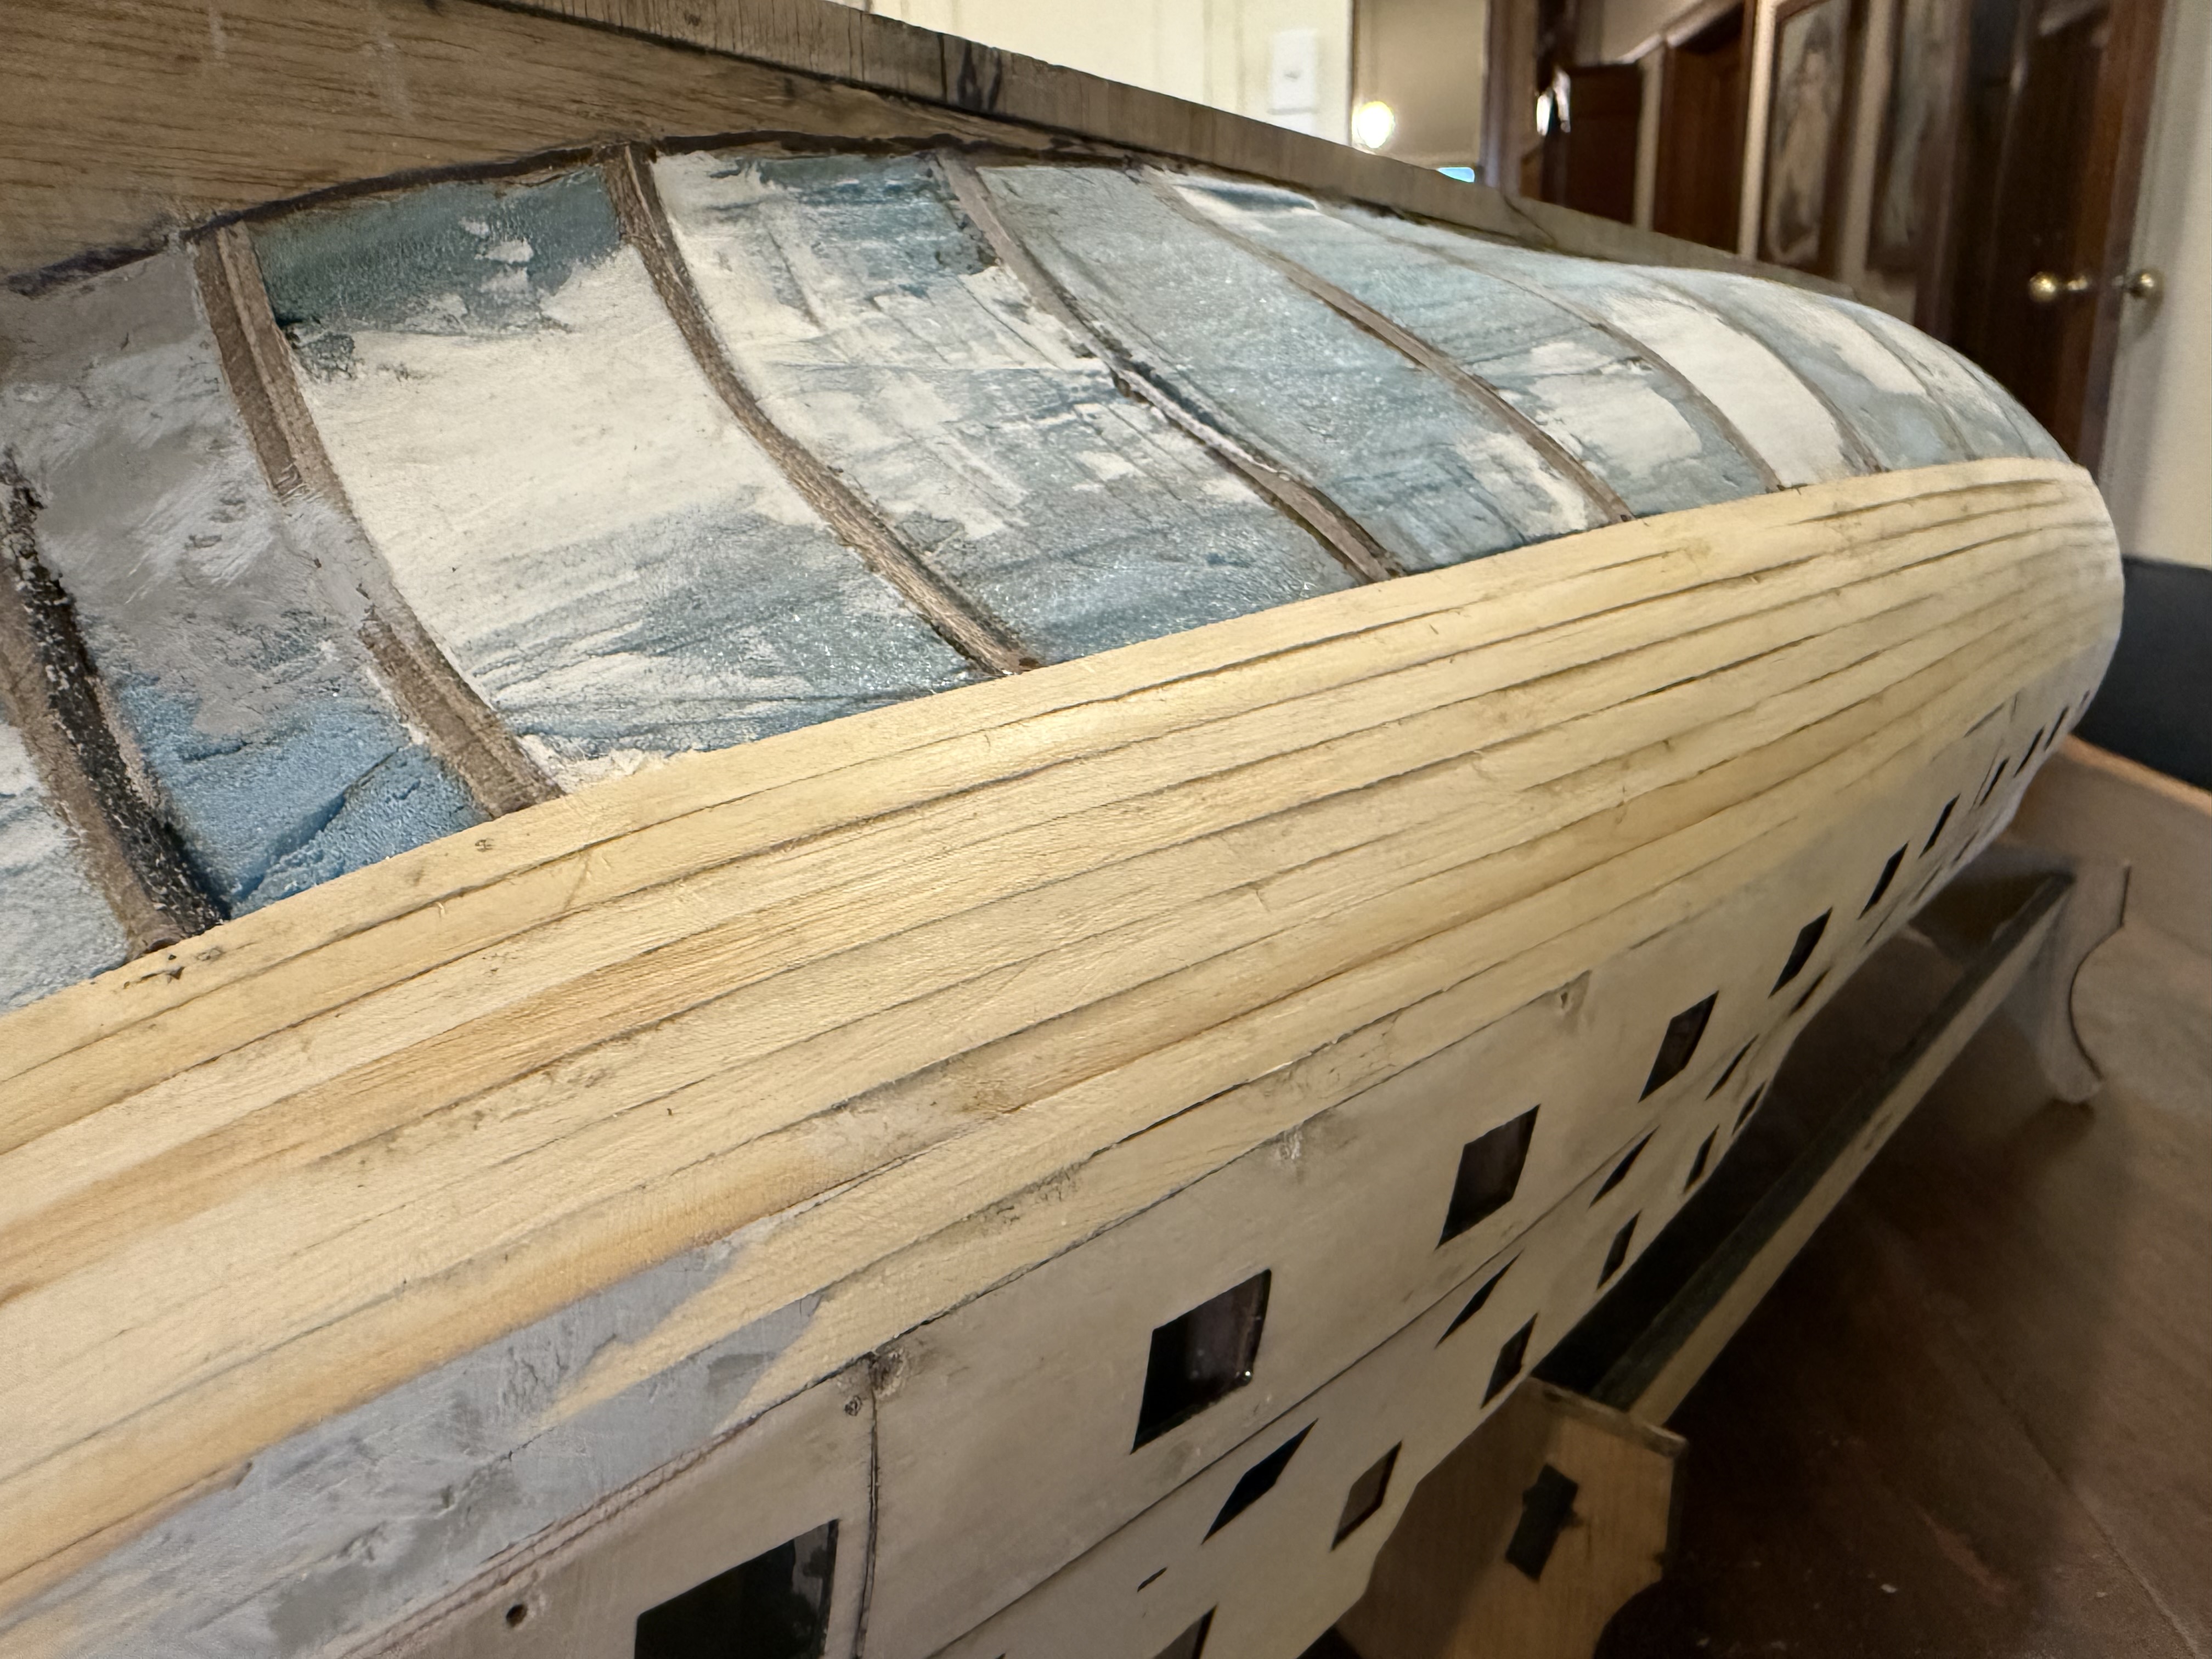
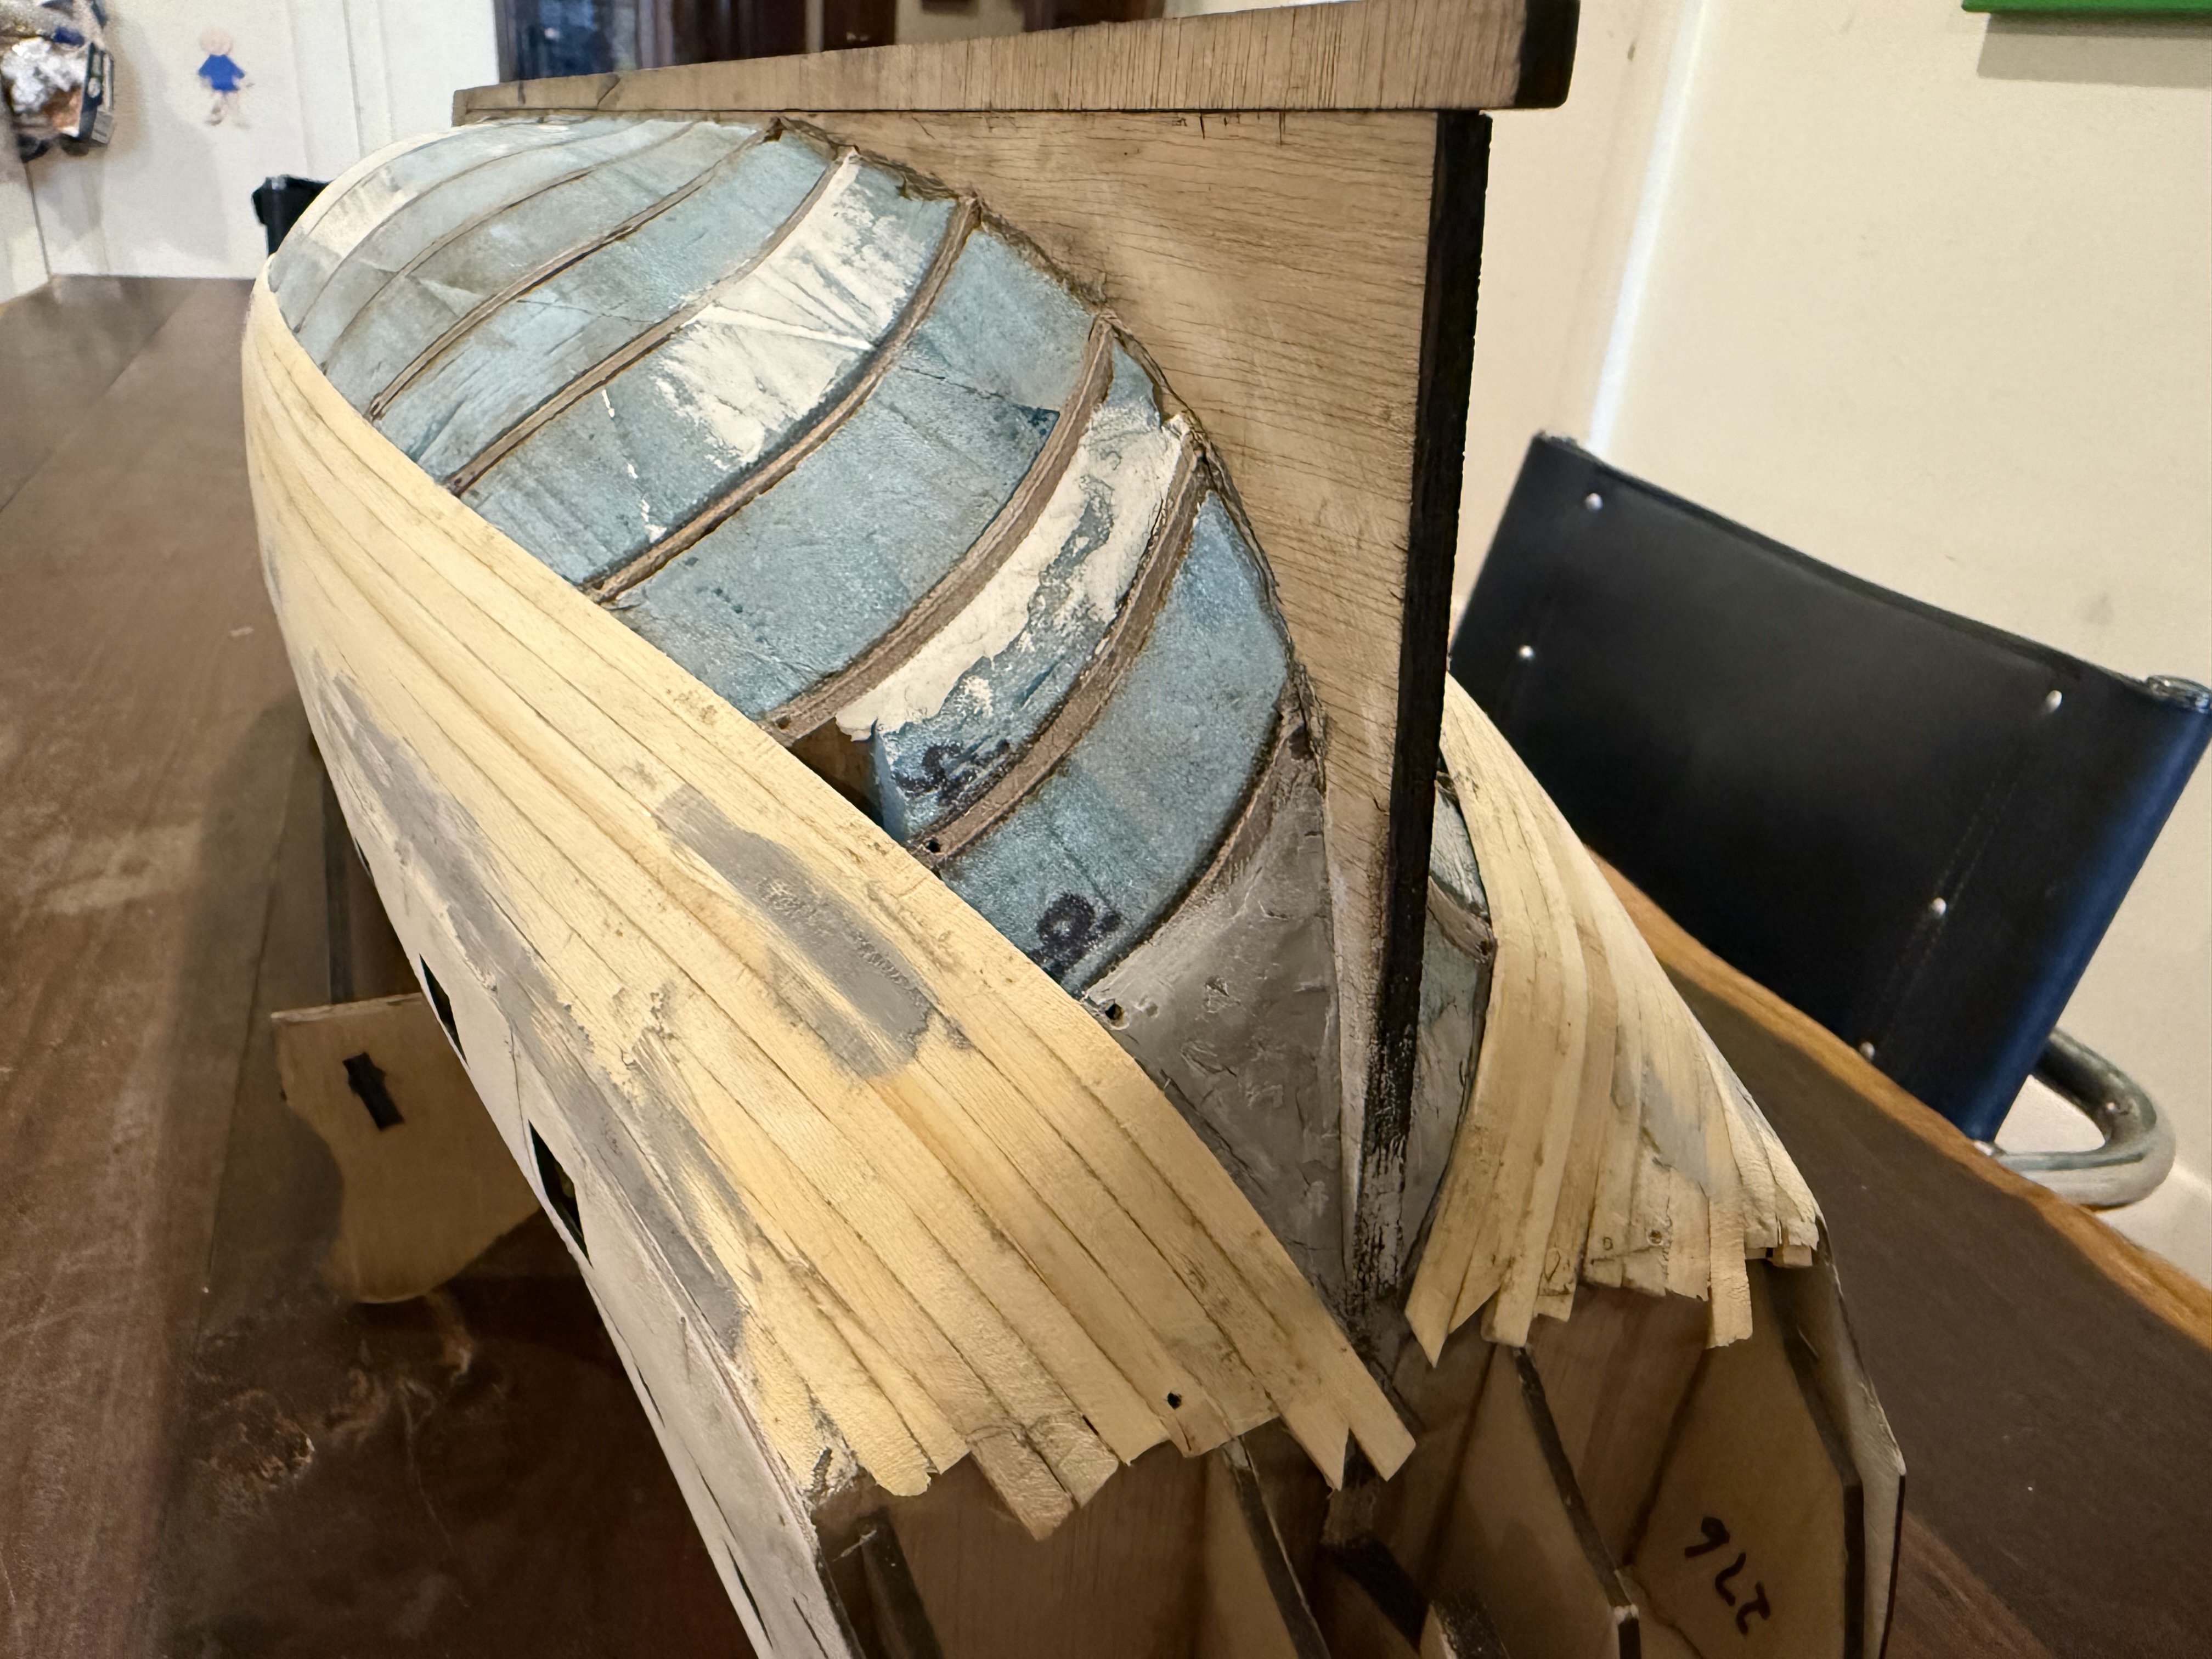
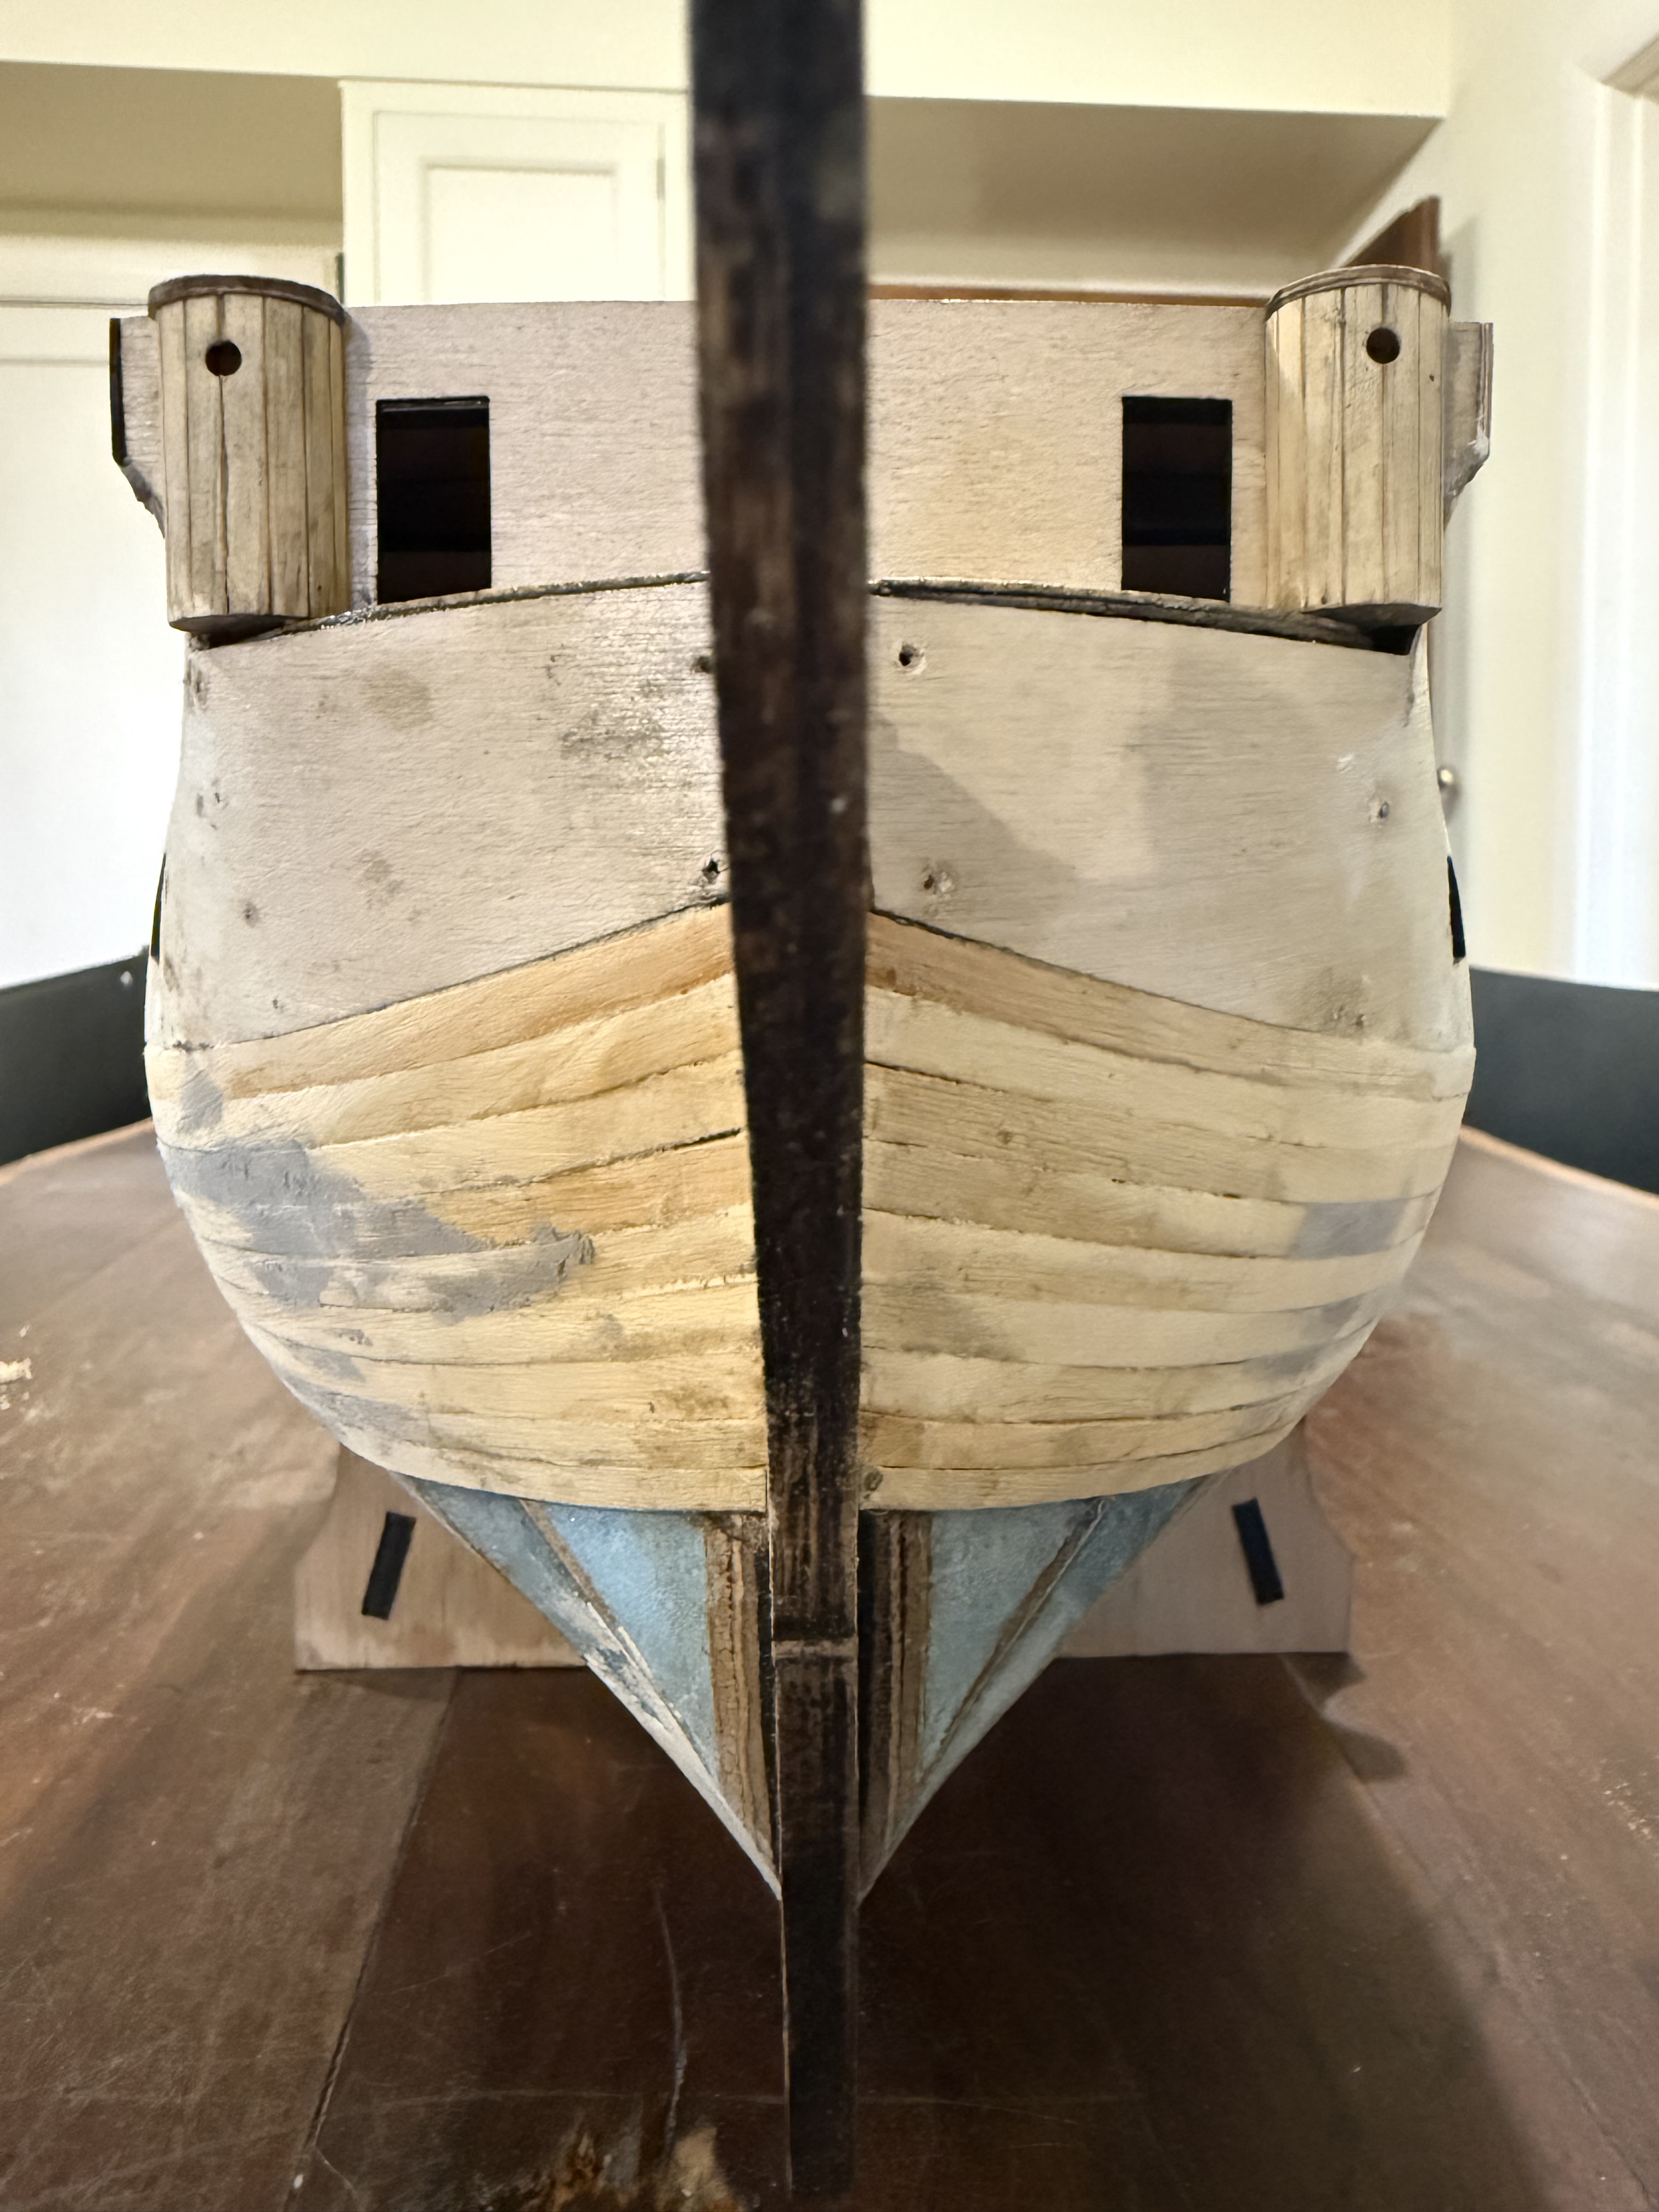
And I have started applying the second layer planks. Photos follow. The second layer planks are so far being installed onto the plywood ship sides, which are mostly gently curved and smooth. But the process is slow because every plank will be visible, and therefore filler will be avoided as far as possible. That means that every plank will be dry fitted and adjusted before being finally glued in place. Also, use of screw in clamps with resulting holes, is to be avoided unless the holes can be covered with the planking.

Regarding glue. Where possible I am using PVA glue, but sometimes CA glue is used where fingers must be used to hold the pieces in position.

Pictures of the progress to date are following.

The first planking layer covers the lower half of the hull. Some filler was required, but not too much. The second layer will cover all of the first layer, and the upper plywood section.
The first row, the one immediately above the gunports, was the most difficult, because the plank needed to be sharply curved. Despite pre-wetting the acute curve caused the plank to split a little, but that will eventually be invisible.
The first 2 rows of the second planking set the scene for all subsequent planks, so the positioning was crucial. I used non traumatising alligator clips, and drawing pins where the holes will be covered. The fins at the stern quarters will eventually support the officers’ lavatories. The planking on the model stops before them. The tops of the gunports provide handy positioning for the 1x5mm Huon pine planks.
Third row. Home made plank cutter bottom right. Note the single sided bevel on the blade.
First day results. 6 rows on one side.
And this is to show 2 methods of filling the spaces between the gunports. The usual method is to lay a plank right along the gunports, then to cut out the holes with a scalpel. The other method is to cut short pieces of planks to fit between the gunports. Can you pick the difference? And which method do you think was faster?

Bellerophon Planking Continues…

In the 2 layer method of model ship planking the purpose of the first layer is to create the final shape of the exterior of the hull, and to provide a base for attaching the very thin (0.5mm) final layer planks. The shape was initially determined in the model by the shapes of the bulkheads and keel, and refined as far as possible by judicious sanding, but as the planking progresses small depressions and bumps become more obvious and can be corrected to some degree.

As mentioned previously, I chose Huon pine for the first layer of planking, because the the thin strips (5mm x1.5mm) can be bent and twisted into fairly sharp bends without snapping. It is beautiful fine grained timber, and it is a shame that it will be finally covered by copper or paint or a second thin layer of darker planks such as walnut or jarrah.

Each plank covers 5mm. It is glued to each bulkhead and edge glued to its neighbour. I manage about 1 plank per hour, so what you see is about 18 hours effort. If I see obvious hollows or bumps I fill or sand as I go. The plank filler is “Multifill”. It dries quickly and sands well.

The severest bends are at the stern and the bow. So far I have needed only 2 “stealers”, the wedge shaped filler pieces, but more may be required as the planking progresses. The 3D printed clamps are working very well. The stern post will be attached when the planking is finished.

Each clamp requires a 1.5mm hole drilled into the bulkhead. It is filled with glue when the next plank is attached. The hole is angled and positioned so the plank is held flat against the bulkhead, and with as much length for the screw in the bulkhead as possible. Each plank has its opposite installed immediately after so the twisting force on the hull is balanced.

At the bow I have started to taper the planks so they sit flatter against the bulkheads. The lowermost 2 planks are tapered for about 100mm.

I am reasonably satisfied with how the planking is going. No major problems so far.