johnsmachines

machines which I have made, am making, or intend to make, and some other stuff. If you find this site interesting, please leave a comment. I read every comment and respond to most. n.b. There is a list of my first 800 posts in my post of 17 June 2021, titled "800 Posts"

Tag: ship model

Bellerophon -6

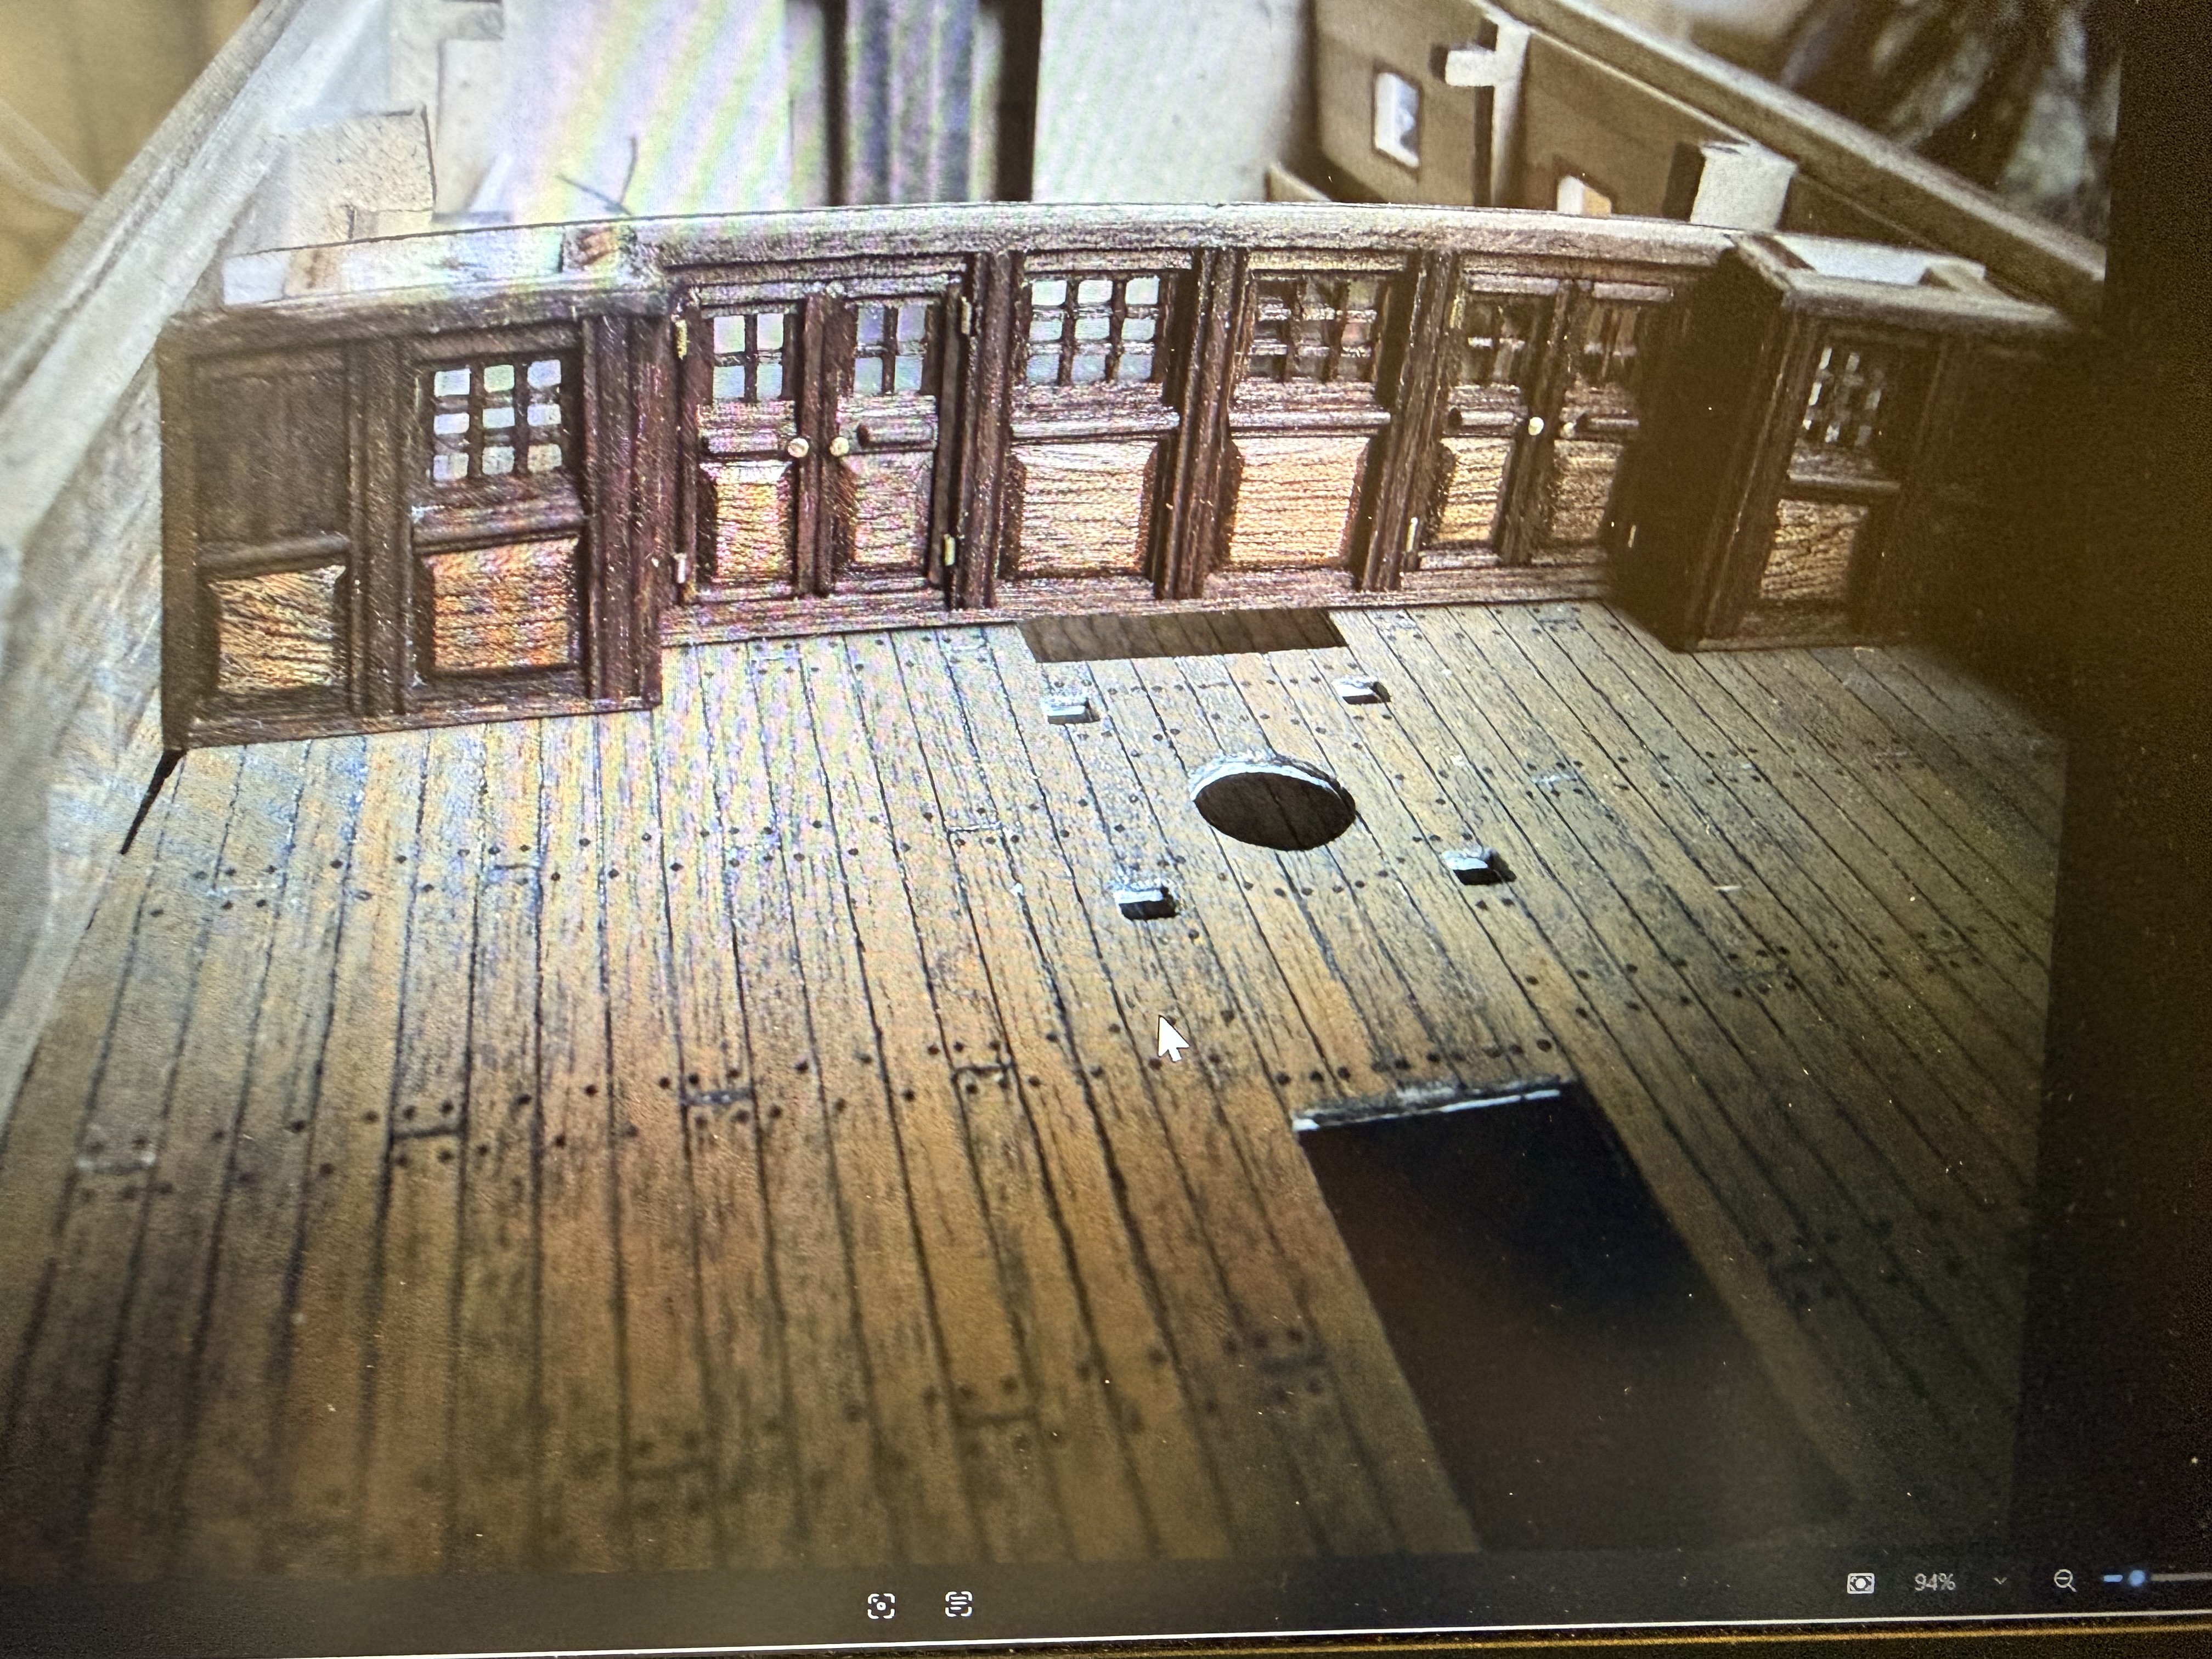
This, regrettably, is not my model Bellerophon. It is copied from Ships of Scale, to see how expert ship modellers manage the deck planking of model ships of the period. Those planks are 3 or 4mm wide, and the wood is appropriately very fine grained, and suitable for the scale.

On the original British 74 gun ships the planks were 4″/100mm thick, and the fasteners were made of wood! Called treenails or trenails. They were hammered into hand drilled holes, and were about 12″/300mm long. French 74’s of the period used iron nails, but I double checked. The trenails were tapered and approximately 25mm diameter at the deck surface. At my model’s 1:72 scale, that is about 0.3mm diameter, so the trenails in the above picture are a little bit oversized.

Some modellers actually drill tiny holes and hammer in sharp toothpicks to get this effect. (Yes Neil!) but being a bit on the lazy side I will just glue the planks to the underlying plywood, and make marks 0.3mm diameter to get what I hope will be the correct appearance.

This is the upper gundeck. It runs the full length of the hull and supports the largest guns, which were 32 pounders. There is another full length gundeck below this one, which is why they were called 2 deckers. And there were more (smaller) guns mounted on the decks above that, but those decks were not full length, so they don’t count as 3 deckers, (like HMS Victory). But Bellerophon was a 74 gun ship, which was awesome gunpower for the period, and was faster and more manoeuvrable than the first rates. And cheaper to build and man. But I digress. The bulldog clamps and drawing pins are to hold the ply in place during gluing.
I asked the AI for the best filler to further smooth the hull shape in preparation for planking, and it (it/he/she/they?) recommended Spakfilla. First time I have used it! No mixing. Use straight out of the container. Pink changes to white when it sets. Sandable. Paintable. Glueable. Excellent!

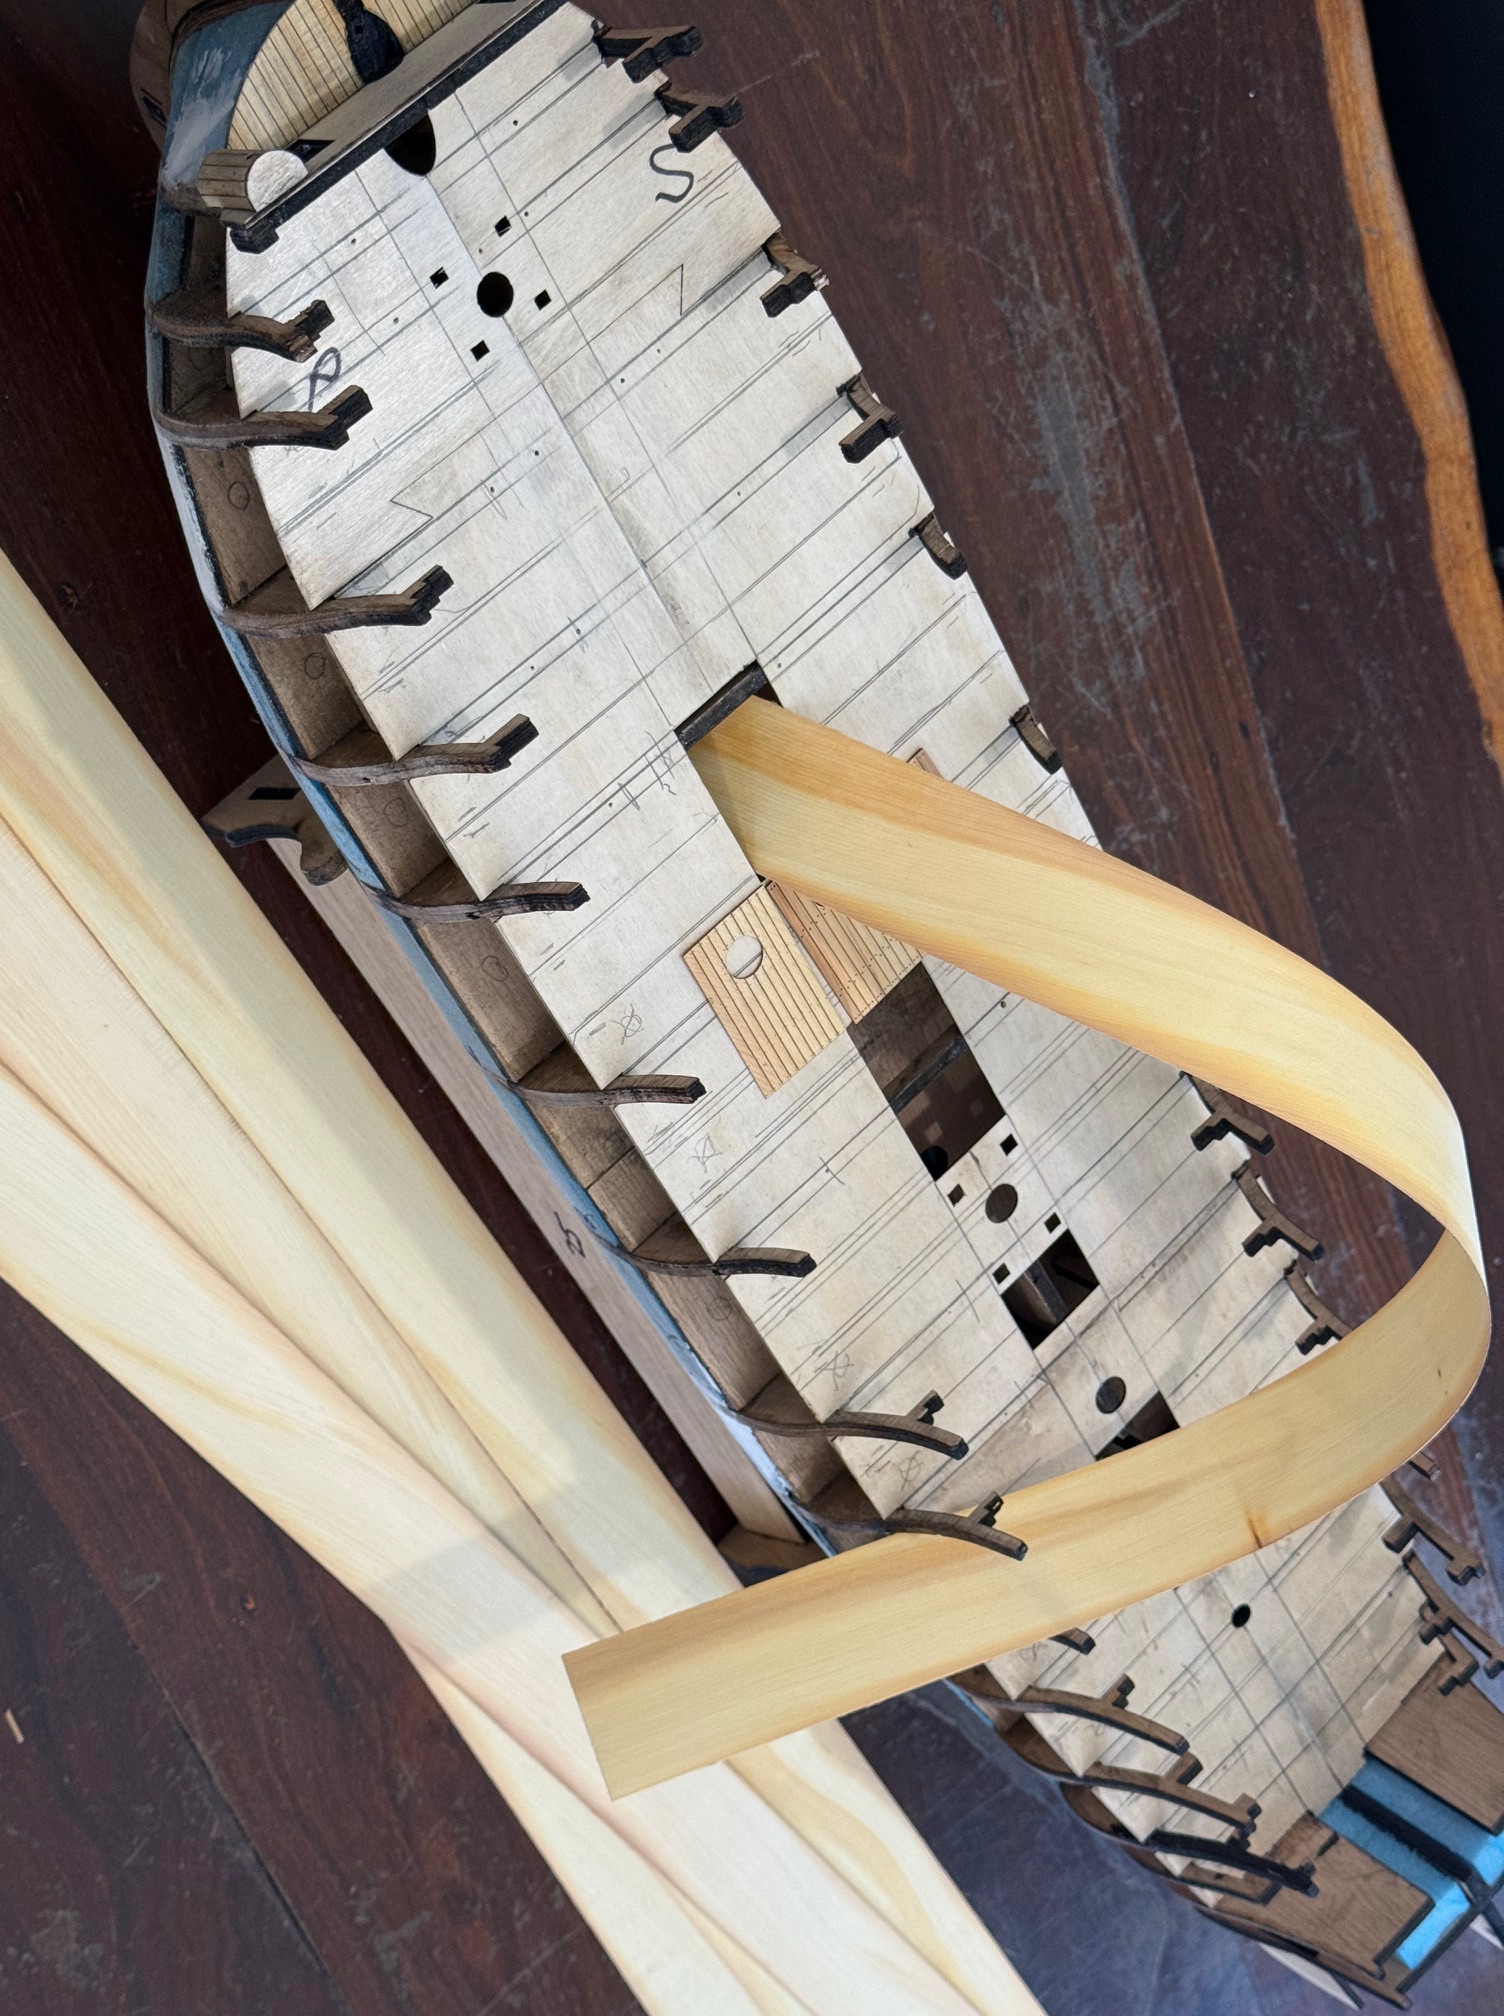
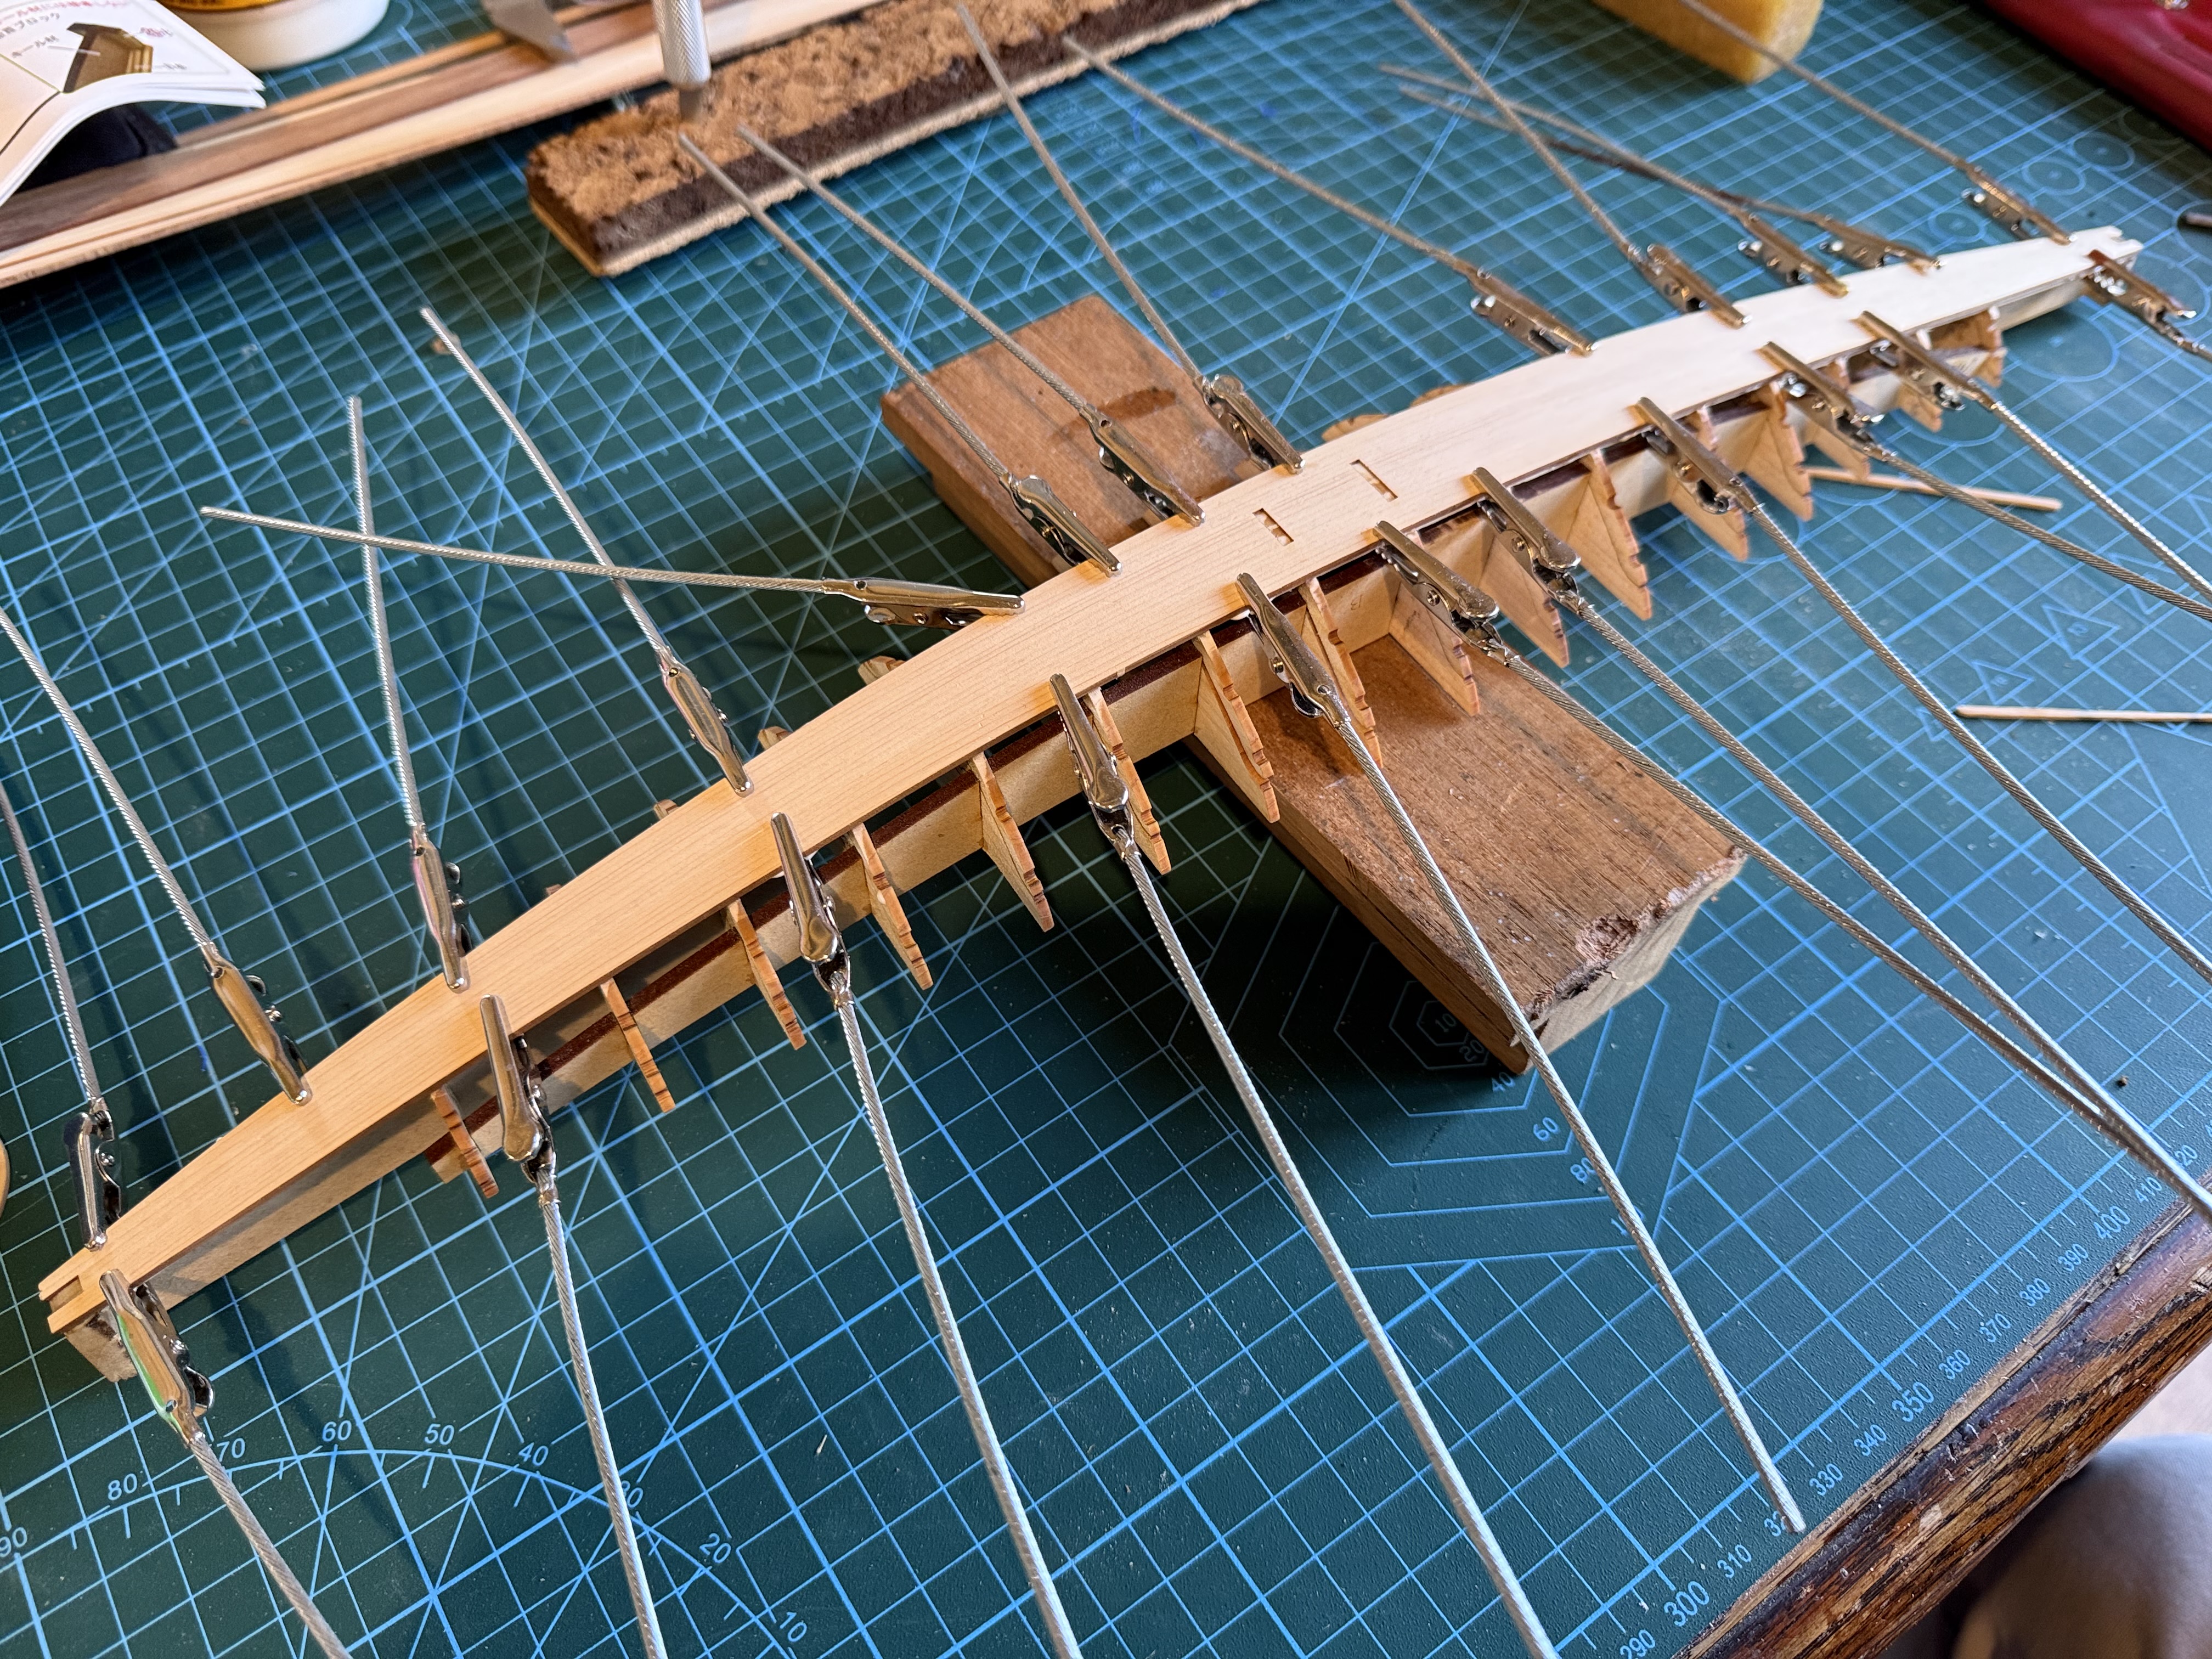
I paused the build while considering how to plank the decks. The kit instructions say to glue on individual planks of tanganyika wood, which I do not have. But a friend kindly donated a piece of huon pine, (thanks Neil M and Hamish L) which the AI said would be ideal…. very fine figuring, minimal tendency to warping and splitting, easily worked. And even used in full size ships which were made in Tasmania, but never on 74’s as far as I know.

I did some tests on 0.6mm thick Huon pine, to check laser settings for cutting pieces and marking trenails and plank edges. I wont be using these pieces because of the dark areas which were probably close to the bark. Also I need to reduce the power to make the trenails a bit less obvious

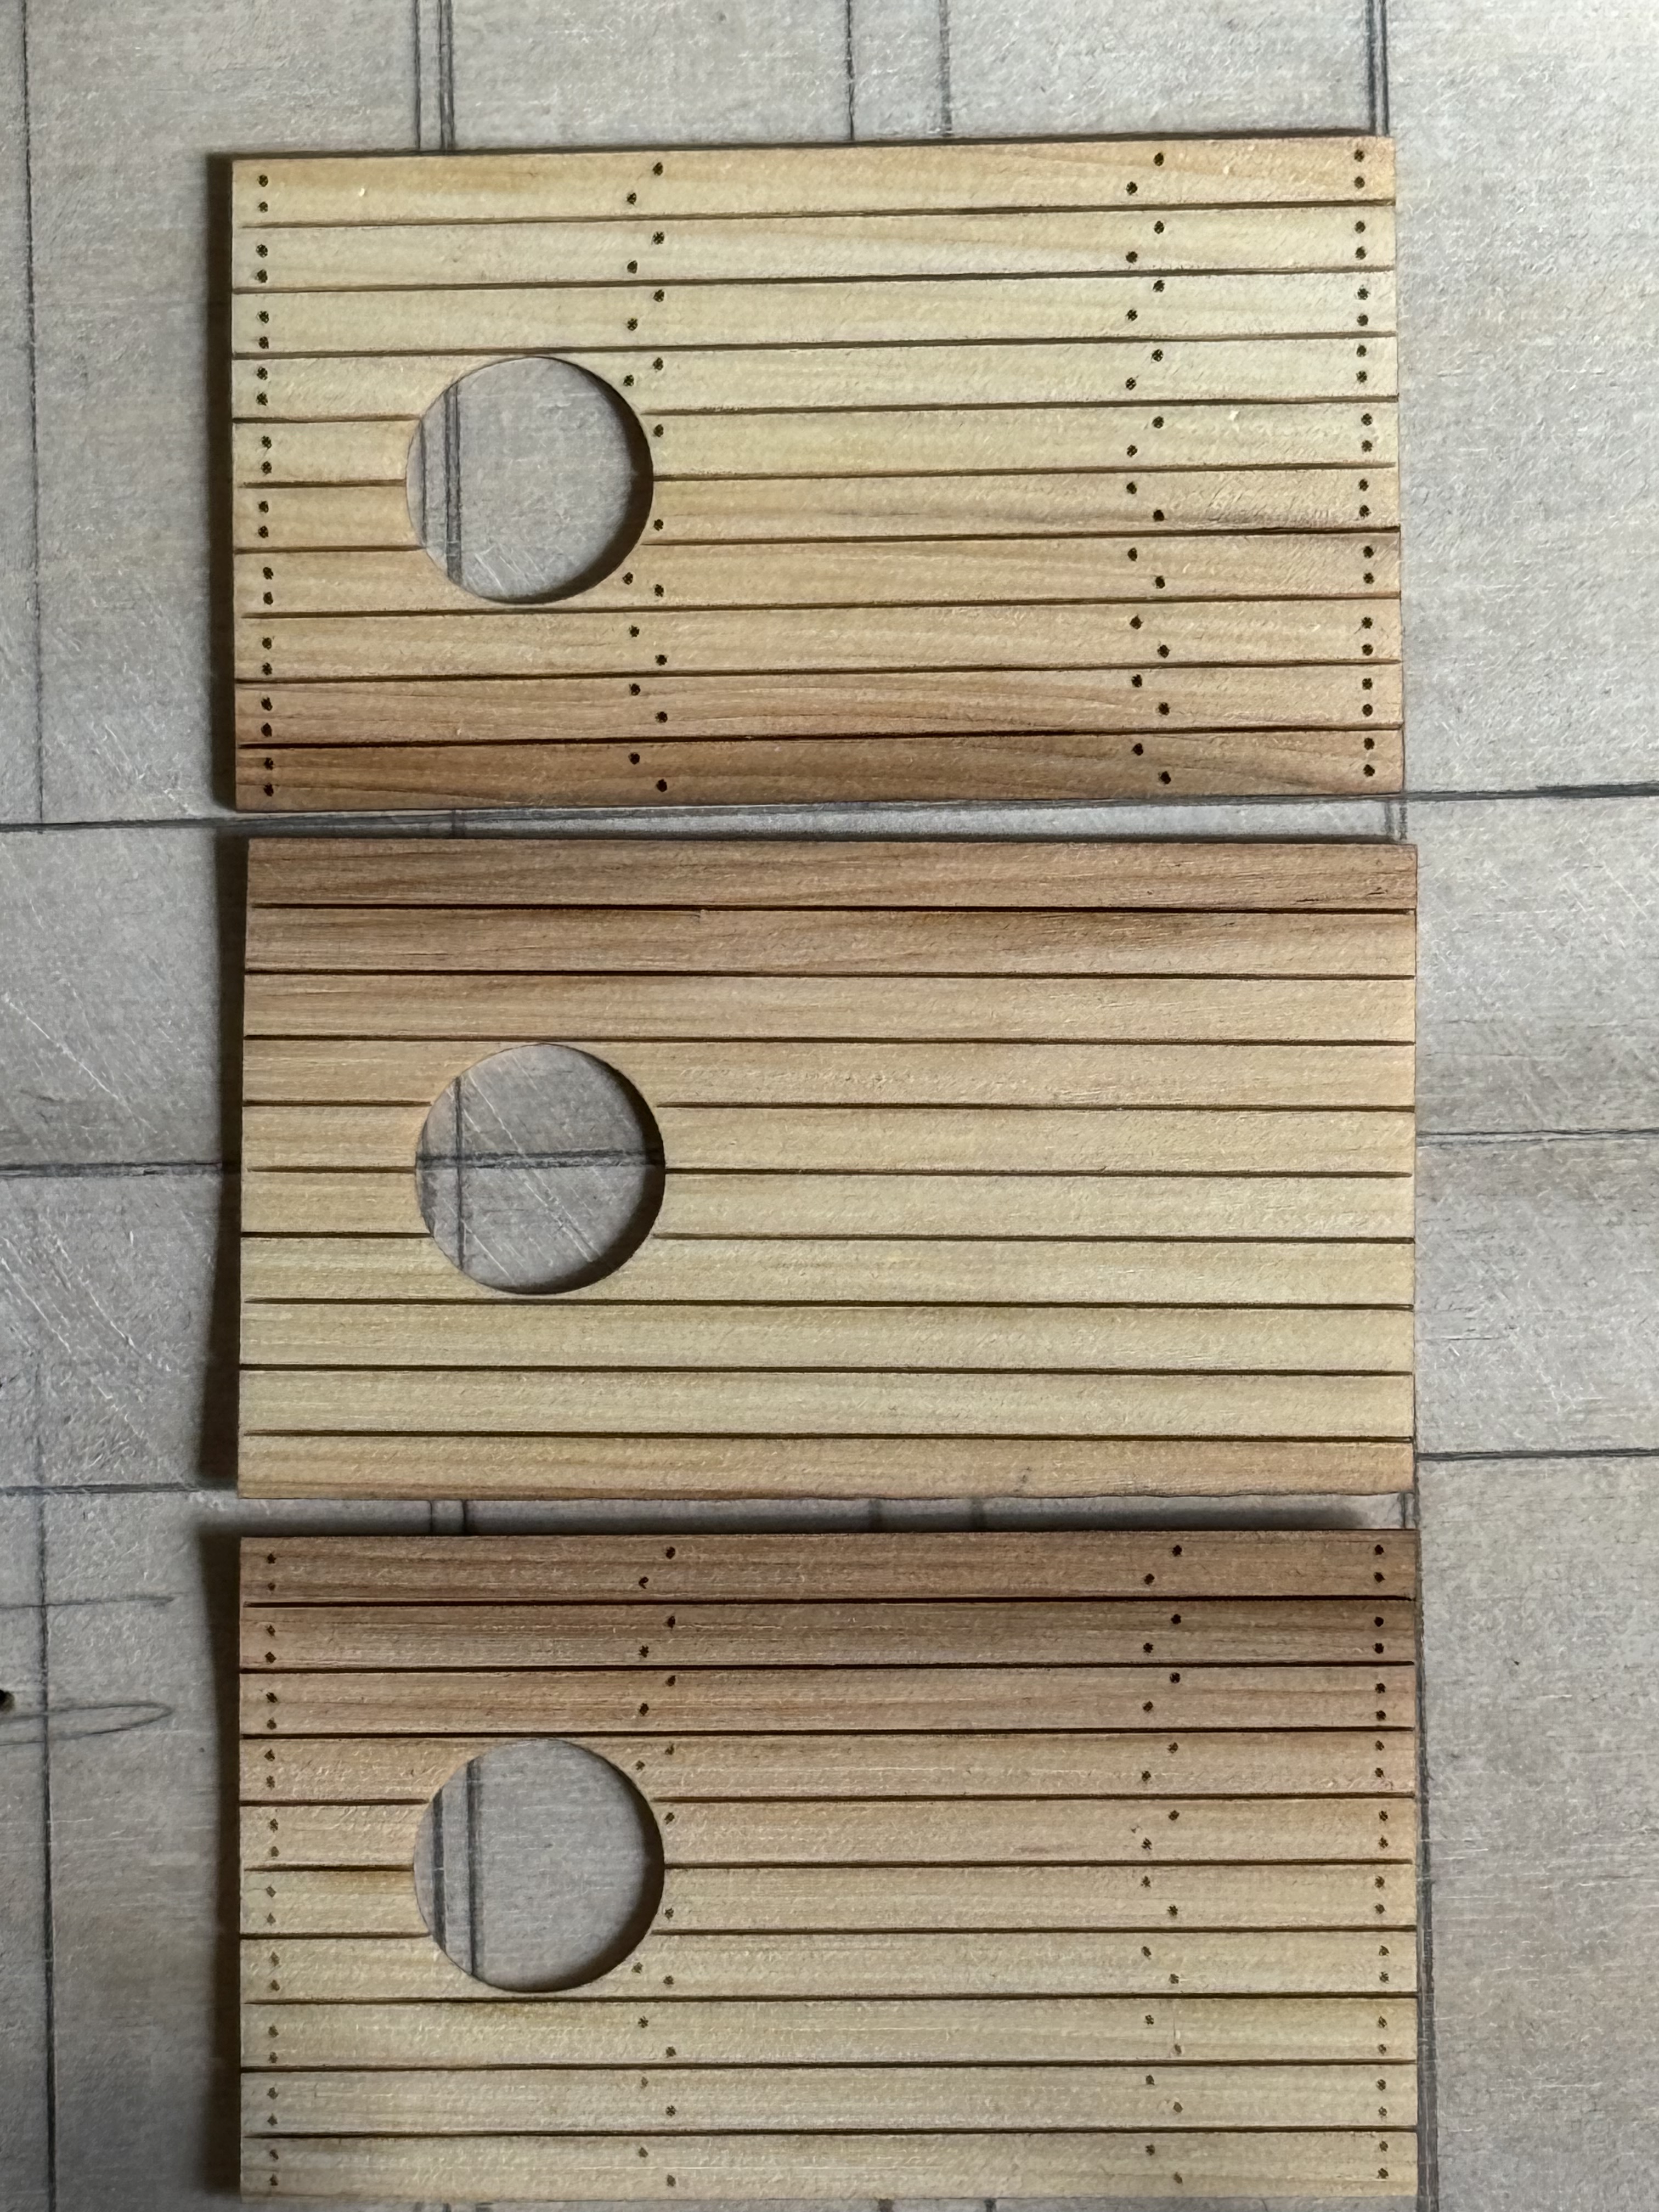
That was so successful that I am considering installing the planks in large sections rather than individual planks, but need to do some more testing because the model deck is almost 600mm long, and my laser machine has a maximum working length of 415mm. One of the above pieces to plank an area between hatches, so the trenail pattern is different at the ends compared with the central area. Also I need to add trenails around the capstan circle and mast penetrations. Note the slight irregularity of the trenail positioning. After all, the originals were hand measured.

Oh, and I used my home made drum sander to prepare some Huon pine…

The huon pine was sawn to 1.5mm x45mm x 850mm then drum sanded to 0.5mm thick. As you can see it is very flexible. 5 pieces should cover the upper gun deck. But first I have to cut the staggered “plank” ends using the laser so there is no visible material join. More about that in a later post.

Bellerophon -3

Finally found some time to return to HMS Bellerophon, having paid for and picked up the laser cut marine ply keel and bulkheads.

Today I cut out some supports for the keel from workshop scrap.

Then roughly put together the laser cut parts. Only gluing so far is to join together the 2 parts which form the “longitudinal frame” using Gorilla Glue..

Here are the bulkheads sitting in the slots in the longitudinal frame, which is sitting in the blocks fore and aft supporting the lot. And behind a familiar ship model to some of you. Destined to decorate the legal chambers of one of my daughters.

You can see some of the evidence of overexuberant laser cutting.

I was pleasantly surprised how well all of those parts fitted together. Only one joint required any trimming persuasion.

The deck (?orlop deck, no, lower gun deck) holds the bulkheads in good position. Gluing yet to occur. I am pretty happy with how it all fits together, despite my alterations to cope with the increased ply thickness from 5 to 6mm. At this stage it could still be Vanguard, but it will not remain so.

And a close up. some voids to be cut and pushed out. And a lot of bulkhead shaping to accept the planking later. Also suggestion of some small spot fires during the lasering.
Our dining room table is rarely used for its original purpose, but suits very well for assembling my current model. I made that corner cupboard and table from Honduras mahogany almost 50 years ago, and the 12 chairs from American black walnut about 45 years ago.

I feel quite excited to see the skeleton of the hull in this form, even though it is waiting for some glue.

ps. The “tapestry” on the wall is actually a painting of “The Battle of Brugues” with Louis XIV on horesback. The original,I believe is in the Louvre. Makes a handy place to locate the main lateral plan of the Vanguard/Bellerophon for quick reference. Louis XIV will reappear eventually.

Khufu Pyramid Ship

I have been interested in Egyptology for many years, and a few months ago I came across this book in my favourite second hand book shop, bought it and read it. It appealed to both of my interests in Egyptology and ships.

It is the oldest ship in existence.

It was found in 1952, buried in a stone chamber next to the base of the great pyramid of Cheops/Khufu. The ship was deliberately buried, carefully, in disassembled pieces. Complete, even with the ropes that joined the planks together. The wooden ship survived 4500 years, because the chamber was airtight, and the area receives very little rain.

The ship was excavated, and painstakingly reassembled over the next decade. The book pictured is largely about the known history of the ship, its reconstruction, and thoughts about its purpose.

It is a sizeable vessel… 43.6m (143′) long, 5.9m (19.5′) wide, 45-50 tonnes weight, made mainly of cedar from Lebanon. Powered with 24 oars, plus steering oars, but possibly towed by another vessel or from the river banks.

It is not an attractive shape in my eyes, but very interesting from a marine technical viewpoint. It does show evidence of having been actually used in water as a ship.

So, I wondered if it had been modelled, and in my Internet searches discovered a Japanese source of a wooden kit,, which I purchased.

1:72 scale. The laser cut parts, planking wood, etc were impressively well packaged, labelled, (in Japanese plus Arabic numbering). However the instructions were also in Japanese. A search of the site revealed that there were no non Japanese instructions. Thank heavens for Google Translate, which performed an almost flawless English version for me. However there was no means of saving the translation except by saving screen shots on my PC.

The kit sat unused for several months. I have been busy with Constitution, and other machine projects of which regular readers of this blog will be familiar. And I have been busy planning my scratch build of a 74 gun ship. But I have been waiting and waiting for some plans of the 74 to be copied and printed so I can make a start on the 74. Still waiting, (paper supply then printer problems). So I started on the kit build of the Khufu ship. This post is a pictorial summary of progress to date. 3 days work so far.

The laser cut parts are very accurate. The wood is spruce I think. Excellent quality. A simple job with a scalpel to cut the parts from the frames. The bulkheads and longitudinal pieces are temporary and are eventually broken out of the semi completed hull.
Bow and stern pieces fitted. Nothing glued yet.

Some stringers were fitted and glued to the frames, and the bottom plank was glued to the stringers. The bottom plank does not classify as a keel.

Stern and bow blocks fitted but not glued, then 4 more stringers glued to the frames and bow/stern blocks.
Steps so far had been completed quickly, but the stringers were fiddly and tricky and took a whole day.
The side planks were soaked in water to facilitate bendability, and glued to the frames. They did not require shaping. Again the laser cut outlines were accurate.
The bulkhead forms and longitudinal pieces were removed, broken out where necessary, just leaving the frames and planks and end pieces.
Starting to look like a hull. Mostly using CA glue so far, but later switched mainly to Gorilla Glue.
Assembled and shaped the prow and stern pieces. These are typical ancient Egyptian shapes, probably reflecting the shapes of papyrus reed boats.
The stern piece. Sanding will be required to merge the end pieces with the planking.
Some years ago I experienced a retinal detachment requiring surgery, then cataract surgery. Consequently everything which I see from one eye is wavy, no straight lines. So that is my excuse if the prow and stern pieces are not precisely lined up.

So far, the build has taken 3 days. Maybe 4-8 hours each day. I reckon that I am about half through the build.