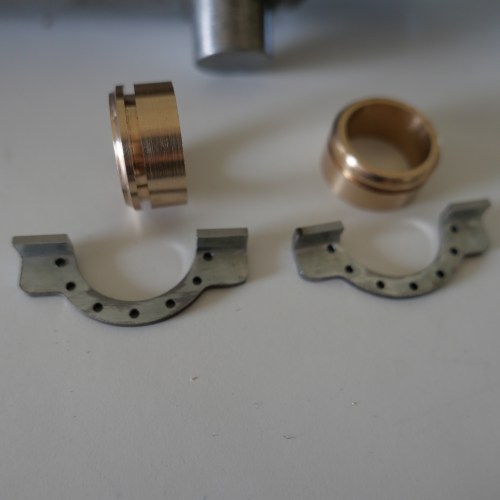
Trunnion Mounts -3
I did not expect these mounts to require a third day session, and they are still not finished!
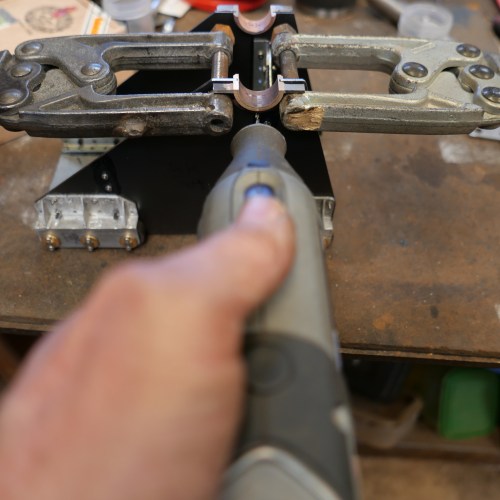
I discovered that two of the drilled holes in each bracket were in the wrong position, by approx 1mm. That is a really bothersome error, because the correct position includes half of the existing hole.
I managed the problem by threading the errant holes, and Loctite gluing in some threaded rod. Each rod was trimmed flush with the surfaces. Then drilling the new hole, partly through the Loctited metal patch. That fix worked well.

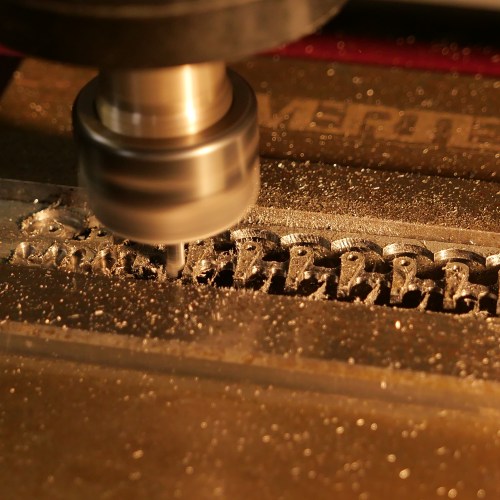
Threaded rod glued into the errant hole. Trimmed flush later. Then redrilled correctly.
THE TRUNNION PINS.
The pins hold the trunnion caps in place. And they took another whole day to make and install. Ah…. just as well I enjoy all of this. They are tiny, and I spent at least 50% of the time looking for them on the workshop floor after accidentally dropping them on several occasions.
Milling the pin handles from 2mm steel. The handles ended up at 7mm long. The holes were drilled before the outlines were cut. Then the tabs were ground off using my newly made belt sander belt. The belt lasted 15 minutes before the belt itself tore, with the join still intact!

Then some delicate silver soldering of a ring to attach a securing chain later, then the pin shaft itself. The wire through the ring is just to hold it in position during soldering.

And that is one of the 8 pins made. I will polish them in a gemstone tumbler next session.

On the model, the pins are jammed into position with a cam action, after some filing-shaping. On the original cannon there was a small protrusion on the inner end of the pin shaft, which fitted through a slot in the side of the carriage. I could not figure out a method of making such a tiny slot (1mm wide x 1mm deep) through 4mm of steel plus 2mm of brass, but the cam action seems effective. I will attach some chain soon, because I do not wish to make any more of these. And yes, the pins handles are slightly over-scaled, but I think not outlandishly so.
So, apart from polishing riveting and painting, I think that the trunnion mounts are finished.
Now planning to make the gear train for the carriage positioning on the chassis, and the pinion, quadrant gear, and bevel gears for the barrel elevation. We are currently in level 3 lockdown for Covid containment, with level 4 looking likely any day, so obtaining brass for the biggest gears is difficult. I am considering workarounds. Apparently community anxiety and depression, family violence, and even suicides are mounting. When I am in the workshop I am in a different world, thank goodness.


 Tidied the parts with a file and belt sander.