
Making Wheel Brackets for a Model Armstrong Cannon using Subtraction.
by John
For my previous model Armstrong 80pr cannons I made the iron carriage and slides using metal casting of 3D printed PLA filament for the complex castings. The results were OK, but I was not satisfied with the surface finish.
So, I bought a resin printer, and I have been very impressed with the results of the resin prints.
But, to date, I have been unable to get any castable wax resin suitable for the resin printer, with which to make the bronze castings.
So, I decided to revert to traditional machining methods, using reductive technology. Milling, lathe, etc, removing brass chips from bar stock to end up with useable parts.
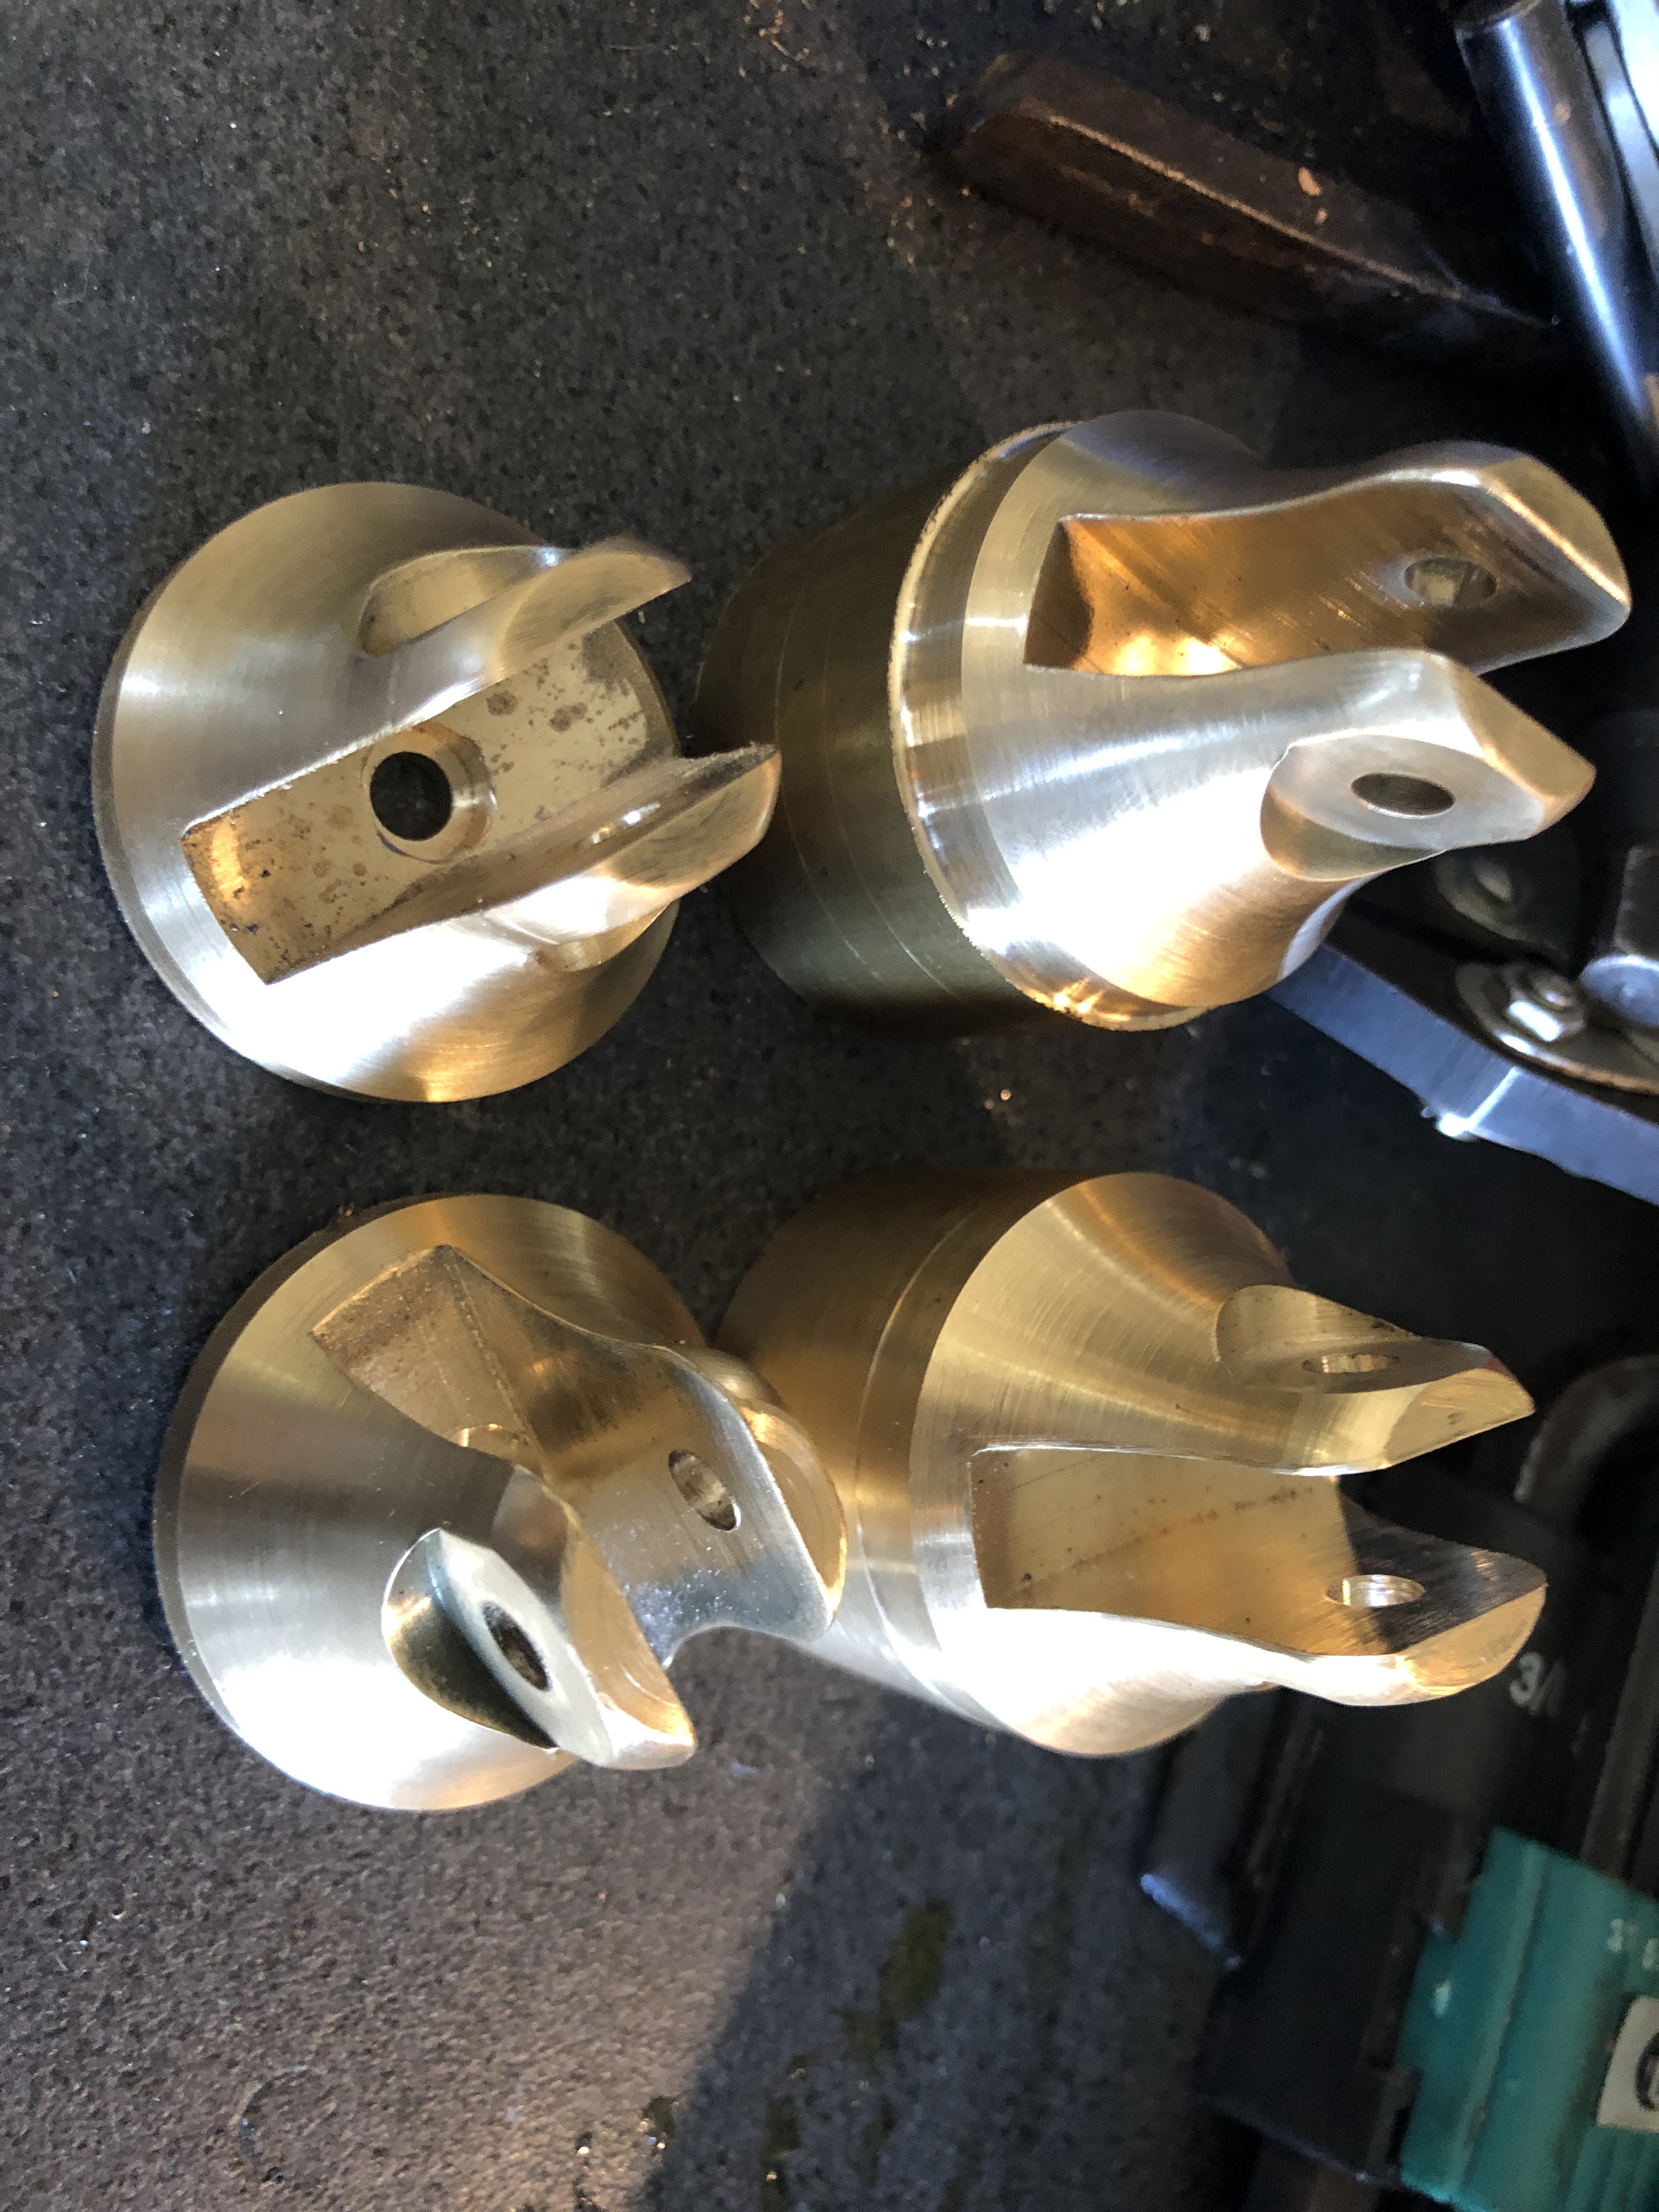
This is what I am trying to make at 1:10 scale.


Then, I pondered long about how to remove the 20mm of stock which was allowed for the chuck jaws. I realised, too late, that I should have allowed another 10mm or so, because the parting line leaves too little to be held in the lathe chuck while parting.
So, I came up with this work holding solution…..
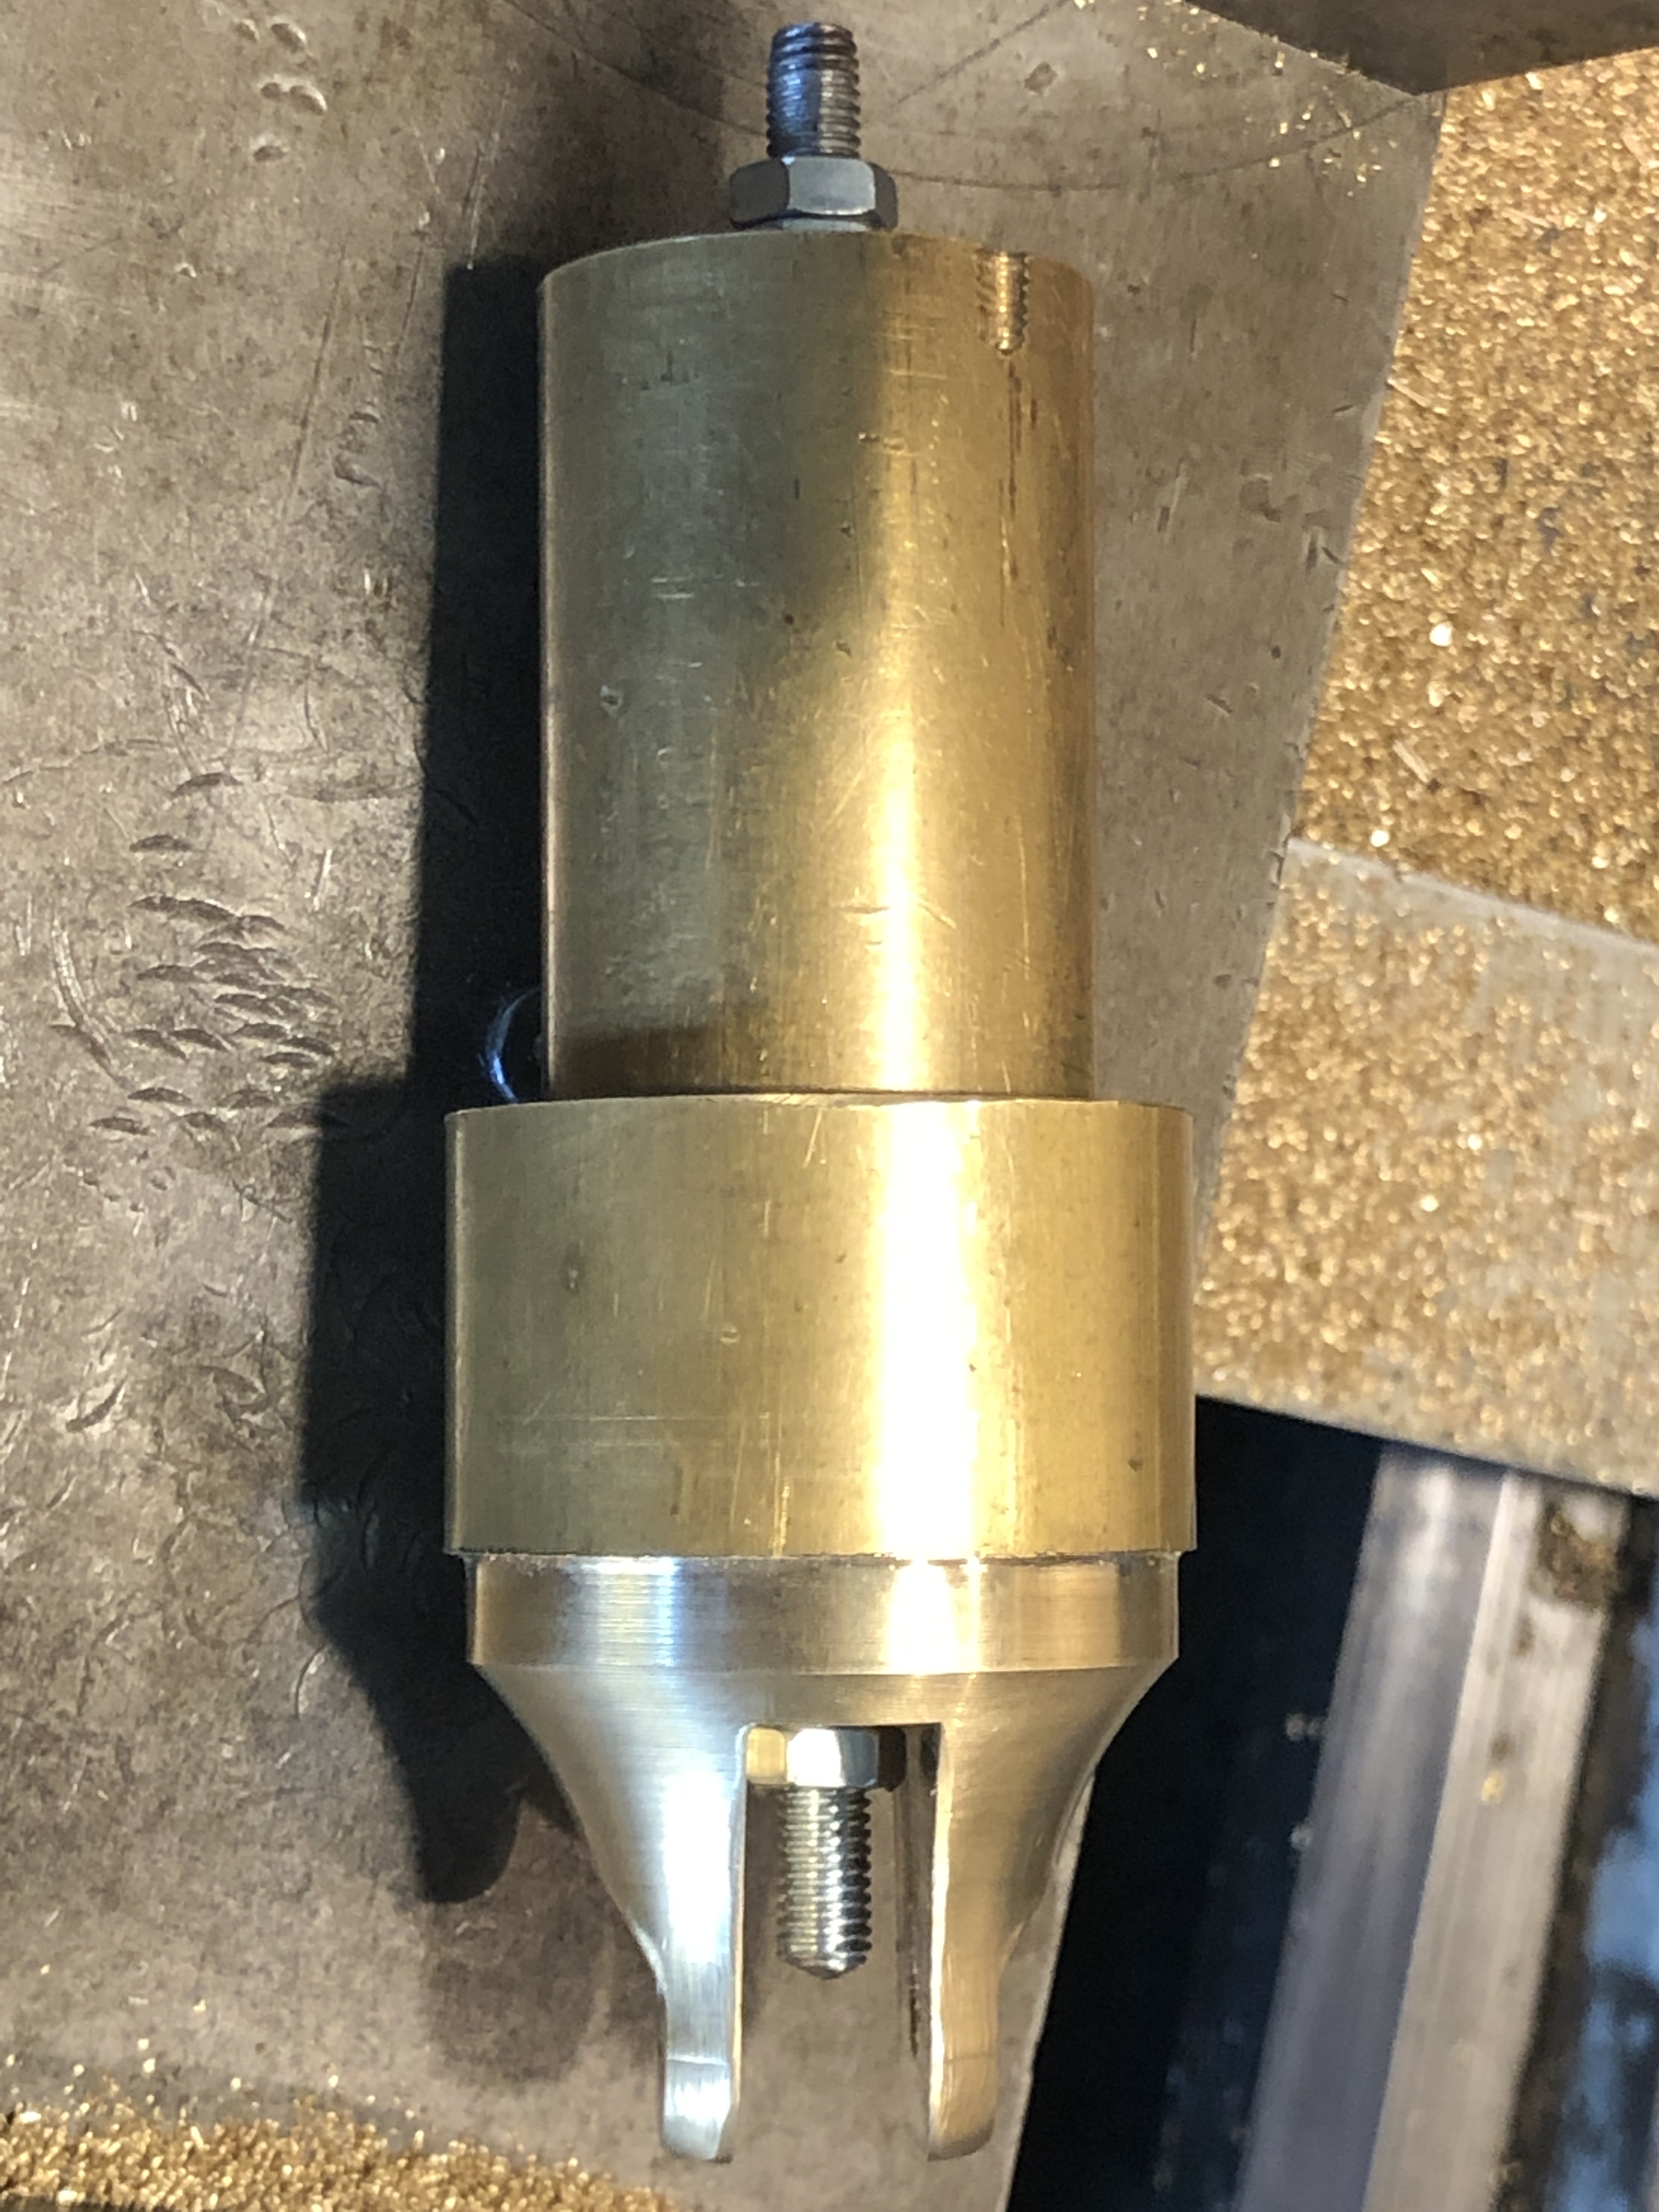
Actually, 5mm allthread is not much to hold a 36mm diameter piece for parting. So the thread was nutted and lock-nutted at each end. And torqued as tightly as I dared.
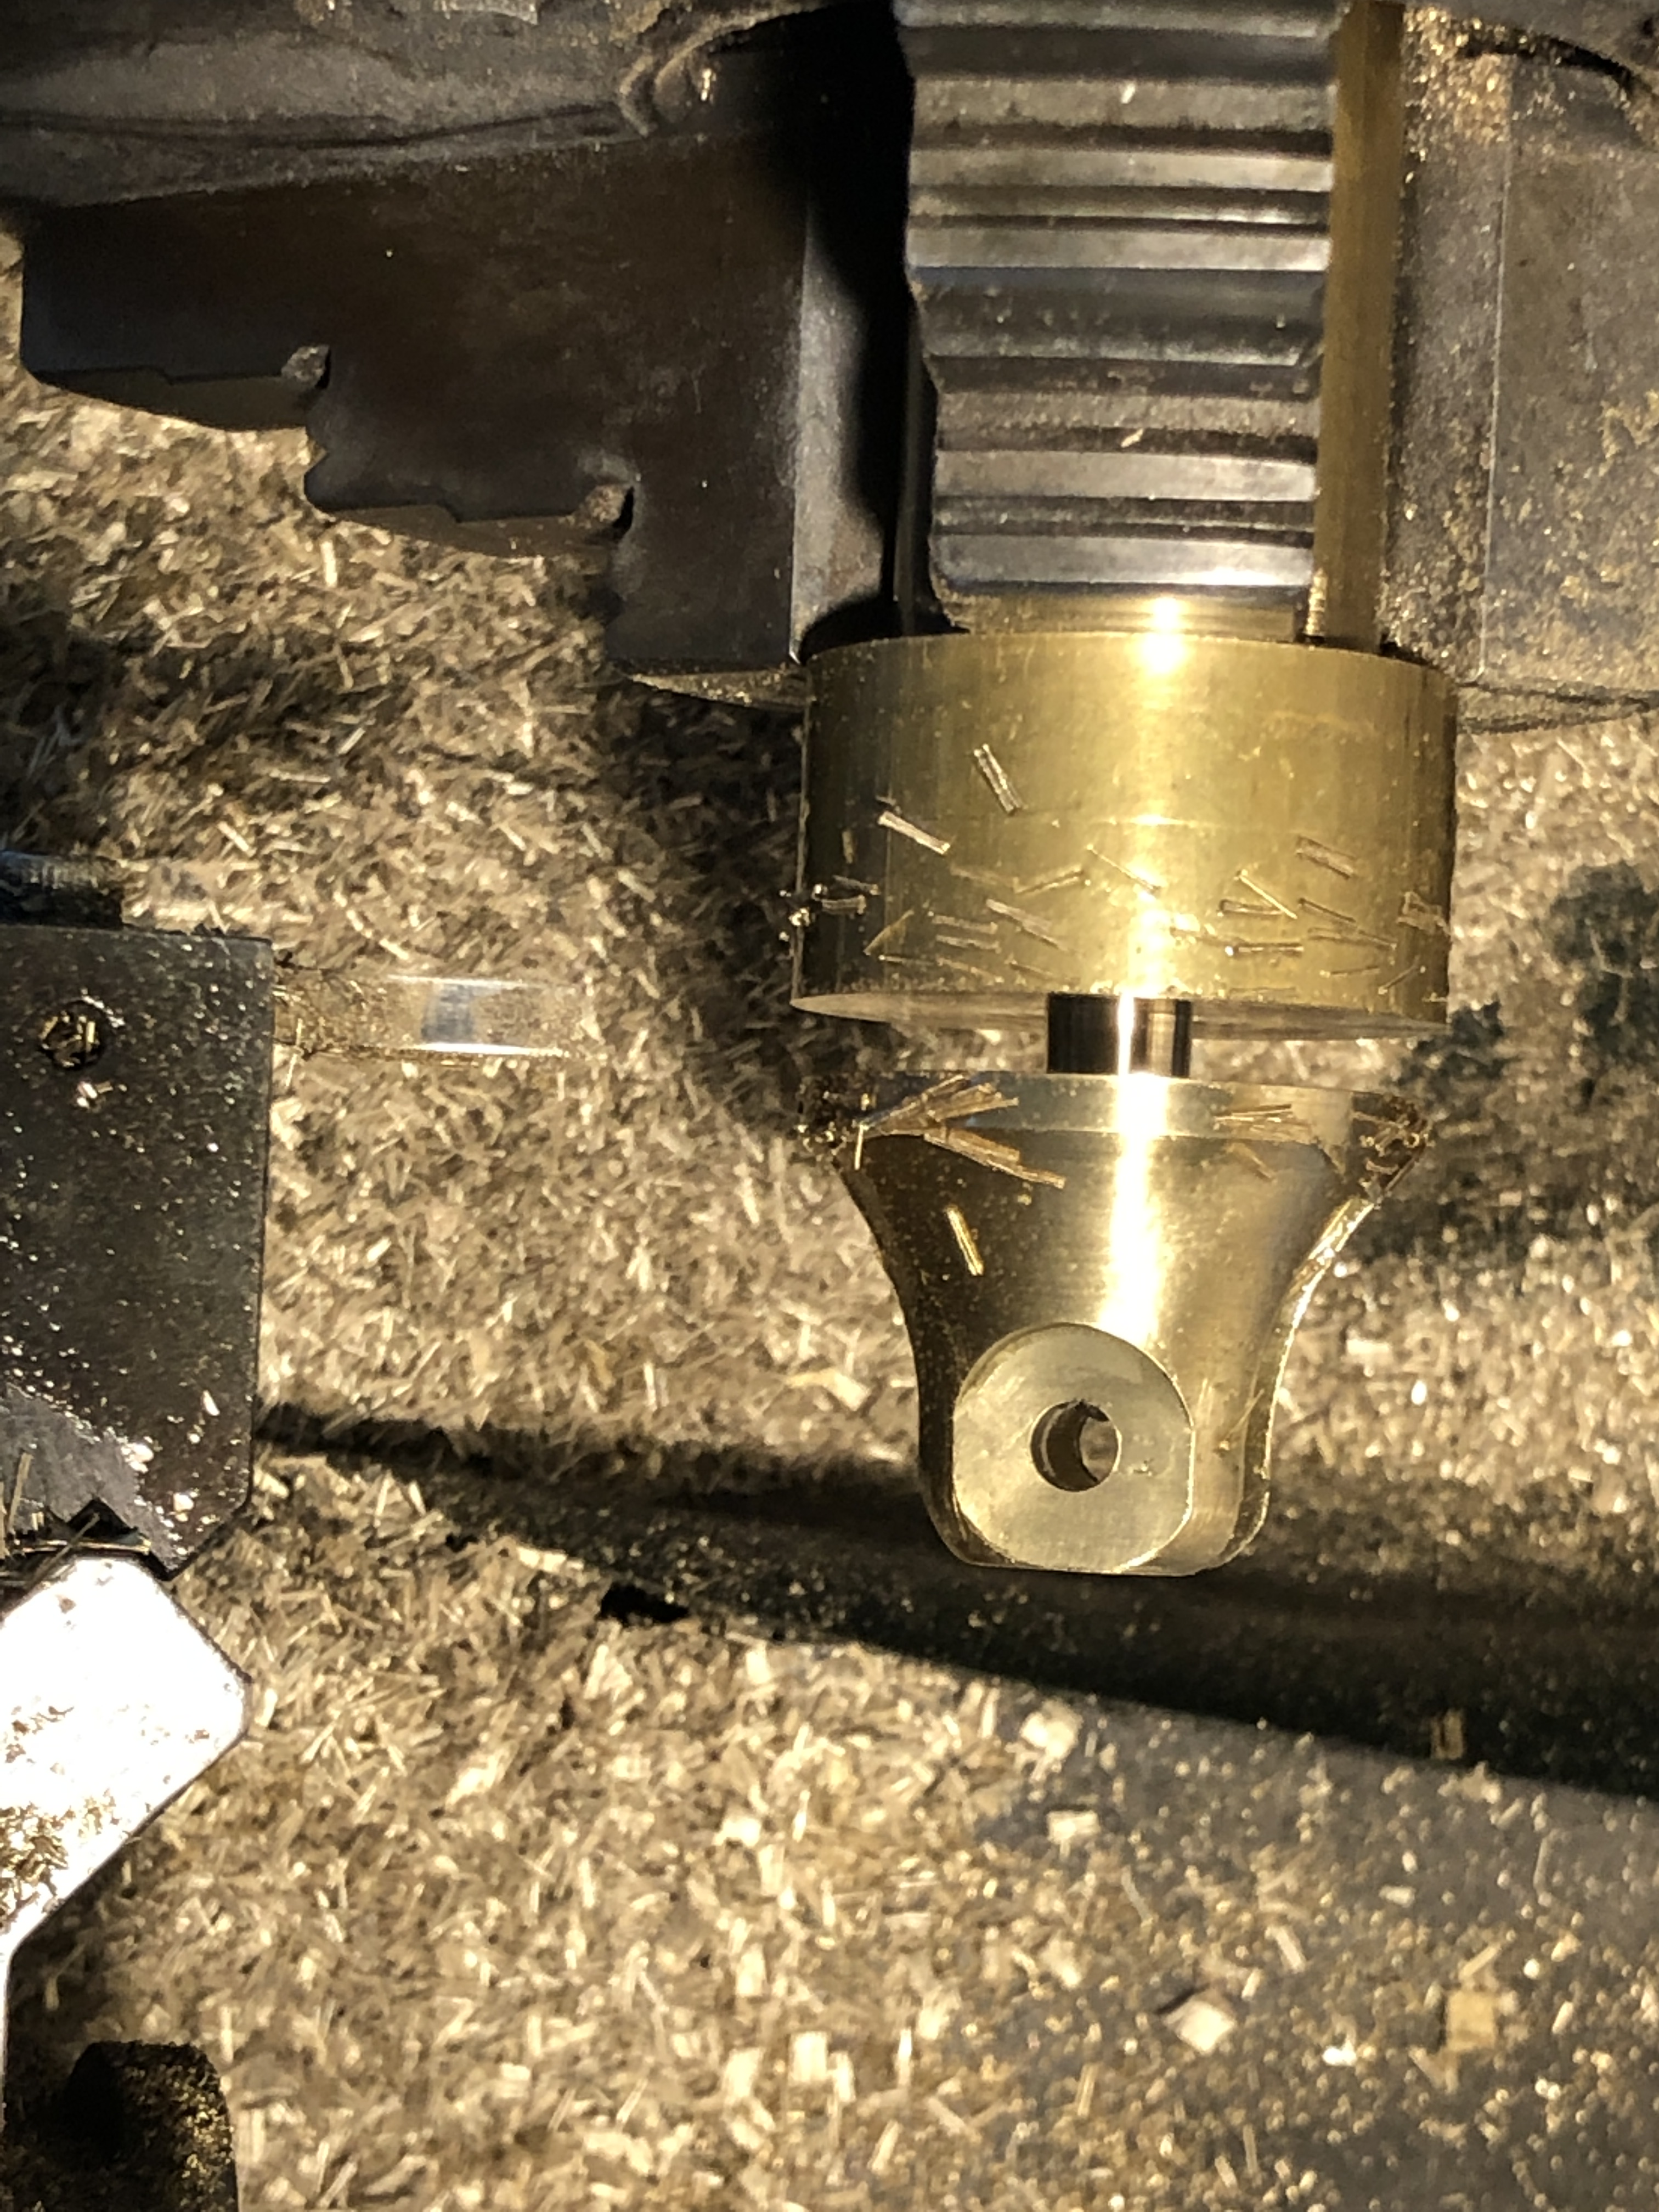

After parting the first part by hand winding the cross slide, I became more adventurous with the next three. Made sure that the gibs were tight, the carriage locked, and setting the spindle at 500rpm, used the power feed to do the parting automatically. With plenty of coolant-lubricant (my home made mixture of olive oil and kerosene.). But still finishing with a hacksaw.
With end result shown in photo 2. All good.
Next to make the wheels and axles from steel. Those brass bar offcuts will go into the “might be useful oneday” container.

Good morning John, I suspect that the carriage wheels would have been chill cast. Hard as the boys of hell. Keep up the good work, regards, Don.
LikeLike
Hmm. That is a new one to me. Thanks for the stimulus. I will follow it up. John
LikeLike
Amazing work as usual John. That makes my effort look very amateurish.
LikeLike
Good thinking John plus, it worked, Yay!
Incidentally, I am about to use the same method but my center bore is 10mm so a bit more robust. The part is sitting on the bench waiting until I finish doing the bigger stuff in the 4 jaw then install my ER32 collet chuck. Fiddly task on mini lathe but I’ve got it down to 6-8 minutes.
LikeLike