
Model Armstrong 110pr RBL – Early Steps.
So. Having made the decision to make a model rifled breech loader, Armstrong gun, on a wooden sliding carriage and wooden traversing platform, I gathered my references. A lot of these guns were made, 959 in use in 1878. Many on wooden carriages, some on iron carriages. They were used in several wars, and I will be delving into the history. Examples of the guns exist in quite a few countries including UK, USA, Canada, and Australia. There are references in Wikipedia, and several artillery books of the era (1860-1890). Various models have been made and documented, including good descriptions, particularly by jefenry.com.
I have several reasonable scale drawings, including some kindly sent by jefenry. (Thanks again Jeff!)

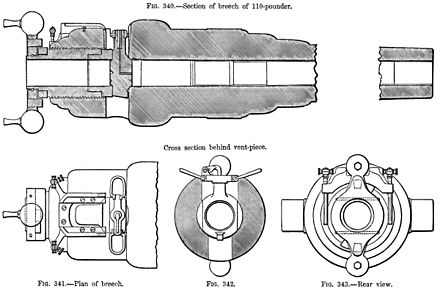
In the drawing above, the traversing platform is identical to the ones under the 80pr Armstrong RML’s which I recently modelled, so my previous experience will be useful for the current build. The carriage for the 110pr RBL is similar, but not identical. The barrel itself will be quite different, and will be the main challenge in the current build. Apart from the breech block, and breech seal, there are 76 (!) rifling grooves, compared to 3 rifling grooves in the RML. I am already thinking that I will be reducing the number of grooves, to maybe 28.
Another handy resource which I found during my Internet searches of Armstrong 110pr’s, is ETSY.com, a Canadian site, where the Armstrong 110pr has been CAD drawn in very fine detail, and available for $AUD34. The drawings are not perfect in every detail, but even so I rate them as very good. Only available as Fusion 360 files, but Fusion 360 is available free of charge for hobbyists, with some restrictions relating to file numbers and some features.
The link to the Canadian site is: https://www.etsy.com/ca/listing/702320886/3d-model-british-armstrong-rbl-110-pr-7
Yesterday I purchased a lump of 1020 shaft, 1270mm long. I only required 305mm, but the supplier was unable to cut it for 3 days, so I took the whole piece. A burly worker picked it up as if it was made of balsa wood, and put it in my car. I struggled to unload it at the other end. 40+kg/ 90lb.
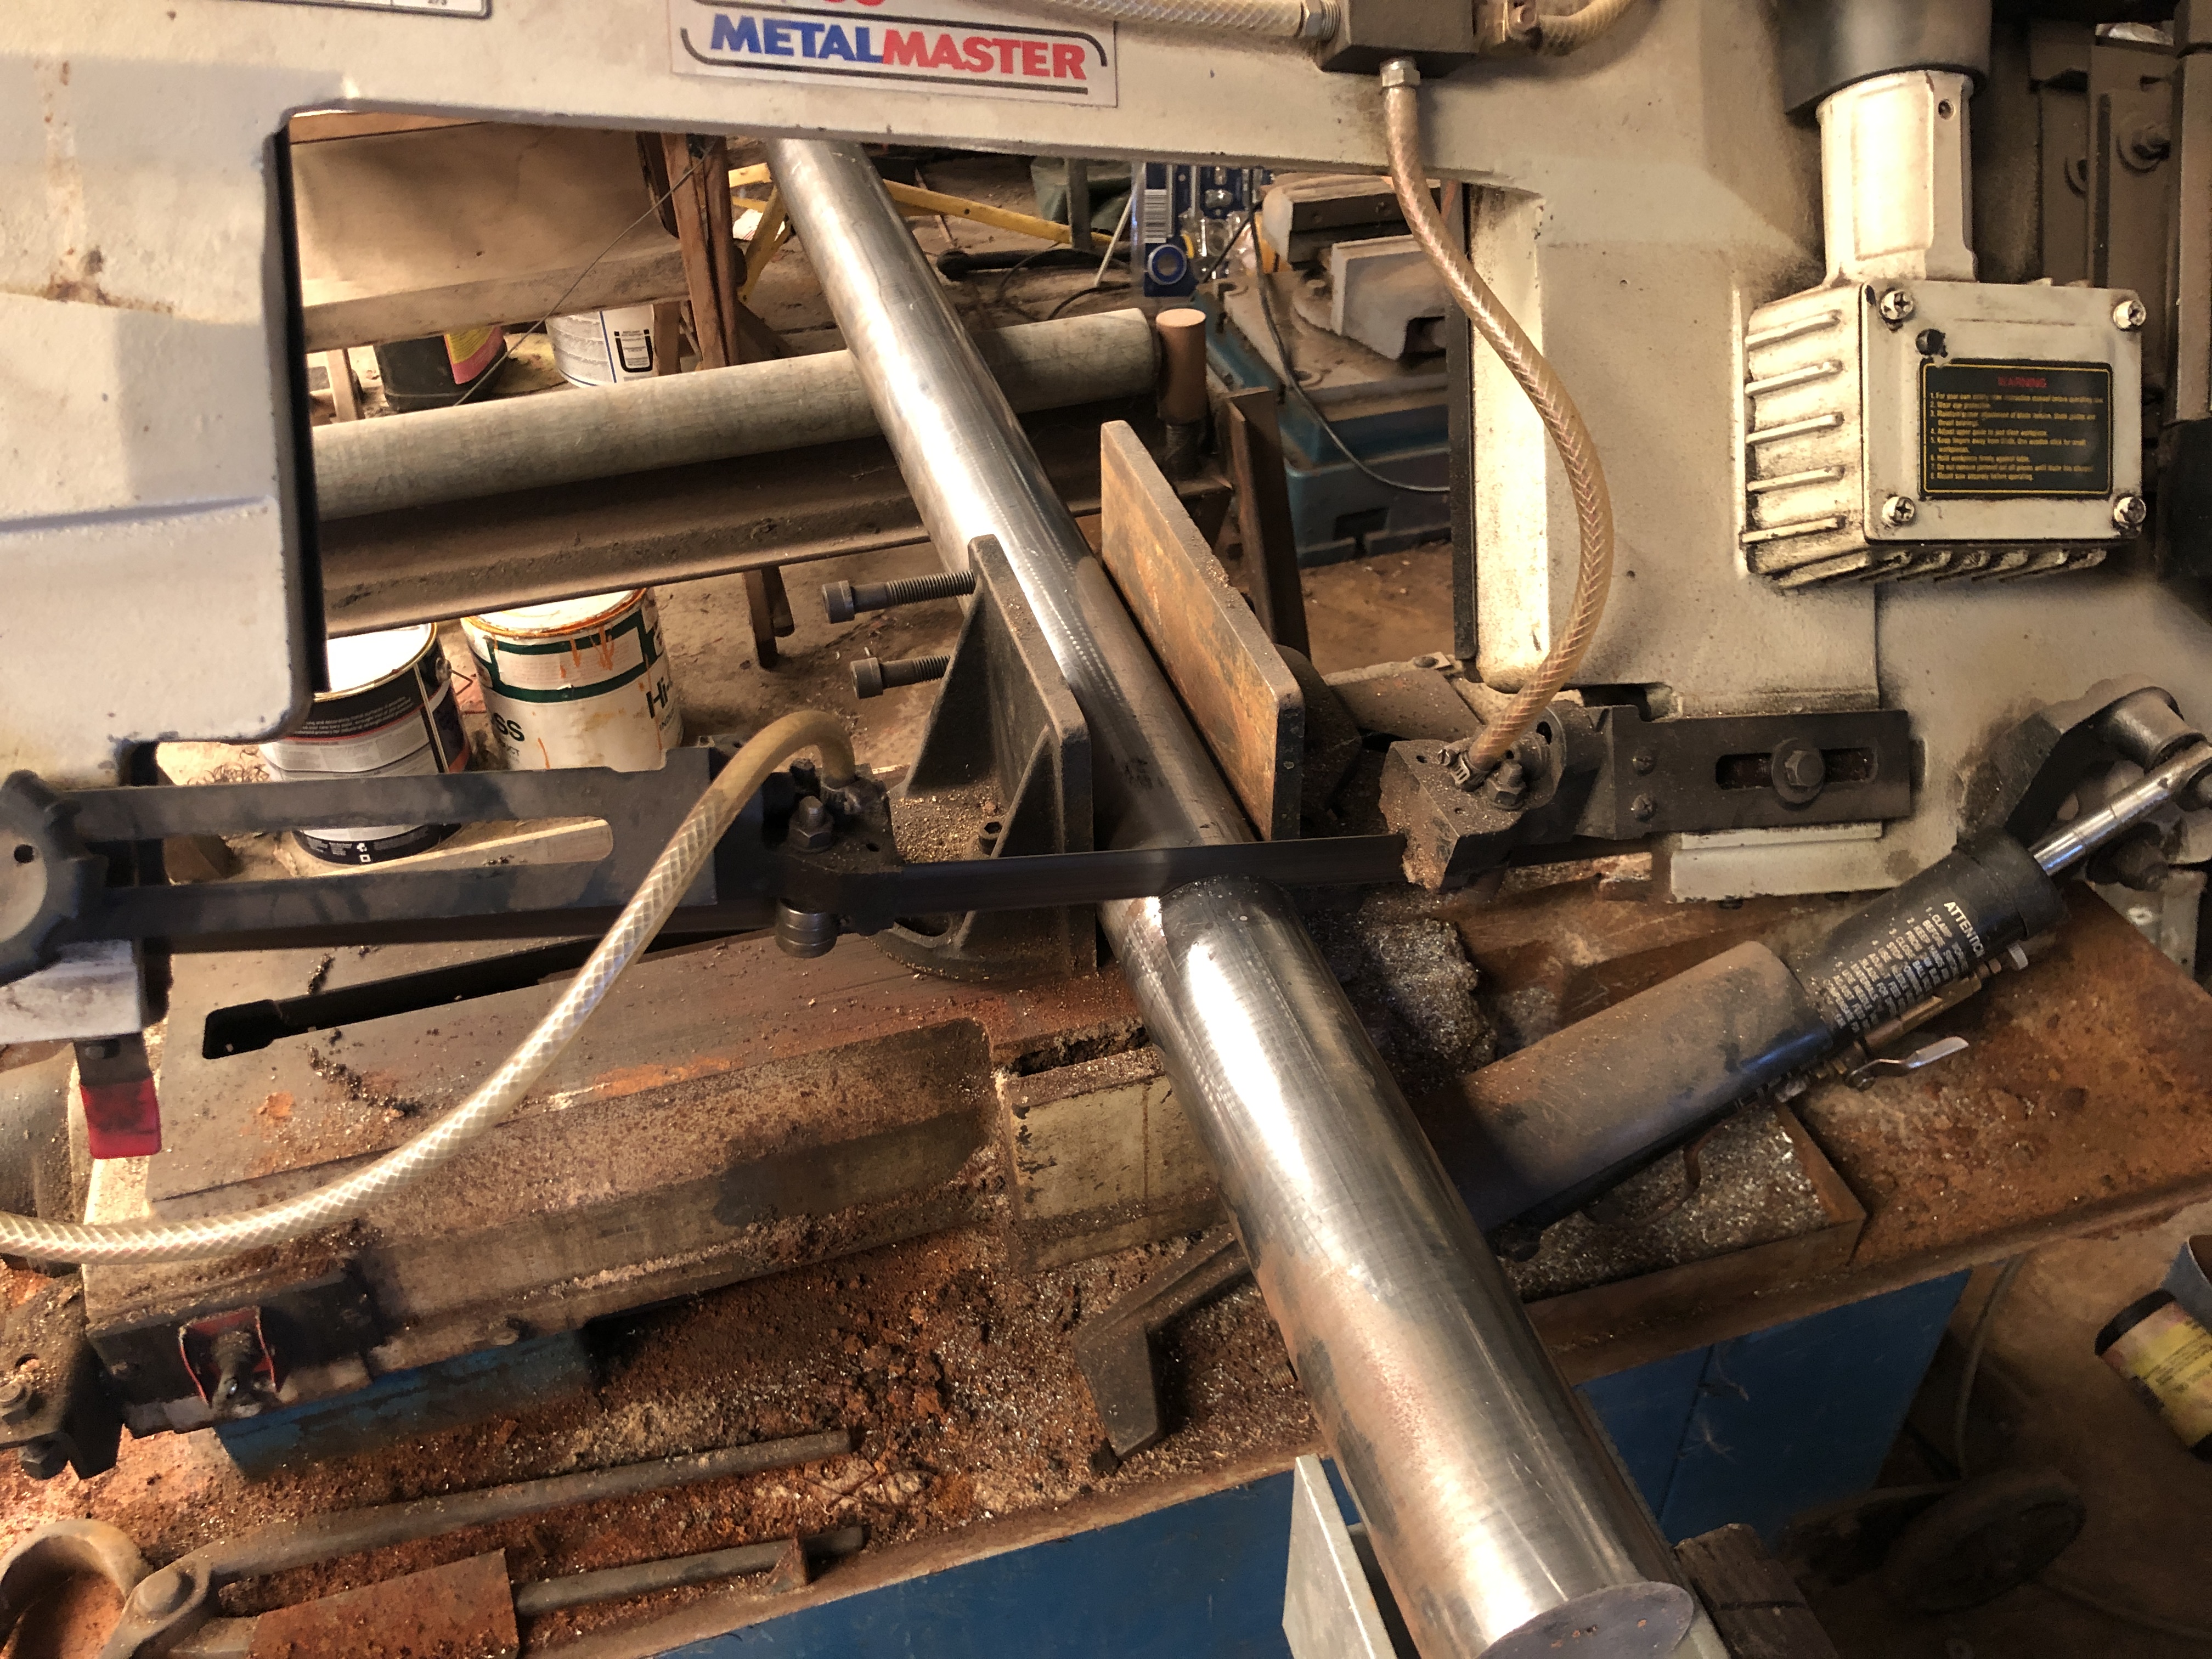
…and weighed the 306mm piece…

The next step for the barrel is to rough drill the bore. I have an extended 16mm drill bit from the previous model, but will have to modify a 17.75mm bit and extend an 18mm reamer or make a long 18mm D bit, before I can proceed. So instead, today, I made a start on the traversing platform.

Having made a few errors in the machining sequences last time, hopefully I can avoid the mistakes this time. Also, with multiples of some components, such as wheel brackets, and rope rings, I will be casting some of these in bronze, and getting laser cut parts for others such as the metal slides.
The original Armstrong barrels were constructed in multiple pieces which were shrunk together, using the “coil” method to construct the pieces. The trunnions were on a separate ring which was forged, then machined to final shape, then shrunk into position. I am considering machining the model trunnion ring separately, and shrinking it into position, but the rest of the model barrel will be turned from a solid piece of 1020 steel.
