
Bellerophon (or Elephant). Nails or Screws?
by John
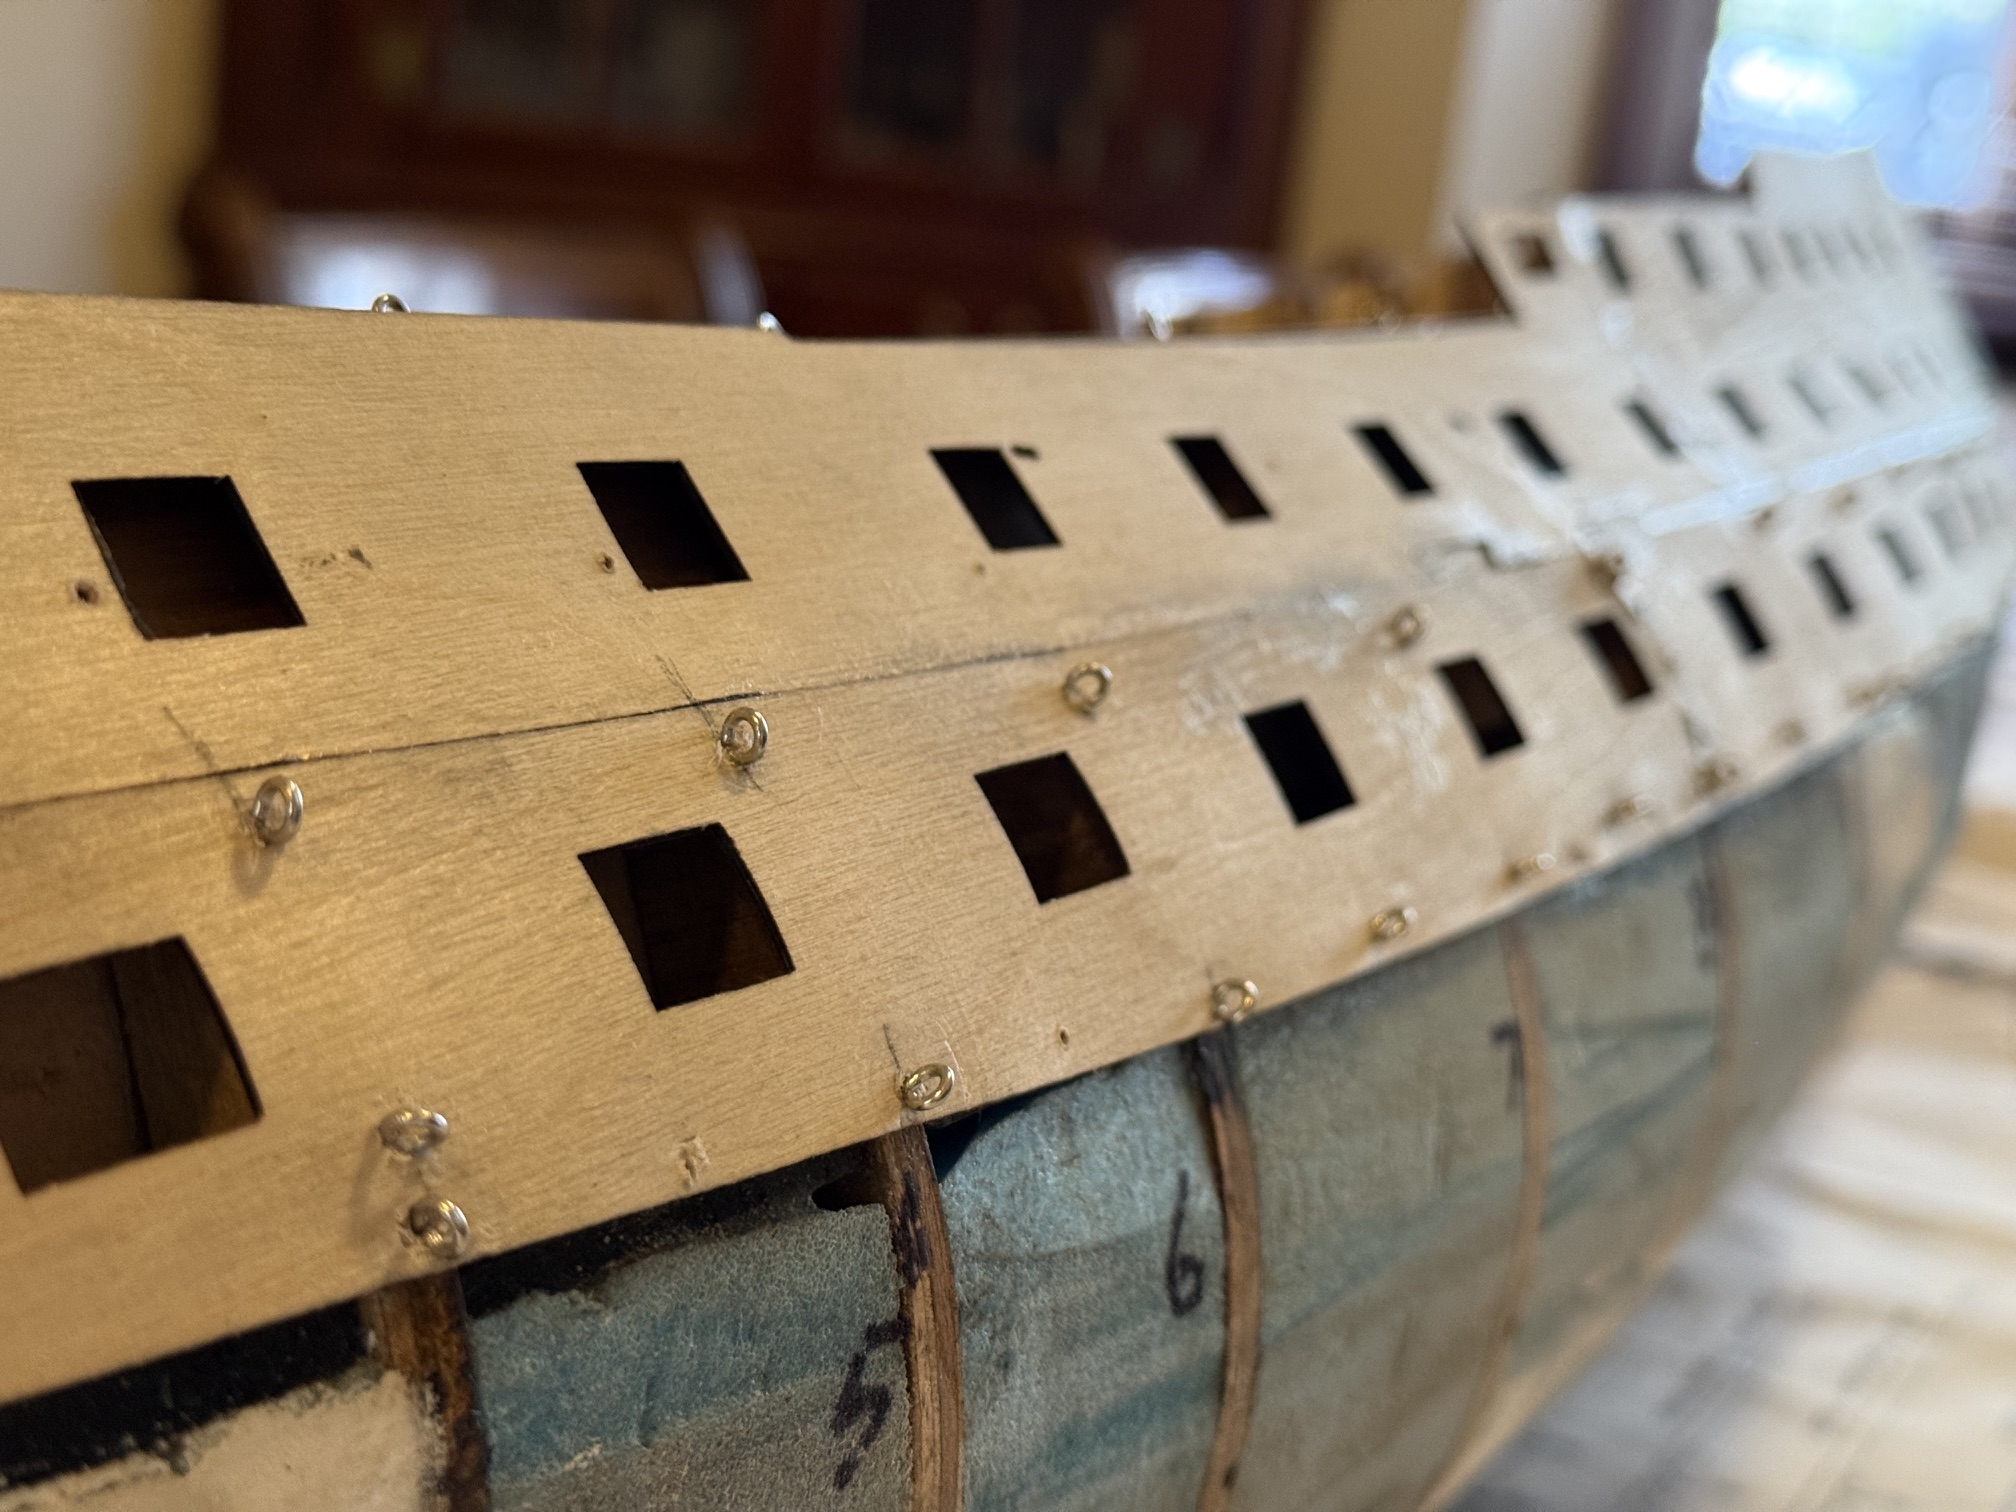
I was at a stage in the construction of a 74 gun ship which necessitated attaching 8 pieces of plywood to the outside of the hull.
So what?
Well, each piece of 1mm thick plywood bends in 2 or 3 ways, which is reason that soaking the piece in hot water for 20-30 minutes prior to attaching it to the hull is recommended.
I did try attaching some of the simplest shapes dry, but that just did not work satisfactorily. So I removed them, soaked them and reattached them, with much better results.
This is the end result.
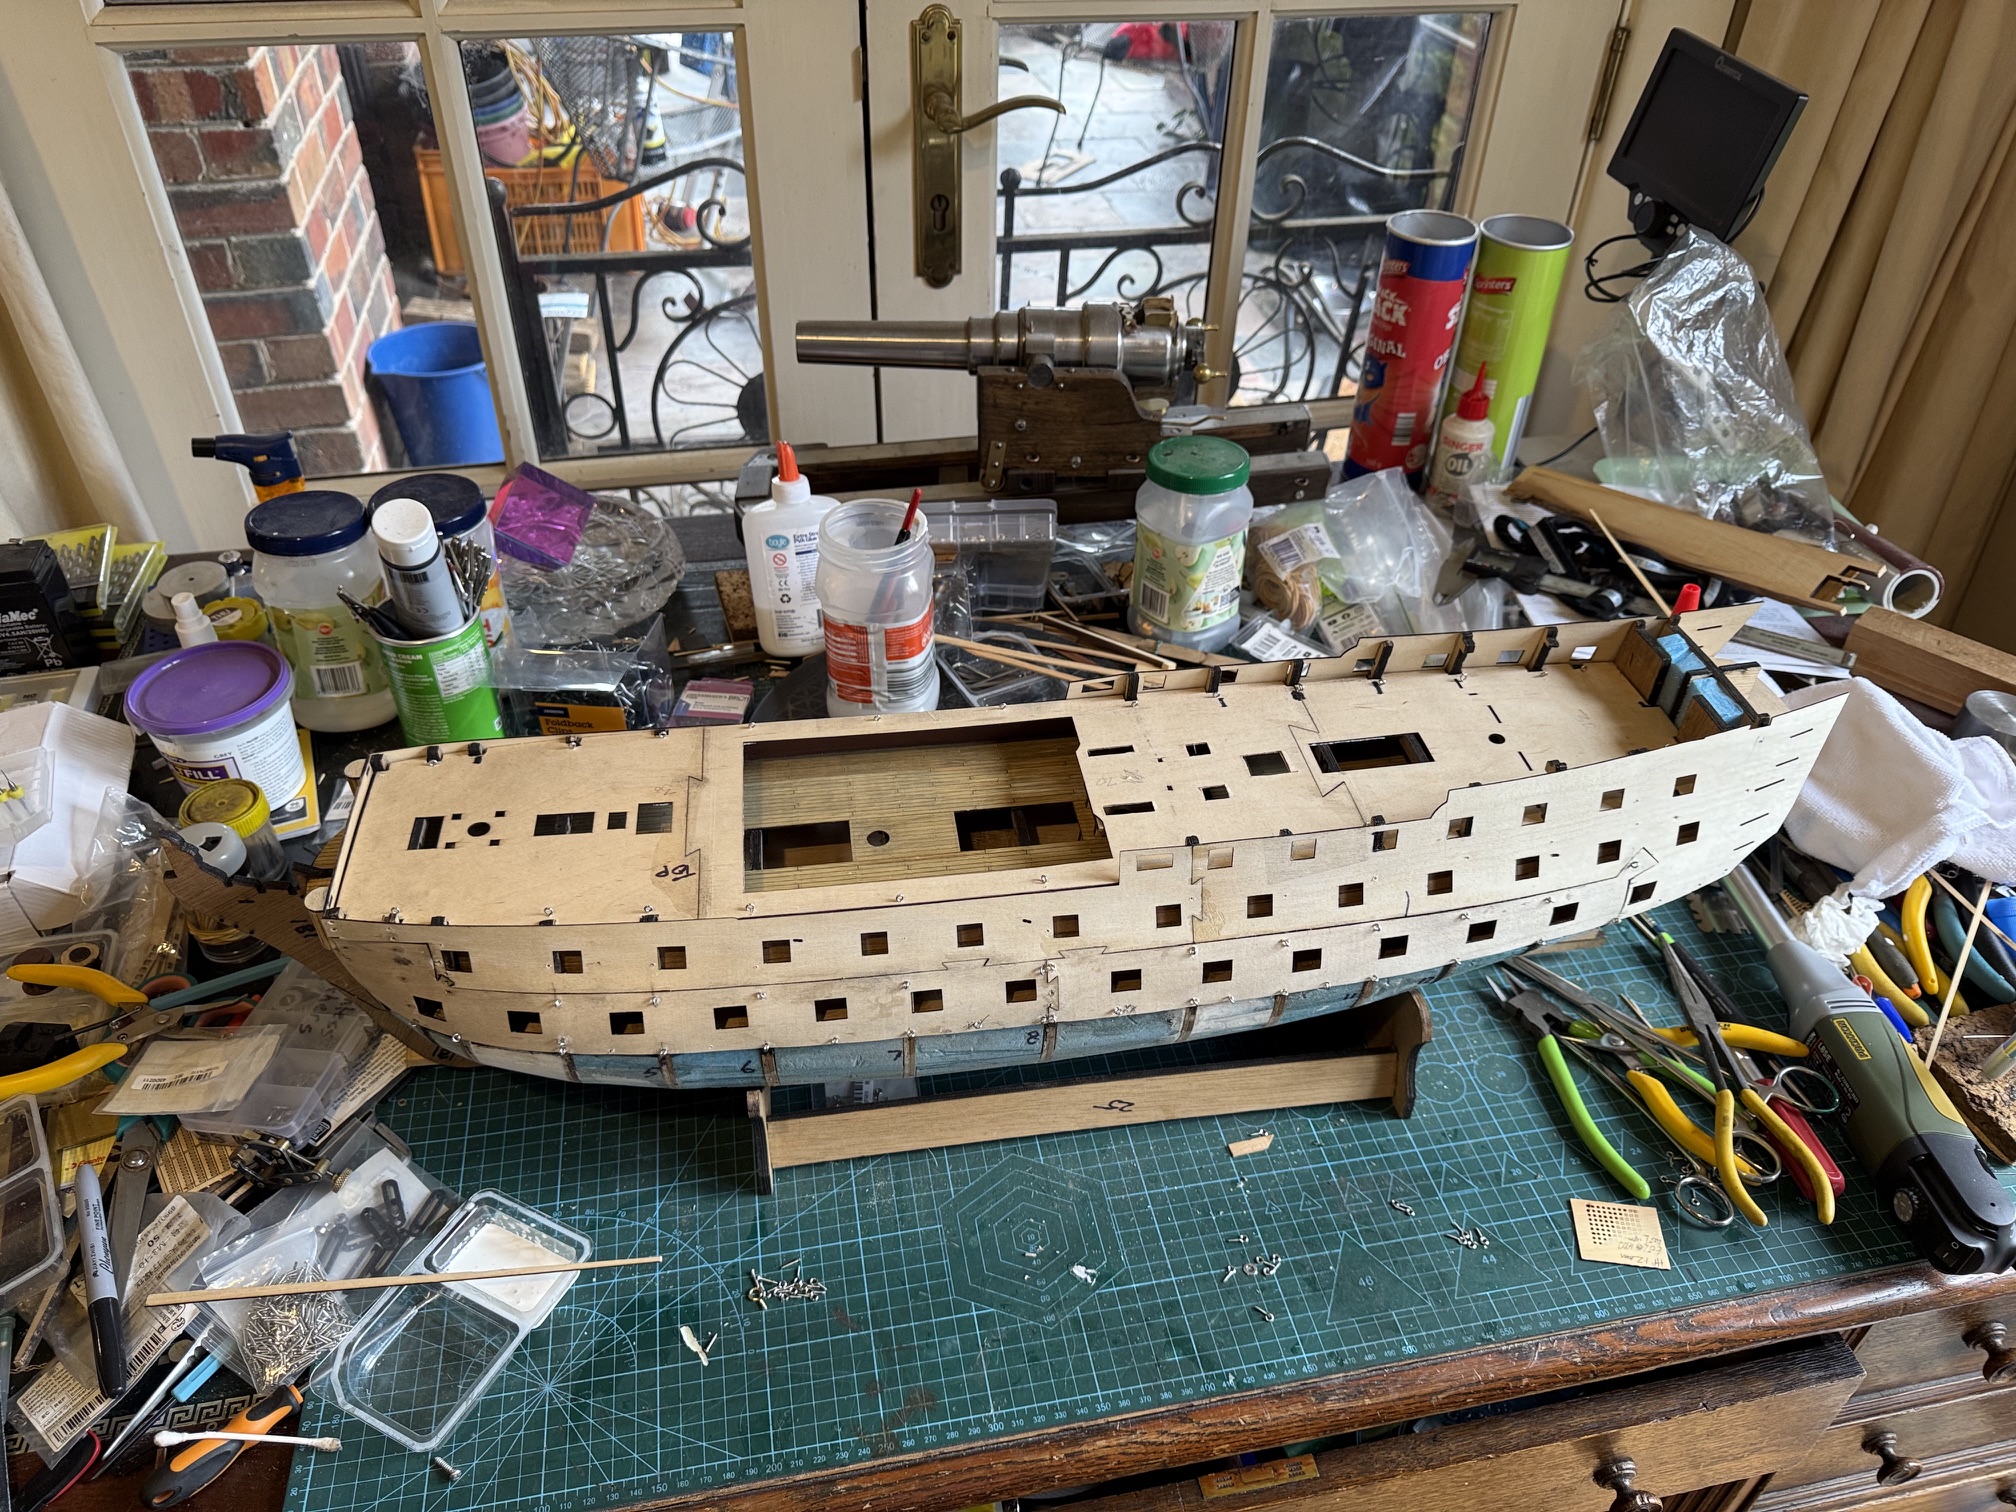
Most model ship builders use small brass nails to attach pieces like this.
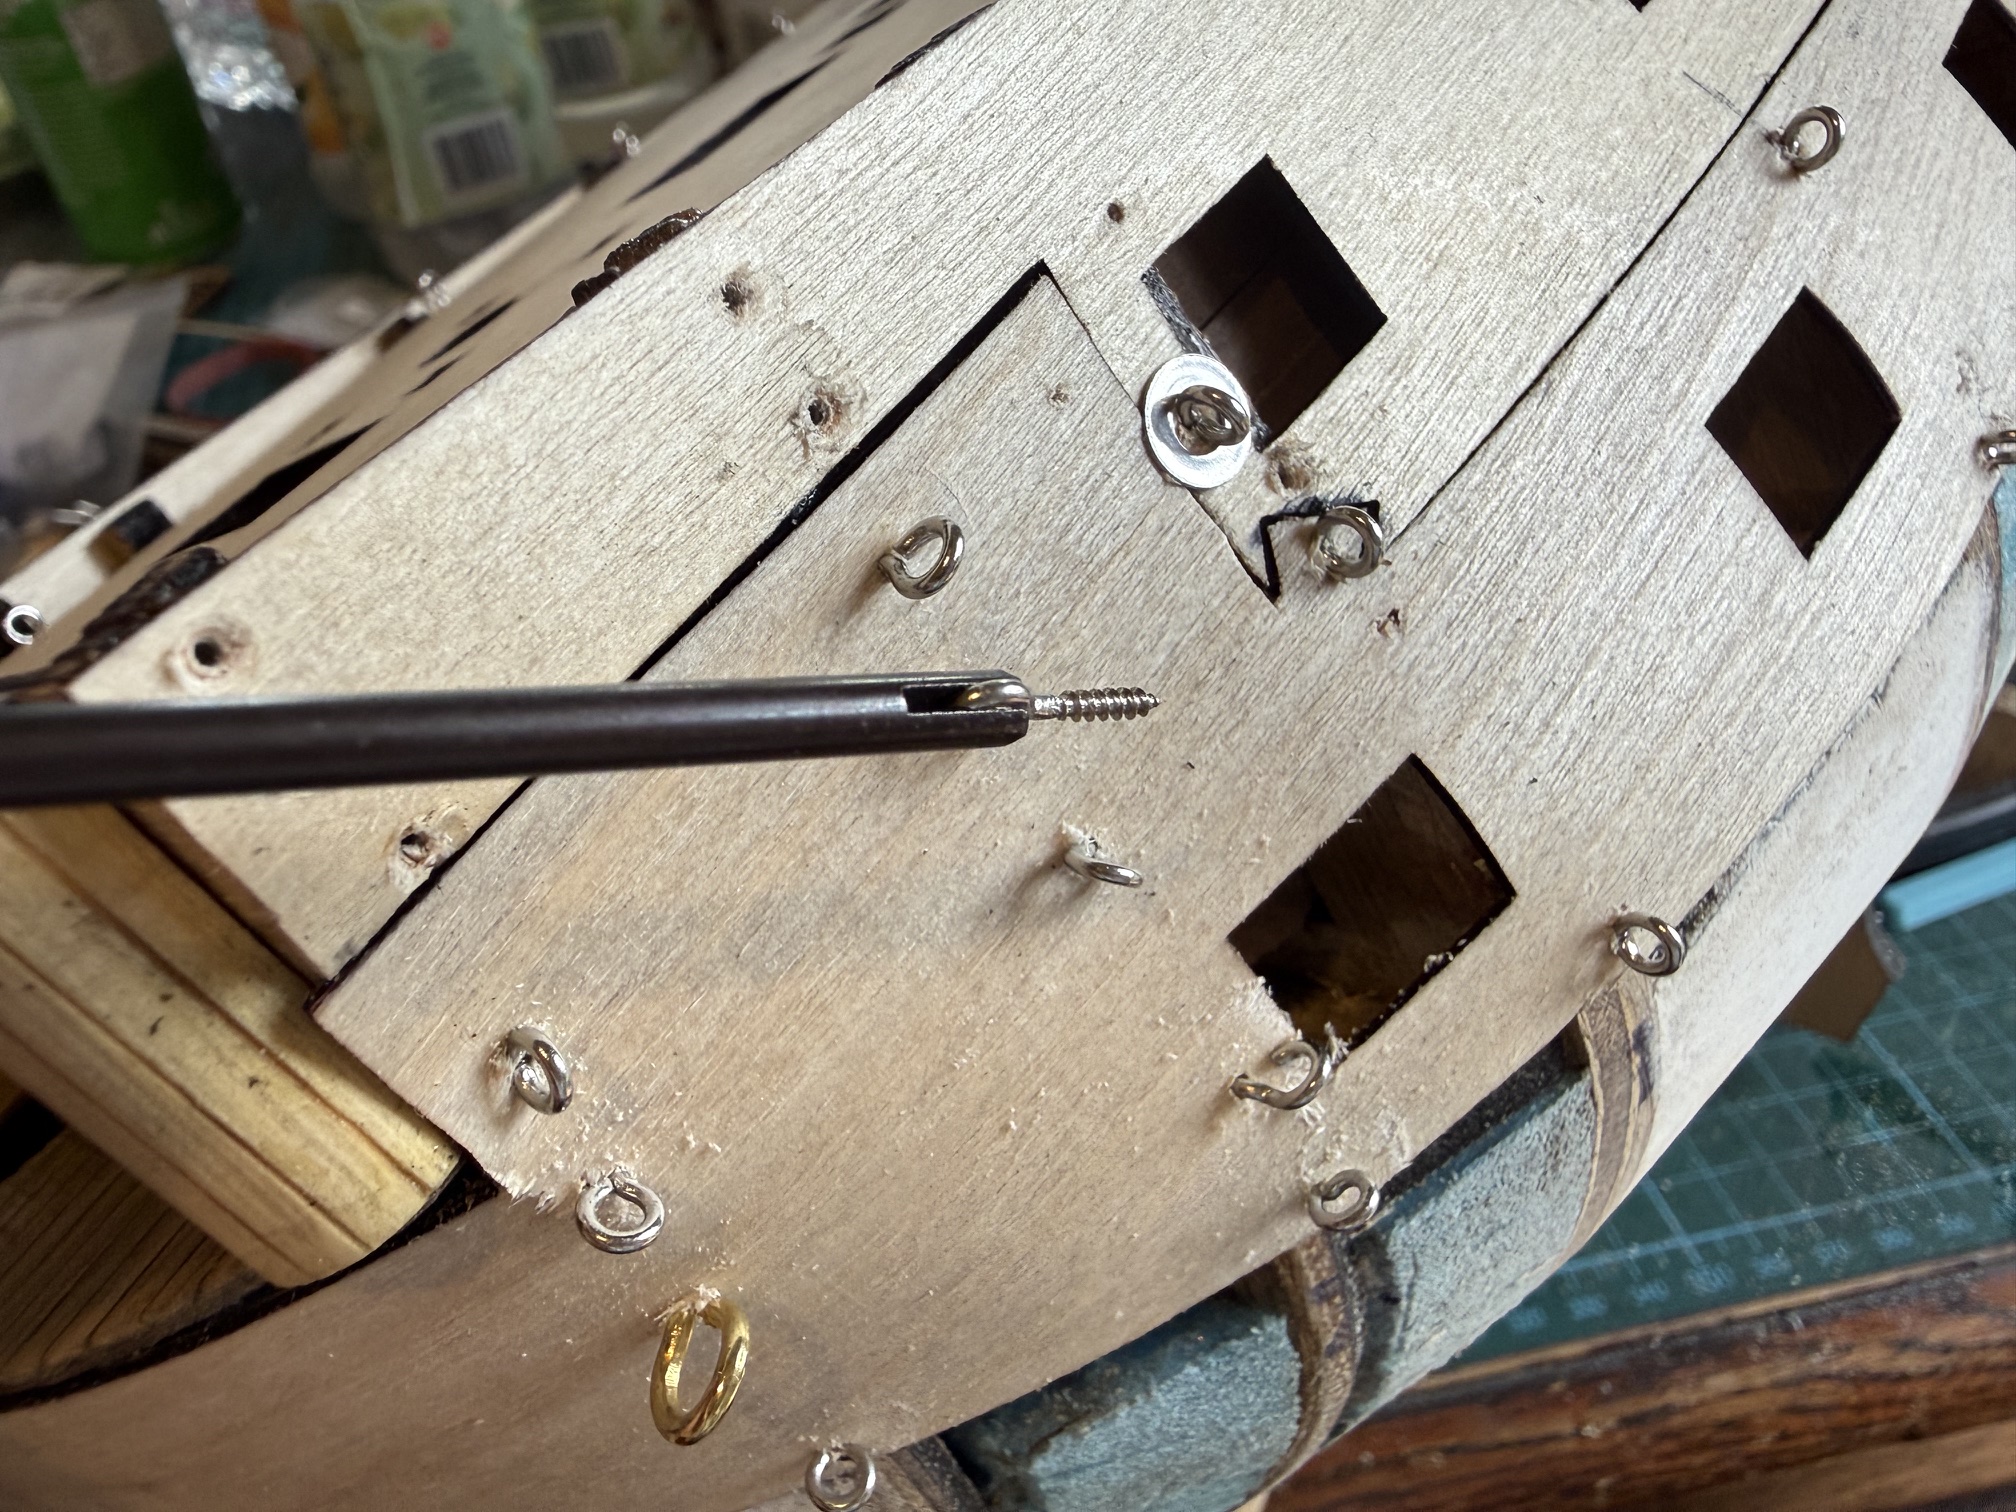
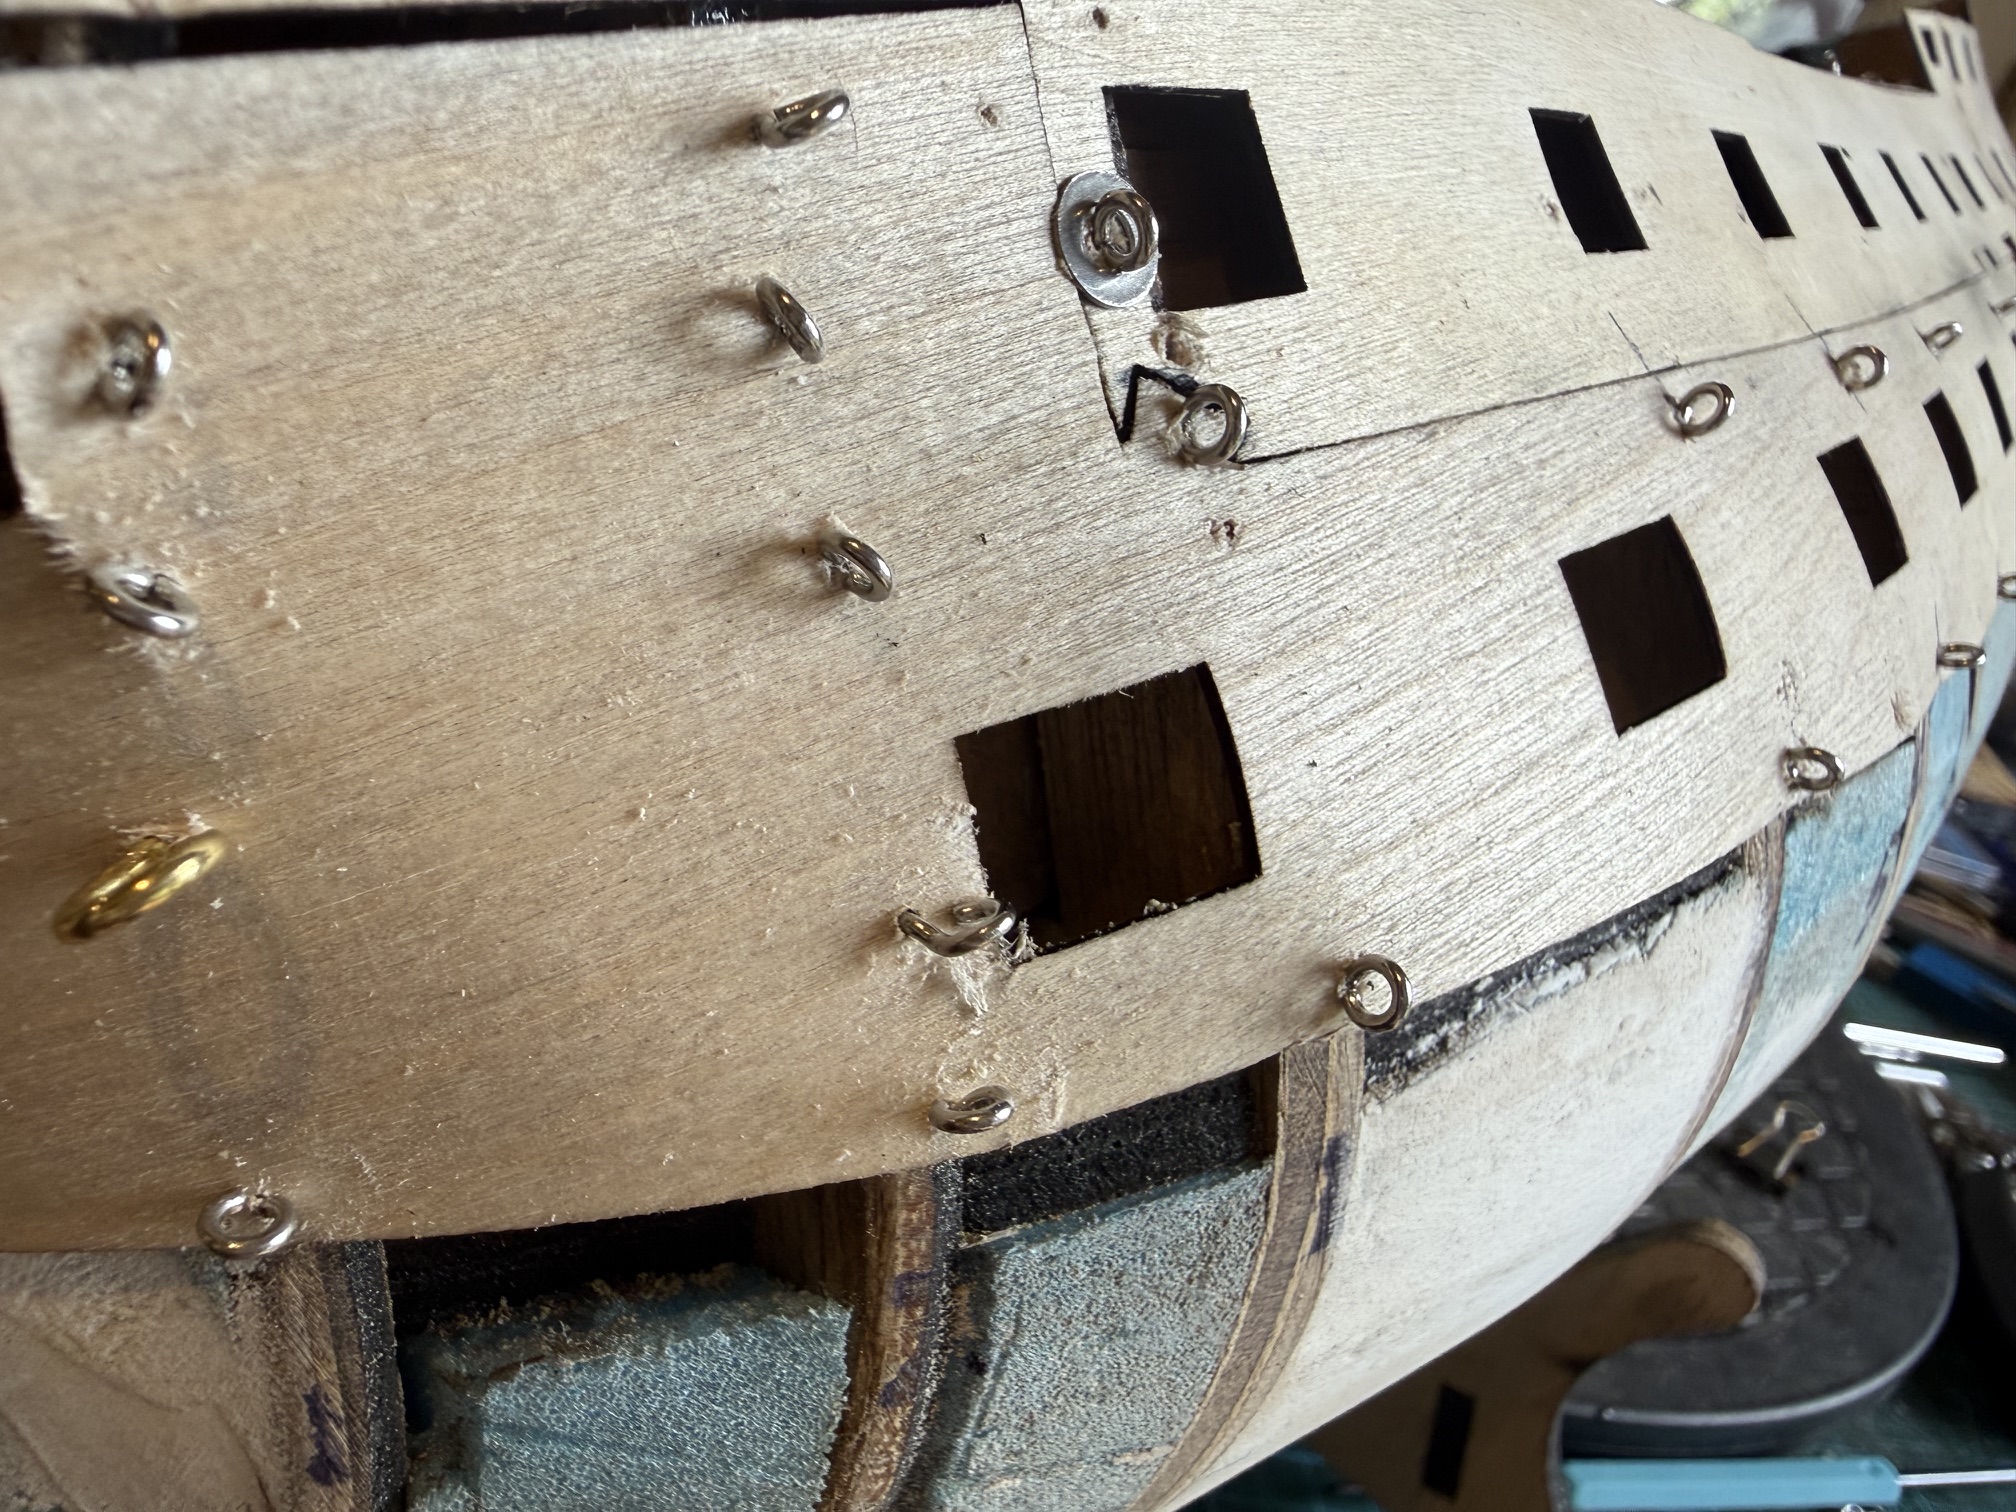
But I have an aversion to hammering on my carefully assembled hull and I decided to try using small screw eyes. (in the foreground of the above pic.) Yeah. I prefer screwing to banging.
I predrilled the ply, then inserted the screw eyes. First I tried just using my fingers, but that was hard, painful, and I dropped at least 50% of the eyes.
Then I tried long nose pliers but the eyes twisted in the pliers and again I dropped many of the eyes.
Then I tried rigging tool with a slot in the end. That worked amazingly well. It held the eyes and was easy to turn. But alas it snapped after using it on 2 or 3 panels.
Then I had a brainwave. Remembering a tool which I had used every day in my surgical days….
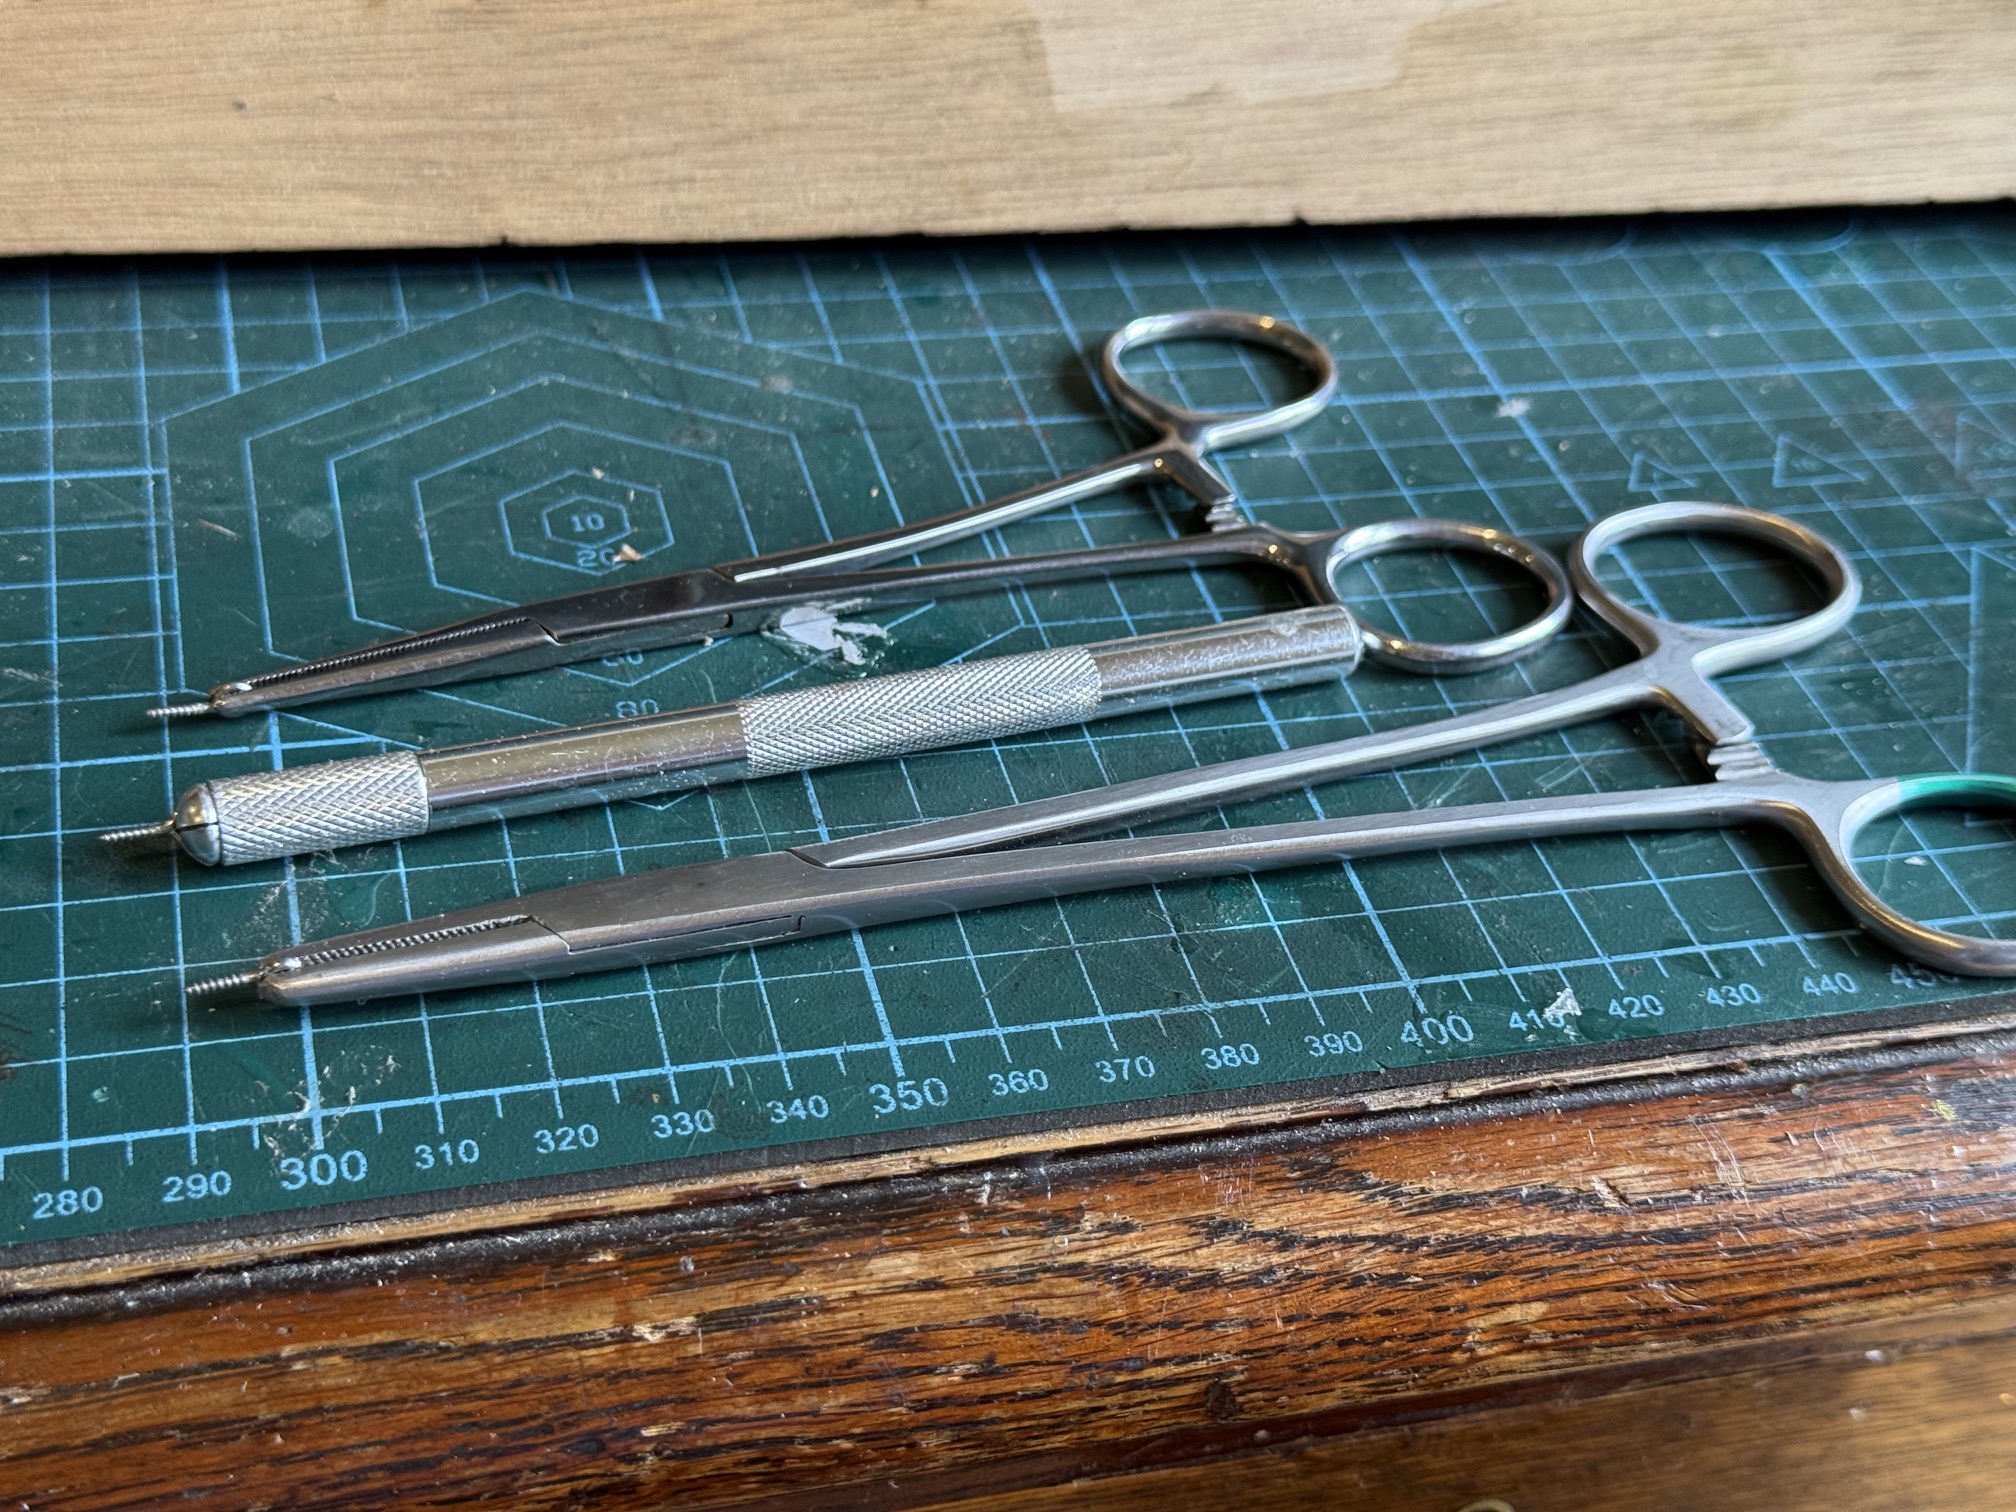
That particular needle holder is a single use instrument. i.e. used for one operation then thrown out. In this case, retrieved by me. Like me, you probably think that this is a shocking waste of resources, but these single use instruments are fairly inexpensive, and when cleaning, sterilizing, and repacking costs are taken into account, the costs stack up. And a few of them can have a second life for modellers!

Coming along rapidly John, a good base for the final planking.
cheers
Pat
LikeLiked by 1 person
Thankyou, and I hope so.
LikeLike
I prefer screwing to banging, too; none of my boats had nails in them, just lots of bronze screws. At first I was puzzled by your use of screw eyes but soon understood that it was a great solution to the problem of holding the pieces in place while the glue set. Can’t say I have a straight needle holder in my tool repertoire, though I have lots of dental instruments that come in handy on small projects.
By the way my work table has always looked very much like yours when I’m in the midst of a project!
Aloha and mahalo for your posts!
LikeLike
Medical instruments are cheaply available on ebay. And I am happy that I am not the only workplace slob. Cheers.
LikeLike