johnsmachines

machines which I have made, am making, or intend to make, and some other stuff. If you find this site interesting, please leave a comment. I read every comment and respond to most. n.b. There is a list of my first 800 posts in my post of 17 June 2021, titled "800 Posts"

Tag: propane burner

Experiment Failure

Sometimes information derived from a failed experiment is just as useful as a successful experiment.  Several readers predicted that burning coal would not not work in my dredger engine boiler, but I had to be convinced.

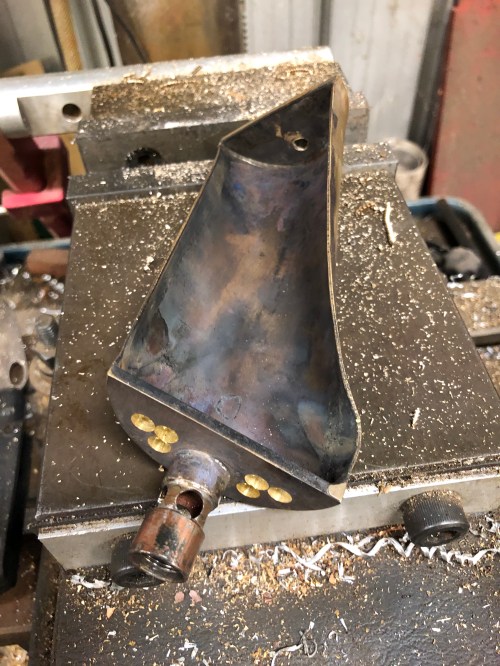
So, I removed the gas burner.

I have 3 types of coal.  One is Welsh steaming coal in 25-30mm lumps.  It has an attractive shiny appearance.  The other is coal lumps which were picked up next to a local railway line and are probably from Newcastle NSW.  I also have some brown coal, but it is in the form of briquettes, and I did not attempt to use them.

IMG_7760.JPG

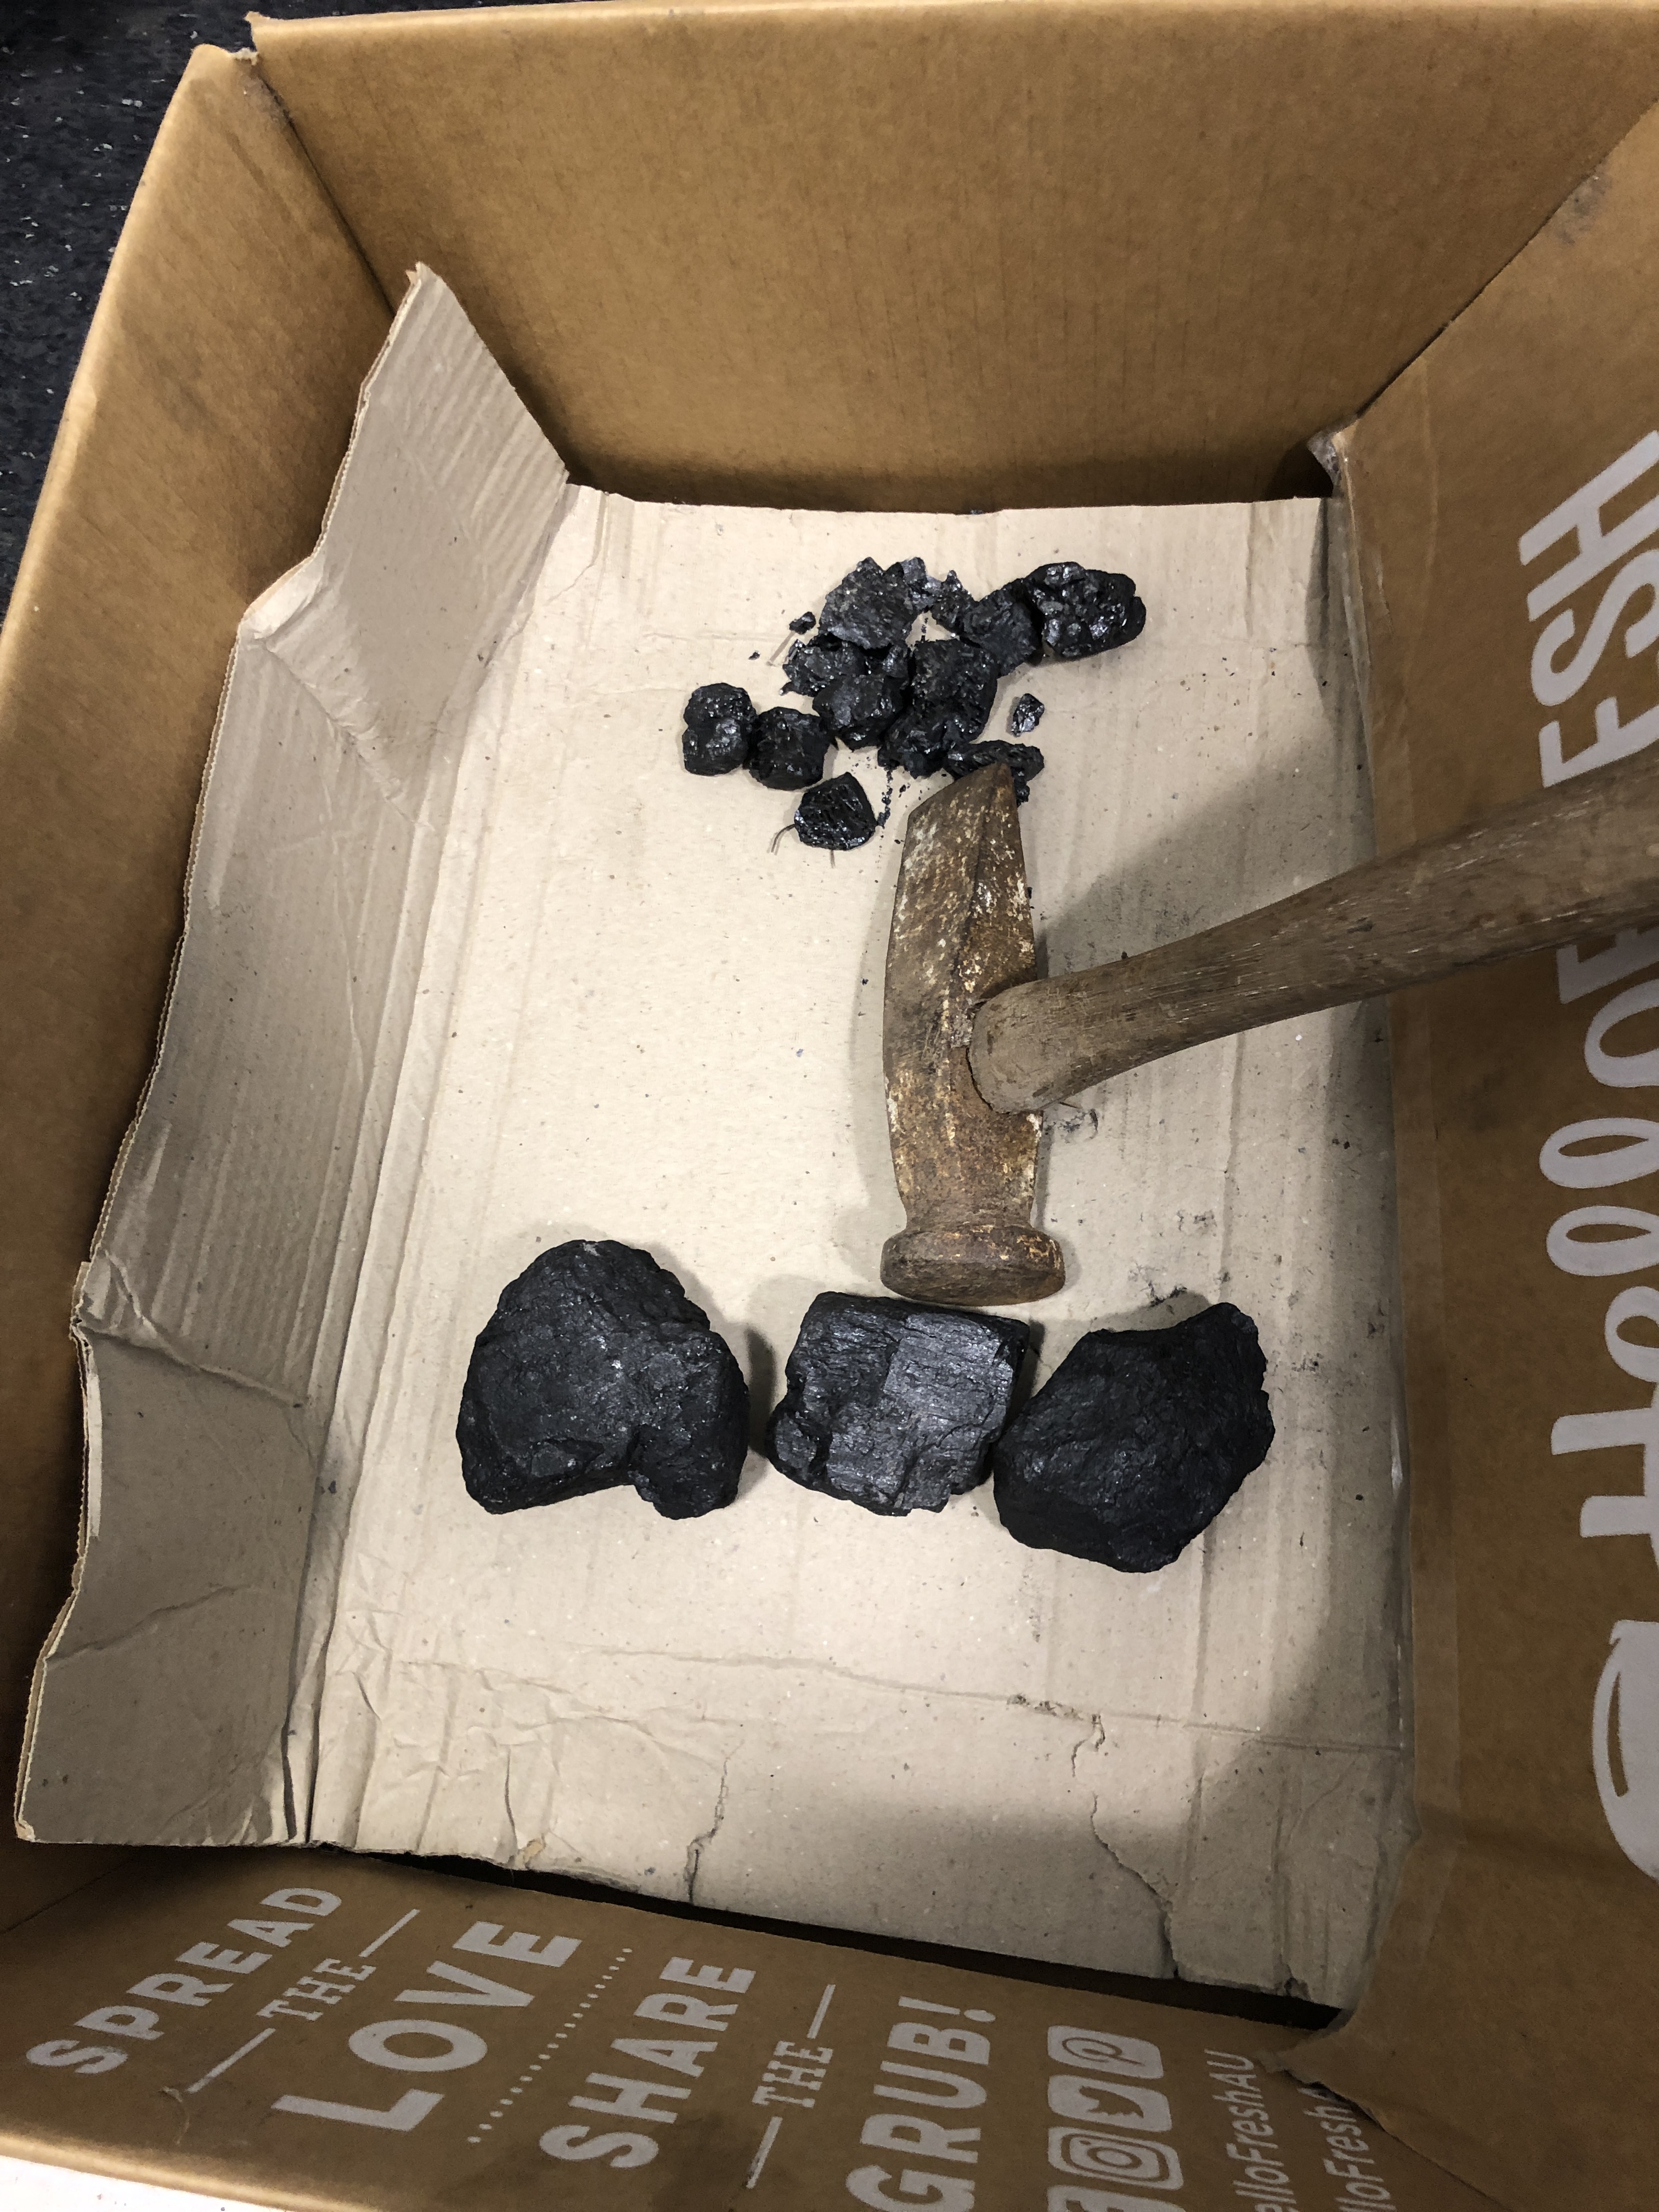
Welsh steaming coal top, railway line droppings bottom.  All too big. 

Both black coal types were too big for the ~60x40mm diameter firebox in the dredger engine.  How to make them smaller?

Smash them up with a hammer and pass them through a sieve?  That would leave a lot of unusable tiny fragments as well as bigger bits.  And be very messy.  And require making a sieve.   If my experiment was successful that is what I would do in future.  Did not happen.

Meanwhile, I tried a hammer with a splitter edge.  The Welsh coal had definite layers, and split fairly predictably, with not too much dust or tiny fragments.   The Australian coal crumbled unpredictably into many fragments with a much lower usability fraction.

I started the fire with newspaper, then pine and hardwood kindling.  I should have paid more attention to the wood sizing, because it was problematic getting the wood alight.  Also, I had not set up a blower for the chimney.  I was relying on a really long chimney extension to provide enough draught.

IMG_7764.JPG

Chimney extension.  worked well.  Now what is that black circular patch on the ceiling?

Got the fire going with the assistance of a gas torch.  When the fire got going the draught seemed adequate.

IMG_7768.JPG

The wood fire at its best

Tried to add coal lumps, but they would not fit the firebox while the wood lengths were in place.  Firebox is just too small.  So I persisted with wood.  Soaked some in mineral turps.

I was not impressed with the appearance of the fire, but surprisingly, eventually, steam was produced, but never enough pressure to run the engine.  And the fire did require constant attention.  The front of the boiler was quite dirty after all of this.  I am glad that I have not yet painted it.

I will give the wood + coal fire another attempt, but size the pieces better (smaller).  The Sievert type burner is looking more likely.

Later in the day…..

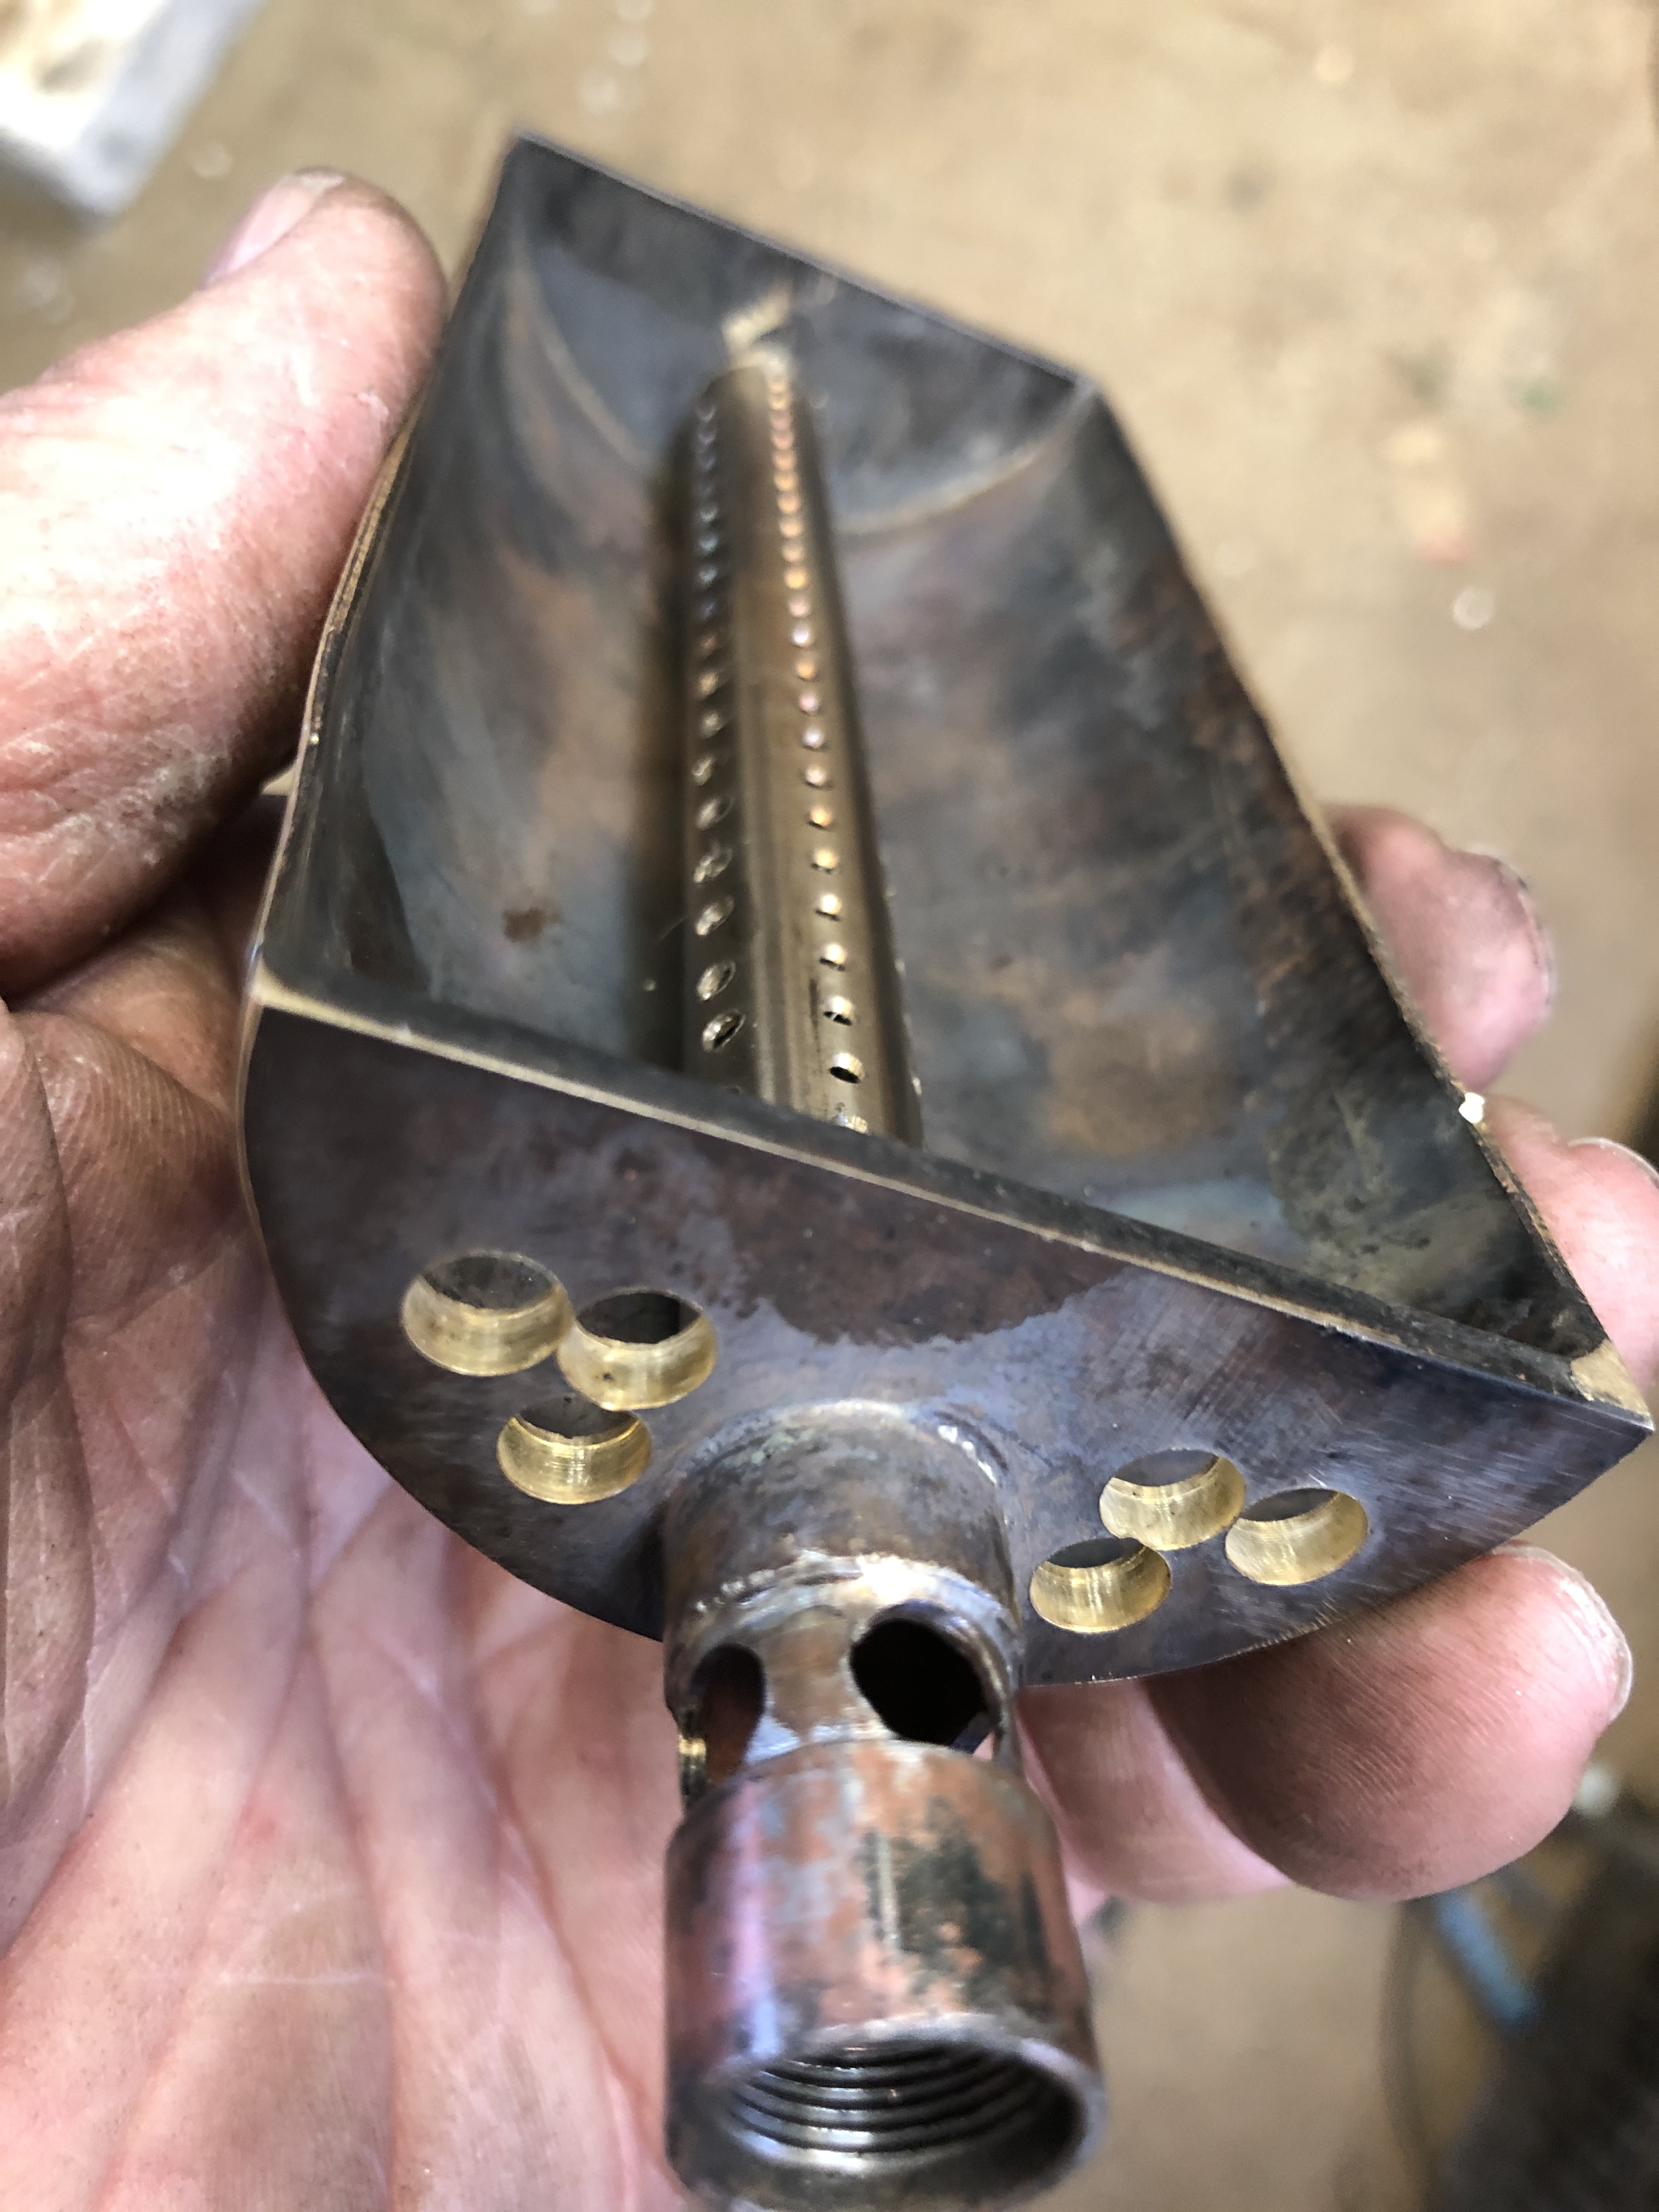
…after a further discussion with Stuart I have decided to try the Sievert burner.   Made some steel rings which are a press fit on the burner, and an easy sliding fit inside the firebox.

IMG_7771.JPG

IMG_7773.JPG

This is the new burner inside the firebox.  Not exactly @Trevithick, but I bet that he would have used it if it had been an option.

I still need to make a fitting to hook up a valve and the propane hose.  And try it out maybe tomorrow.  Another experiment.  I hope to not see flames shooting out of the chimney.


Oh Shit!

PART 1

I was drilling a hole in the end of the Trevithick burner today.  The burner was securely held in the vice, but the heat annealed brass was not as strong as the torque in the 6mm drill bit.

IMG_7651

After the initial self hatred at misjudging the situation, I thought …oh well, I will have to make another one.    Then I thought, …I wonder if I can repair it…..

I still have the wooden forms which I used to make the burner originally, so, roughly twisted the part back into shape.  It was pretty malleable still.  Then forced it into the wooden form.  And beat it into shape with the copper hammer.   This was looking promising.

IMG_7652


IMG_7653.JPG

Then forced in the other part of the form, and applied the 20 ton hydraulic press.

IMG_7655.jpg

The curved shape was pretty good, but there was still some twist.

IMG_7654.JPG

I still had to drill an 11.5mm hole, so this time I used the form, successfully.   Then removed the twist by hand after knocking out the form.

Tapped a 1/2″ x 26tpi thread, and assembled the burner.

IMG_7657.JPG

All beautiful again.  And now the burner tube is properly secured.   The bulge under my thumb was pushed straight.


PART 2

My reader/advisor Huib, suggested filling the tube with stainless steel scouring wool, in order to improve the flame.

I asked SWMBO, and was directed to the appropriate supplier.. the local supermarket.

IMG_7650.jpg

Bought 3 types of stainless steel scouring pads.  The finest grade was available only impregnated with soap.  I am not sure how soap burns, probably pretty well, but I do not need that added complication.  Fortunately it mostly came out when tapped.   All very inexpensive.

IMG_7636.JPG

Then I experimented with all 3 grades, various degrees of packing it in, and using various lengths.  I even tried mixing the different types of steel wool.  It cuts easily.  Eventually I decided the best way was to have a loose wad of the fine mesh in the first 1-2 cm of tube, then a very light piece of the fine mesh in the distal 10cm.

It has improved the flame;   there is no back lighting of the jet itself, and there is a more even flame along the length of the tube.   I think that I will be able to improve the flame further, but will wait until I can test it inside the boiler itself.  In the video the roaring of the flame drowns out my voice somewhat.  You will not miss much.    I am varying the gas control.

Error
This video doesn’t exist

So, sorry about the voice track.  The stainless steel stuff is interesting.  It is like swarf, but not sharp.  I wonder how they make it.  I imagine that it works in the gas-air tube by creating swirls and eddies, and better mixing the gas and air, without impeding the flow much.

Back in the workshop tomorrow.  A few connectors to make, check the feed pump, then make an appointment with The Boiler Inspector.

By the way.  The parcel opening post was apparently not very interesting, so I wont bother with that format again.  I am aware that my video technique was pretty ordinary, but I am not inspired to try that one again.  Pity.  I enjoyed making that one.


Experiments With Propane and Paint

The gas burner on the modelTrevithick dredger engine has been more problematic than anticipated.  In the absence of published information about gas jet sizes, air hole sizes and numbers, the effect of a ceramic cover, and firebox size and shape, I have resorted to trial and error.  Having read many of the comments on the subject in Model Engineering web sites, I can see that most other builders adopt the same approach.

I have lost count of the number of changes which I have tried.  These are the ones which I can remember.

  1. Burner surround made from brass, as per the blog on Feb 5,6 8.   Ceramic top.  Burner difficult to light, and only the end distal from the jet would light.
  2. Fitted a tube with about 40 2mm holes beneath the ceramic plate, to better distribute the gas-air mixture.  The entire ceramic plate lit up, but the heat output was poor, and the the time to boiler steaming was very slow at 25″.  Also the flame contained lots of yellow, indicating inadequate air.
  3. Drilled holes in the end of the burner surround, to increase the air flow.  Some improvement.
  4. Tried 3-4 different gas jets.  Problems with obtaining jets.  Lack of published info.  Different threads and jet body sizes.  Used the CNC lathe to recut some threads to fit the Primus jet enclosure.  (0.5mm pitch, 4.5mm diameter).  This was all trial and error.  Air is admitted through the 4 holes next to the jet, using a venturi effect, which relies on the velocity of the propane coming out of the jet.  Important factors are the diameter of the air holes, the number of the air holes, the velocity of the propane, and probably the diameter of the propane cone of gas.
  5. In order to further increase the supply of air, I drilled the air holes progressively from 4mm to 6.5mm.   6.5mm was the limit due to available metal.  In the video which follows, you will see the effect of reducing and increasing the number of air holes.
  6. Drilled an extra 20 holes in the distributor tube, but the flames from the initial 2mm holes were too big.  Then made another distributor tube, with 60 holes, about 1.5mm diameter.  Better size flames.  See the video.
  7. Each variation has been tried with and without the ceramic plate.  I have decided to not use the ceramic.  It seems to restrict the flow of gas-air mixture, and causes flames to shoot out backwards through the burner surround air holes, sometimes setting the jet alight.
Error
This video doesn’t exist

Concurrently while experimenting with the burner, I have been applying some paint.  SWMBO insists that I am a hopeless painter, but I think that it is going on OK.

Error
This video doesn’t exist


Boiler stand, gas fire, and firedoor latch/catch.

The boiler will most often be fired on gas, but it is being made so that it can also use coal-wood.

So the base needs to cope with ash from coal or wood, and also have adequate clearance to fit a gas (propane) burner.  And to look OK.  And to be not too heavy to carry.

This is what I have come up with.

IMG_6755

Two plates of 6mm aluminium, separated by brass pillars.  It should polish up nicely.

IMG_6756

IMG_6757.JPG

This is the first burning test. Fail!  Too much yellow.  Not enough blue.  Back to the drawing board.  Propane – air mix is not correct.

So I increased the jet diameter……

The flame size increased, but the mix did not improve.   A work in progress.  Another jet change, and an adjustable regulator to be tried next.

To do something positive, I made a firedoor latch and catch.  Some CNC and filing.

IMG_6761.JPG

Not finished, but going OK.