
Model Cannon. Final Photos before Teardown
by John
I have commenced the teardown of the model Armstrong cannon. But first I took some photographs, just in case the paint job is not the best. To explain, I do not have a great history of good paint jobs. SWMBO bans me from painting around the house (that is NOT a loss, believe me) because of runs, brush hairs in the paint, paint applied too thickly etc etc.
So here are the photos….taken with my iphone. Just to reiterate, this model cannon cannot be fired. It has no touch hole/vent.

After the teardown I will complete the insertion of rivets, replacing many of the 8BA screws with rivets.

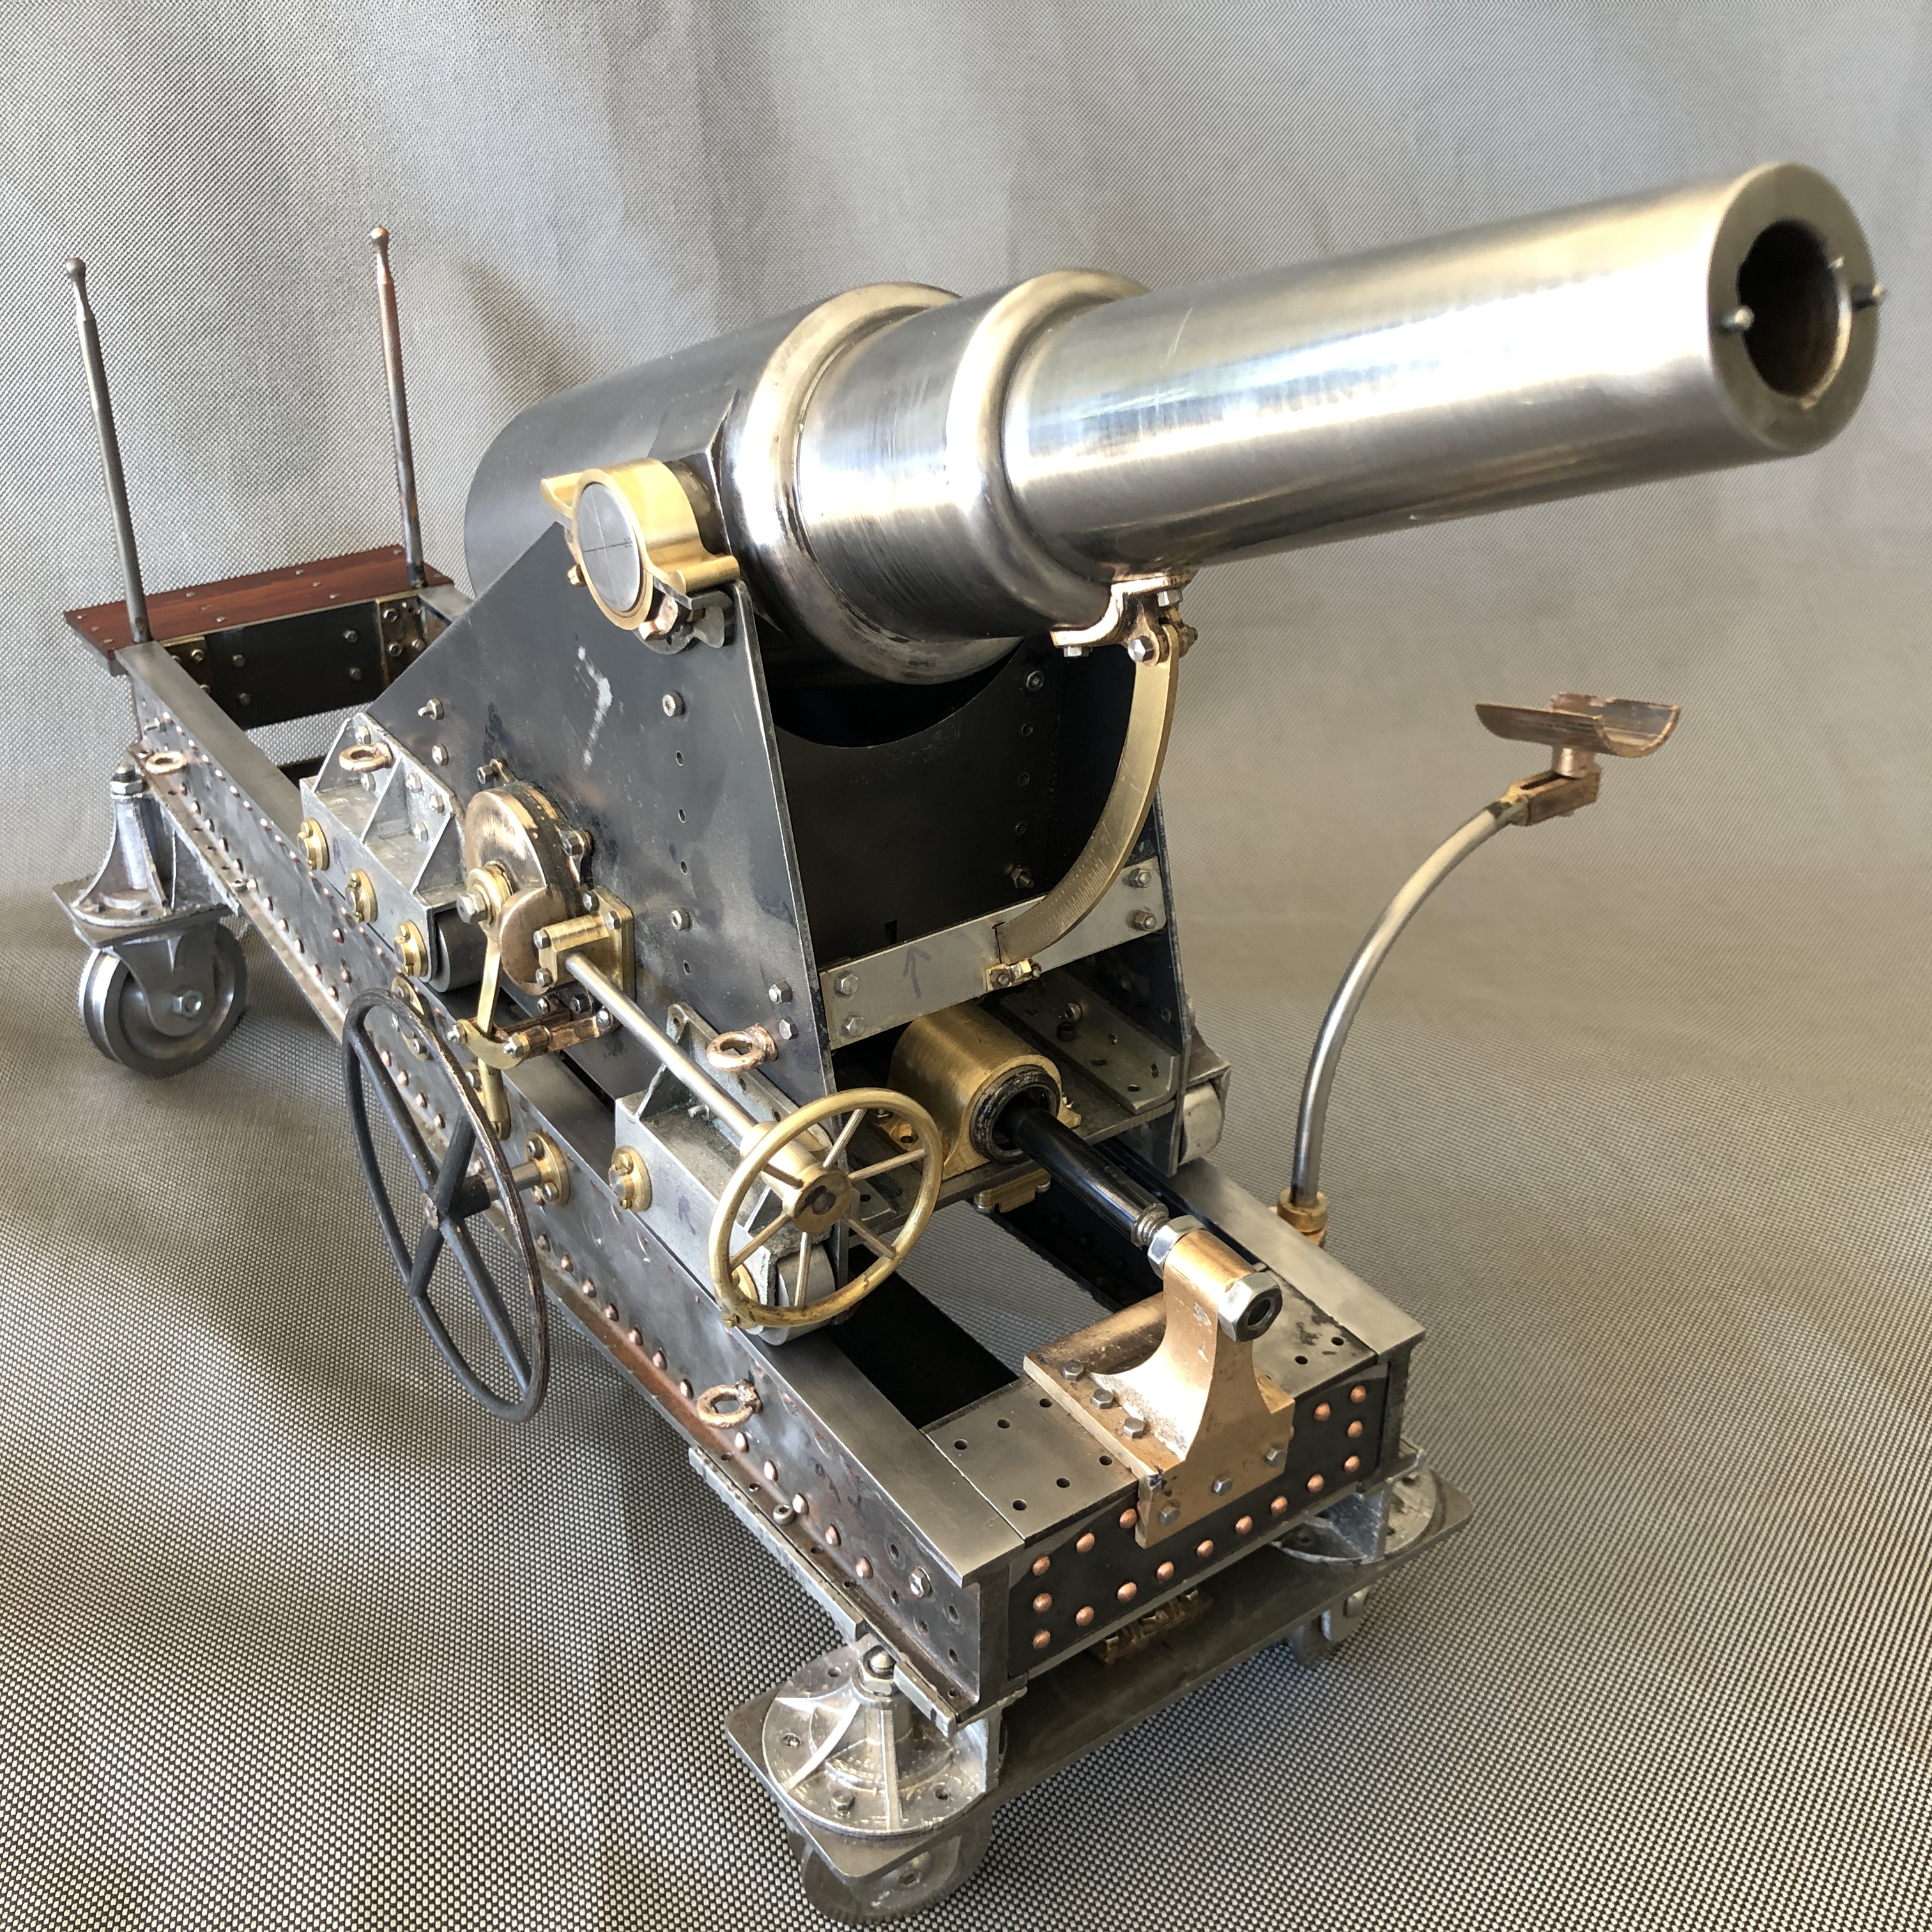
The firing rate for these 80lb cannons, with a trained crew, was about 1 round every 1.5 minutes.

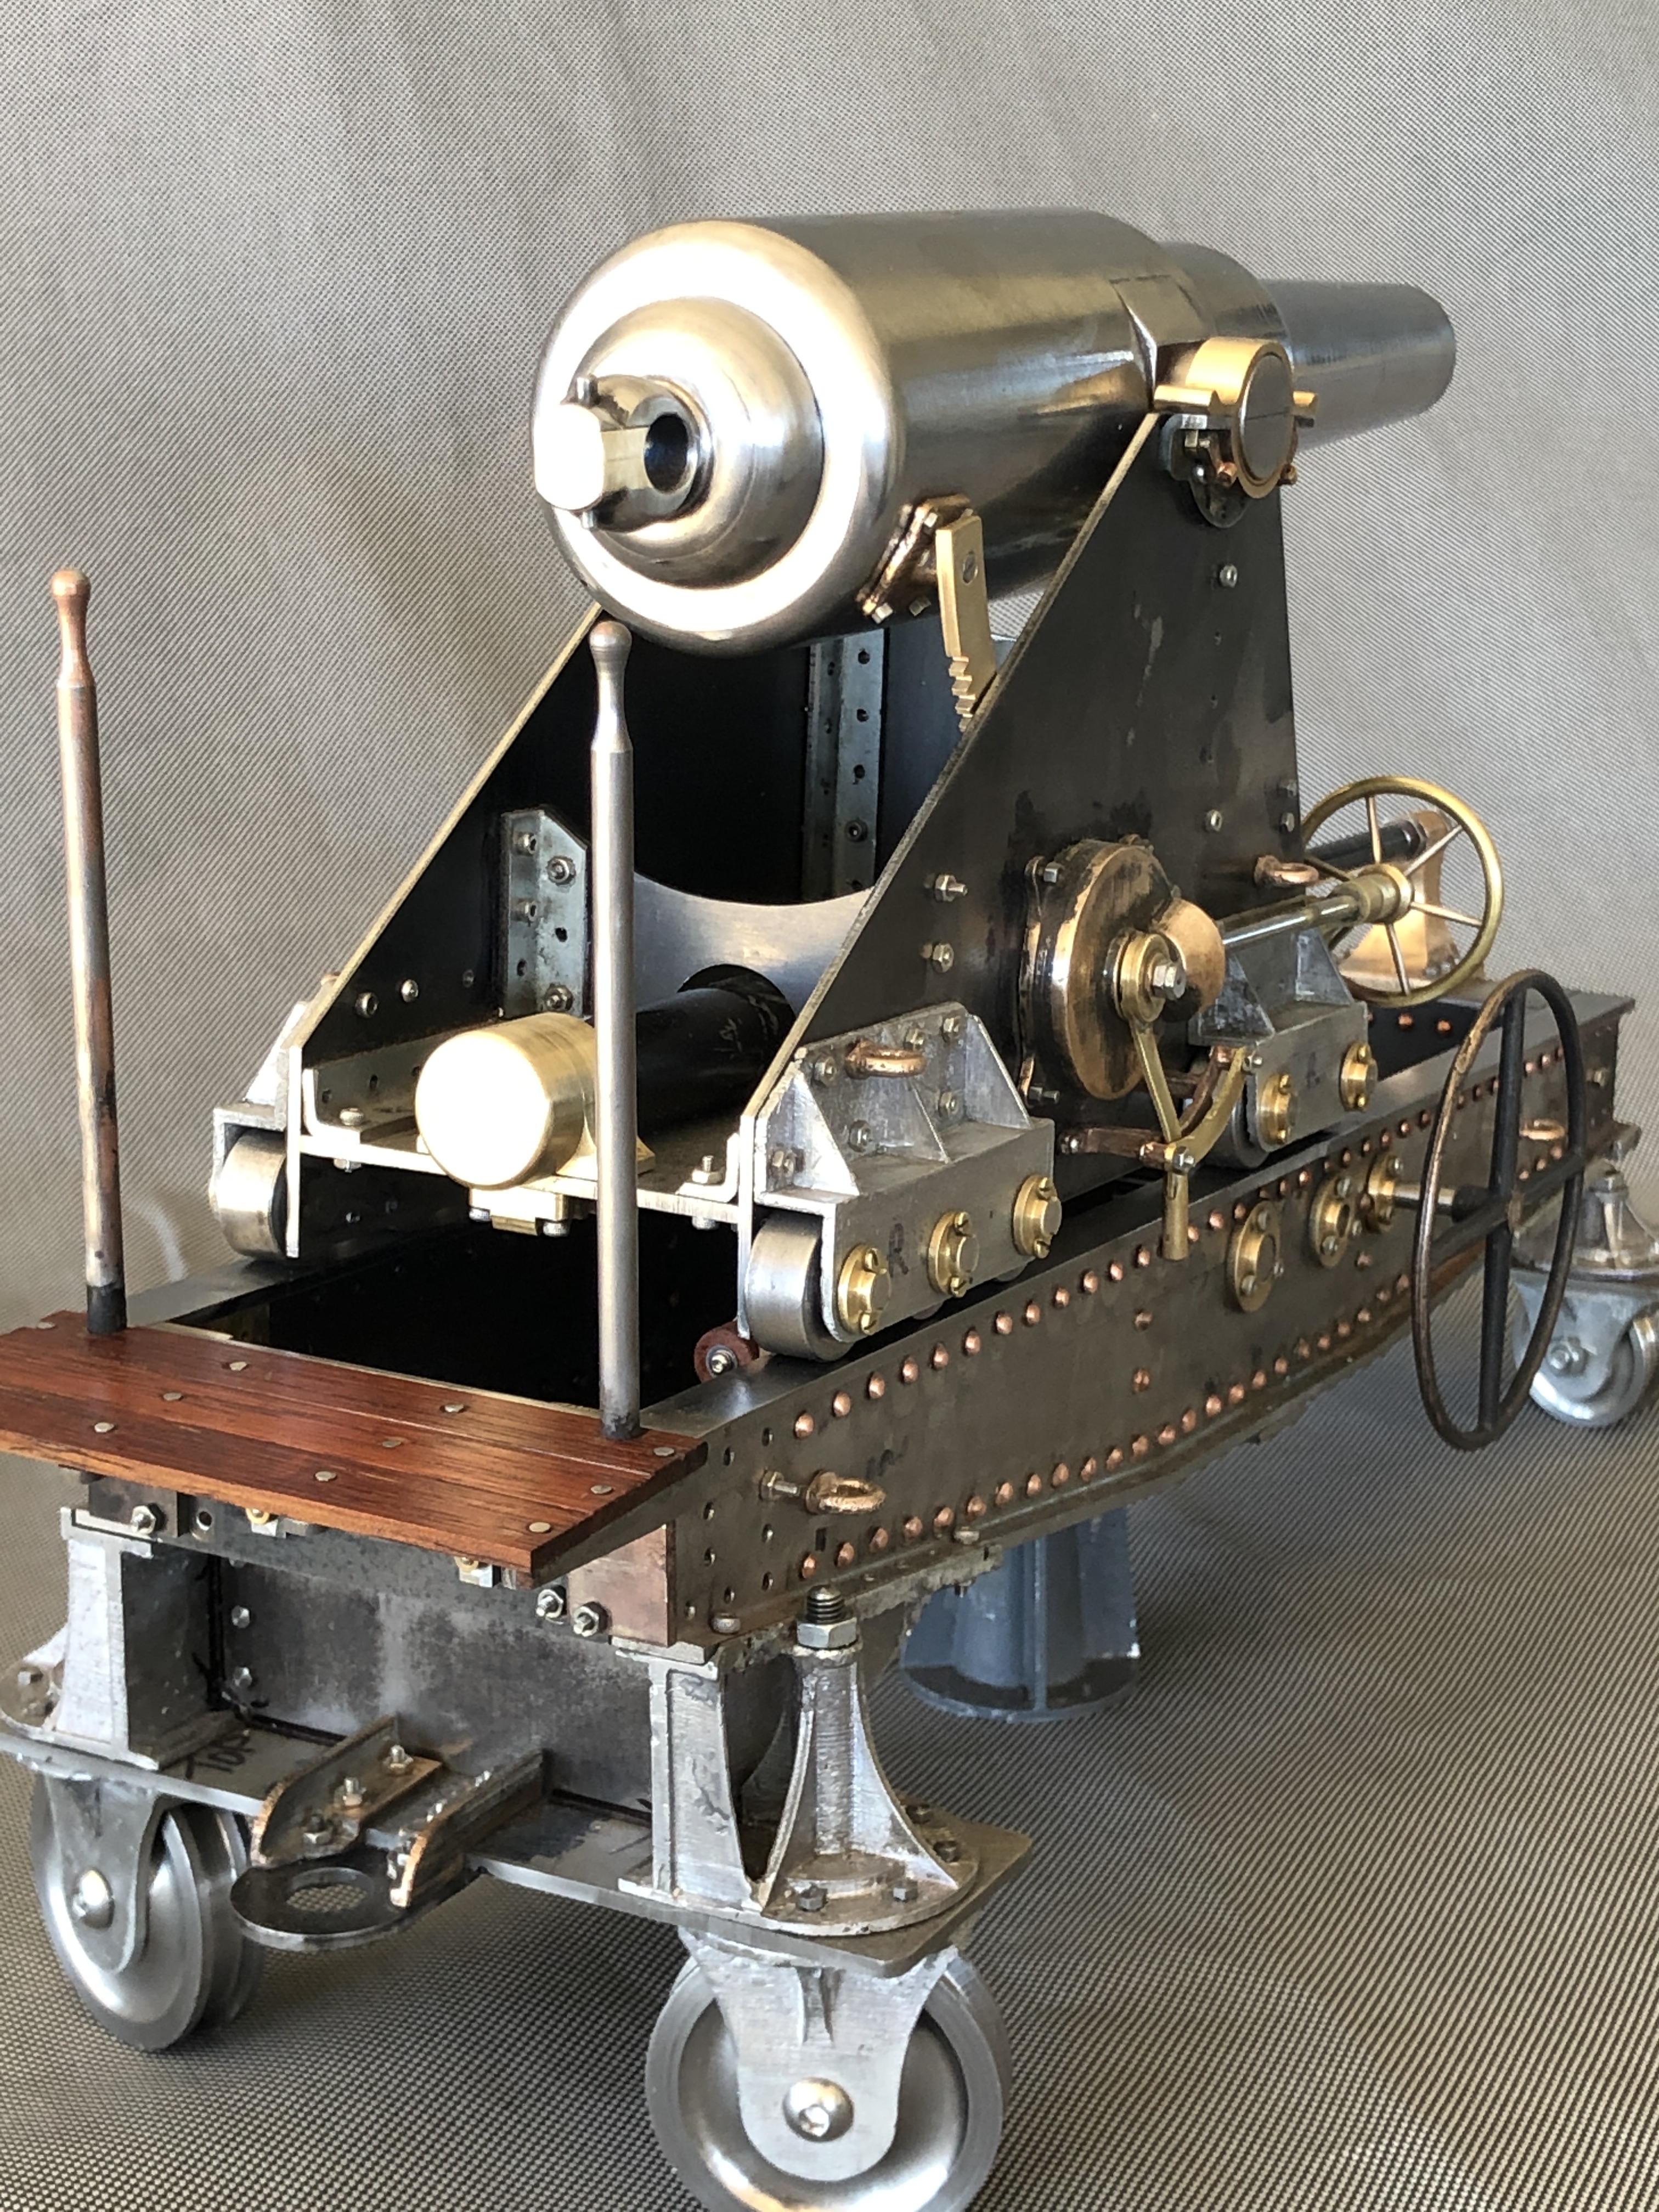


So, wish me happy painting. Still haven’t finally decided on colours. But probably black for the interiors, silver for wheel assemblies, wheels barrel gears and brass components unpainted. Maybe a light grey-blue for the exterior of the carriage and the chassis.

That’s brilliant! I’m not much of a commenter but I’ve followed along all through the construction. As a 3d printer owner I was fascinated by your incorporation of that technology (which is great, everybody should try it) into your build, especially as related to your castings.
Your emails are always keenly read, but I’m not skilled enough to really provide any meaningful comments.
Well done
Ron
LikeLike
Thanks Ron. I DO appreciate the feedback. John.
LikeLike
This is amazing ! Where can I get one !
LikeLike
same as me. Make one.
LikeLike
It has been great to follow this build along on the blog, with the added bonus of having the weekly explanations and discussions on progress as part of our ZOOM sessions. Looking forward to seeing the fully finished item.
LikeLike
Brendan, you are my most loyal reader. Thank you!
LikeLike
Hi John
Another great model I enjoy all your posts keep going it makes my day to read your each one.
Cheers
John Emery
LikeLike
Thanks John. Feedback is very appreciated.
LikeLike
Hi John,
An amazing bit of work, absolutely inspirational
Well done
Tom
LikeLike
Thanks Tom. Very nice compliment.
LikeLike
You have done a marvellous job there John. Well done from a quiet lurker
LikeLike
thank you quiet lurker!
LikeLike
John,
Really looks great and I am hoping to see it finished early-ish next month. BUT, there’s a heck of a lot to do in strip-down, paint and re-assemble before that event. Better go for quick dry paint. 🙂
LikeLike
It’s a worry. How do I stop the xmas paper sticking to wet paint?
LikeLike