
Armstrong RML model No 2 Finished!
by John
Well, 99% finished. I still intend to make sights, a base, and bumper components. But it now looks finished. A few pics.

It has a few differences from the first one of these which I finished for last Xmas. It has side platforms, handles for positioning the carriage on the slide, minor design changes in the rear wheel brackets, minor changes in the elevation wheel, and probably a few more that I cannot remember.
The explosive projectiles would never have been placed on the side platform. The noses contained impact sensitive detonators, and I doubt that the gunners would have risked them falling off.

The positioning gears work well, as does the elevating mechanism/gears, the elevation lock, the clutch and brake.

Oh yes, some fasteners for the rear platform too… And engraving text on the recoil tube cap, and the muzzle mouth. OK, 98% done.
Now, I am getting on with my next project too. Yes I will eventually finish the Armstrong RML cannon. But I am getting impatient to be doing something different, so I have started on the bronze version of the Ottoman bombard.
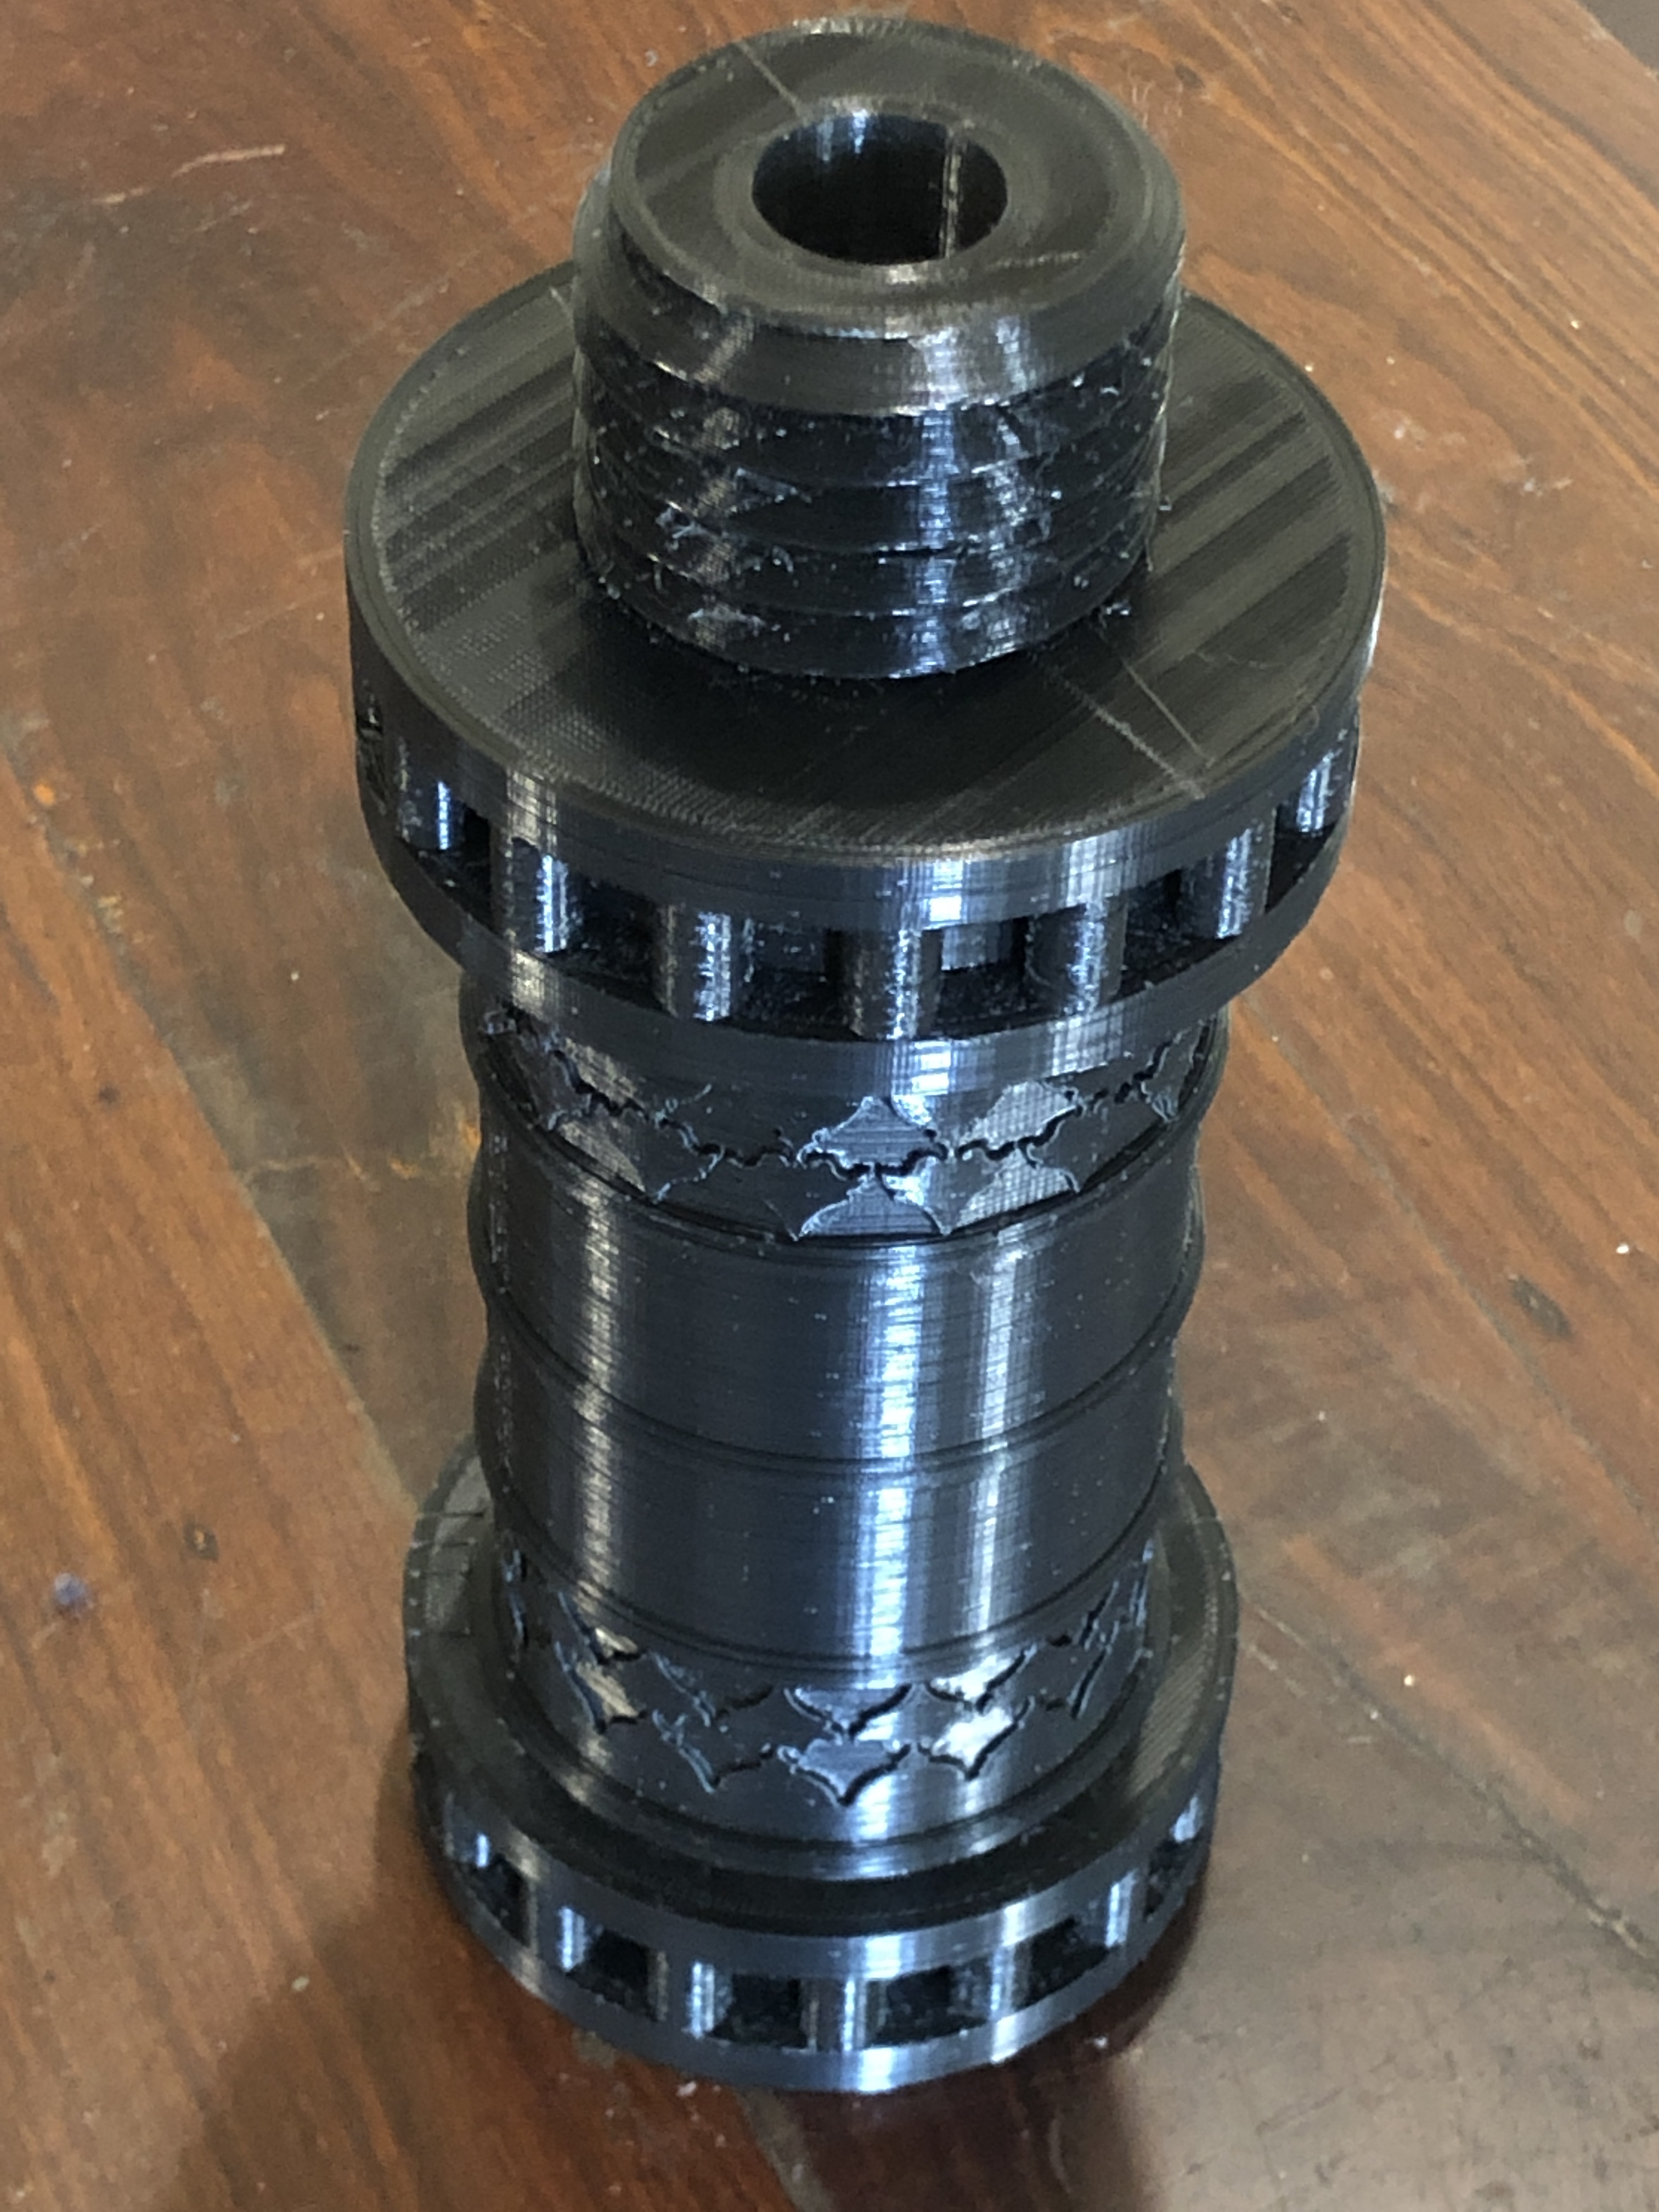
This PLA 3D printed breech is 230mm long, plus thread, and 107mm max. diameter. Still deciding whether to refine the design and print another. For one thing, the threaded section is constant diameter, whereas the original had a tapered thread. Yet to 3D print the barrel. It is 280mm long. That is a lot of plastic to burn out prior to bronze pouring. Maybe I should use transparent PLA in case the black dye (whatever it is) damages my burn out oven, or my lungs.

For another thing I have been unable to get my CAD program to convert the Ancient Arabic Script into vectors. But, I have been able to get V-Carve Pro to recognise them/

That is a tracing from the photograph. A couple of hours of effort doing the tracing. Then scanned the tracing, and imported the scan into V Carve. That worked, and I hope to remove 0.5mm of the muzzle bronze, leaving the raised script and stylised designs. V Carve predicts that will take 5 hours on the CNC mill!! Watch this space.

5hrs milling is better than nearly 25hr 3D print methinks.
Just a thought tho, it would be possible to just print the threaded section in a tapered version. That done it can be glued (wax or summat?) in place of the straight part that you will of course carefully lop off.
Armstrong is brilliant as usual.
LikeLike
Thanks John. And your suggestion for a tapered thread is tempting. It would look more authentic. I imagine that I would leave the female thread parallel. I suppose that the original was tapered to make starting the joining process more manageable… after all, the pieces being turned to make the join were 9 and 8 tons respectively. I am now waiting for some more transparent PLA, so I might reprint the entire breech section thread and all. INcidentally, I have solved the issue of making the male and female threads workable in the parallel type. As usual I had mucked up the steps in the original design. Oh well. Live and learn. John
LikeLike
Hi John. Try using a resin printer and not a filament one. Finish will be great and it works as a wax.
LikeLike
Thanks Zane. I am trying to resist my tool buying compulsion, (but weakening). John.
LikeLike
After your comment I did look at resin printers Zane, but I could not find one which would have a work space big enough for my bombard barrel (107mm dia x 316mm high. Any suggestions? John
LikeLike
I’ve thoroughly enjoyed watching your progress with the Armstrong, thanks for taking the time to document it for us. I’m looking forward to seeing how you make the bombard too. I’ve always thought a golfball sized one would be fun.
LikeLike