johnsmachines

machines which I have made, am making, or intend to make, and some other stuff. If you find this site interesting, please leave a comment. I read every comment and respond to most. n.b. There is a list of my first 800 posts in my post of 17 June 2021, titled "800 Posts"

Tag: Crealty CR-10

3D Printing is FUN! (but still slow)

IMG_8498

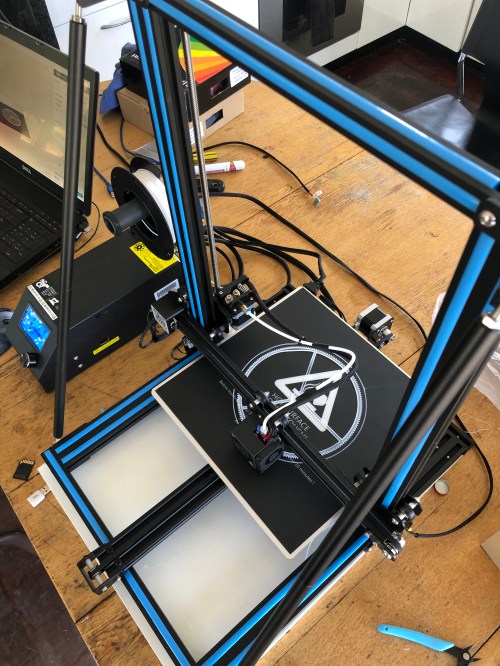
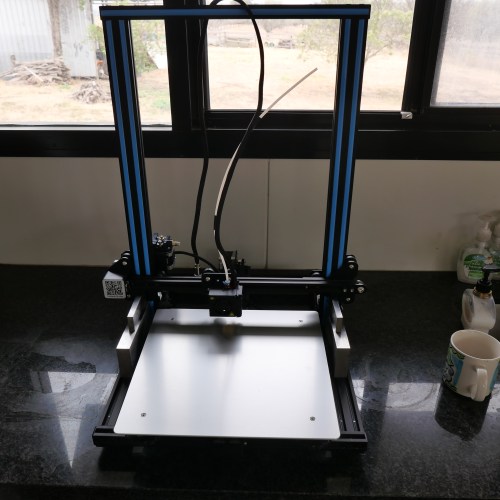
My 3D printer.  Bought from Amazon on a special offer.  $AUD279.  Worked straight out of the box after minimal assembly, and using the supplied plastic filament (PLA).  You can see the large gear on the platten which I drew up using a CAD program.  I used the software (Cura) supplied by the printer manufacturer (Creality).   The printer is a Creality CR -10S.  The “S” refers to a “filament out” sensor which I have not yet installed.  I read some reviews of the printer before spending my money, and so far I am very happy with it.  You might notice some bracing bars which I bought separately on Ebay.  Not sure if they are necessary, but they might improve the print quality by reducing vibration in the printer.

P1053563

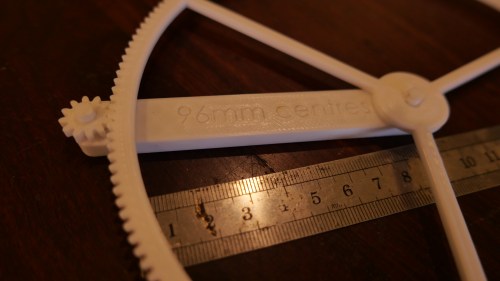
These gears and shafts were printed.  They were used to check the sizes of parts for my next model cannon build.  I used a program called “Gearotic” to plan the gear module, teeth numbers, distance between centres etc.  Gearotic is also great fun.

P1053561

The printed gear and pinion quadrant on a background of a photo of the real cannon.  On my model the gear and pinion will be made of steel or brass, machined from bar stock.

P1053558

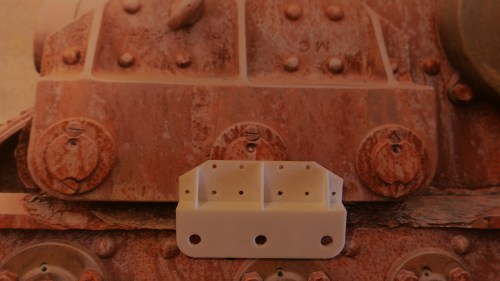
Another part sitting on a photo of the original.  This demonstrated that I had got the corner chamfer a bit wrong.  Much better to discover the fault at this stage! 

P1053560

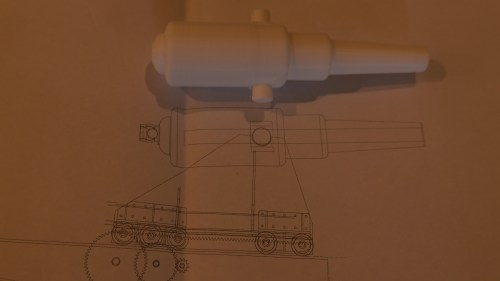
A half size print of the barrel.  This was just for fun.  The final part will be ~300mm long, and will be machined from steel.  This print took almost 4 hours.

P1053557

A print of the centre column which the cannon chassis sits on and traverses around.  It is ~60mm tall.  It will be tricky to machine from solid bar.  Could be fabricated in pieces and silver soldered together, but I am considering using the printed part to make a mould and cast the part in brass or bronze……   The original cannon column has an 5-600mm extension into the concrete base which my model will not need.

So far all of these prints have been made from PLA filament, which I read is easy to use, tough, rather brittle, and has a low melting point.  It is also inexpensive (about $20-25 for 1 kg).  I am still on the supplied small roll which came with the printer.  Future prints will be in colour!

The weather is a bit cooler today, so I might get back into the workshop and make some metal swarf.


3D Printing is SLOW

P1053454.JPG

Crealty CR-10s 3D printer.  The machinists parallels were my solution to ensuring that the horizontal arm is parallel to the base frame.

So, I took delivery of the 14kg box, and spent a couple of hours assembling the printer.  It was partly assembled, as delivered, and if I had known what I was doing the final assembly would have been done in a fraction of the time.  The assembly instructions were adequate.  The wiring connections were well labelled.  The wiring connectors were delicate, and I took care not to bend or break them.

The vertical frame bolts to the base frame, and it is surprisingly rigid.  There are 2 Z axis stepper motors, and when not powered up, they can be individually turned.  It occurred to me that the horizontal arm which the Z axis motors raise and lower should be exactly parallel to the base, so I placed the machinist’s parallels as shown in the above photo and screwed the horizontal arm down onto the parallels to set the horizontal position.  I assume that the Z steppers will move the arm equally. (Hmm… I will check that assumption later.)

Next day, I downloaded the operating software.  An older version was supplied with the machine, and the newer version would not work on my old XP Pro Windows computer, so I used the old version.

I spent some time manually levelling the bed, then ran the automatic bed levelling software.

The printed operating instructions are very basic.  An Internet connection is assumed, and I did not have one available, so my first printed object was with default settings and the supplied white filament.

Somewhat to my surprise, it worked.

P1053455.JPG

The platten is aluminium.  A glass plate was also supplied, so I used that on top of the aluminium.

The filename was “dog”.  I had no idea whether “dog” was a 3D dog, a picture, or whatever.  Neither did I have any idea of its size.  After an hour, I had printed a disk about 125mm diameter and 1.1mm thick.  Then the disk came off the platten, so I aborted the print.

Today, after getting some advice from Stuart T regarding print adhesion I removed the glass platten cover and applied some special adhesive 3D printer cover.  It is called “3M double coated tissue tape 9080A”.  Then I printed 2 more items.  Neither broke free.  in fact they were difficult to remove at the conclusion of the prints.

P1053466.JPG

This tiny Tyranosaurus was printed from a 3D file which I found on my computer.  It printed in about 20 minutes.  Default settings again.  The supports were too big for the object, and when I broke them free I also broke off the T Rex arms.  Some settings for supports need to be changed.

The next print was a tool which I planned for the 3D printer…..

P1053468.JPG

The item is a speed handle for a milling vise.  It is 80mm diameter with some grippy indentations on the circumference.  The tricky feature to make is the hex hole, to fit a 19mm hex shaft.  This is the 3D drawing, imported into the Creality software, so the G code can be generated.

P1053469.JPG

First layers.  Each layer is 0.2mm thick

P1053475.JPG

The internal framework is a bit lighter than I wanted.  I thought that I had chosen 90% density.  (ps.  a couple of weeks later.  The speed handle seems to be standing up to the usual rough treatment in my workshop, despite my misgivings about its lightness.)


P1053477.JPG

The speed handle on the vise.  Nice fit.  The print took over 2 hours.

Error
This video doesn’t exist

Not perfect, but too bad at all.