johnsmachines

machines which I have made, am making, or intend to make, and some other stuff. If you find this site interesting, please leave a comment. I read every comment and respond to most. n.b. There is a list of my first 800 posts in my post of 17 June 2021, titled "800 Posts"

Tag: Painting model ship

Nelson’s Checkers -2

With the serious mistake of not removing all pencil marks prior to painting the yellow ochre stripes, I consulted my AI. It advised NOT scraping the yellow stripes back to bare wood, but just living with the mistake, on the grounds that scraping, sanding and repainting was likely to look worse than the persistent lines.

I agreed with that advice, but did add 2 layers of undiluted yellow paint, which makes the pencil marks visible only to those in the know. And you wont tell will you!?

Then, after 2 days of waiting while the yellow cured, I applied the masking tape. I used Tamiya 3mm wide tape, which was highly recommended on the modelling sites. The sites also recommended painting the edge of the tape with yellow paint after appliction of the tape to the yellow stripes. That was to increase the sealing of that edge before applying the black paint.

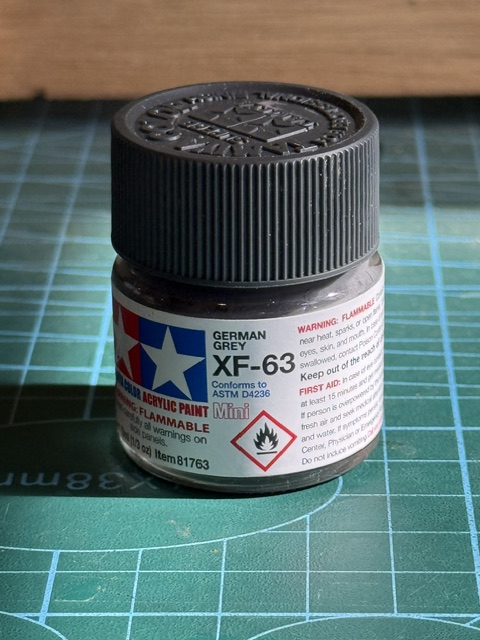
Then I applied the black paint, with a brush. Well actually it is a very dark grey. “German Battleship Grey”. Recommended by the AI to slightly soften the black which might look too intense in a scale model. SWMBO agreed, and since she is a talented artist and architect I do follow her advice regarding painting and colours.

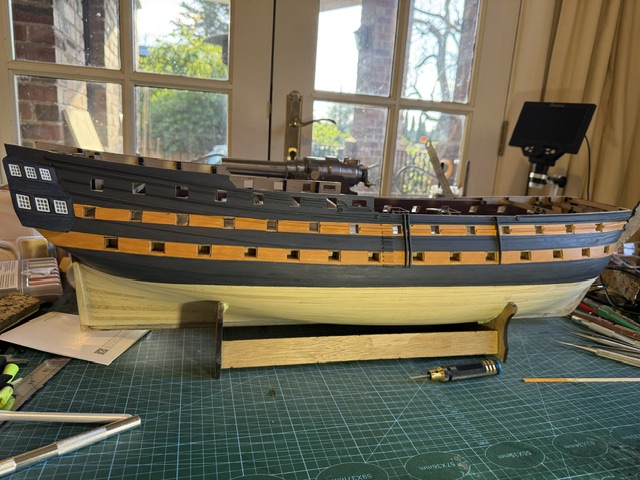
See the previous post for the ochre yellow stripes. Here is a photo of applying the black. The masking tape is over the yellow. The first layer of paint always looks pretty rough. You ignore that and press on, making sure not to have any runs or drips. I follow the advice of experts and try to always brush in one direction and never go back over a previously painted stroke until it has dried. Well, almost never. A glob or run has to have its volume spread or reduced. So I use a very small brush, and dip it into the paint only half the length of the bristles or less. The paint is acrylic, and slightly diluted with water. A few drops of water are added to the pot from time to time if the paint shows any sign of thickening.
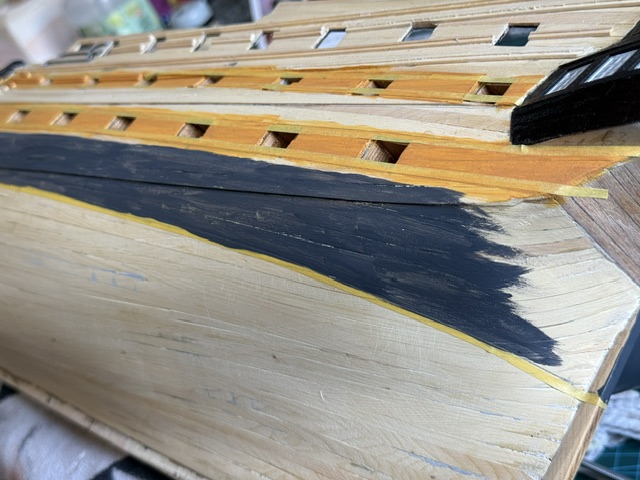
3mm Tamiya masking tape applied then finger tip massaged flat. A pointy probe is used on the joins and crevasses. I leave the ends long where possible to aid eventual removal. The first layer of paint always looks patchy and bare spots appear. Do not fill those spots until the first layer is dry. It is excruciatingly tempting, but the acrylic paint is dry within an hour, and a thin skin appears within a few minutes. If extra brushing is done within a minute or two of intial application that skin turns into tiny lumps which become embedded in the paint. How do I know? Not telling.

So, I am learning from my mistakes. And the final result is reasonable IMO.
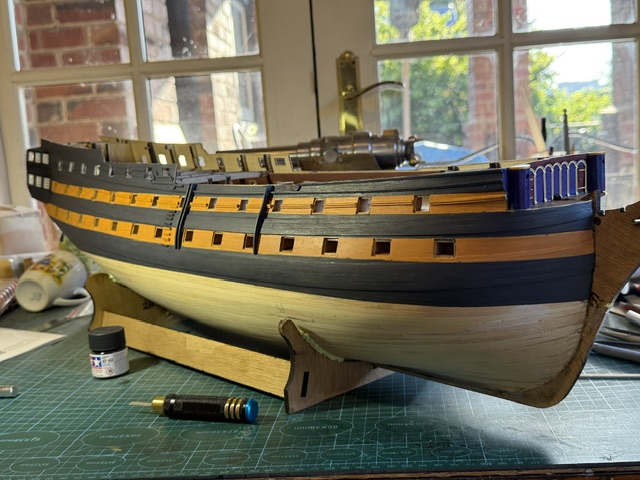
2 coats of the black-grey. Between the second and third lower gunport you might see slight bleeding of the black into the yellow. I used the 1mm wide chisel shown to gently scrape off the black bleed (and a few others) and touched up the yellow.
The junction between the lower black stripe and the bare planking is the waterline. When viewed from the horizontal it is actually flat.

The next step is the coppering of the hull.
Nelson’s Checkers.

British battleships at the time of Trafalgar 1805 mostly had adopted a paint scheme consisting of yellow and black stripes on the hull. Yellow ochre, because that was cheap and visible, and lamp black because that was cheap and contrasted well with the yellow.

Lord Admiral Horatio Nelson, recommended that all ships under his command adopted the stripes, although the final decision was always up to the ship’s captain. The reason for the stripes was two-fold. First, it clearly identified British ships in the confusion and limited visibility of a naval battle battle, where there was a risk of friendly fire. Secondly, it clearly identified whether the gun ports were open or closed, an important consideration when entering a foreign port. When the gunports were open, the gunports looked quite different compared with when closed.

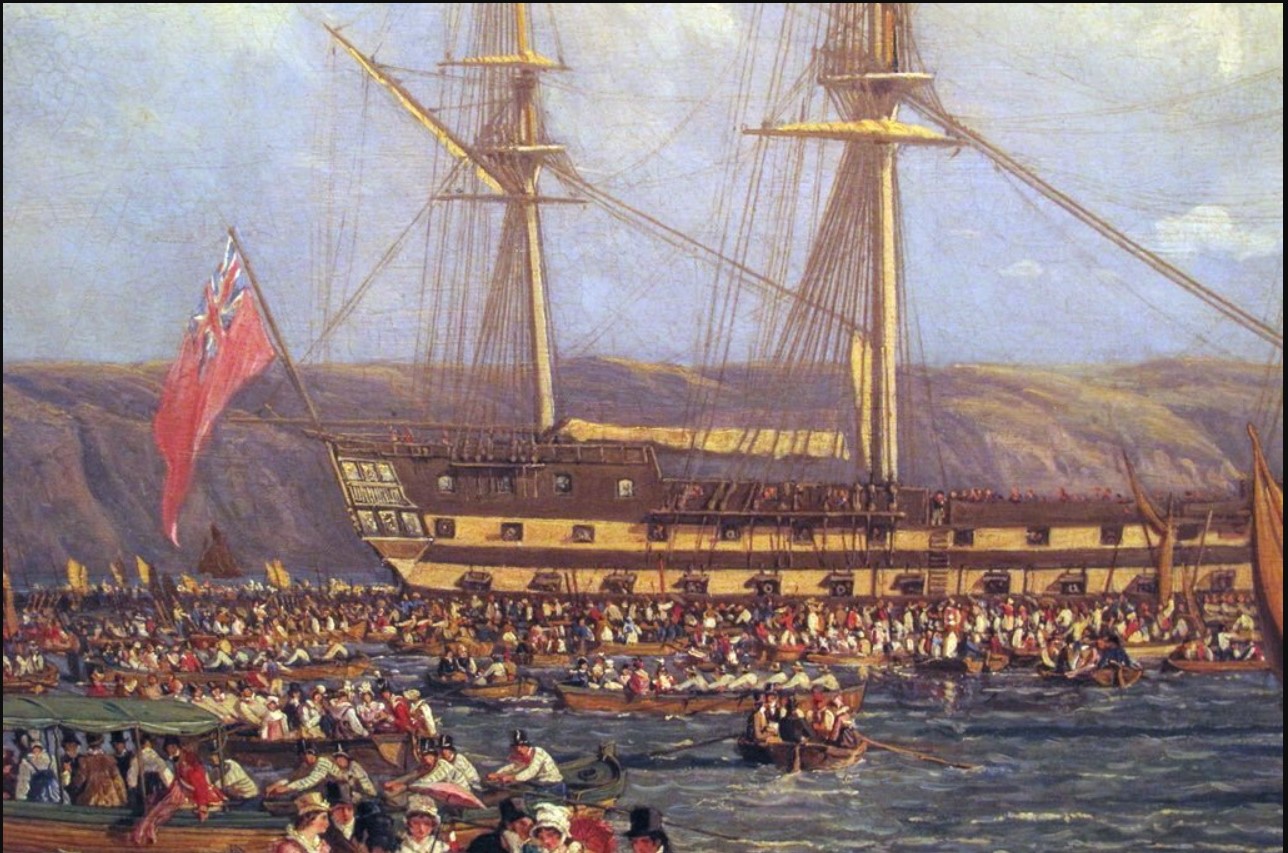
HMS Bellerophon 1815. Crowds hoping for a glimpse of Napoleon before his transportation to imprisonment on St Helena. Gunports were normally open when the ship was anchored, for ventilation of the gundeck and extra space with the guns run out.

My model of Bellerophon is at the stage of painting the yellow ochre and mat black stripes. I have many skills, but regretably painting is not one of them. SWMBO has banned me from any painting jobs around the house, but then she is a talented artist and has different standards. With Bellerophon she is happy to give advice, but not volunteering to do the painting. So I have read some model ship building books, and asked the AI for advice.

Armed with that information I purchased some yellow ochre acrylic paint, and some brushes. Sanded the hull to 600 grit. Filled most of the defects. Then applied a coat of sealer. SWMBO had some “Peel Stop” which the AI said would be fine, but said not to use Bondcrete which was an alternative I had considered.

What no-one thought to say to me was “remove all pencil lines BEFORE applying the sealer”. In my ignorance I assumed that the paint would cover the pencil lines. So I painted on the sealer, and then 4 coats of diluted yellow ochre.

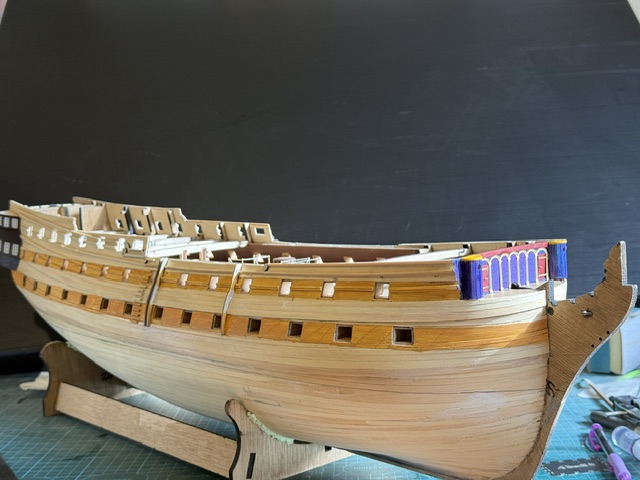
That is after the first one or two coats of yellow ochre. Look closely and you can see the pencil marks. Those marks were still visible after 4 coats of dilute yellow ochre! What to do??? SWMBO said “sand off all of the paint and sealer and pencil marks and start painting again.” That did not appeal. Fortunately I had made the marks only on the starboard side so I thought “I will only display the port side”. But on reflection I knew that was unacceptable. Note also the painting on the foredeck partition. That came up quite well I thought.

Then I had a another idea.

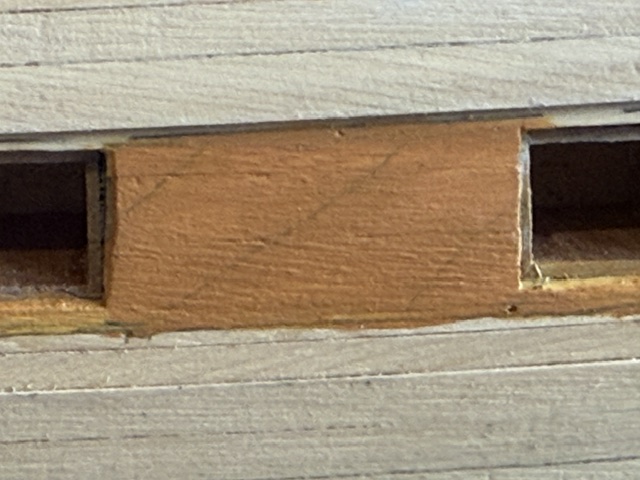
Not ideal, but worth a try. I painted a layer of undiluted yellow ochre on the pencilled side. I was hoping to avoid that thicker paint because I did not want to lose the planking details, but better that than those very obvious pencil marks.

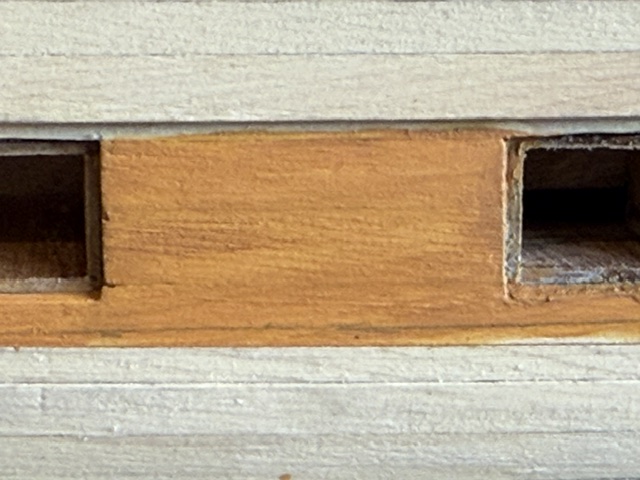
The other side, without any pencil marks…
With the thick paint the pencil lines are just visible in this magnified view. One more coat should make them invisible. But the colour is darker, and the plank joins and wood grain are also becoming invisible.

The black paint will neaten up the yellow-black junction. And I am pretty sure that pencil lines under the black paint will be invisible. Wont they?

We do learn from our mistakes, don’t we? I do. I try very hard not to repeat mistakes more than 3 times.