
Triple Expansion Steam Engine resumes
by John
Busy at this time of the year.
Making some wooden toys for the grandchildren for Xmas.

Not sure whether these are ducks or chooks. My talented wife brings them to life with colours. When pushed by 1-2 year olds they waddle with an entertaining flap flap walk.
Preparing the surgery building for sale. Removing and storing 34+ years of medical records, moving furniture, arranging repairs and painting etc etc. Feels strange to be no longer a registered medical practitioner, but I know that it was the correct decision to retire. It has taken 2 years to totally burn the bridges by dropping my medical registration, and selling the surgery etc.
Model Engineering Club annual exhibition.

This model quartz crusher at the exhibition was driven by a hit and miss engine.
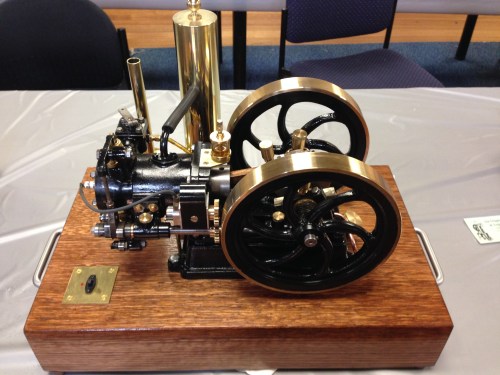
Another superb engine at our exhibition.
Plus ongoing military history book reading and reviews.
Slashing long grass, to reduce the summer fire risk.
Assembling and installing a kitchen into a rental property.
So it was a treat to get some time in the workshop today. I had previously made the layshaft brackets for the triple expansion steam engine, so I spent a happy few hours setting up an angle jig on the milling machine to drill and tap holes to attach the brackets.
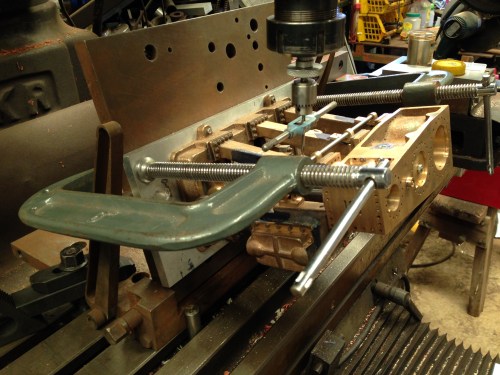
This is the setup. An adjustable angle plate was bolted to the milling table, and the angle was set so the columns were horizontal. The layshaft brackets were Super glued to the columns with the shaft in place after filing to get the brackets quite level. The holes were spotted through, then drilled (1.6mm) and tapped (2mm).

The layshaft bolted in position with M2 nuts and studs. M2 is very similar to BA7, and a lot less expensive, and is stainless steel. Way to go!

Yes, but, you will have difficulty getting M2 bolts with hex heads
john f
LikeLike
M2 studs and nuts look fine!
LikeLike
Hy John,
It must be a strange feeling to walk away from a place where you have working your hart out for such a long time. But if this is the right decision for your self that must be even a relief. Anyway strenght thus.
I’m glad you pick up again the Triple building.
So far I have translate (only for myself) your blog in to Dutch.
Why? because I am intend to make this engine as well, I’ll hope you can appreciate that.
I have alraedy the castings and the drawings or plans as you say.
The plans I have resized from inches to cm. My hole equipment is metric so that is the reason for doing this resizing to cm.
I am looking out to your next post and in the meentime I wish you and your loved ones a blessed Chistmas and a happy and healthy new year.
Reegards from the Netherlands
Huib Hoogendoorn
LikeLike
And Christmas wishes to you too Huib.
Re the triple, do be sure to get the series of articles by Bertinat in Model Engineer 1985. I would have saved myself a lot of grief if I had these from the start of the build.
I also converted the dimensions from imperial to metric, and where possible I have used metric standard materials.
Good luck with your triple, and feel free to contact me if I can be of any assistance.
John.
LikeLike
John,
thanks for your reply.
Indeed the articles in the Model Engineer of 1985 are a good guide for making this engine, I have these articles all bounded up in a map.
Recently I bought 4 spare coloms for this engine by your supplier
Ben De Gabriel, the new owner, of E and J Winter.
In England I bought a spare base at J. Reeves, this casting is in Aluminium not in brass.
Last week I bought a rotery table on my mill to make the crankshaft on the way you have done. My Emco Super Maximat 11 is not heavy enough for these job.
Thanks for your kind offer to assistance me when I jammed.
Regaards Huib
LikeLike