
Yamato-Painting1; Restoring an old Westcott 6″ wrench.
by John
The 1:350 Yamato model is made of plastic. Mostly Polystyrene, but also a small amount of ABS. Different glues required for each type of plastic. Both types will hold the parts in a minute or so, but several hours are required for rigid holding.
There are 17 different colours specified, which explains why the paints were so (unexpectedly) costly. Mostly IJN grey, and dull red, for the hull exterior, and wooden deck tan. I bought Tamiya spray cans for the dull red, IJN grey, and primer. The wooden deck tan was unavailable, so I bought some laser cut sheets of impossibly thin wood, already in the correct colour, and made for this particular model. Pictures later.
So I sprayed the primer coat.
The question was whether to make the entire model, then paint; or paint the individual parts on the sprue frames before assembly ; or something in between.
I thought that painting the entire model would be simplest, but some small parts and areas would be inaccessible, and the result would be messy.
Painting every component on the sprues would leave a bare cut area on every part which would need to be touched up later, so that did not appeal. Plus it would be very time consuming.
So I decided to make the ship in modules, and paint each module separately.

1. The painting modules….. the hull is just 2 colours, IJN grey, and dull red below the water line. Some masking will be required. The other modules will be painted individually. As seen, 99% of the gluing has been finished.

2. So today I applied the primer coat. The paint is touch dry in about 10-15″. I started with the underside of the hull, then turned it over, on the box as support, and painted the decks. The box was exactly the correct size to support the deck without damaging the tiny attachments.

3. Then the smaller modules. The alligator clip attached to a chopstick was a handy way of rotating the workpieces, and minimising painting my hand.

4. Still some small parts to be attached, but they will be different colours which is my reason for not attaching them before this. This is one of the 18″ gun barbettes.
Tomorrow I hope to start applying the final colours.
Painting is really NOT my thing. So to finish the day I spent some time restoring an old small Westcott adjusting wrench which had been given to me by a friend.

4. Still some small parts to be attached, but they will be different colours which is my reason for not attaching them before this. This is one of the 18″ gun barbettes.

5. I tried to cold bend the fixed jaw but it would not move. So I used a hand hack saw to open up the crack, then bent the jaw back towards a right angle. 3 successive cuts and bends were required to get it back to 90º.
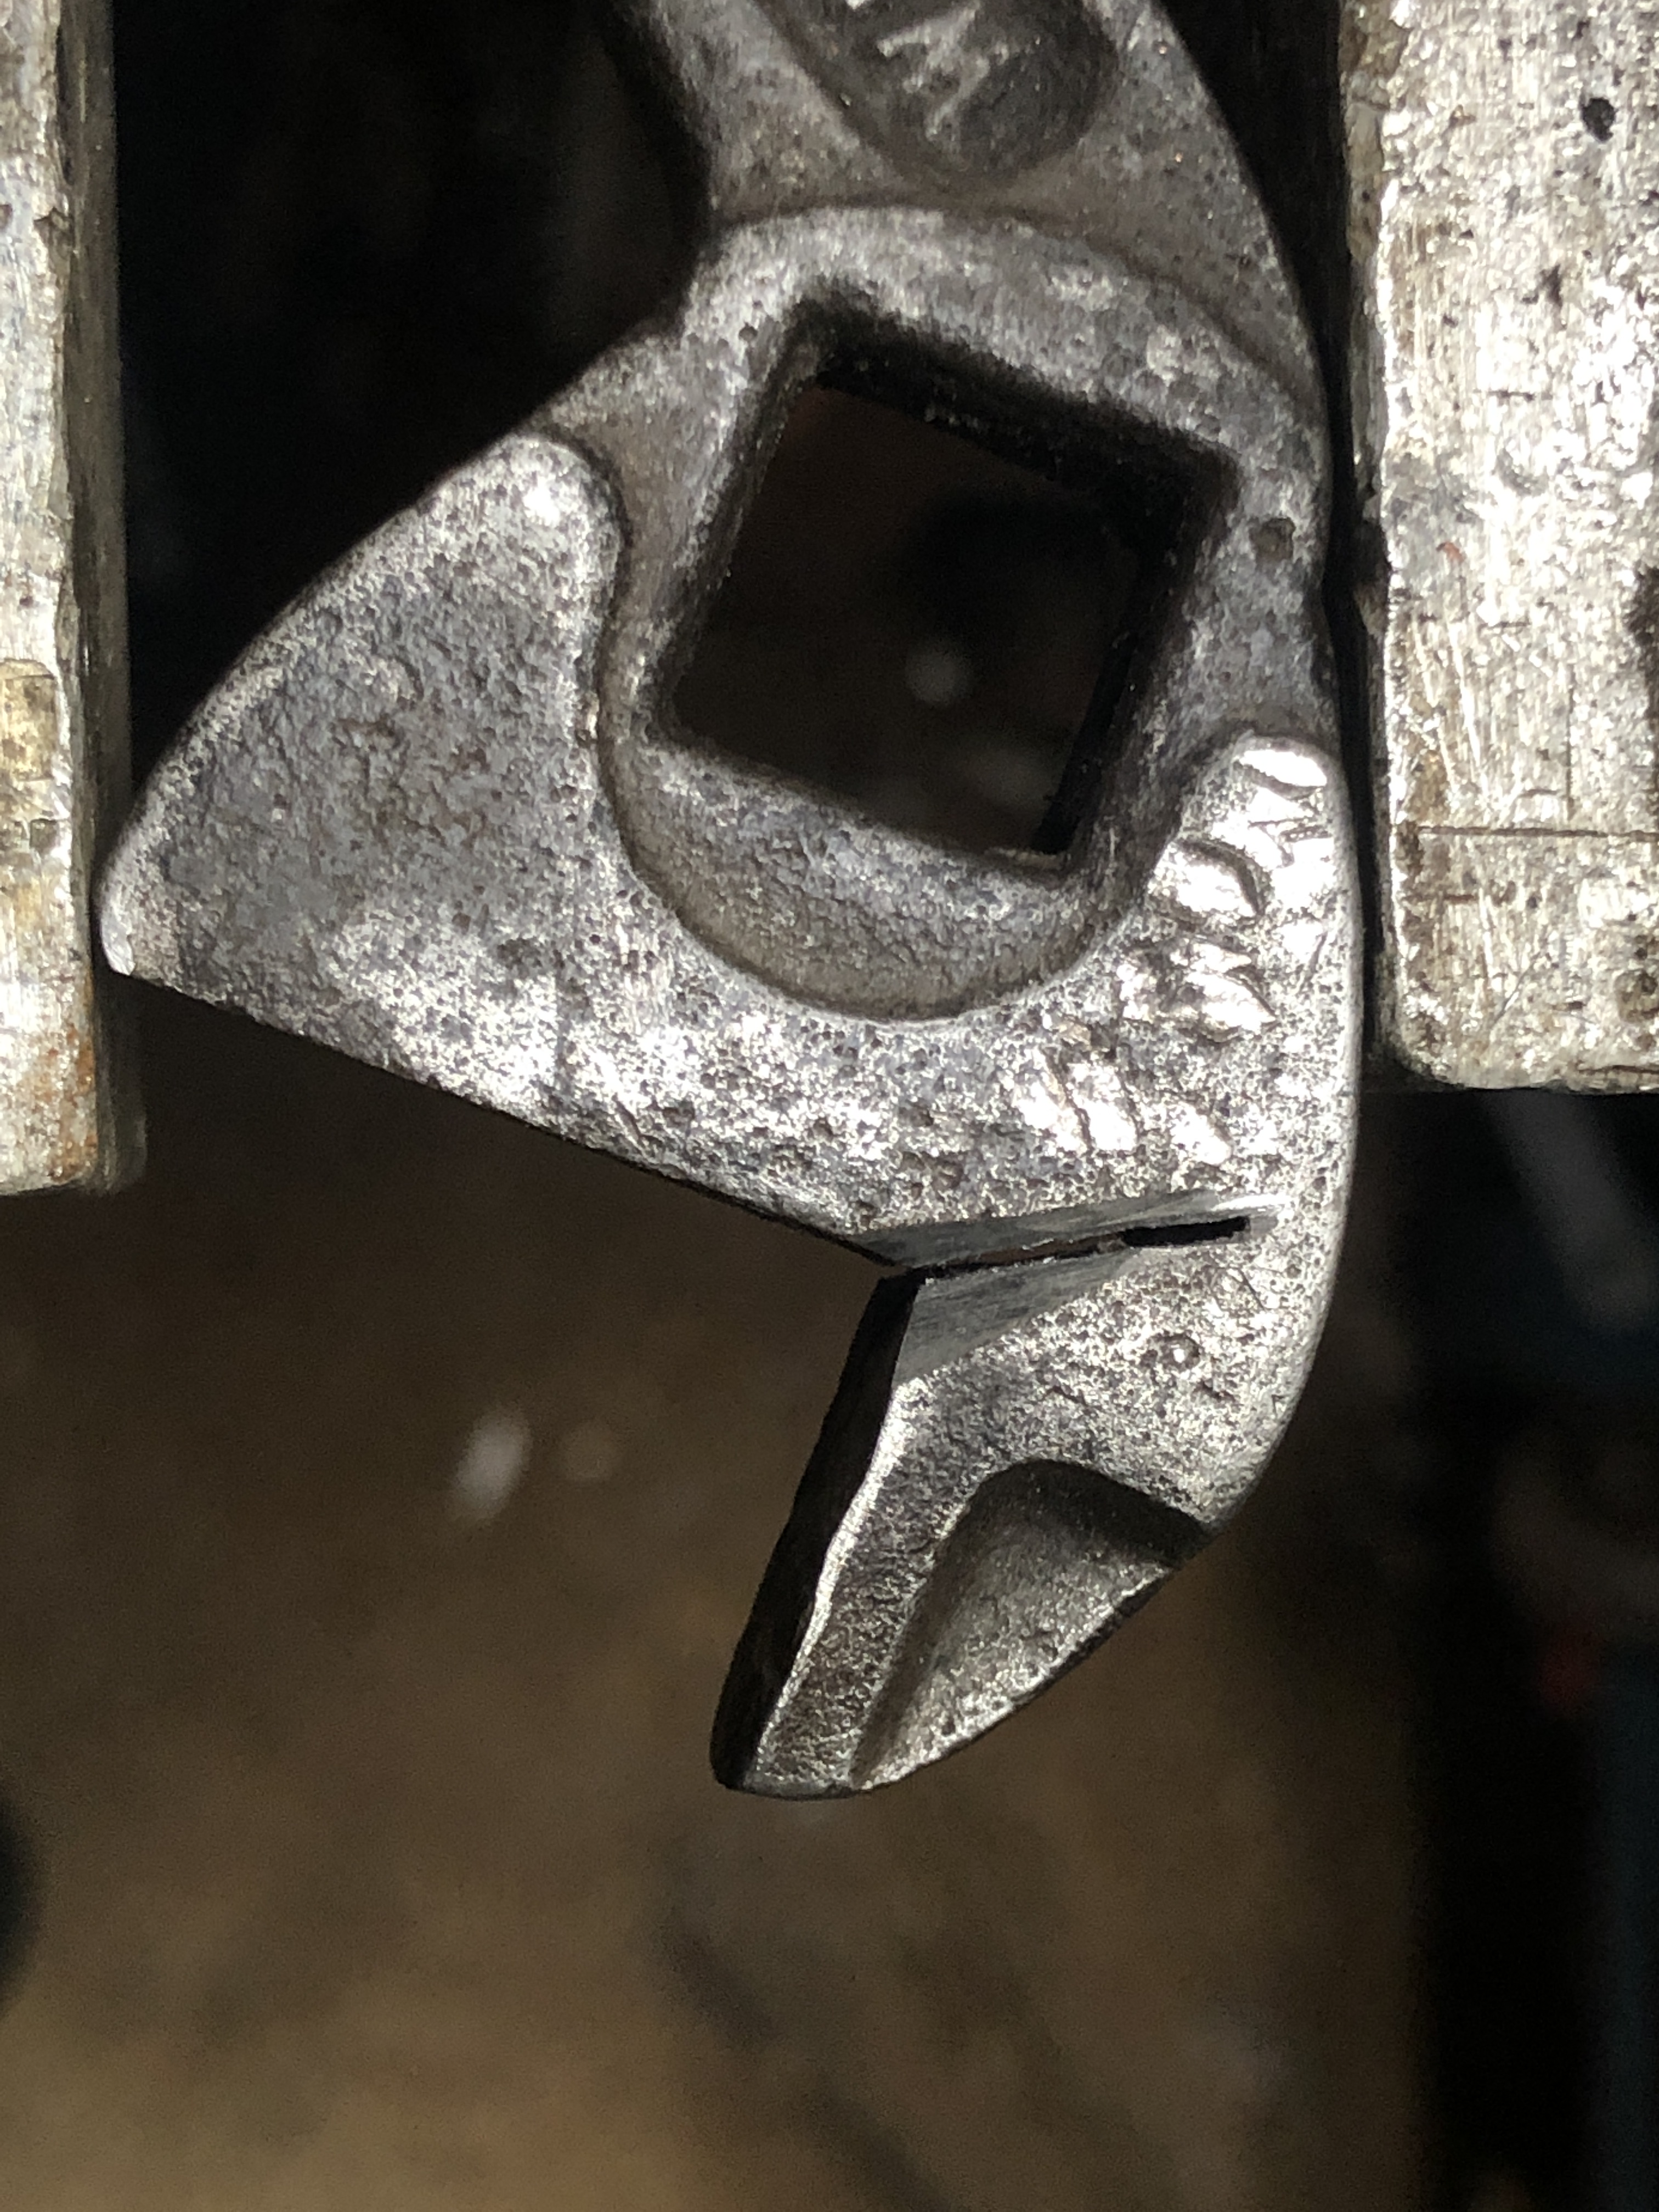
6.Then V’d the cut, almost to the box inner section. Then arc weld filled the V. It wont be as strong as the original, but will be OK for light applications.
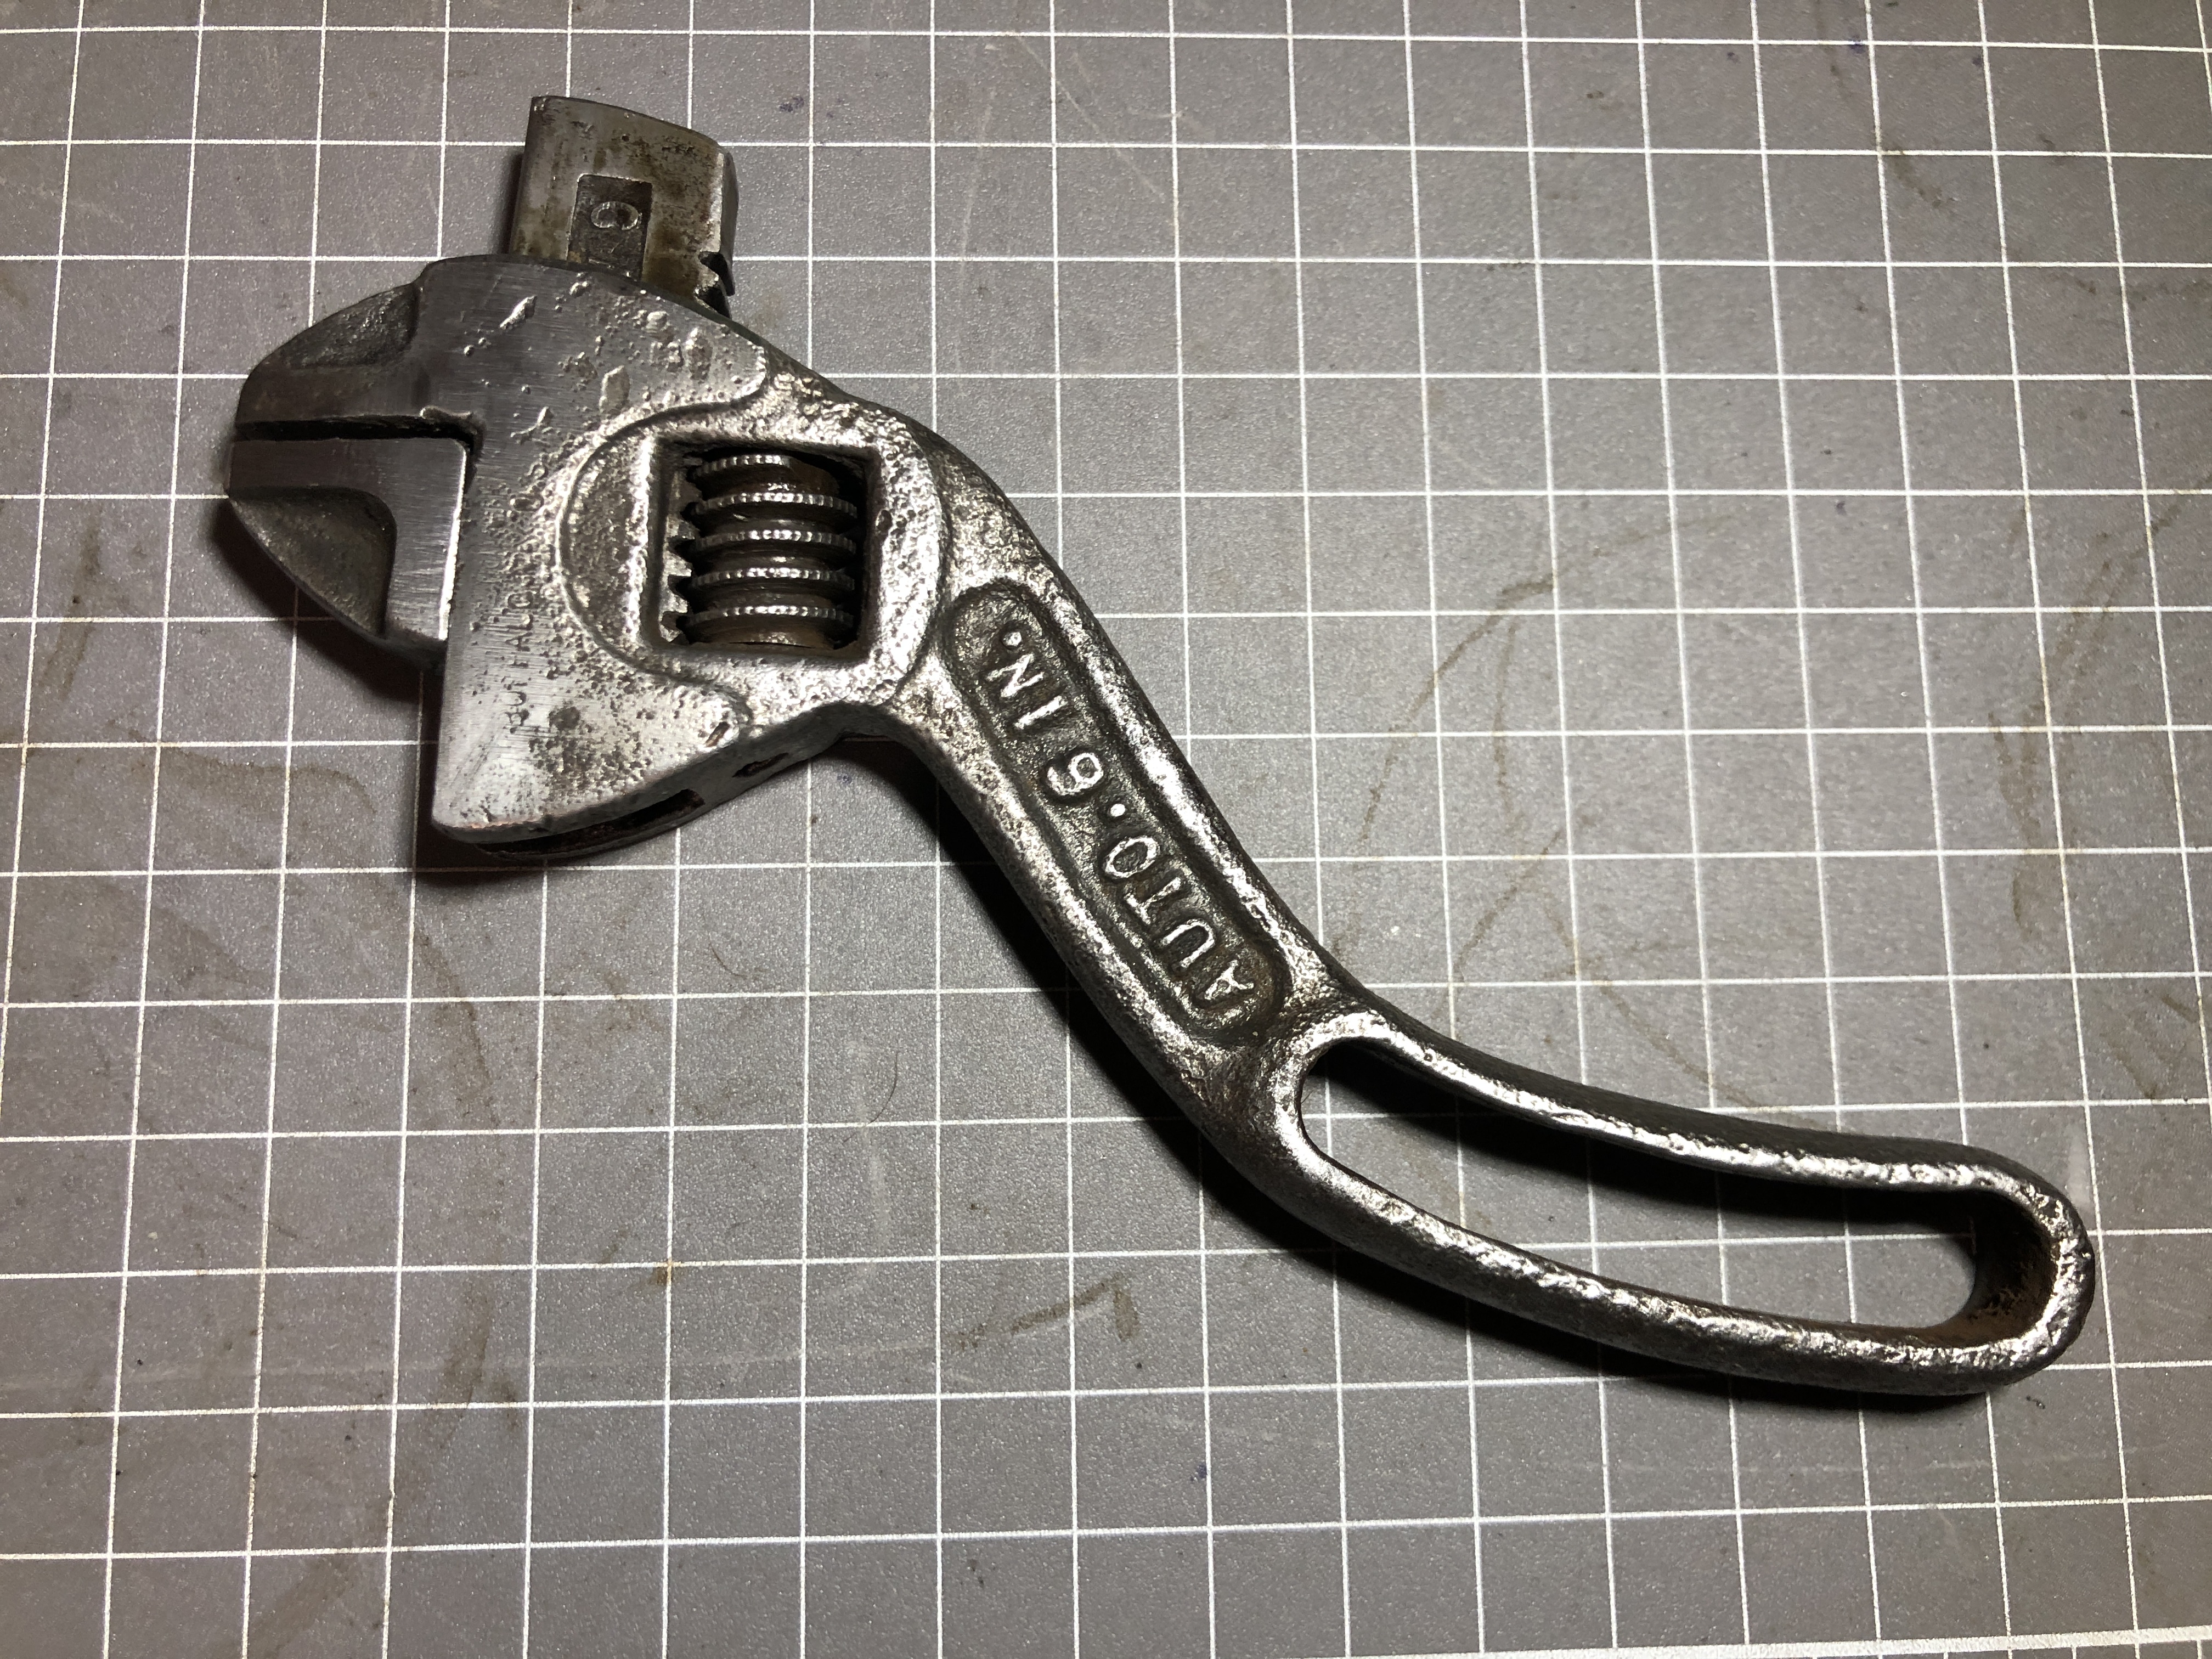
7. Finally some time was spent grinding and sanding the weld flat, and filing the parts make them slide easily. It was still a bit sticky, so some “Gumption” was used to smooth the action. The handle was cold bent back into a nicely curved shape. I might get around to blackening the wrench by heating it and quenching in dirty sump oil.

Just checked your recuperative fix of the Wescott wrench and, whether by design or serendipitous happenstance it seems you have matched the corrosion pitting of the rest of the wrench. 😉
As for the Yamato, painting fiddly parts shows the challenges and solutions?
LikeLike
Yep! And wrench by design of course!
LikeLike
I Find it very interesting that it had a Bulbous bow, these didnt come into general use until the late 60 s .
LikeLike
Yes. Me too.
LikeLike