johnsmachines

machines which I have made, am making, or intend to make, and some other stuff. If you find this site interesting, please leave a comment. I read every comment and respond to most. n.b. There is a list of my first 800 posts in my post of 17 June 2021, titled "800 Posts"

Category: Steam boiler feed pump

So Many Mistakes! Am I Too Old for this hobby? Or is it the heat?

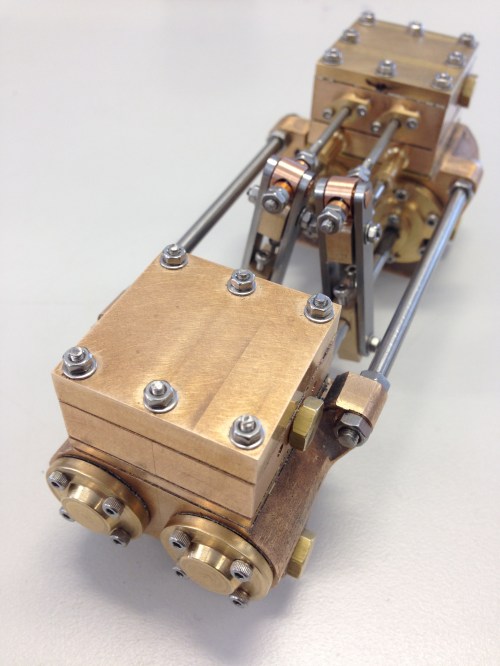
Having completed the model Trevithick dredger engine, and not having an inspiration to start another major build, I decided to make another steam driven boiler feed pump.

Earlier this year (2019) I made a horizontal, duplex, twin cylinder feed pump for the 6″ vertical boiler, but I had also purchased the castings and plans for a vertical, single cylinder feed pump, not having decided which version to fit to the boiler.  The horizontal twin version fits and functions very well, but I decided to make the vertical version while I am thinking about another major build.

Screen Shot 2019-12-30 at 11.01.18 am.png

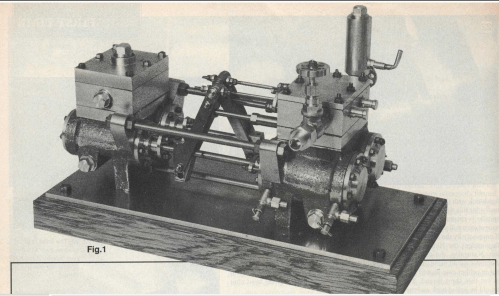
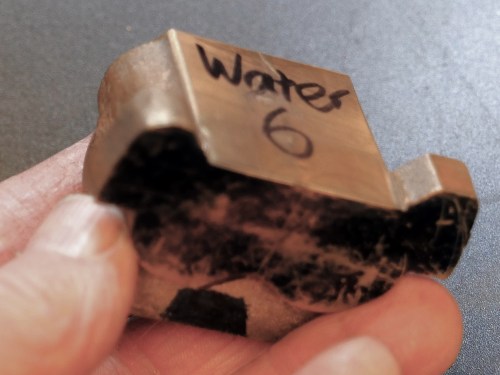
This is what it will look like.  Hopefully.  Single acting 3/4″ steam cylinder top, and 1/2″ water pump bottom.

P1053271

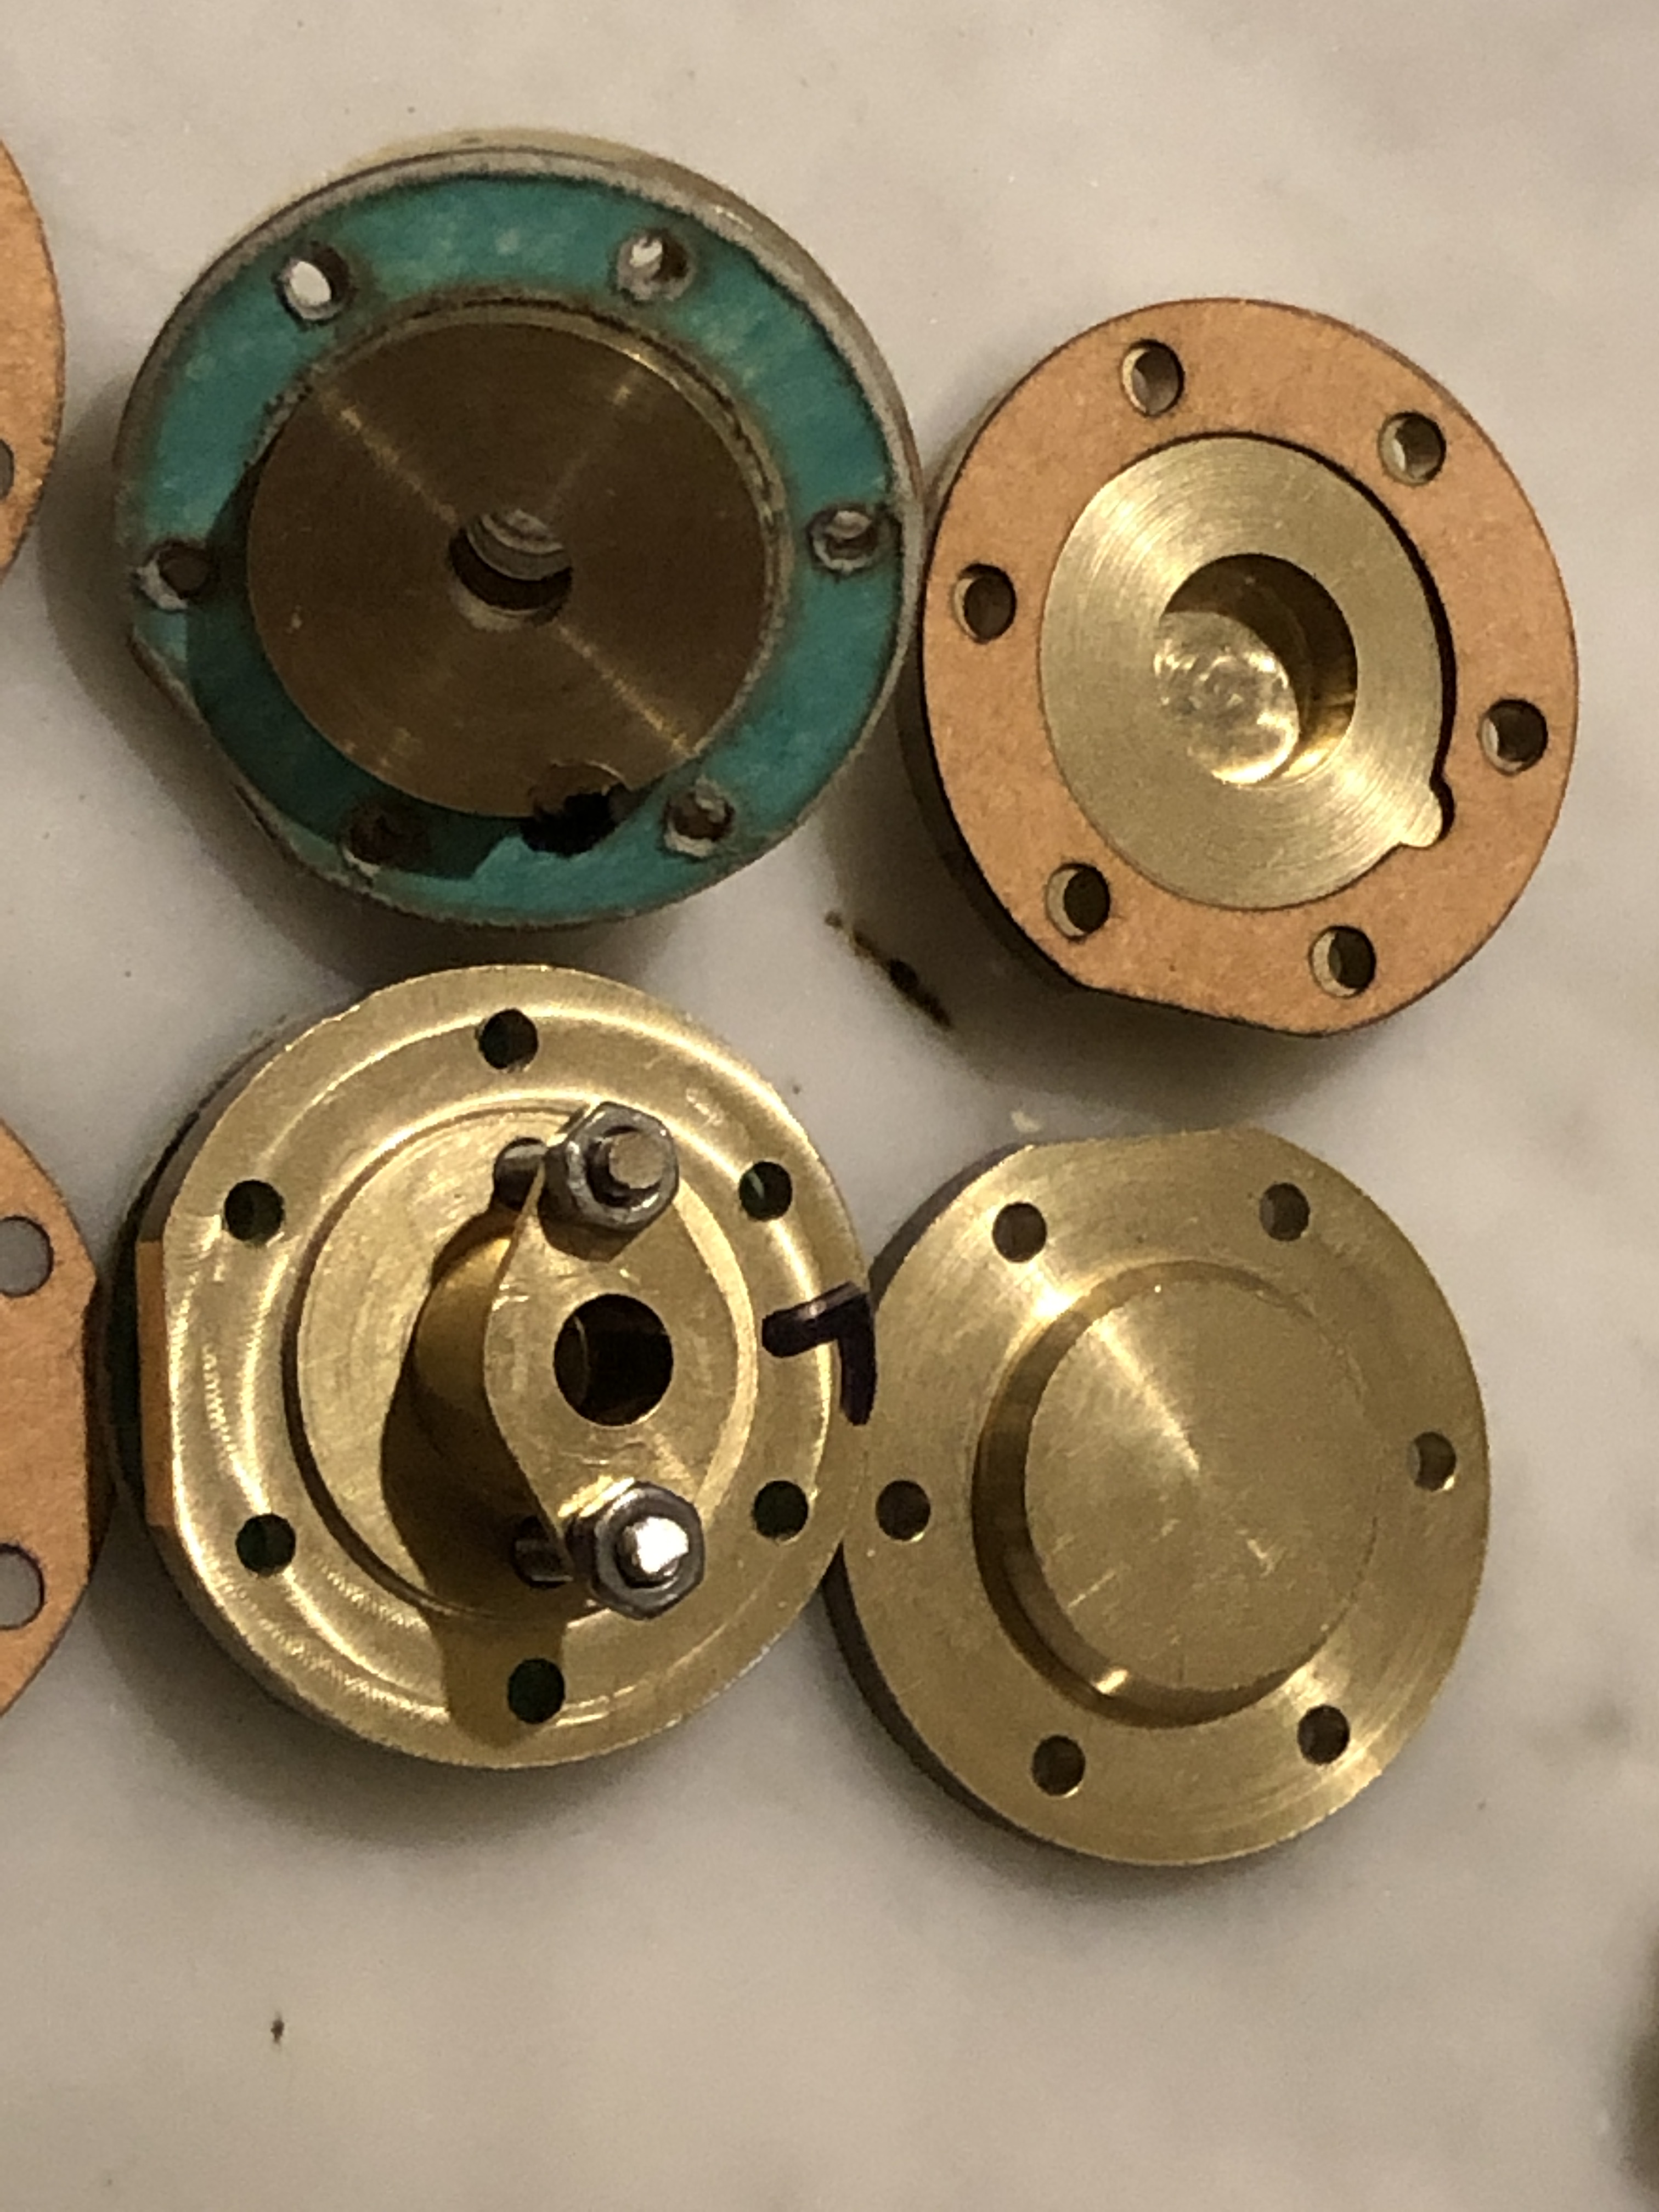
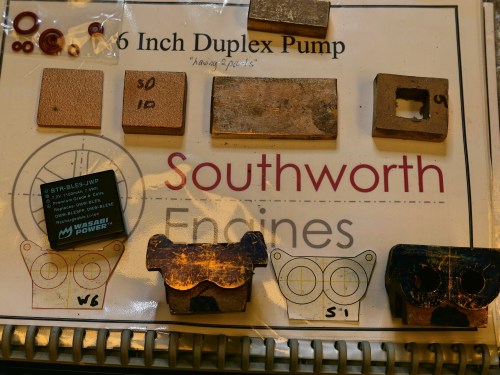
The plans, O rings and castings.  The castings have been cleaned up on the RadiusMaster, and the steam cylinder (top) is almost finished.

P1053275.JPG

The 7 pages of plans are excellent.  Imperial measurements and fasteners.  I will use metric fasteners.

P1053276.JPG

But I work in metric.

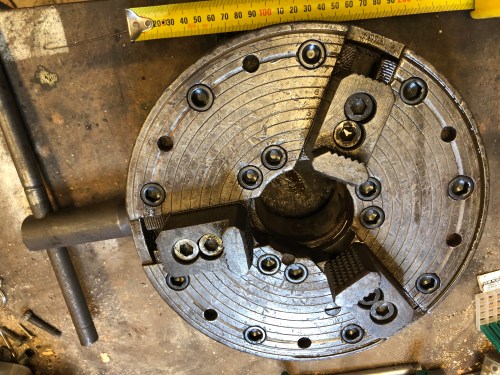
So over the past few days, excluding the ones over 38ºc (100ºf), I have been machining the gun metal castings.  And making a real mess of it.

The Mess.

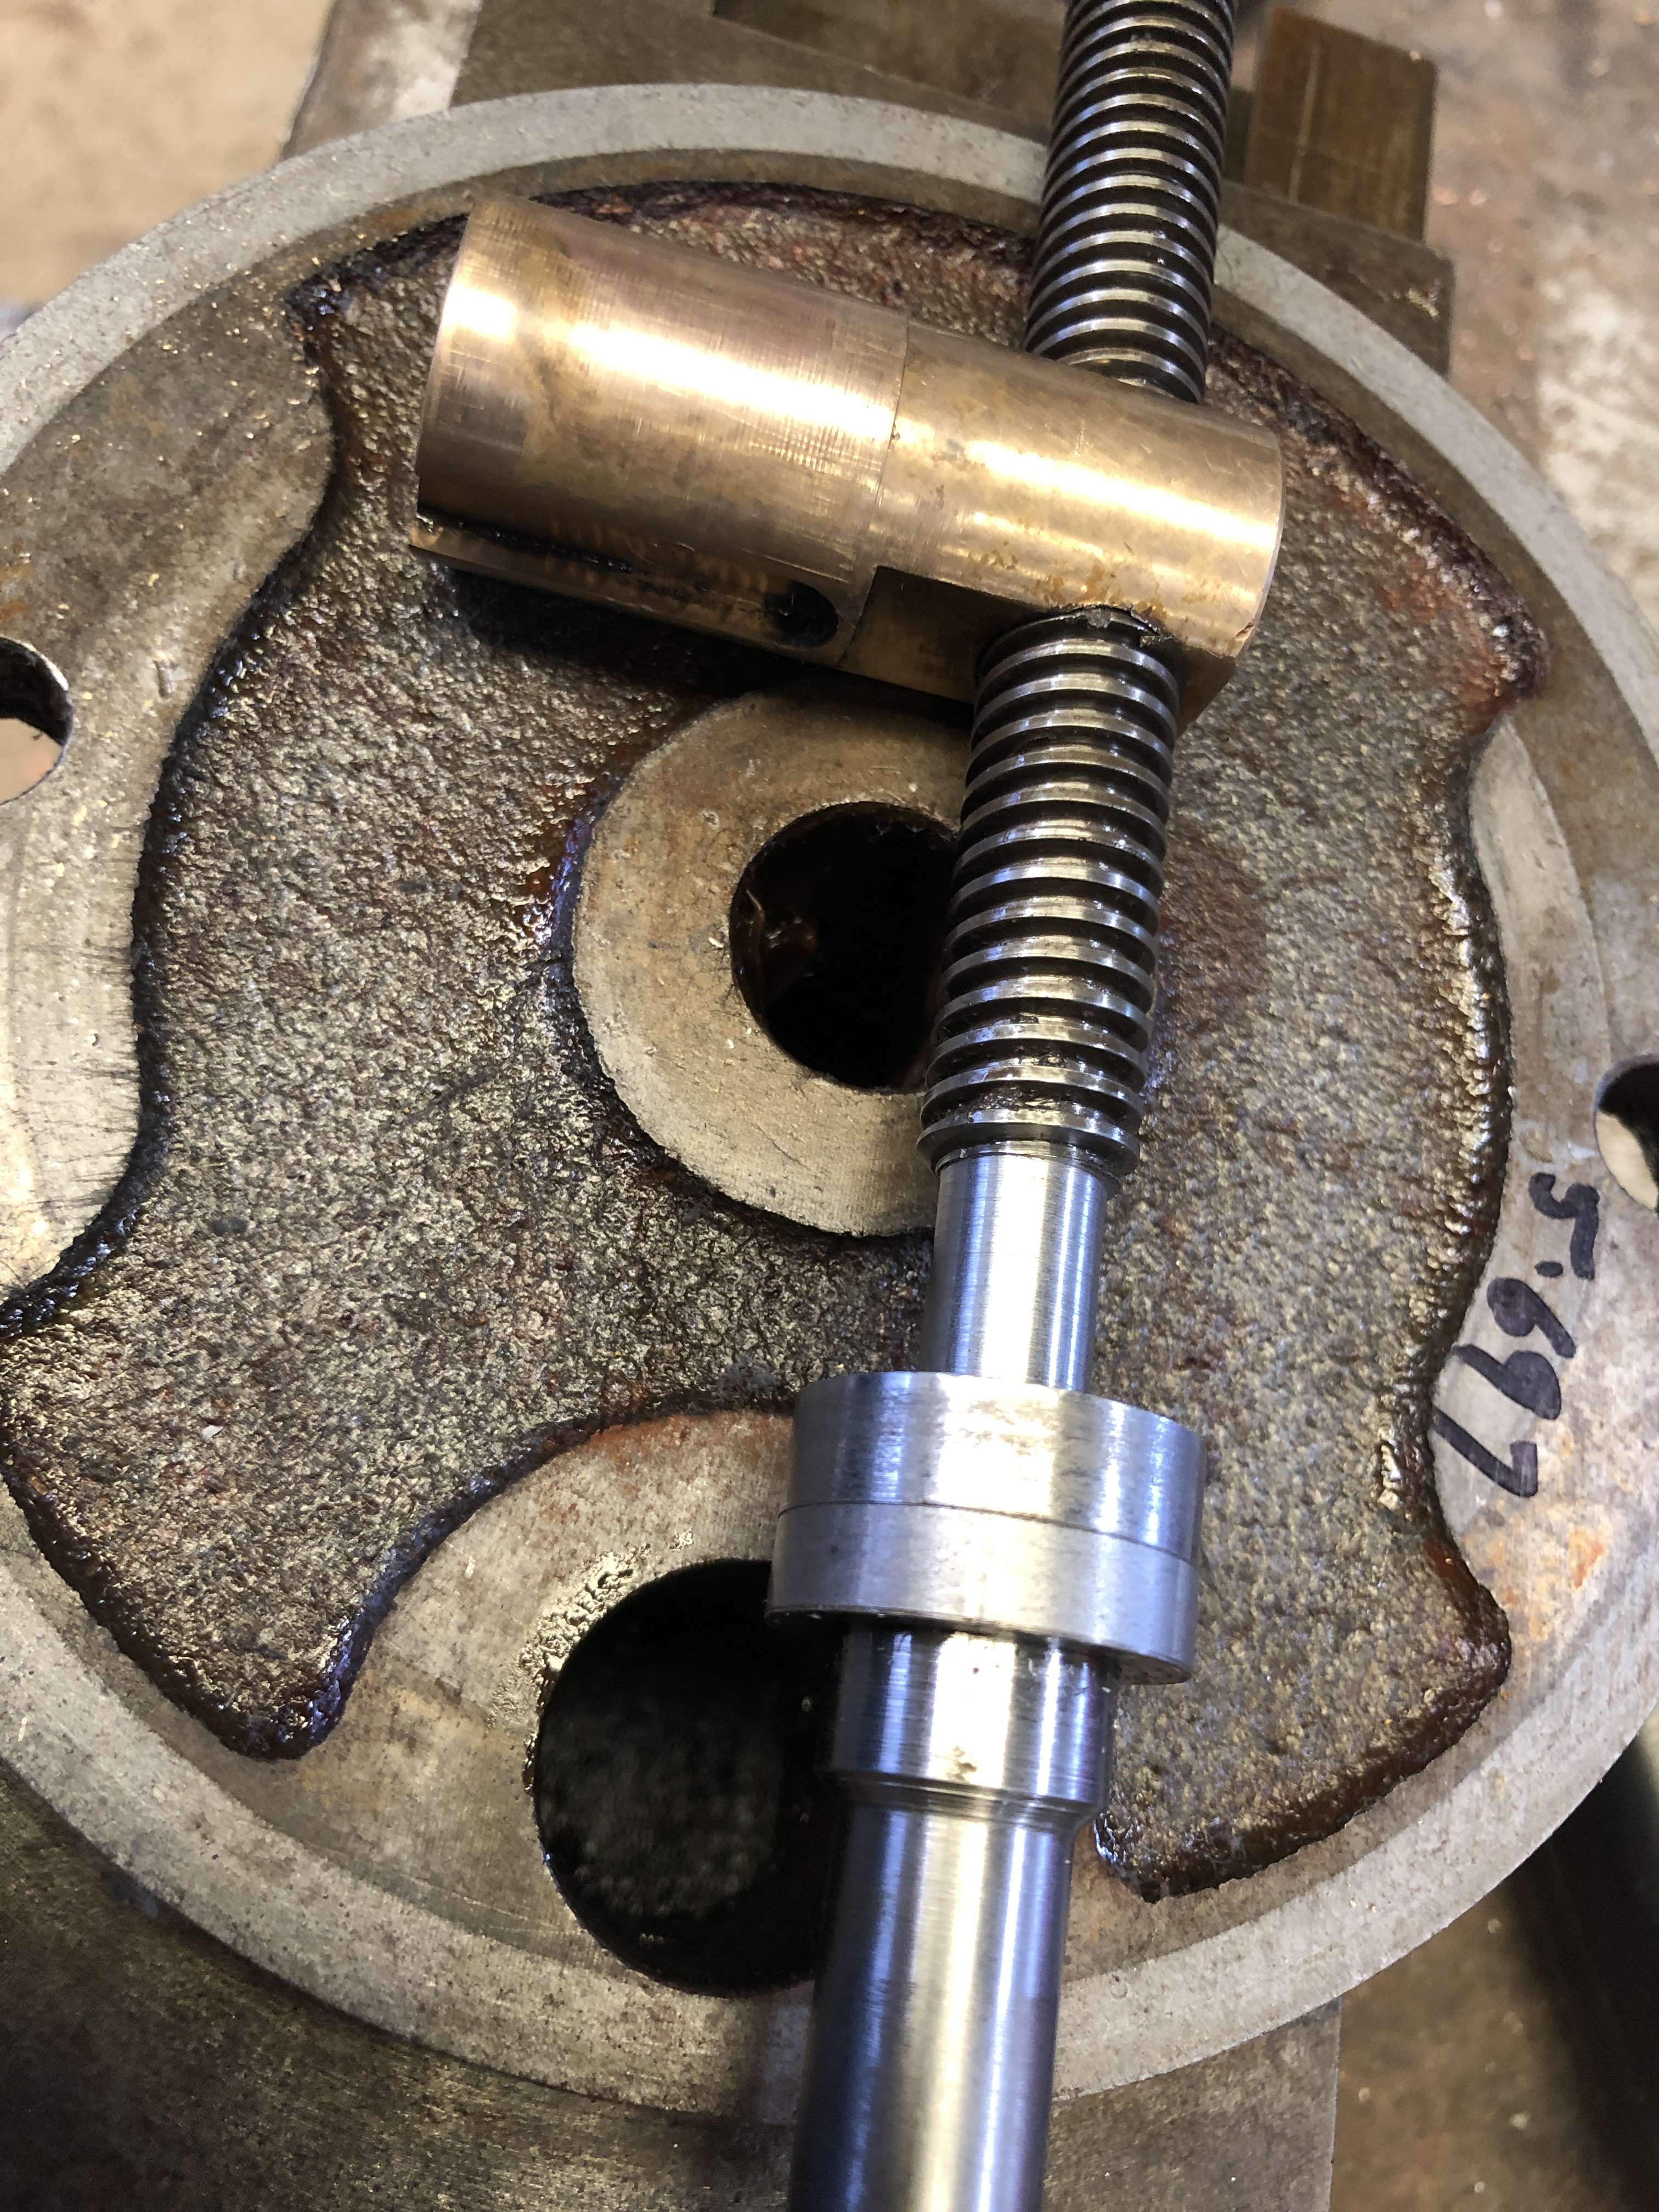
  1. The steam cylinder bore.  Bored with a boring head on the milling machine.  Turned out nicely, but I decided to run a 3/4″ reamer while it was set up on the mill, thinking that the dimension would be more accurate.  I did not notice until too late that the reamer was damaged.  It badly scored the bore.  I considered making a new cylinder from bar stock, but used the boring head to remove the scores.  Now 0.75mm oversize.  Annoying but not fatal.
  2. Steam passage not centered.
    P1053278.JPG

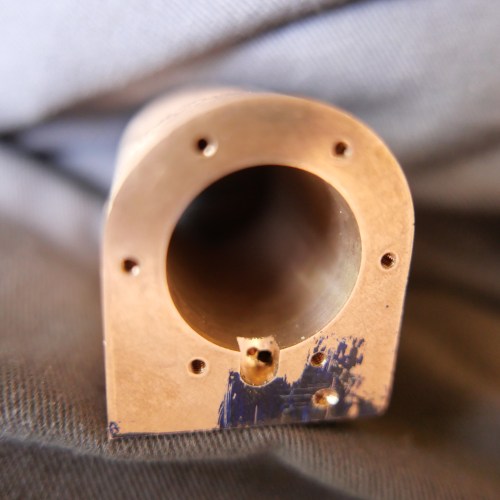
    The steam passage in the cylinder cutout is meant to be centered.  It is off at a 15º angle, and is centered with the cylinder top, but not the bottom of the cutout where it should be.   OK, it will not be seen, will not affect the function.  Just a trivial mistake.  That is the final oversize bore.

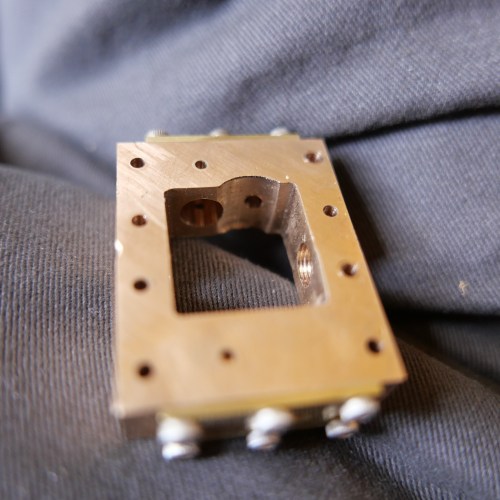
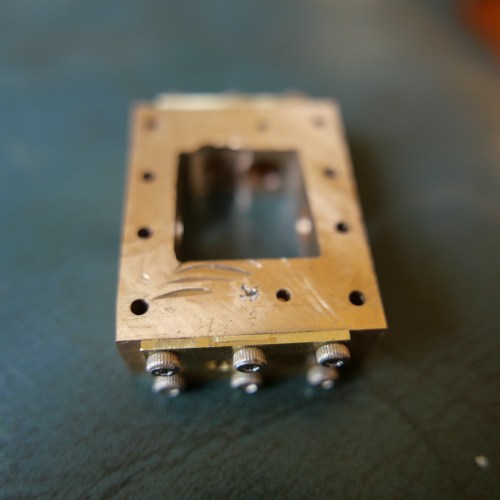
    3.  This one could have been fatal.  All of the center drill holes for the screws and steam passages in the cylinder valve face were off by about 1mm.  The workpiece had moved in the milling vice between setup and machining.  I really thought that this would probably require a new part, but I decided to proceed and see what eventuated.

    P1053279.JPG

    The middle 6 holes are the steam inlet and exhaust passages.  Fortunately they are in the correct vertical position, and have just been widened horizontally by the incorrect centre drill holes, which should not effect the function.  The screw holes merged into the incorrect holes, and were pulled a fraction laterally, but should be OK.   At final assembly I will fill the incorrect holes with something, probably epoxy or gasket goo.

    4. This was the most obvious error.  Moved the mill table in the wrong direction, and the rectangular hole ended up with an extension.  I don’t think that it will effect the function.  And it wont be seen by anyone except me, and all of you blog readers.  Oh, and now I have to kill you.

    P1053281.JPG

    Bugger bugger bugger

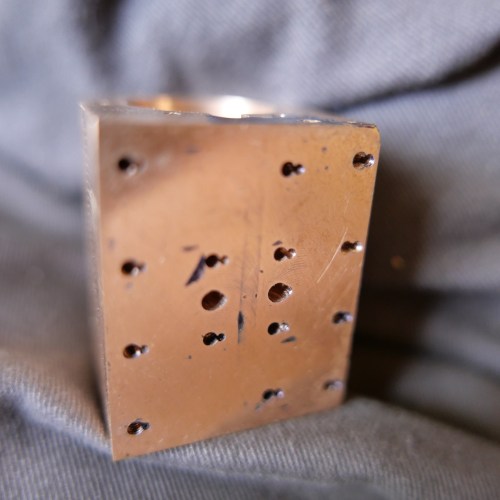
    5.  This was another mill problem.  I had changed the tools to a 1.6mm drill bit, and reset the Z axis zero.  Or had I?  Maybe I had neglected to hit <enter> after the reset.  Anyway, the chuck crashed at high speed into the job, impaling and snapping off the drill bit, gouging the steam chest, and the drill chuck gouged the milling vice.  The chuck survived but required some remodelling on the belt sander and then a diamond file.   The vice jaw also needed some impact craters to be flattened, then swapped out to another less critical vice.

    P1053282.JPG

    I flattened the gouges in the steam chest face, and I will make sure to fill those with something at final assembly.  The embedded drill bit can stay there, after flattening it with emery paper.


There were some other more minor issues, which do not bear repeating and prolonging this missive.  This all happened over 2 days.  Mistakes are made, and I console myself with my father’s advice “he who makes no mistakes makes nothing”.  But, this is the worst run of blues which I can remember.   It IS hot, which is not ideal machining conditions.  So what do I do?

Well, maybe it is just a bad patch, and things will be better next session.  And, I will try to be not SO impatient to get things finished that I don’t double check.  I (and you) will just have to wait and see.

BTW, have a safe and happy new year. 2020.  It is 101 years since we had a double number year (1919), and most of us will not see the next one (2121).  So make the most of it!


6″ Vertical Boiler, Triple Expansion Steam Engine and Southworth Pump, all working together. Fairly well.

2 videos of the triple and the vertical boiler and the Southworth boiler feed pump working together for the first time.  Not perfectly yet, but working.


Thinking about future exhibitions….

Still recovering from The Royal Geelong Show, where my beam engine and the Trevithick      dredger engine ran for ~8 hours per day for 4 days, and required almost constant supervision. I was very pleased that they did so without a problem.

For future exhibitions I would like to also run the triple expansion steam engine using the vertical boiler, for which I recently made the Southworth boiler feed pump.  And there are occasions where I might run the triple and the beam engine together from the vertical boiler.  That arrangement will occupy a fair bit of bench space, and in this post I am considering options for the arrangement.

But first, I needed a steam outlet manifold to handle multiple engines, simultaneously, and hopefully to avoid a big tangle of pipes.  Here is the manifold.

IMG_8246.JPG

The manifold has 6 x ¼” outlets and one 3/8″  outlet.    

Option one lines up the boiler and engine like this….

IMG_8243IMG_8244

Option two is more compact, but ?less appealing.  Pics following..

IMG_8237IMG_8238

IMG_8239

The lump of wood under the engine is temporary,  just to give an idea of the heights.

OK, this post is just an excuse to show some pics.  I have decided to go with option one.  It is closer to the appearance if the boiler and engine were actually in a boat, and also will make it easier to add the beam engine to the right of the boiler if/when I run the two engines simultaneously.

And I doubt that I will be able to avoid a jumble of pipework.  The triple has 6 pipes attached, the boiler has more, then there is the beam engine.  And, I will need a water container from which to feed the boiler.  That will be located behind the boiler.  Still considering whether it should be a squarish box on a stand like the railway water towers, or a cylinder on a low stand.   Any thoughts?


Boiler Feed Pump Pumping

Yesterday I reseated the pump valves, reassembled the pump, then tested it on steam.

Most of the following video has the boiler at only 25psi, but I did run it off camera at up to 75psi.

After making the video I redirected the exhaust steam from the pump into the firebox.  It actually seemed to improve the gas flame, maybe by acting as a blower.  Not so sure about this being permanent though, because the exhaust steam contains oil from the displacement oiler, and I dont want that oil to be deposited in the firetubes.

I will make a water tank to supply boiler water.  Maybe the exhaust steam could be passed through a heat exchanger in the tank, so the boiler feed water is preheated.

(if the video is not showing, click on the https link below)


First Steam for Boiler Feed Pump


Mounting the Boiler Feed Pump

Today I mounted the Southworth boiler feed pump on the boiler base, then started on the pipework.  Nothing is tested yet, but it is looking interesting IMO.

P1032923.JPG

The Southworth pump, located behind the hand pump.

P1032919.JPG

The steam supply pipe on the left, and the water delivery pipe on the right.  The hand pump and the Southworth pump deliver water to separate clack valves on the boiler.  There is yet another clack valve in case I ever add an injector.  The water supply tank and connections are yet to be added.   I am not planning to install a bypass.  Note the displacement oiler for the valve chest.

P1032922.JPG

I tried a new trick to bend the pipes for this installation.  I read about this somewhere.  Bent a piece of wire to use as a pattern when bending and cutting the copper pipe.   Worked a treat!

Looking forward to firing up the boiler and testing the boiler feed pump on steam.  If it works OK there will be a video.


Boiler Feed Pump -Working

I could not induce my Southworth steam powered boiler feed pump to work.

Initially I thought that it was a bit tight, and spent time easing the glands, and slightly deepening the O ring grooves.  That took a couple of days.  But no luck.

So today I took it to our model engineering meeting, with some tools to perform a tear down, and 2 of our senior members took a close look.  After some to-ing and fro-ing, the verdict was that I had reversed one of the steam passage blocks, and machined it back to front.  I had mis-interpreted the plans.  It was due to not really knowing the rules for rotating a part in 3rd angle plans.  Pretty annoying.  A 3d view of the part would have removed any confusion.  Fortunately the fix was not too complicated.  2 threaded holes to fill, and 2 new holes to drill and thread on the other side.

That done, I re-assembled the steam engine side of the duplex.  Hooked up a compressed air hose, and see the result….

This is on approx 10psi air.  There is no load, so it is running faster than it would if actually pumping water under pressure.

Next I will mount it to the boiler base, and hook up the pipes.  Then there will probably be another video.

Southworth Steam Boiler Feed Pump Progress.

With book reviews and OP’s workshops on this blog you might be wondering if anything is happening in MY workshop.

Well, yes.

I have been beavering away, making parts for the Southworth steam powered boiler water feed pump.  Today I made the final parts.  The machining has been fairly basic and straightforward, so no special photos or videos.

IMG_8196.JPG

These are the parts and assemblies.  Top is the steam cylinders left, the water cylinders right.  The water pump stack not attached.  The the tails for the valve rods, the valve rods with valves attached, the cylinder caps, the valve rod levers, and some of the gaskets.

I will make a separate blog about the gaskets.  These were all laser cut.  I will never hand cut another gasket.  Laser cutting is cheap, fast and accurate.  Way to go!

IMG_8197.JPG

The valve levers and fittings.   These are small, precise, and accurate.  Quite a pain to make, even with CNC.  I remade more than one of these, due to dropping and losing the original.  The fasteners are M2, and not finalised.  The off centre drilling of the left hand fitting is of no consequence (I hope).

IMG_8198.JPG

The valve rods, M2.5, and valves.  Cutting those threads, 2.5mm diameter and 25mm long, was also a challenge.  I learnt about fixed steadies, but too late to use on this job.  Subject for a future blog.

IMG_8199.JPG

And some of the cylinder end caps.  There are 8 altogether.

So now that all of the parts/components are made, I will commence the assembly, then the timing of the steam engine component.  Watch this space.

Book review of “A Military History of China” coming up soon.  Quite an eye opener.

If you have not sent in photos of your workspace, please do so.  The series has generated quite a lot of interest.


Southworth Steam Pump- first parts

A couple of days in the workshop, and the large castings are almost fully machined.  Straightforward machining.   Made a couple of mistakes, but none fatal.  Changing BA fasteners to metric.

P1032887.JPG

The steam cylinders block in the mill vise.   Almost complete water cylinders block sitting behind for the photo.

P1032888.JPG

Steam cylinders on right, water cylinders on left.  The temporary steel pins are to ensure accurate alignment of the 2 blocks.   Water and steam passages come later. 

This is the first model machining which I have done since April.  It should be second nature, but I admit to a bit of hesitation, nervousness, initially.  Especially starting on an irregular, slightly complicated shape like these.   But it is all coming back now.  And I am really enjoying it.

Steam Powered Water Feed Pump

My CNC mill is now mostly functioning, although several functions are yet to be connected.  The main spindle and XY&Z axes are working, and responding appropriately to Mach3 commands from the laptop computer.  It has taken longer than anticipated so far, mainly due to difficulty in understanding manuals supplied from Asia.   Axis limit and homing switches, oil pump, coolant pump, work light, and cooling fans still to be connected.

So there has been little of general interest coming out of my workshop.  Hence no posts on this site.  Not that I have been idle.

I disassembled the top slide on the Colchester lathe to discover the cause for excessive back-lash.  It was a worn acme thread bronze nut.   No luck yet in finding a new nut for this 45 year old lathe.   I will have to make one.  Meanwhile, I used a quick and dirty trick to reduce the back-lash which I will detail soon.

IMG_8156.JPG

The top-slide acme screw and bronze nut which needs replacing.

I also cleaned and freed up a 3 jaw 10″ chuck which I bought on Ebay.  It was frozen solid, so I soaked it in kerosene bath for a few months.  Actually, I forgot all about it while it was in the kerosene, and accidentally rediscovered it.   This time, after using an impact screwdriver, I was able to open it up and expose the gears and get them moving.  Might be worth a photo also.

IMG_8161.JPG

The 240mm diameter chuck.  I was tempted to buy by the removable, reversible  jaws.  Thinking that I could make some soft jaws.   Trouble is that it is an industrial production line chuck with very little movement.   But it is nice and tight.  Still deciding.  At least I can wind the jaws in and out a bit now.

And I finally got around to installing piston rings in the triple expansion steam engine.  Used Viton O-rings.  Not a difficult task, and it should not be difficult to replace them from time to time in future.   Will be interesting to see if the engine performance improves.

Now to get onto my next project.  I have plans and bronze castings for a Southworth design water pump, for replenishing the vertical boiler water while it is in use.  It was a surprise to me, just how much water is consumed by a boiler which is powering a model steam engine.  To date I have used a hand pump, but having seen a steam powered pump in action, I have decided to make one.

The steam is supplied from the boiler which is being replenished.  The pump has to use steam at boiler steam pressure, to force water into the boiler.  So the pump has to raise the pressure of the feed water above the pressure of the steam which is powering the pump.   The clever pump design uses large steam driven pistons to drive smaller water pump pistons.

IMG_6664

Larger steam pistons top right 5/8″ dia,  water pistons bottom left 3/8″ dia.

Here is a video of a Southworth pump in action.  It was made by Stuart Tankard.  Here it is running on compressed air, but I have seen it working similarly on steam.  I will be making one of the same design, hopefully approaching this level of finish.


A build of larger version of the pump was described by J. Bertinat in  a series of articles “Model Engineer” in 1993 (first article 18 June 1993).

Screen Shot 2019-08-20 at 9.39.27 am.png

Southworth castings.jpg

The unmachined castings.  Lumps of rough bronze.   And the plans.

water cyls casting.jpg

One of the castings after preliminary machining to establish some faces.  The “water cylinders” block.   Part no. 6

P1032886.JPG

Good quality castings.