
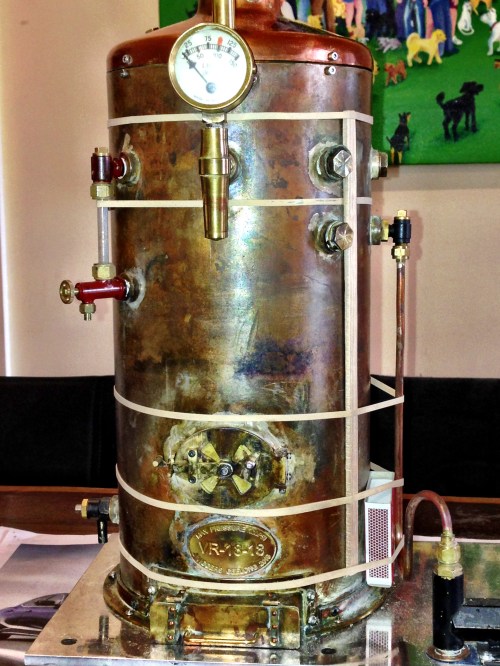
6″ Boiler. Lagging.
by John
Lagging. As in boiler insulation, not as in failing to keep up. I have been working on the boiler for about 3 months, so I am actually happy with the progress. And more than happy to have passed certification!
I decided to apply wooden lagging strips for the appearance and for ease of handling, rather than any minimal improvement in performance of the boiler.
After use, the boiler shell is too uncomfortably hot to handle, so there is a waiting time of 30 minutes or so to allow it to cool. I am hoping that wooden lagging will reduce the waiting.
And wooden lagging will hide the splodges of silver solder around each boss and join. And it looks the part IMO.
But how to attach it? None of my books mentioned any method. I presumed that the brass strips are the main method, and that is certainly so, on full-size boilers. Then I found a short video on YouTube by Keith Appleton and I decided to copy his method.
The method uses Super Glue as a temporary securing method while positioning the strips, then applying brass strips to hold the wooden strips in place long term. The boiler heat and expansion-contraction will result in the glue bond being temporary, and if the wood strips have to be removed later, for any reason, that will be possible. It also means that an insulating blanket cannot be inserted between the copper shell and the wooden strips, but I was not planning on using a blanket, so not a problem.
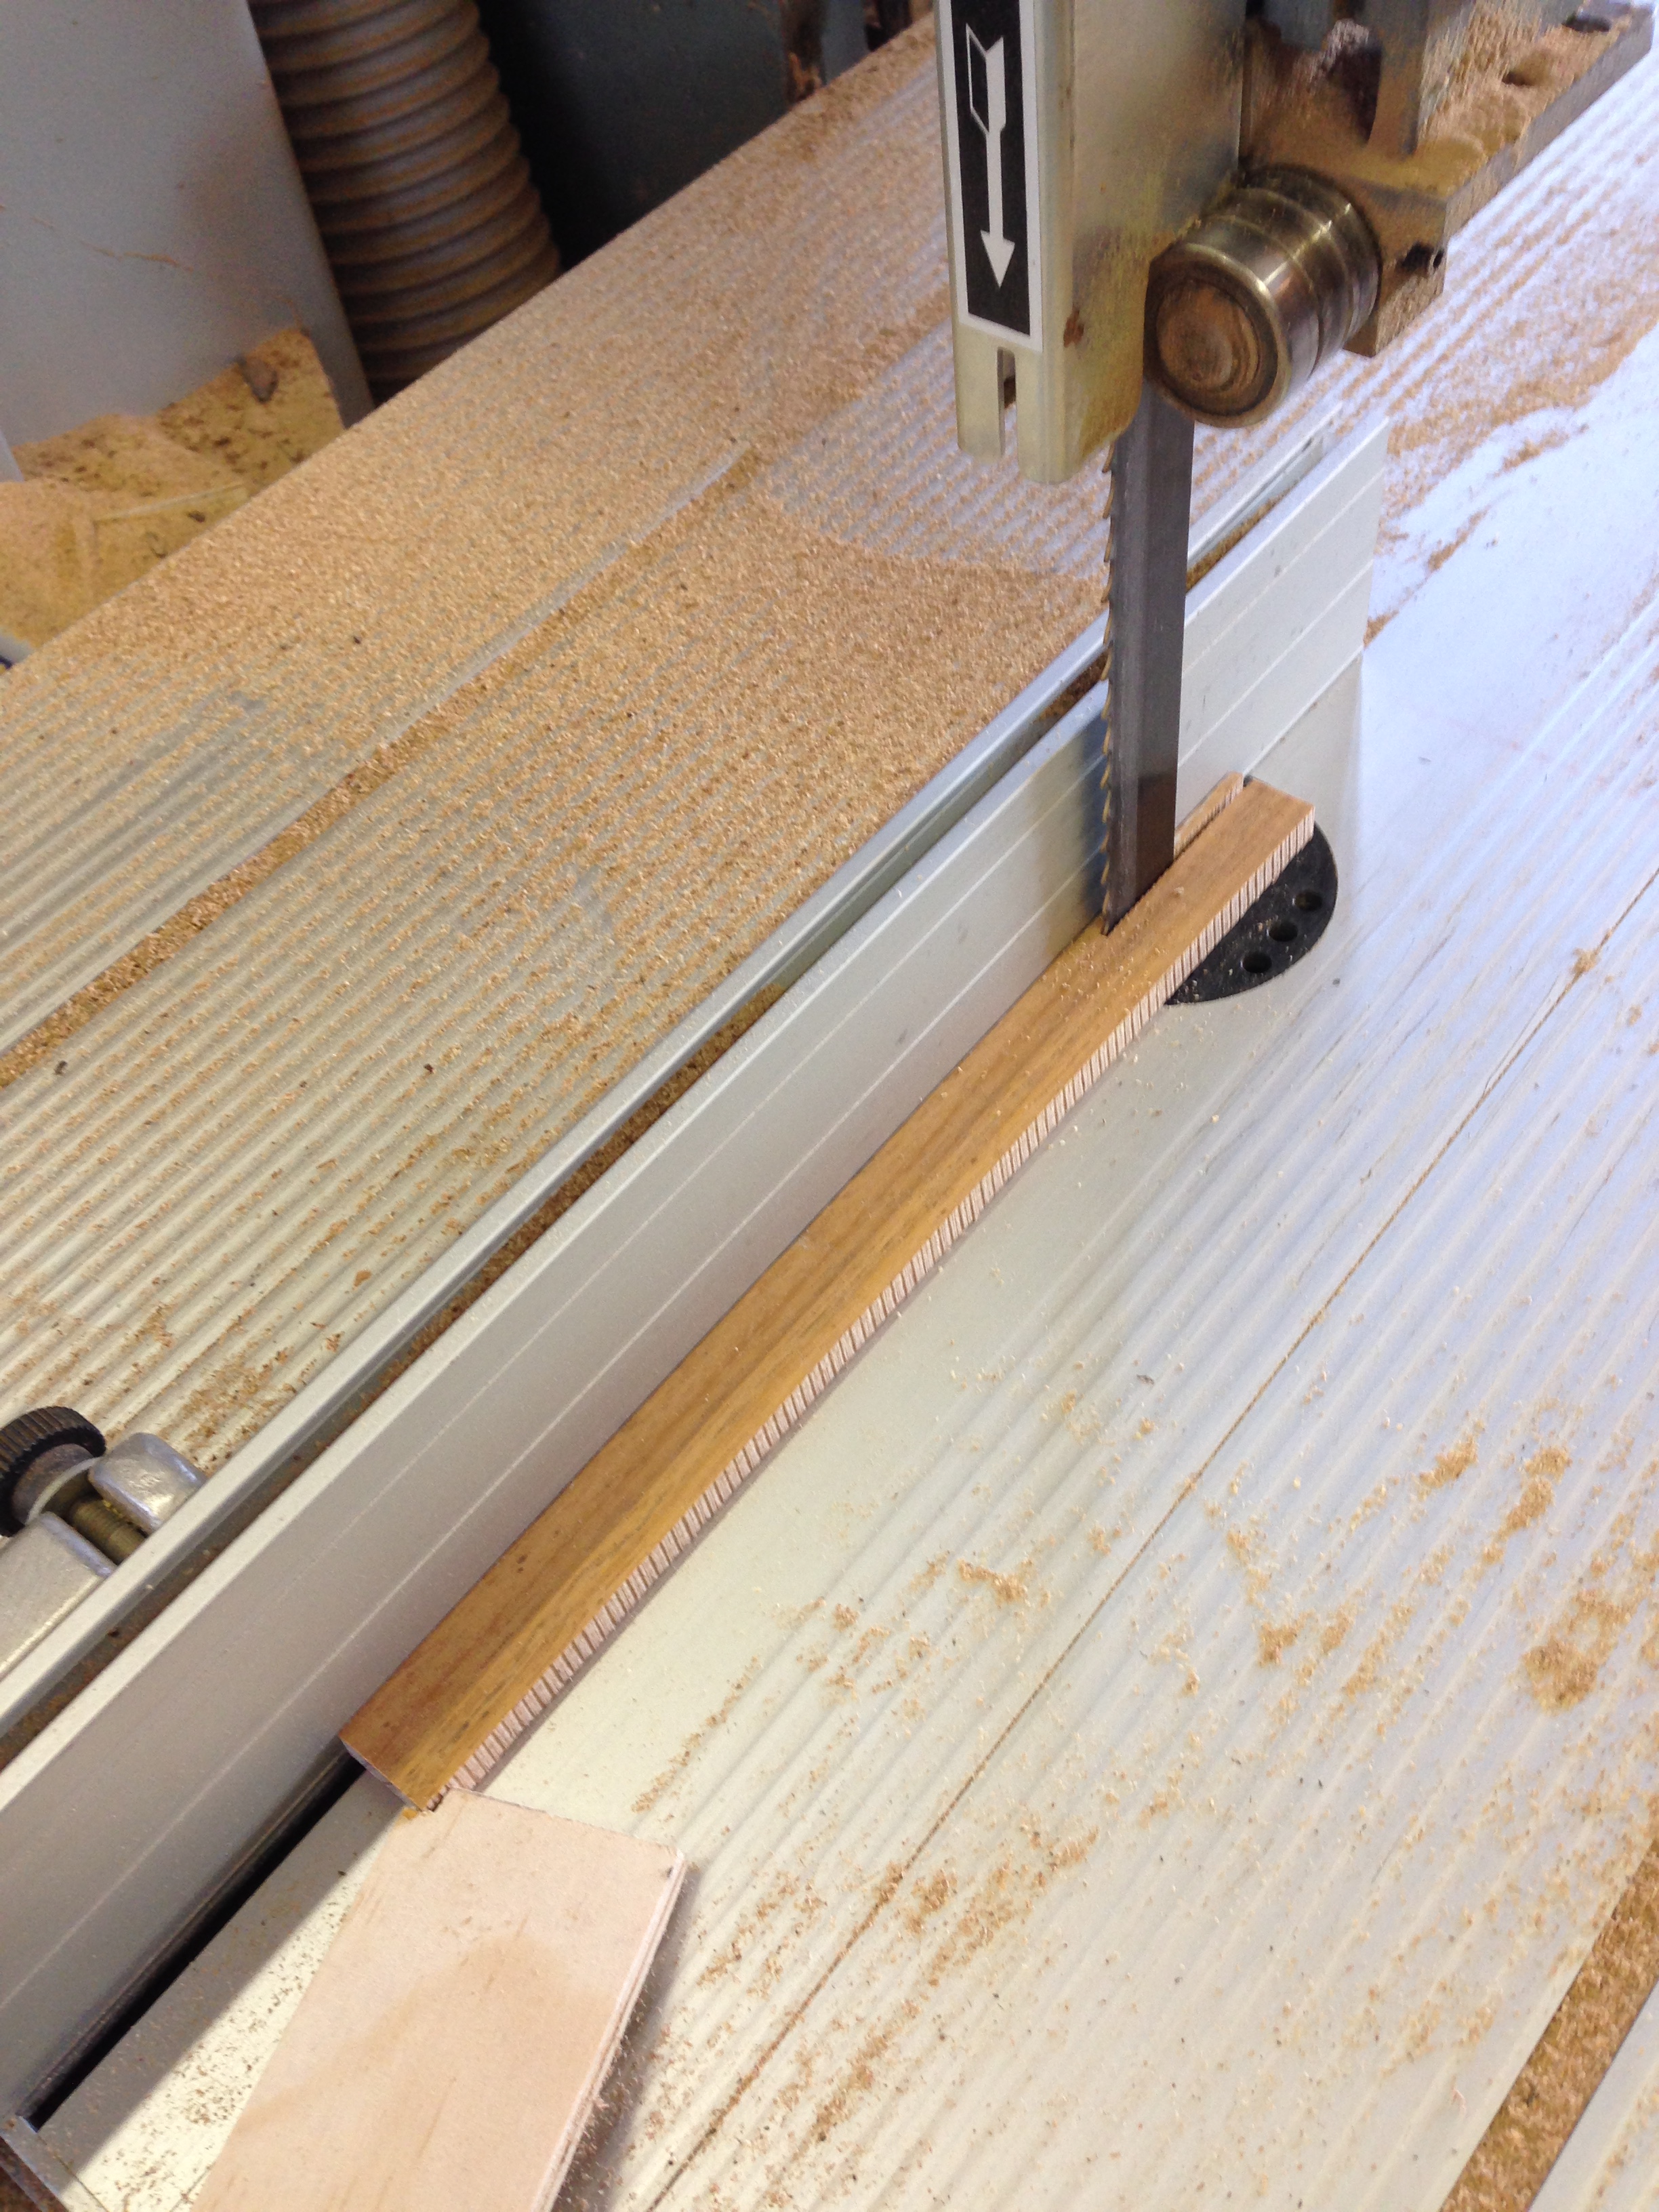
The strips are 3x8x265mm. I chose Tasmanian Oak which is actually an ash, because it is hard, fine grained, and I had some in old floor boards. I cut the pieces to length a bit oversize, then ripped them to size on the bandsaw. It is difficult to avoid fingers being close to the blade with small pieces like this, so I used a push stick. I needed 65 pieces. The blade teeth are a bit too coarse for this job, but I was too lazy to change it for a finer one. Note the saw blade guide. I did not like the one which was provided by Metabo, so I made that one. Works well!
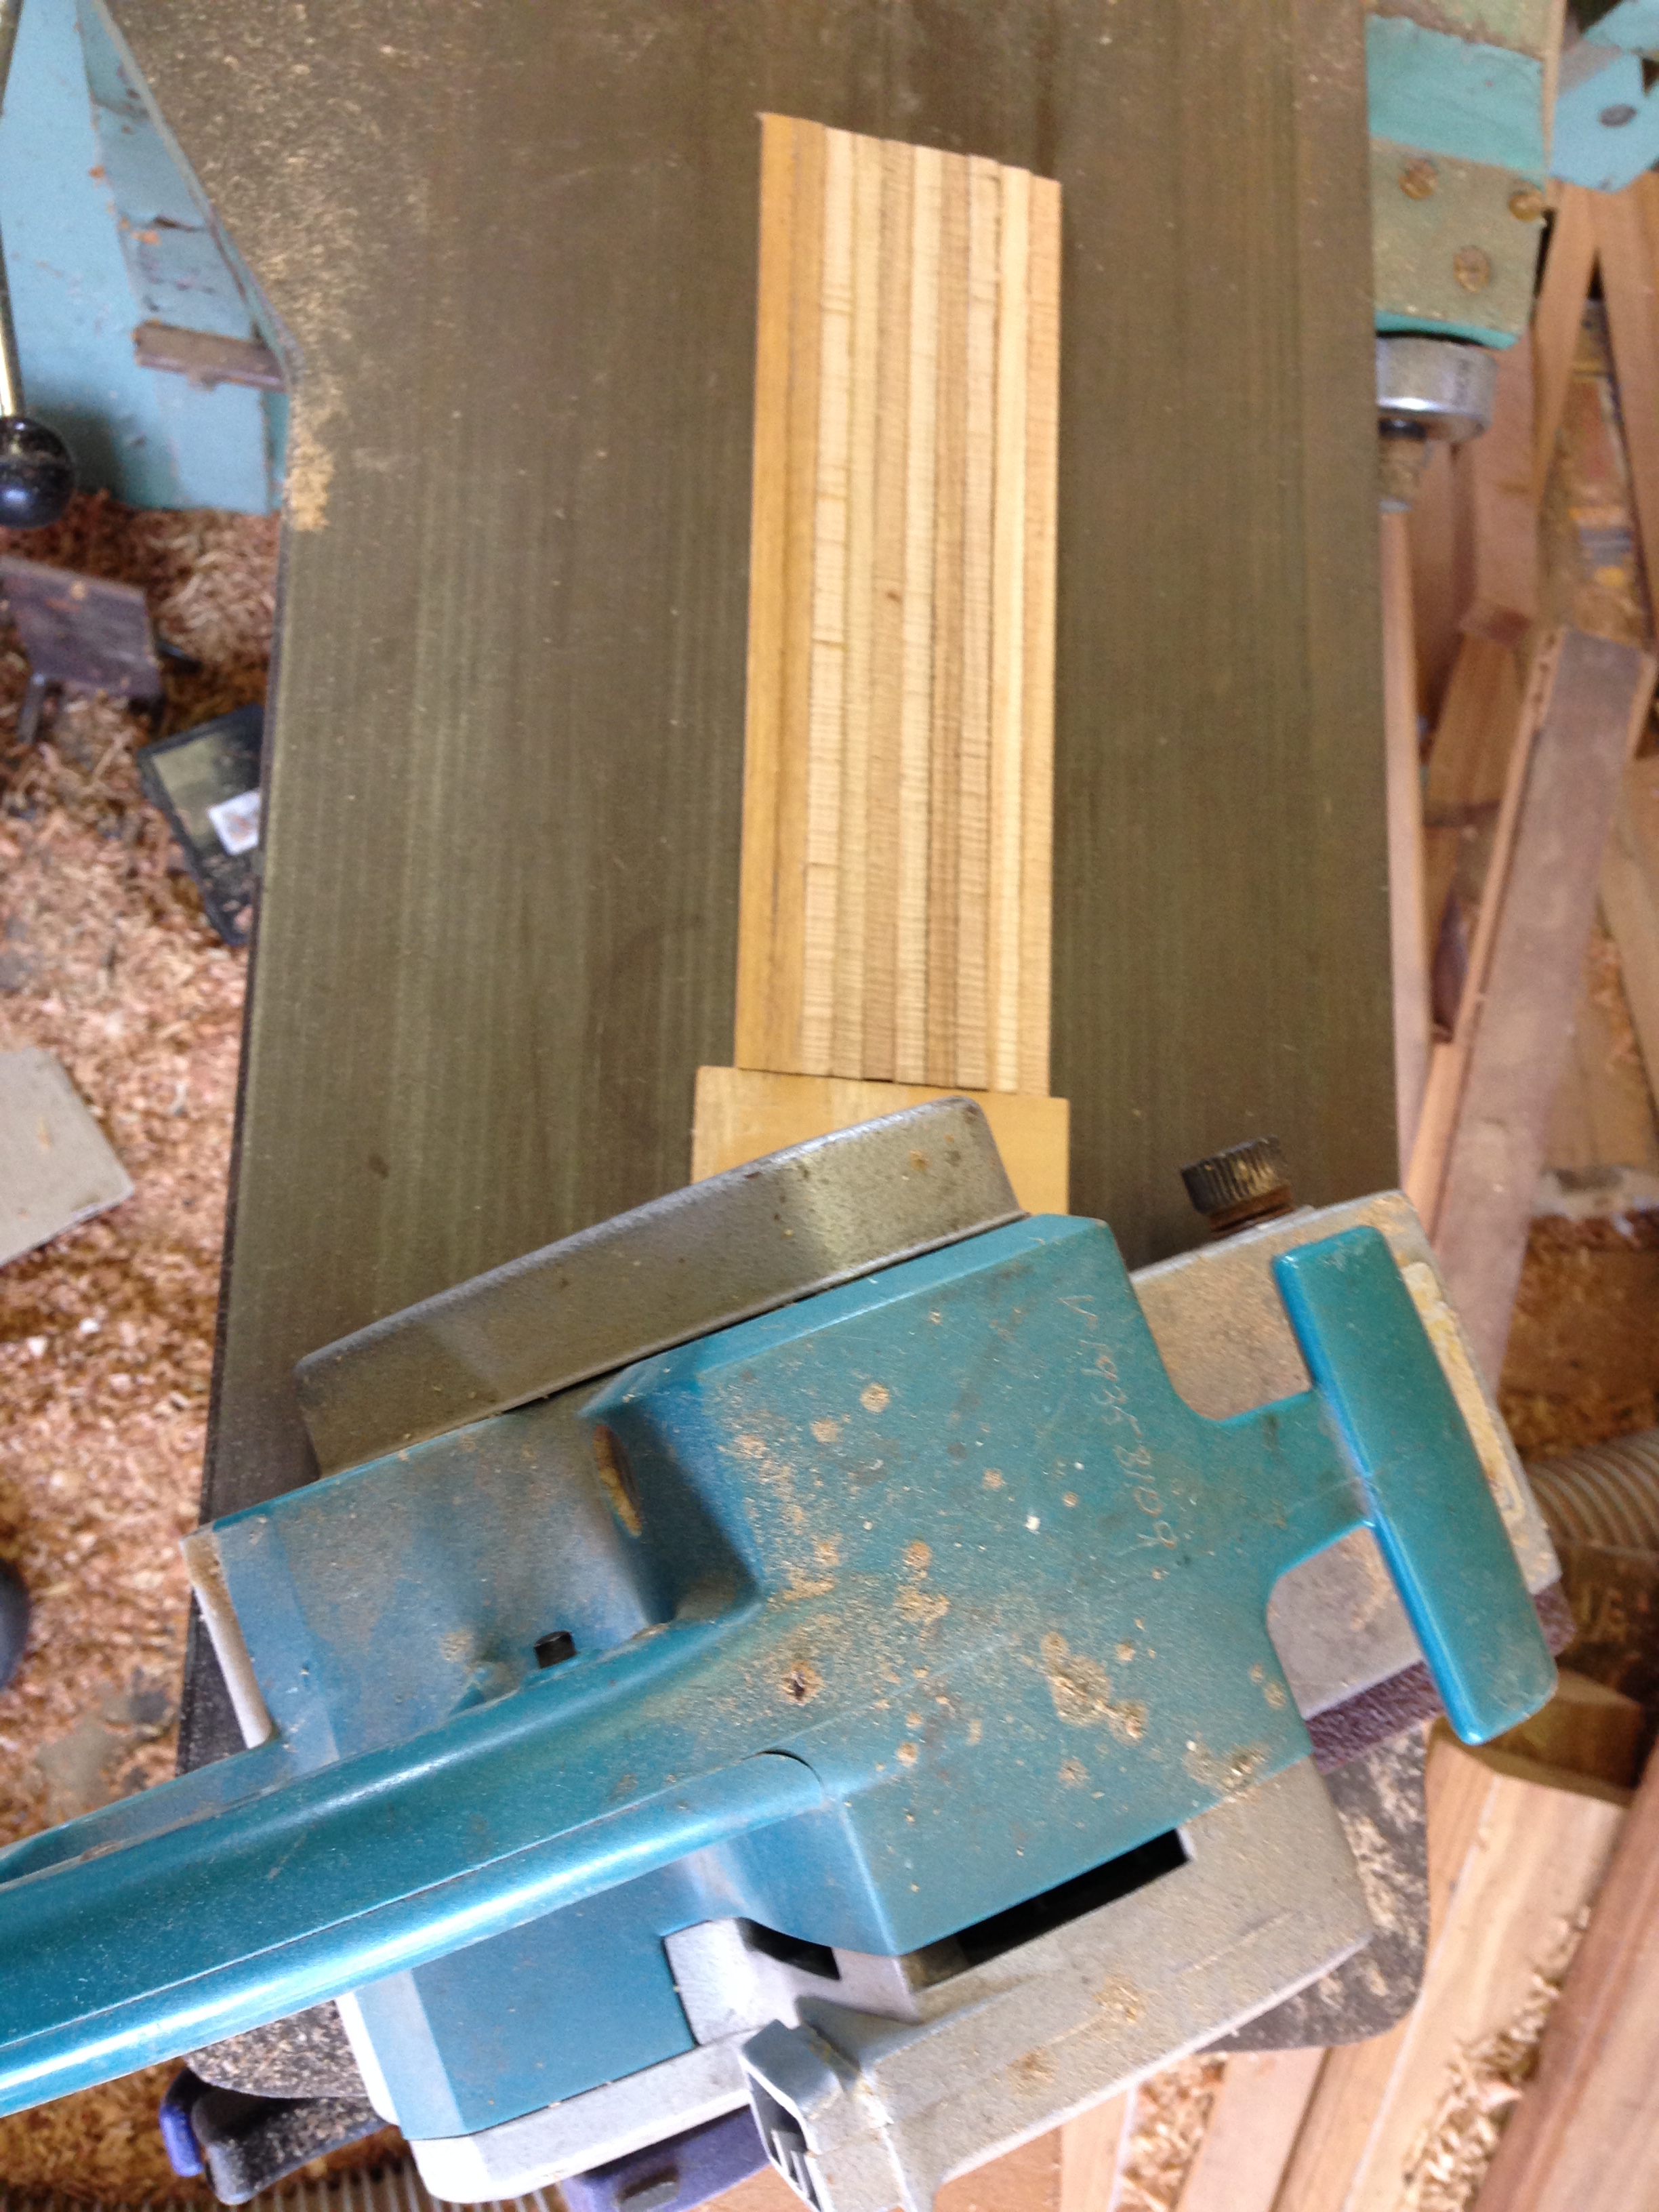
Then I used a belt sander to remove most of the sawing marks. The resulting thicknesses varied from 2.8 to 3.4mm but I hope that variation will not matter.

Some hand sanding to remove wood fur.

Hope that this will be enough pieces!

The boiler feels out of place in all this woodworking rubbish.
SWMBO was away, so I set up on the kitchen table. Here deciding on the final length of the strips.

Each piece is cut to length, then fitted into position. Shaping the wood to fit around bosses and fittings is done with a small sanding drum in the Dremel. It is a slow process. Then each piece is glued into place, and held with rubber bands.

It has taken about 4 hours to apply about 1/3 of the strips. The Baileys was to keep me in an appropriate mindset. I am looking at the slightly ragged top and bottom edge in the photo. Looks a bit rustic and authentic, or just rough? The wood will be darkened after oiling, and possibly staining. And Tasmanian Oak darkens with exposure to light.
That was yesterday. Today I hope to complete this job, but SWMBO is home, and not appreciating the dust and mess, so I am exiled to the outside.
I have realised that to secure all of the wooden pieces I will require 5 brass bands. I do not want it to look too brassy, so I am ordering narrower strips than the 6mm material which I had previously bought. I think that 4.75mm will be about right.

John you can get hight temp tolerant silicone and use is as a glue.
I’ve used it to secure tuned exhaust headers to very high speed ic engines, not just as a sealant but a glue.
You can get a very good finish on your timber in several ways. Eg a small metal scraper and/or dampening the grain with a little water to raise the grain, then 400 or finer grey paper on a block. I find gluing the paper to the block makes things secure and accurate.
Just a few thoughts.
Cheers Tim
LikeLike
Thanks Tim. Just in case the lagging has to be removed for an inspection or to repair a leak I am happy that the glue is not permanent. But I will keep your suggestion in mind for other high temperature applications. John.
LikeLike
On the original the planks would have been separate and held on place by brass bands. however this is a bit tiresome to do especially if the planks are of several different lengths.
On my Jenny Lind I made a round metal shape that covers half the barrel and fits it closely. I glued the planks on it using ordinary brown silicone stuff. The planks edges are untouched so they do not fit together tightly, however the outer corners are rounded. this was done by using a linisher to chamfer the corner and then finished with sand paper.
This gives the right appearance yet makes it easy the put the cladding on and off.
I have check this against the cladding on the Rocket in my local museum which actually has very small beading along one edge of each plank. so the appearance from a distance
of the planks on the rocket and on my Jenny Lind is similar.
I have photos of this in my camera but have forgotten how to get it from there to here.
could email it to you.
john f
LikeLike
Thanks for that info John. After 9-10 hrs of sticking the strips on individually, I think that I will complete the method which I started. Just waiting for the 3/16″ brass bands to arrive so I can finish this phase of the build! John. ps. you could post your photo(s) on Facebook. I would like to see them.
LikeLike