
Making a Lead Ball for the safety valve
by John
The deWaal plans for the Trevithick Dredger Engine call for a 30mm diameter lead ball for the safety valve.
I considered substituting steel or brass, and turning the ball, but lead is almost 50% more dense than the other metals, and that could be detrimental to the functioning of the safety valve, so I worked out how to make the ball in lead.
I have previously cast lead balls 14mm diameter, but this is significantly bigger. I did briefly consider making a plaster of Paris mould, but I could find no balls of the correct diameter for the POP mould, so I decided to mill the mould.
On rummaging through my big milling cutters, I discovered that I have a ball nose cutter, 31.75mm diameter. It was part of a package of cutters which I had purchased years ago, and almost forgotten. I had bought the cutters BY WEIGHT. I think that I paid $US5 per pound, and I bought 20lb. Mostly the cutters were resharpened end mills, but one of them was an unused 31.75mm ball nose. Pretty close to perfect for this job!
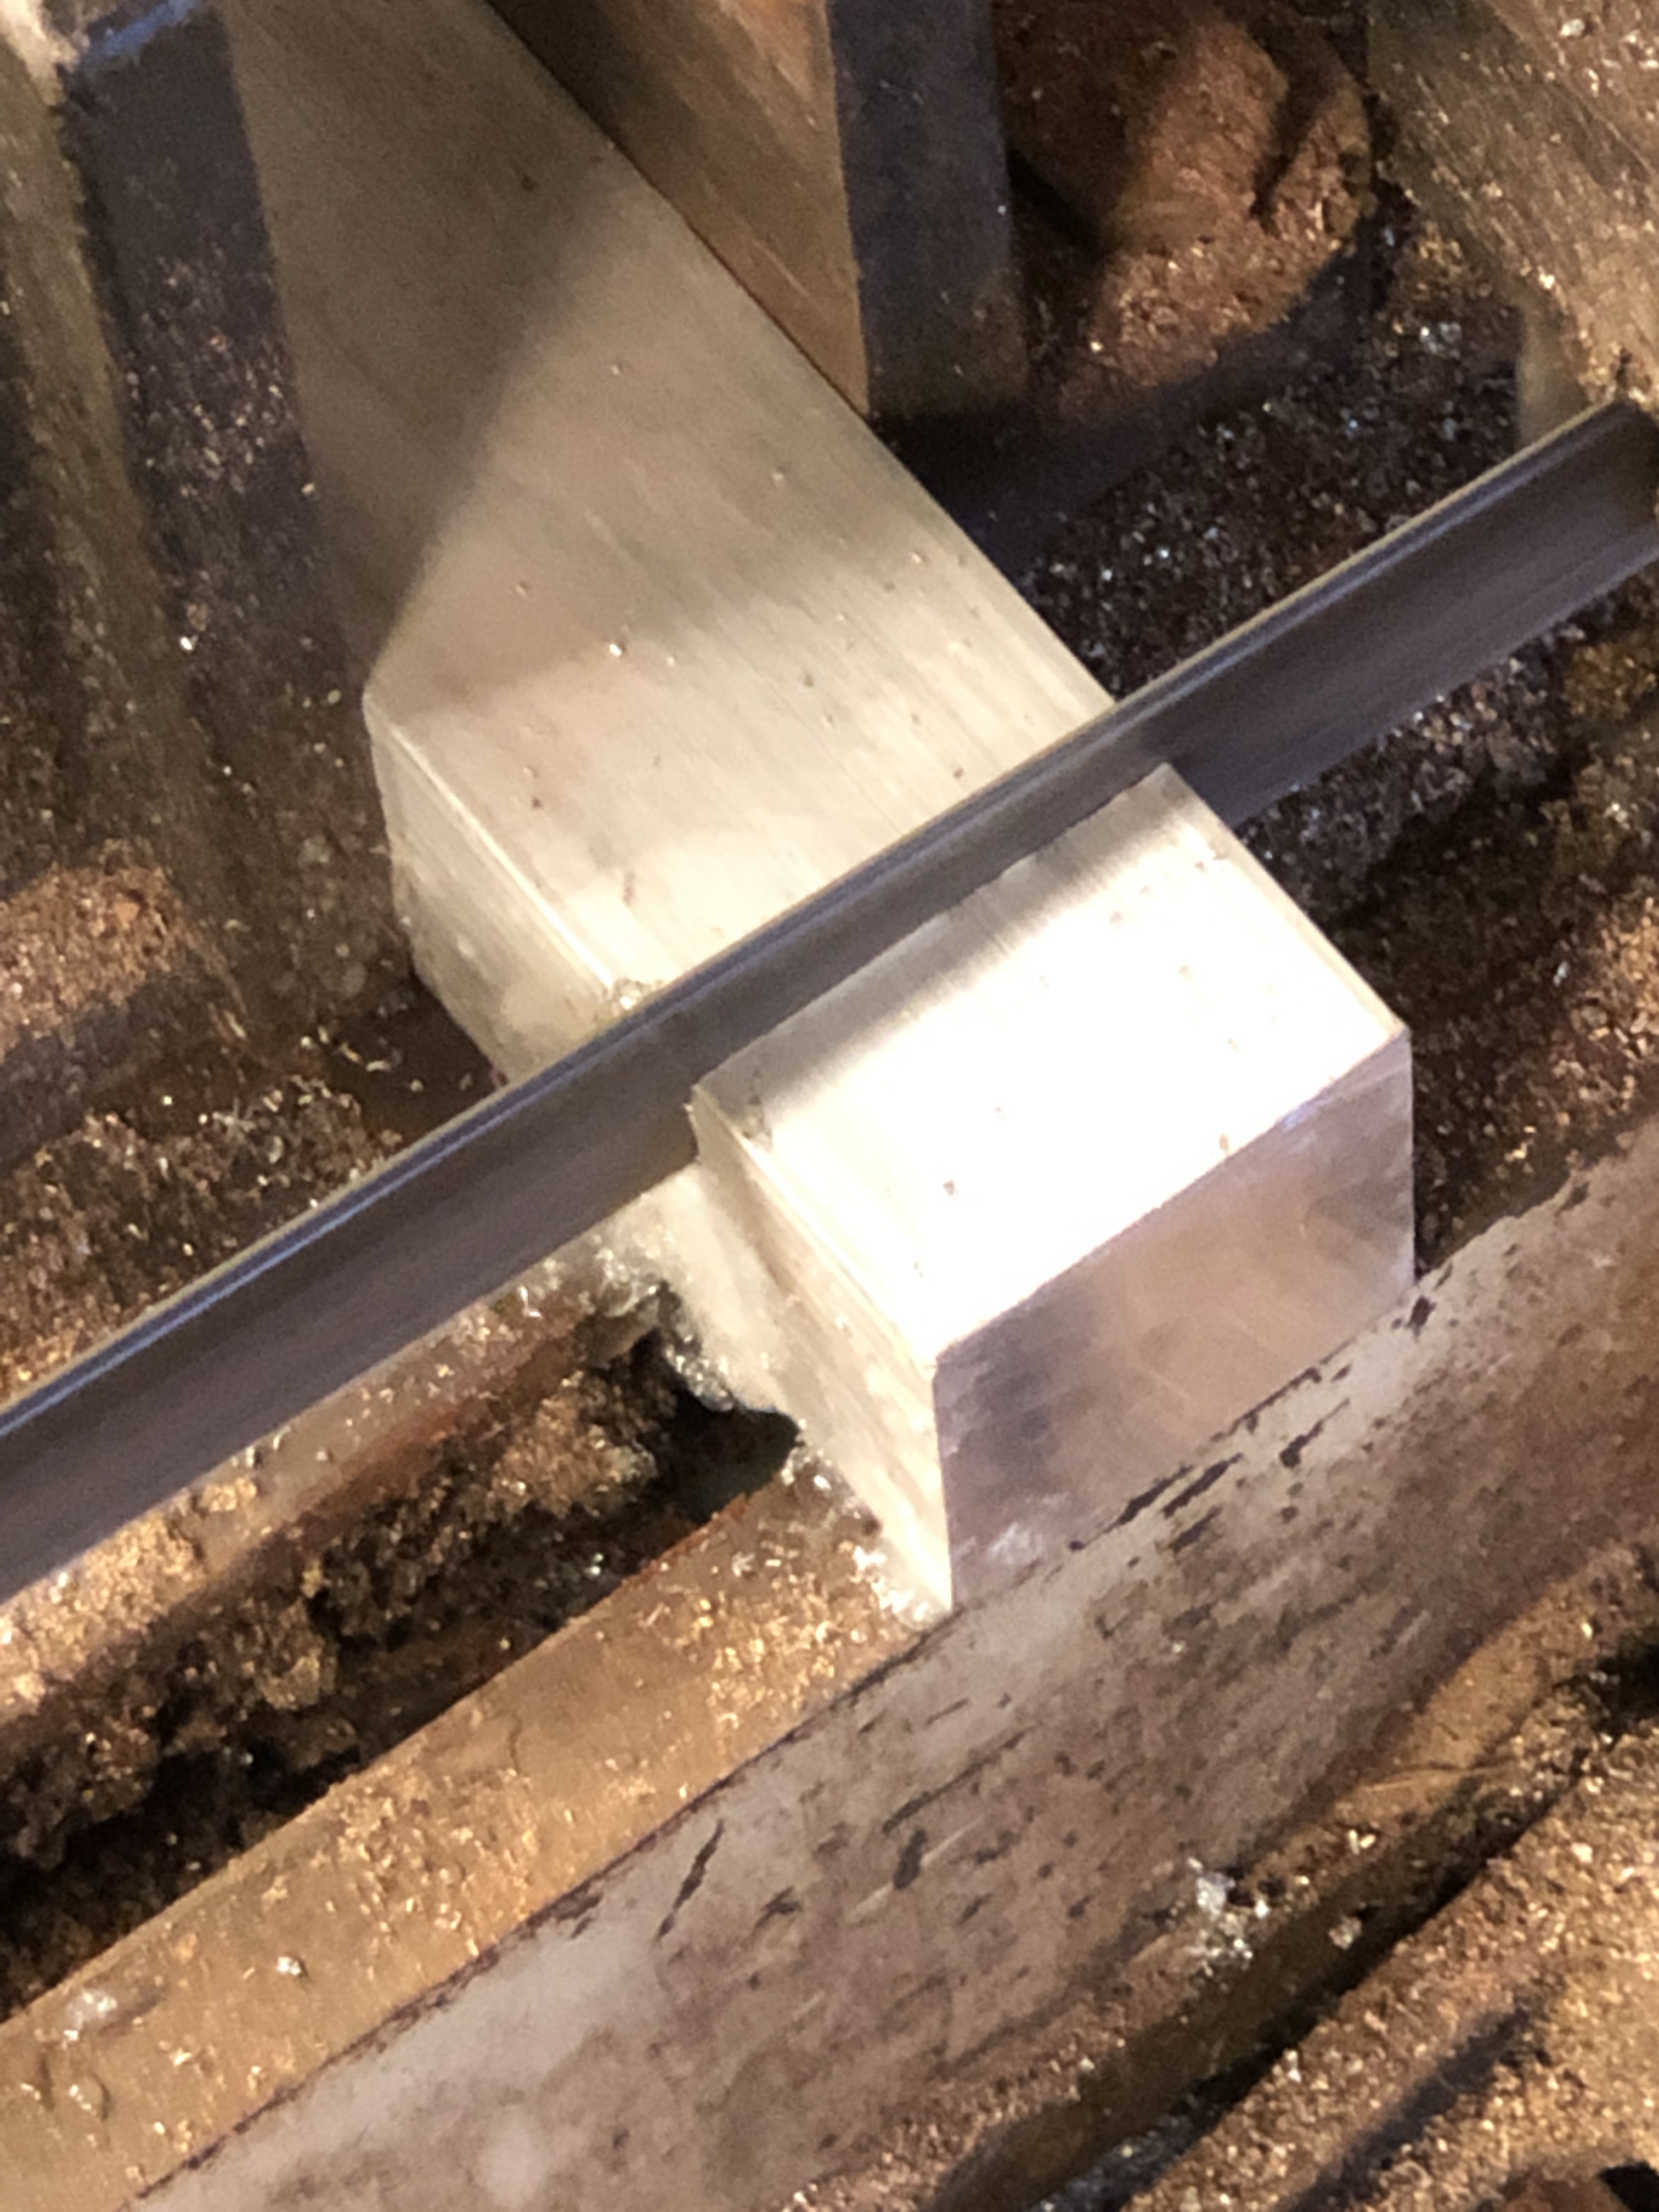
First I cut off two 25mm lengths of 40mm square solid alu bar.

Then milled them pretty close to square and identical.
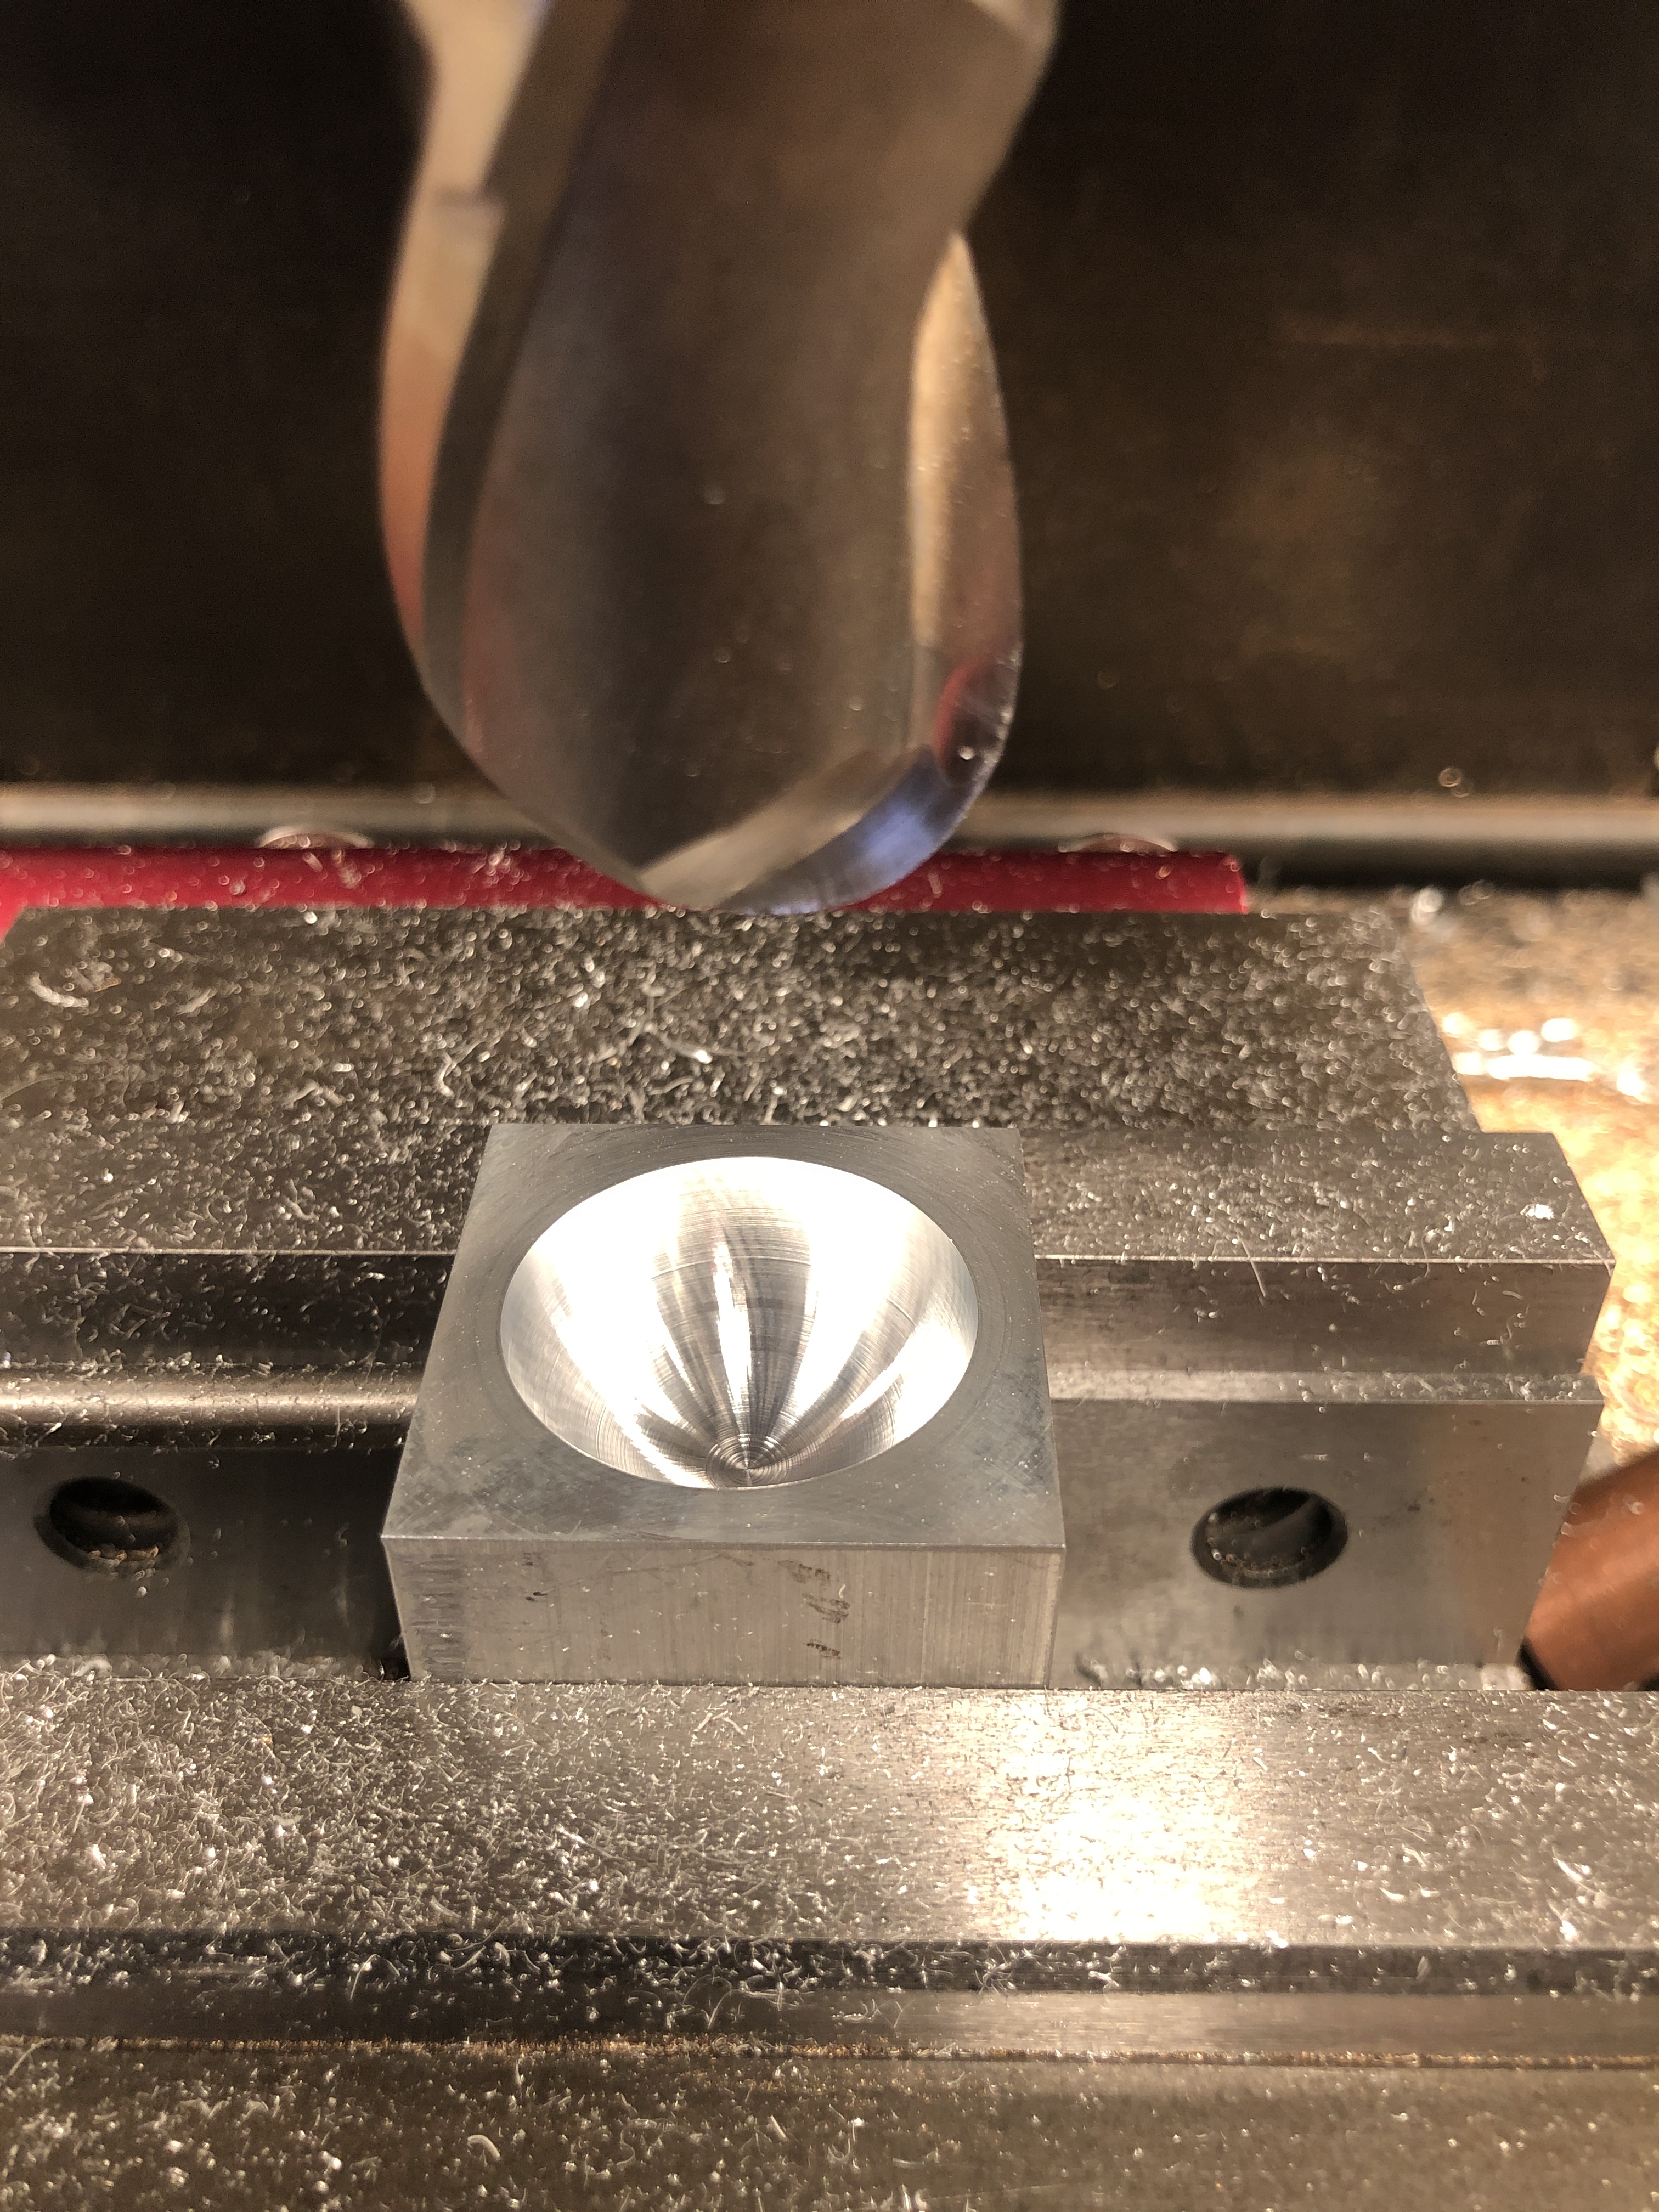
Then used the 31.75mm end mill to make a hemisphere in each alu blank and drilled and tapped for a 5mm cap screw in each corner.

On the left is the mould, screwed together, with a hole drilled into the spherical cavity. Here I am heating it in a frypan, ready to accept the molten lead, which is being prepared in the cast iron saucepan on the right. I hasten to add that SWMBO knows nothing about this. Those utensils are part of my workshop gear, and will never be used for human consumption. SWMBO does not read this blog, so I am safe. I hope.

From my previous experience with lead castings, I have decided that the mould should be 250-300ºc so the lead will not solidify in the small entry hole, and also to minimise the formation of voids in the casting.

Here is the molten lead after pouring. It is still liquid.

And after cooling and splitting the mould. The hemispheres were not exactly aligned.

And there was a big void. I could have filled it. But I decided that if I made the mould even hotter, it might work better, so I made another lead sphere.
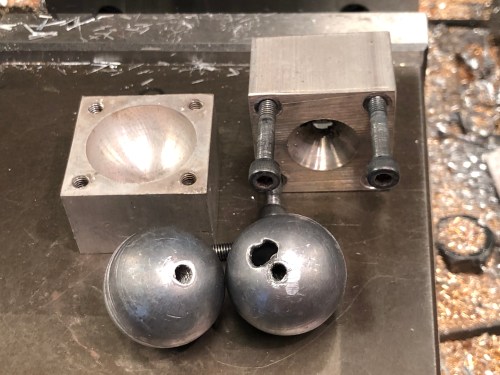
The next one, on the left, worked perfectly. I heated the mould to 300ºc, and no voids at all. I also reversed the bolting positions which removed the hemispherical misalignment. Drilled and tapped for the supporting ring.

And here is the weight in its final position. I dropped it, resulting in a Death Star indentation, which I kind of like. A little bit of polishing will remove the latitude lines.
Only one part for the day’s work again. But it was a LOT OF FUN!

Be thankful SWMBO didn’t catch you and have a great new year. Aloha!
LikeLike
Same to you Richard! Love your feedback!
LikeLiked by 1 person
Thank you, John.
“The Old Man of Kalihi”, a hidden treasure of Hawaii’s history that is poorly interpreted and little known, got my interest stoked in triple expansion engines. I wanted to design exhibits for the Board of Water Supply Fred Ohrt Museum here in Hawaii. I didn’t get the contract but got to see the beast up close and virtually meet you in the process of research. It is such a beautiful machine, I hope you get to see it someday.
I want to go to Cheyenne, Wyoming in May to see the Union Big Boy X4014 steam up. Fact is, we are planning to quit Hawaii to move back to New England. With a bit of luck it will be a stop on the way!
2019. Onward!
LikeLike
Looks awfully close to a 4ounce ball fishing sinker John.
Naaa probably not.
Has a hole through the centre too.
Hmmm.
Nice mould John
Tim
LikeLiked by 1 person
Bum! Wish that I had known.
LikeLike
Mine is 190g = 6.6oz. Good guess Tim!
LikeLike
I think your moulded lead sphere looks prettier than a fishing sinker.
LikeLike
me too
LikeLike
I think your moullded lead sphere looks prettier than a sinker.
LikeLike
I think that Tim was having a joke at my expense!
LikeLike