
Trevithick Dredger Engine.. the firedoor fittings. Or silver soldering tiny pieces.
by John
Another day in the workshop.
Yesterday I bolted the latch to the door. But how to attach the catch to the surround, and the restraint to the door. The plans call for tiny screws, but that method did not appeal. I decided to silver solder them in place. Silver solder is immensely strong, and does not require tapping and threading minute screws into position. The problem with silver solder is that some parts of the firedoor are already silver soldered, and I did not want to risk undoing that previous solder.
So, I used a heat sink.

The catch is held in position by pressure from the latch. I did NOT want to melt the solder of the hinge, so I rested a sizeable block of brass on the hinge. Pure copper would have been even better. Then, as I was soldering the catch, any heat travelling toward the hinge would have been absorbed into the brass heat sink.

A staged shot, after soldering the catch was finished. I was careful to keep the flux just in the joint which was to be soldered, to avoid the solder running into other areas.

A close up of the soldered catch. The iphone camera is pretty good hey? That catch is only 3mm wide. A bit of filing and finishing needed.
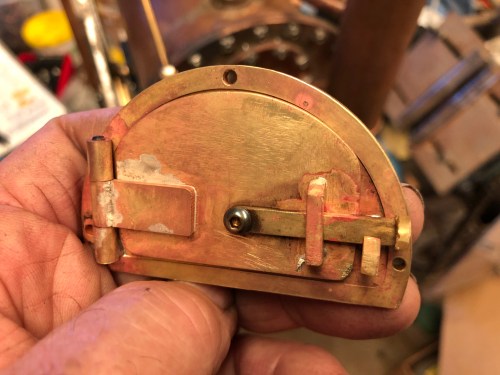
And the finished door. Looks OK IMO.
The next job for today was to machine a strip of metal 6mm wide, 2mm thick and 600mm long. I decided to make it from brass because I have a sheet of brass the correct thickness, and I was already thinking about the tight bend which was going to be required.
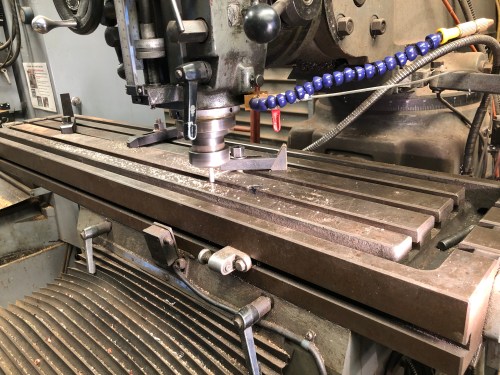
So, I bandsawed a strip of brass from the sheet, about 50mm wide. Then removed the milling vice and universal divider from the milling machine. I am amazed at how those items are becoming heavier with age! Then cramped the brass strip to the table and machined the sawn edge with a 6mm end mill which protruded into the milling table slot. Fortunately I managed to not enlarge the T slot during this procedure.

Then moved the brass strip, and indicated it parallel. Then used the 6mm endmill to cut off the 6.5mm strip. Probably not very efficient, but it worked, and the strip was correctly sized and dimensioned.

Finally, annealed the middle of the strip, and bent it around a 5mm thick piece of steel, with a rounded edge. This will become the fitting which operates the steam inlet/outlet valve.

Thanks for sharing your adventure in micro-soldering. The photo of your fingers holding the door and the close up of the catch convey the incredible accuracy of the work you do. It’s really a great vicarious pleasure to watch you build a machine!
LikeLike
thanks Richard. I have a greater appreciation of jewellery now.
LikeLike