
Making Springs and Other Stuff
by John
Other stuff first.
MOVING STEPS
SWMBO has always considered that having a winch on a vehicle is a bit of a wank, but I have used it many times getting out of bogs, getting other people out of bogs more often, moving machinery, pulling down/moving trees, straining fences etc etc. SWMBO was intending to replace these concrete steps, because they were crooked with respect to the house which she is fixing up. I said that I could straighten them.
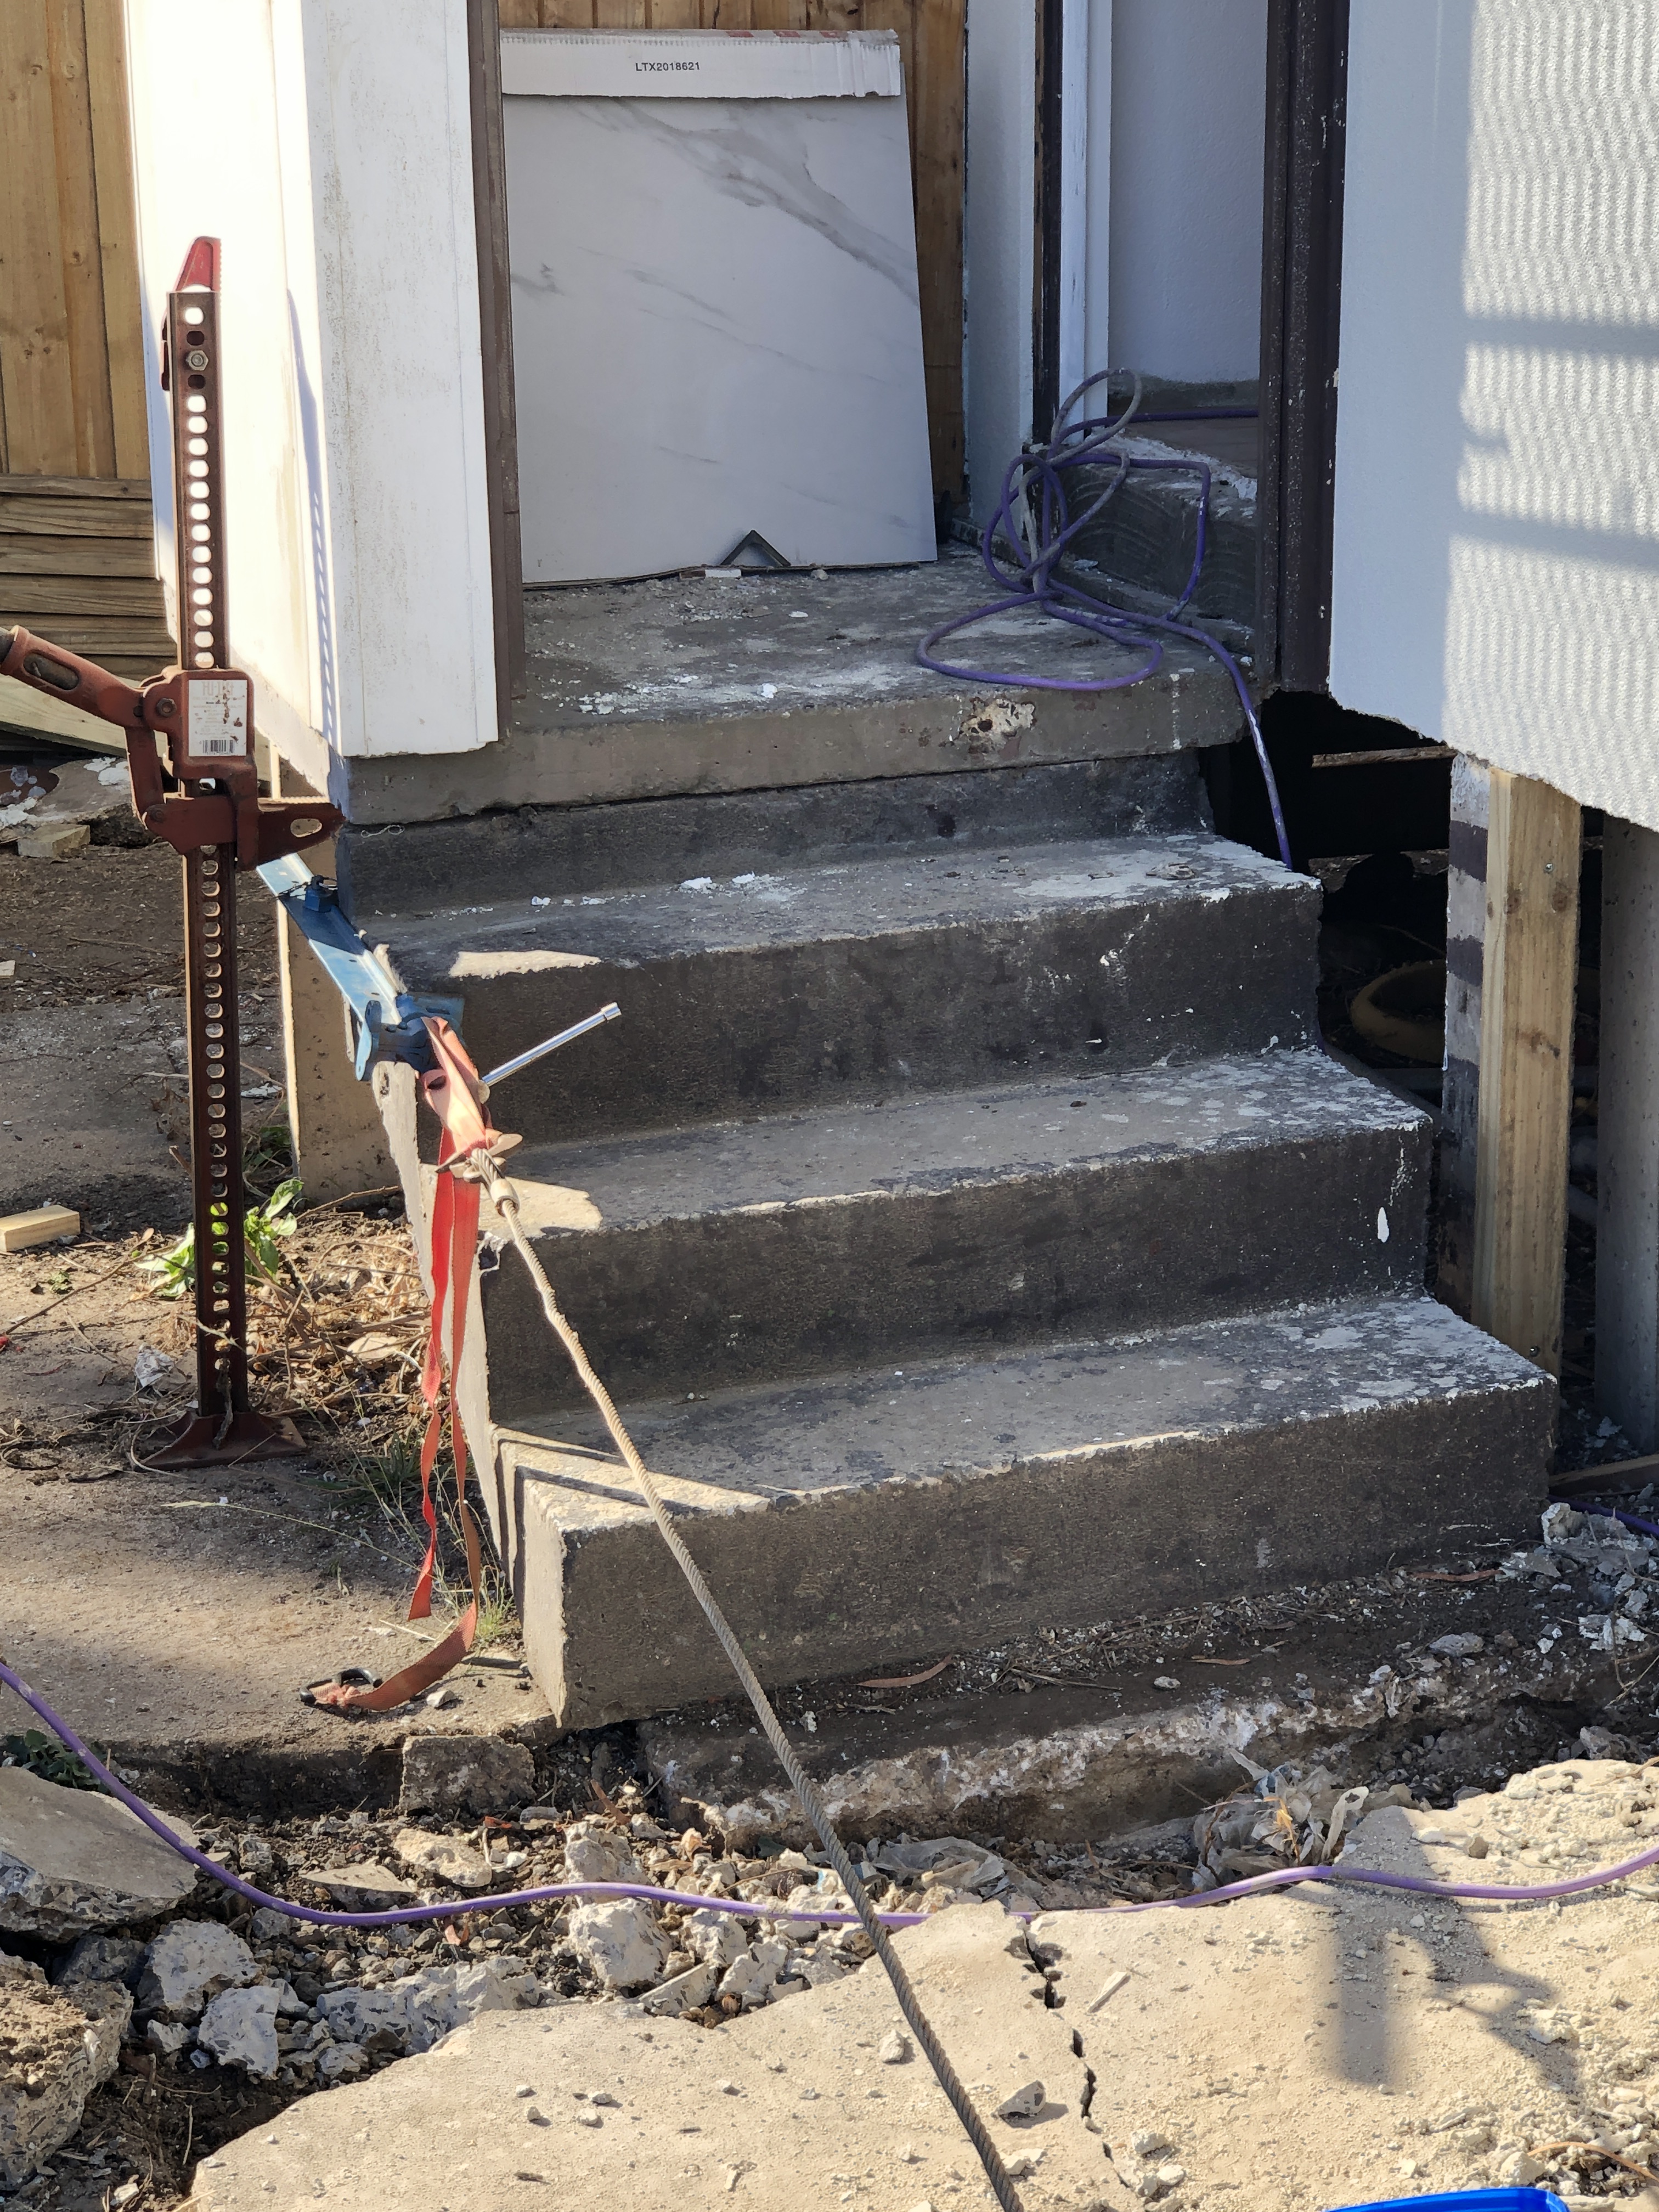
This is after straightening. I jackhammered the path slab, lifted the floor slab with the 4WD high lift jack, and pulled the steps with the Landcruiser winch. Easy as. Took 30 minutes. SWMBO was delighted!
MAKING SPRINGS
And I used my new spring tool. Brilliant! Recorded on videos. Again, apologies for my lousy video technique. I had forgotten to bring the spring making instructions, so it was all trial and error.

This was my first effort. Aluminium wire, just to try the tool. As you can see, there were multiple errors. Feed rate too slow for the RPM, forgot to enter a stop command at the end, feed rate much too slow at the beginning on the left.
So I started with aluminium, making many mistakes, sometimes repeatedly, but eventually learning. Progressed to soft iron wire, and eventually to stainless steel spring wire.
Following is a series of pics and videos.
The mandrel was 4mm diameter, and there was a bit of spring back, with the final ID of 4.4-5.0 mm.

Initially I secured the end of the wire by catching it in the collet, but quickly replaced that method, and drilled a 1.5mm hole in the mandrel. Again, I forgot to issue a stop command in time. The starting coils were hand wound by manually turning the spindle and jogging the feed. If I was making multiples of the same size spring that would be simple to program on the CNC.
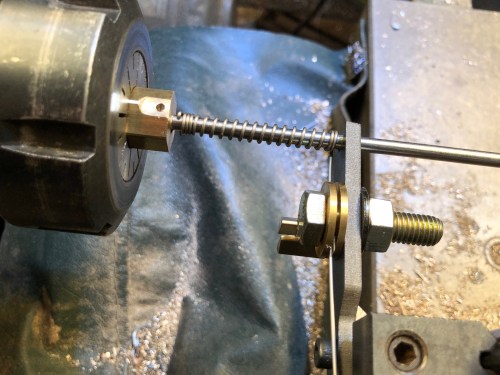
Ah! Getting the hang of this! That one looks good!
In the next video, a good spring is made. The mandrel wobble is occurring because I had bent the mandrel, when the steady was not hard enough against it. Bend straightened afterwards.
And the safety valve with its new spring…
But screwing in the safety valve was a bit of a struggle…
And re-installing the safety valve lever was almost comic..
So, that’s it for this post.
How did you like the videos? I suppose that I should have stitched them together into one long video. Maybe I will do that later for YouTube. And to edit out all of the errors.
Later today I will post another video, this time a longer one, a tour of the Trevithick engine.

Hi John,
a great post, good to see the very detailed experiment to making the spring with the new tool. Gives a good look on the tool an the problems you ran into.
The video are good an I think many of us like them to, so don’t make them to clean with editing, this look gives a real view of the work you’r doing.
Huib
LikeLike
Thanks Huib! Valued feedback!
LikeLike
Nice job John,
Seeing the spring with the windings at different “densities” inspired me.
I always thought of springs as a linear source of resistance. By varying the density one can build a spring that is easy to compress and increases in resistance as the force applied increases. One could have three, four or more “steps” or “ranges” of force necessary to compress it.
Now if only I could only think of an application for one! :-))
LikeLike
Thanks Jenny, One can also taper the mandrel to get a progressive response. Took 2 hours to end up with one workable spring! But it was a learning exercise. John
LikeLike