
Axles for a Cannon Carriage
by John
How fascinating is that for a topic!
Well, I found it interesting. Maybe says something about me.
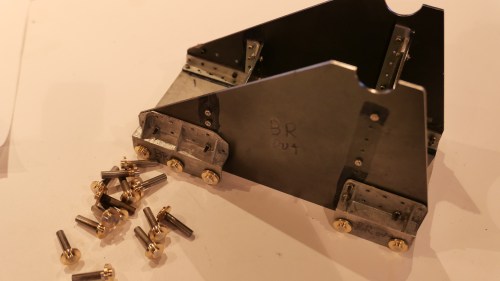
My 2 carriages have 20 wheels and 20 axles between them. Plus the 4 big ones under the chassis’. I had made the wheels. The axles required some planning and thought, after all, whatever I did was going to be repeated at least 20 times.
I decided on stainless steel for the axles, and brass for the end caps. The originals were steel, but they will be painted, so the appearance of the metal is irrelevant.
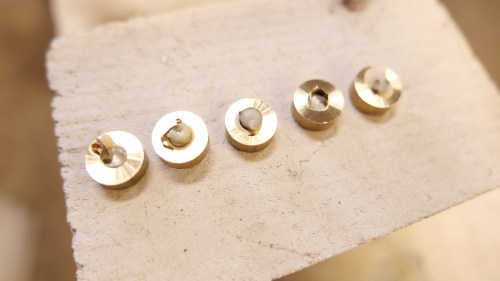
First steps were to cut up 20 pieces of 5mm stainless steel, 25mm long, and drill 5mm holes in 12.7mm brass rod, and part off 20 pieces 5mm wide. With a few spares.

The the brass end caps need to finish 4mm wide, so there was a machining allowance of only 0.5mm on each face. So the silver soldering of the 2 parts needed to be reasonably precise.

To assist with keeping the brass disks square to the rods while soldering, I drilled some 5mm holes in an aerated concrete block, exactly 21mm deep.
Fluxed the mating parts, and silver soldered 5 at a time. Very quickly. I could have used Loctite 620, but would have had to wait until it cured before machining.
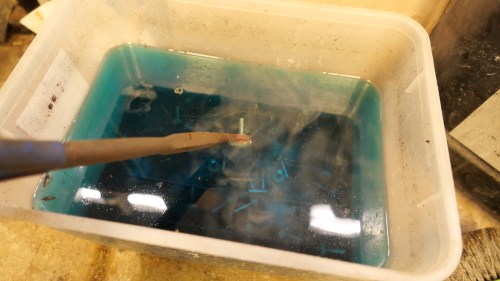
A soak in sulphuric acid for a few minutes, then a water rinse.
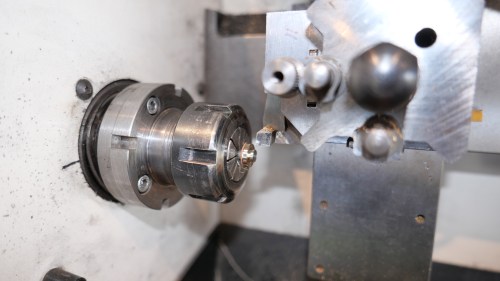
Then turned the end cap shape on the Boxford TCL125
Not quite finished. M2 Holes to be drilled through the end caps, and threaded to the brackets. I will use the CNC toolpost milling attachment which I made in 2019. That might warrant a short video.
A short video. Well, a bit over 5 minutes…
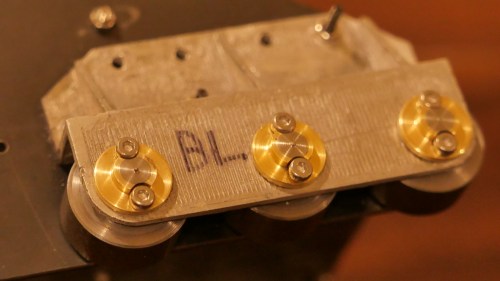
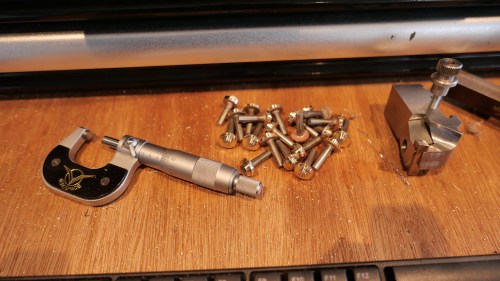
The capscrews are not kosher. The original cannons had large slot screws. But will anyone notice? (idea… I could fill in the hex hole with JB Weld, and machine a slot?!). Maybe.
In retrospect I could have done the entire shaping and drilling and milling of the brass end cap using the toolpost mill on the CNC lathe. Would have been a lot more efficient.

Cap screws on an historic piece?? Can’t see you living with that. Why not buy slotted cheese heads?
LikeLike
I had trouble locating any in the 2mm size. I knew that I would be in trouble for the capscrews.
LikeLike
Slotted M2 panheads minikits.com.au or M2 slotted cheese heads on ebay bolt-world UK.
LikeLike
thanks Rob. I will check them. (groaning under the pressure)
LikeLike
Coming along very nicely, I can see you agonizing over those cap screws though. Shades of the Beam engine!
LikeLike
already copping flak.
LikeLike
Slotted pan head screws ordered after another reader suggested supplier.
LikeLike